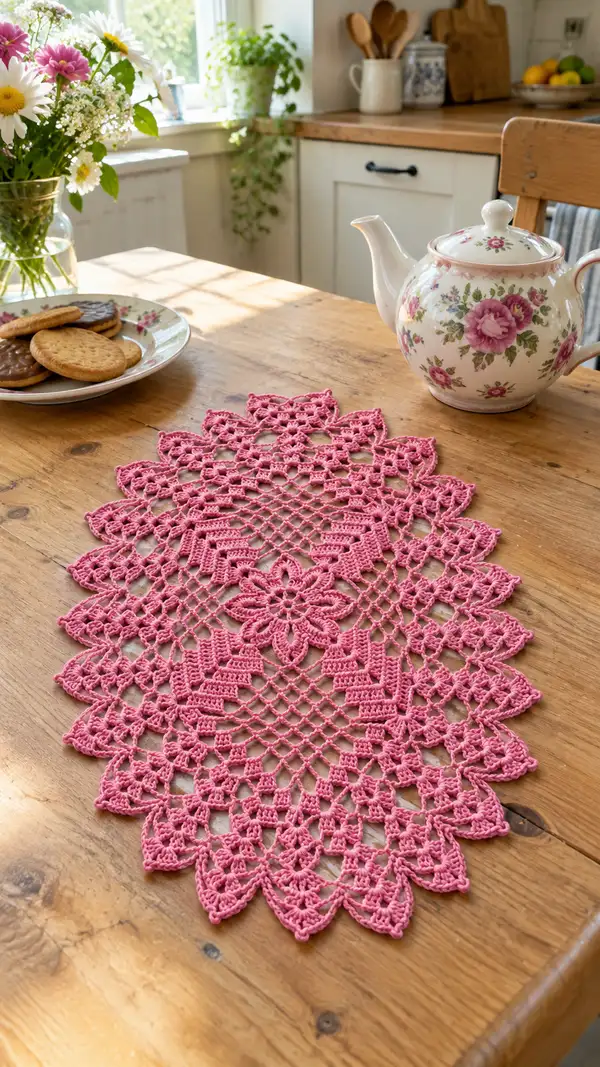
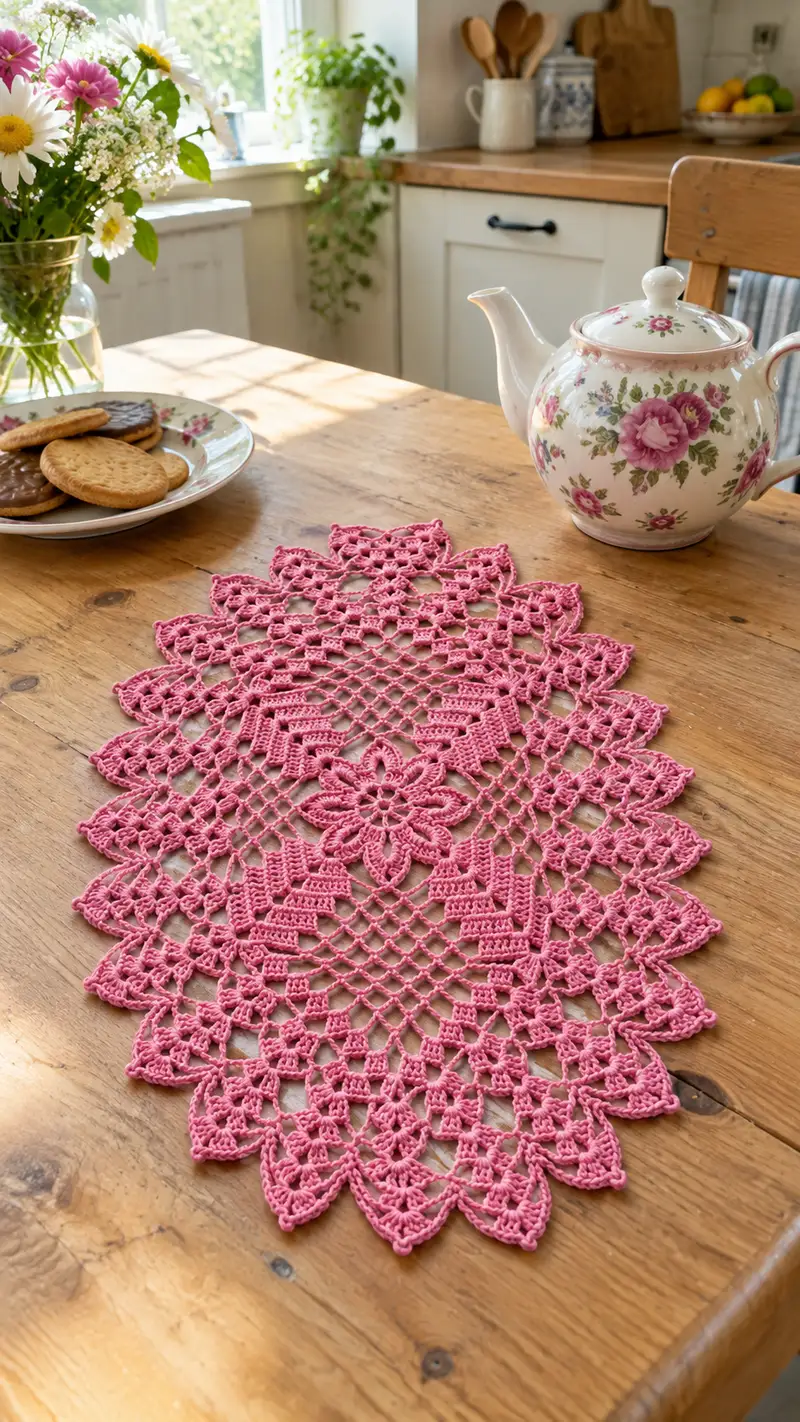
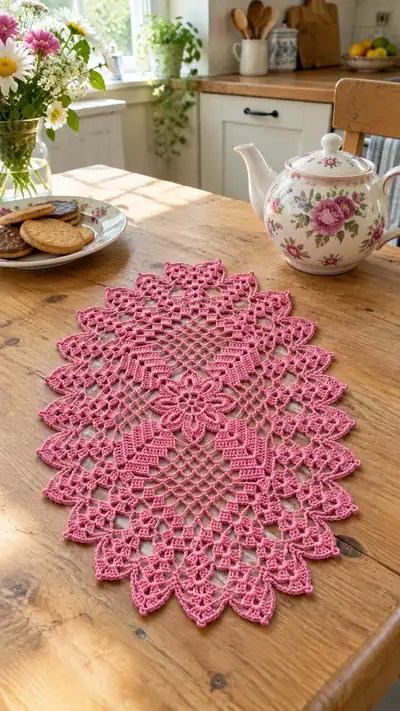
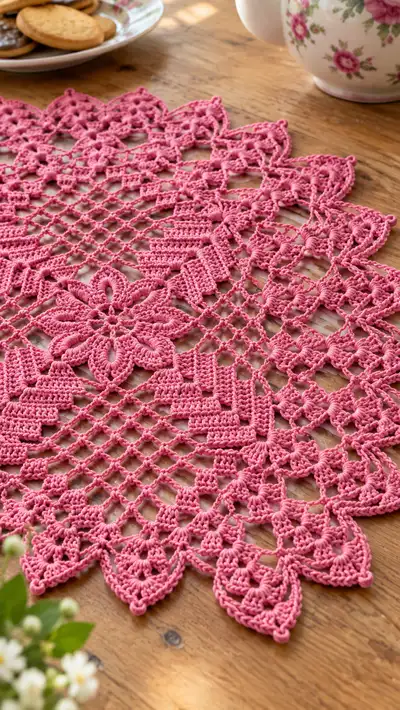
A delicate vintage-inspired lace table runner crocheted in a soft dusty-pink cotton thread. Features a central eight-petal floral medallion, open diamond mesh panels, rectangular block motifs and a scalloped pointed picot edge. Perfect for a tea setting or to add a feminine accent to your table, the runner is made in continuous rounds with elegant textured clusters and picot tips.
Progress Tracker
0% Complete
— Center Motif :
Round 1 :
Make a magic ring. Ch3 (counts as dc), 11 dc into ring; join with sl st to top of ch3. (12)
Round 2 :
Ch3, 1 dc in same st, (1 dc, inc) x11; join. (24)
Round 3 :
Ch3, 2 dc in next st, (2 dc, inc) x11; join. (36)
Round 4 :
Ch3, 3 dc in next st, (3 dc, inc) x11; join. (48)
Info :
Keep joins loose enough to allow a slight cup shape for the flower; place the first stitch marker at the beginning of this round (12 o'clock).
Round 5 :
Ch1, *sc in next 3 sts, ch3, skip 3 sts* repeat around 12 times to create small chain arches; join. (12 ch-arches)
Round 6 :
Work into each ch-3 arch: *(ch3, 4-tr puff cluster, ch3, sl st into arch center)* x12 to form raised petals; join. (12 petals)
Info :
Puff cluster: yarn over 3 times, insert hook, pull up loop, repeat to have 7 loops on hook, yarn over and pull through all loops. Ch1 to secure each puff. Keep puffs slightly loose for texture.
Round 7 :
Ch1, sc around petals working 4 sc between each petal base, sl st to join. (48 sc)
Round 8 :
Ch4 (counts as tr), tr around in each sc across to establish a treble round; join. (48 tr)
Round 9 :
Ch3, *dc in next 3 tr, ch3, skip 3 tr* repeat around making 12 ch-3 arches between treble anchors; join. (12 arches)
Info :
At the end of round 9 place additional 3 markers: mark the 4 cardinal arches (top, bottom, left, right). These marks will guide oval increases later.
Round 10 :
Into each ch-3 arch work: ch1, (sc, hdc, 3 dc, hdc, sc) to form small shell; join. (12 shells)
Round 11 :
Ch1, sc into each stitch and 2 sc into center of each shell - total count: work 4 sc in shell centers and 1 sc on single sts; finish with 60 sc around. (60 sc)
Round 12 :
Ch3, (2 dc, ch2, 2 dc) in every 5th stitch to form corner-style clusters at four points. Work even dc elsewhere so total works to 72 anchor points around. (72)
Info :
Rounds 10-12 build a robust medallion base; counts listed are anchor counts used to space mesh attachments. Confirm you have 72 anchor points before proceeding.
Round 13 :
Ch5 (counts as tr+ch2), *skip 2 sts, tr into next st, ch2* repeat around to create tall spaced posts; you will have 36 tall posts and 36 ch-2 spaces. (36 tr / 36 ch-2)
Round 14 :
Ch1, sc in each tr and 3 sc in each ch-2 space to expand ring; join - total approx 144 sc. (approx 144 sc)
Info :
This is the transition from dense medallion to open mesh. If your stitch count differs slightly by +/-4, it will generally block out; try to be close.
Round 15 :
Ch6 (counts as tr+ch3), *tr into next sc, ch3* around to create a ch-3 lattice base anchored by 48 tr stitches. (48 tr / 48 ch-3)
Round 16 :
Ch1, sc into each tr and 1 sc in each ch-3 space to tidy anchors: (48 sc, 48 sc) = 96 sc total. (96 sc)
Round 17 :
Ch4, *sk 2 sc, dc in next sc, ch2, dc in same sc* Repeat around to create vertical arches; maintain 96 anchor points. (96 dc/arches)
Info :
From this round forward we begin shaping the oval: increase rounds will take place at the four markers set earlier; place additional increases at left and right to elongate the medallion.
Round 18 :
Round of increases at cardinal points: Ch1, sc across until you reach a marked point, then *(sc, ch4, sc) in marker space* to create a longer corner; repeat at 4 markers. Evenly distribute minor increases at left/right markers to roughly add 12 stitches total. Final count approx 108 sc. (approx 108)
Round 19 :
Ch5, *tr in next 3 sc, ch5* repeat around to create longer chain arches; maintain the same number of tr posts as previous round anchors (approx 36 posts). (36 tr / 36 ch-5)
Round 20 :
Into each ch-5 arch: work (sc, hdc, 5 dc, hdc, sc) to create expanded petals; total of approx 36 petals. (36 petals)
Info :
At round 20 the medallion should feel pleasantly flat but slightly domed in center. Begin to check symmetry and re-align cardinal markers as needed.
— Oval Expansion & Diamond Mesh (Rounds 21-50) :
Round 21 :
Ch1, sc evenly around petals placing 2 sc into base of each petal and 1 sc on intervening anchors. Total anchor points roughly 144 sc. (approx 144 sc)
Round 22 :
Ch6, *skip 3 sc, tr into next sc, ch3, skip 3 sc* repeat to produce open tr posts spaced for diamond mesh; you will have about 48 tr posts. (48 tr)
Round 23 :
Ch1, sc into each tr and in each ch-3 space make (sc, ch4, sc) to open mesh; total count maintains anchors used for next rounds. (anchors remain consistent)
Round 24 :
Ch5, *skip 1 anchor, dc into next anchor, ch5* repeat to create long chain spaces; this begins the large central diamond grid. Anchor count ~72 points. (approx 72)
Info :
From rounds 22-24 you are creating the diamond net. Maintain even chain tension so diamonds block evenly later. Place pins at cardinal points for reference.
Round 25 :
Ch1, sc into each dc and into each ch-5 space work (sc, ch6, sc) to expand grid; you should now have approx 72 ch-6 spaces forming a large central lattice. (approx 72 ch-6)
Round 26 :
Repeat Round 24 into alternate anchors to offset diamonds: Ch5, *dc in next anchor, ch5* - this forms the crossing lattice with a repeated count of 72 dc anchors. (72 dc)
Round 27 :
Ch1, sc across anchors and in each ch-6 space work an open mini-shell: (sc, ch3, sc) to visually tie diamonds. Anchor count remains approx 144 sc equivalents. (approx 144)
Round 28 :
Ch3, *2 dc in next sc, ch1, skip 1 sc* repeat around to create small block-definitions that will later form rectangular motifs; maintain anchor rhythm. (counts per block variable)
Info :
At the end of Round 28 reposition your 4 cardinal markers. The oval should be noticeably longer than wide. If not, add an extra increase row at left and right in the following round using the method shown in Round 30.
Round 29 :
Work a round of even sc across all anchors to tidy the net: Ch1, sc in each st (approx 200 sc). This creates a firm base for block motifs. (approx 200 sc)
Round 30 :
Info :
Change to round-smoothing technique: to elongate, add 6 increases at left and right sides only. Mark positions before starting.
Round 30 :
Ch1, sc to left side increase point, *(sc, ch4, sc) in designated increase point* repeat 3 times at left side; sc evenly across top and bottom, repeat 3 times at right side. This will add 12 extra ch-spaces and lengthen the oval. (approx 212 sc)
Round 31 :
Ch6, *tr in next 2 sc, ch6* repeat around to create an elongated tr lattice; number of tr posts will be approx 80. (approx 80 tr)
Round 32 :
Ch1, sc into each tr and (sc, ch8, sc) into each ch-6 to convert to larger diamond net; count approx 160 sc anchor points. (approx 160 sc)
Info :
This wide lattice is the central body of the runner. From rounds 33-40 you'll alternate mesh with rectangular block motifs to mirror the photos' stepped pattern.
Round 33 :
Mesh row: Ch5, *sk 3 st, dc in next st, ch5* repeat; anchor posts about 80. (approx 80)
Round 34 :
Into each ch-5 space work (sc, ch6, sc) to enlarge mesh diamonds; total ch-6 spaces approx 80. (80 ch-6)
Round 35 :
Begin block panel formation: Ch3, work 3 dc into same sp to form first block, ch3, skip 3, form another 3-dc block - alternate blocks and chains to create a checker of 3-dc groups. Maintain symmetrical placement left-right. Count blocks across the width approx 14-16 clusters.
Round 36 :
Ch1, sc in each stitch and 3 sc in the center ch-3 spaces of blocks to flatten them. (anchor total approx 160 sc)
Info :
Blocks give visual weight in the runner and are the stacked rectangles visible in the photo. Keep block counts identical on both halves for symmetry.
Round 37 :
Ch4, *tr in block center, ch4* Repeat to step up into elongated tr columns, creating vertical ribs that will carry into the next diamond panel. (approx 80 tr)
Round 38 :
Ch1, sc into each tr and into each ch-4 space make (sc, ch6, sc). This reconverts the columns to an open grid. (approx 160 anchors)
Round 39 :
Repeat a smoothing sc round: sc in each st to stabilize: approx 160 sc. (approx 160)
Round 40 :
Info :
At this point measure your runner. It should be an elongated medallion roughly 14-18 inches long if using size 10 thread and suggested hook. Add or subtract repeat rounds of the diamond mesh to reach desired length before starting the final outer motifs.
— Outer Motifs & Petal Panels (Rounds 41-80) :
Round 41 :
Ch5, create tall posts around: *tr in next 2 sc, ch5* - approx 80 tr posts. (approx 80)
Round 42 :
Into each ch-5 space work (sc, ch7, sc) to craft elongated diamonds that will anchor the outer petals. (approx 80 ch-7)
Round 43 :
Ch3, make 5-dc shell into each ch-7 base to create small rectangular steps visible on the runner. Work evenly so there are 40 shells per side (80 total). (80 shells)
Info :
Take care aligning shells so the later scalloped edge has clearly defined points. Use pins to mark every 5th shell while working if helpful.
Round 44 :
Ch1, sc around shells placing 3 sc in each shell center and 1 sc between shells; final anchors approx 240 sc. (approx 240)
Round 45 :
Form petal base: *ch5, (sc, hdc, 7 dc, hdc, sc) into next anchor* around to form 40 petal bases (20 per side, symmetrical). (40 petals)
Round 46 :
Ch1, sc around petals and in each between-space make (sc, ch3, sc) to create small latch points that will be used to form the pointed scallops. (approx 280 sc)
Round 47 :
Work a decorative double-row: Ch3, *2 dc in next sc, ch2, skip 1 sc* repeat to create stepped ridges on each petal, keeping symmetry. (counts vary by petal)
Info :
If you want deeper petals like in the photo, add an extra row of 2-dc peaks inside each petal before continuing. This enhances the raised look of each scallop.
Round 48 :
Ch6, *tr into petal ridge every 3rd stitch, ch6* repeat around to create tall supports for final scallops. Approx 80 tr anchors. (approx 80)
Round 49 :
Into each ch-6 space work (sc, ch9, sc) to further enlarge the outer chain spaces that will be filled with layered arches. (approx 80 ch-9)
Round 50 :
Ch1, sc across anchors and into each ch-9 space work (sc, pic, sc) pattern: sc, ch3, picot, sc to add small decorative tips within the petal. (anchors approx 320 sc)
Info :
Picots: ch3, sl st in first ch; keep picot points small and consistent. They will become the small bobble-like tips visible at the points of the scallops in the photos.
Round 51 :
Begin layered scallops: For each outer petal, work: *(sc, ch4, 7 dc cluster over next 7 sts, ch4, sc) in designated petal base* around. This forms the first large scallop ridge. (approx 40 scallops)
Round 52 :
Ch1, sc around, placing extra sc in scallop bases to flatten and define edges. (approx 360 sc)
Round 53 :
Form pointed tip: Into the center of each scallop work (3 dc, ch3, 3 dc) to create a peak; secure with sc into join points. (40 peaks)
Info :
The pointed peak rows are what create the diamond/petal points that fan out in the finished runner. Keep tension steady to make identical heights for every point.
Round 54 :
Work small bobble rows: Across each peak, make a 3-puff shell: *(puff, ch1, puff, ch1, puff)*; anchor each cluster with sc on either side. This produces the clustered look in the photo near the scallop tips. (40 clusters)
Round 55 :
Ch1, sc to secure all puff clusters and tidy edges; count approx 380 sc. (approx 380)
Round 56 :
Reinforce outer row: Ch3, *dc in next 4 sc, ch1, skip 1 sc* repeat to step back slightly and prepare final edge. (approx 380 anchors)
Info :
If using a contrasting color for edging, change color now before Round 57. Carry thread along wrong side or fasten off and join new color at a cardinal point.
Round 57 :
Start final scallop layering: *Into each peak work (sc, ch3, 5 dc, ch3, sc)*. This creates the layered petal appearance with a defined rim. (40 large scallops)
Round 58 :
Ch1, sc around outer large scallops placing 3 sc in the 5-dc middle and 1 sc on adjacent chains to smooth curves. (approx 420 sc)
Round 59 :
Begin final picot tip: *Ch4, sl st into top of scallop to make a raised edge, ch3, picot* repeat to create small decorative loops along each point. Secure with sc between points. (40 picots)
Round 60 :
Ch1, sc around and add a finishing tiny bead of sc (BLO) along the inside edge of scallops to give firmness to the border. (approx 420)
Info :
This is the tricky decorative edge stage. Work slowly: picots and sl sts form the tiny bobbles you see at each tip in the photos. If you prefer a softer edge, omit picots and use small sc clusters instead.
Round 61 :
Edging refinement: *Into each scallop tip work (sc, ch3, pic, ch3, sc)*, then sl st into next base to anchor. This gives the layered, almost beaded look. (40 detailed tip motifs)
Round 62 :
Ch1, sc around to secure all motifs and neaten loose loops; ensure counts equal across both sides of the runner. (approx 440 sc)
Round 63 :
Finishing rope: Work a final round of crab stitch (reverse sc) along inner-most row of scallops: sc in each st working from left-to-right to create a hand-stitched cord look. This tightens the border and gives the runner a finished hand. (approx 440)
Info :
Use a smaller hook for the crab stitch if you want a very tidy corded edge. This is optional but recommended for a crisp vintage finish.
Round 64 :
Optional reinforcing: weave a running thread through outer anchored spaces on WS for extra stability, then knot and weave in ends across 6-8 st to hide.
Round 65 :
Blocking prep step: Fasten off leaving 12-18" tail for weaving. Weave through outer row using yarn needle then pull slightly to shape before final blocking.
Round 66 :
Info :
Weave in all tails on the WS carefully and wet-block your runner. Pin each scallop tip to the blocking mat, stretching evenly to open the mesh and square the diamonds. Allow to dry fully (overnight).
Round 67 :
Optional stiffening: If you prefer a crisp doily, apply light starch or textile stiffener after blocking and re-pin until dry. This helps the picot tips stand proud like in the photos.
Round 68 :
Final inspection: check picots and puff clusters for symmetry. If a ridge or scallop is short, carefully unpick that segment and rework 2-3 rows to match opposite side.
Info :
While these numbered rounds focus on structure and counts, slight variations are expected between thread brands. Use the photos as visual guide for density and openness. Repeat or skip one mesh repeat to reach desired length before final scallop rounds.
Round 69 :
Make 4 sample swatches of the final scallop and picot in scrap thread to ensure look and tension match the main piece before applying any starch or finishing steps.
Round 70 :
Info :
Edge details: use rust-proof pins when blocking and place a thin cloth between the runner and iron if you need to steam lightly - avoid direct high heat on cotton thread to prevent shine or flattening of puff stitches.
Round 71 :
Optional reversible join: If your runner will be handled a lot, add an extra slip-stitch join on the WS around the entire piece to hide weaves and reinforce joins. Work sl st in each st all the way around. (approx 440 sl st)
Round 72 :
Final tidy: Trim ends close after weaving; clip any stray loops after final inspection. Your runner is complete and ready to use.
Info :
Throughout the pattern there are many optional repeat rounds and decorative choices. The structure above produces the shape and look in the photos: central medallion, diamond mesh body, stepped block motifs and layered pointed scallop edge with picots.
This elegant lace table runner combines a classic floral medallion and open diamond mesh to create a beautiful heirloom-style accent. Each scalloped petal and picot tip adds personality and hand-crafted charm to your table. With careful blocking and the detailed steps above, your finished runner will look like the photo — perfect for tea and flowers. 🧶🌸 Give it as a thoughtful gift or keep it for your own cozy corner. Happy stitching! ✨