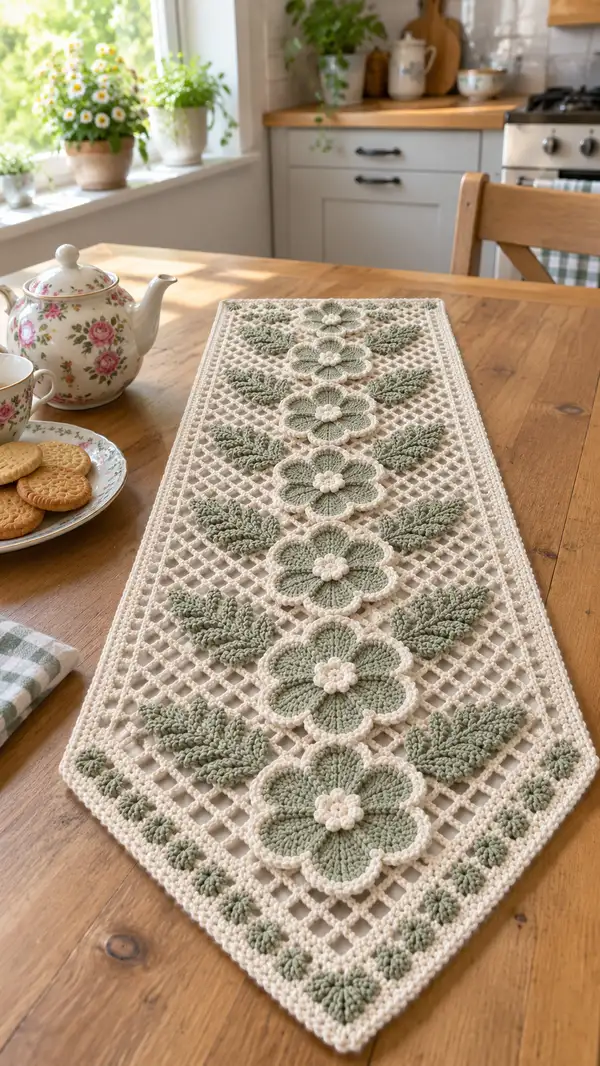
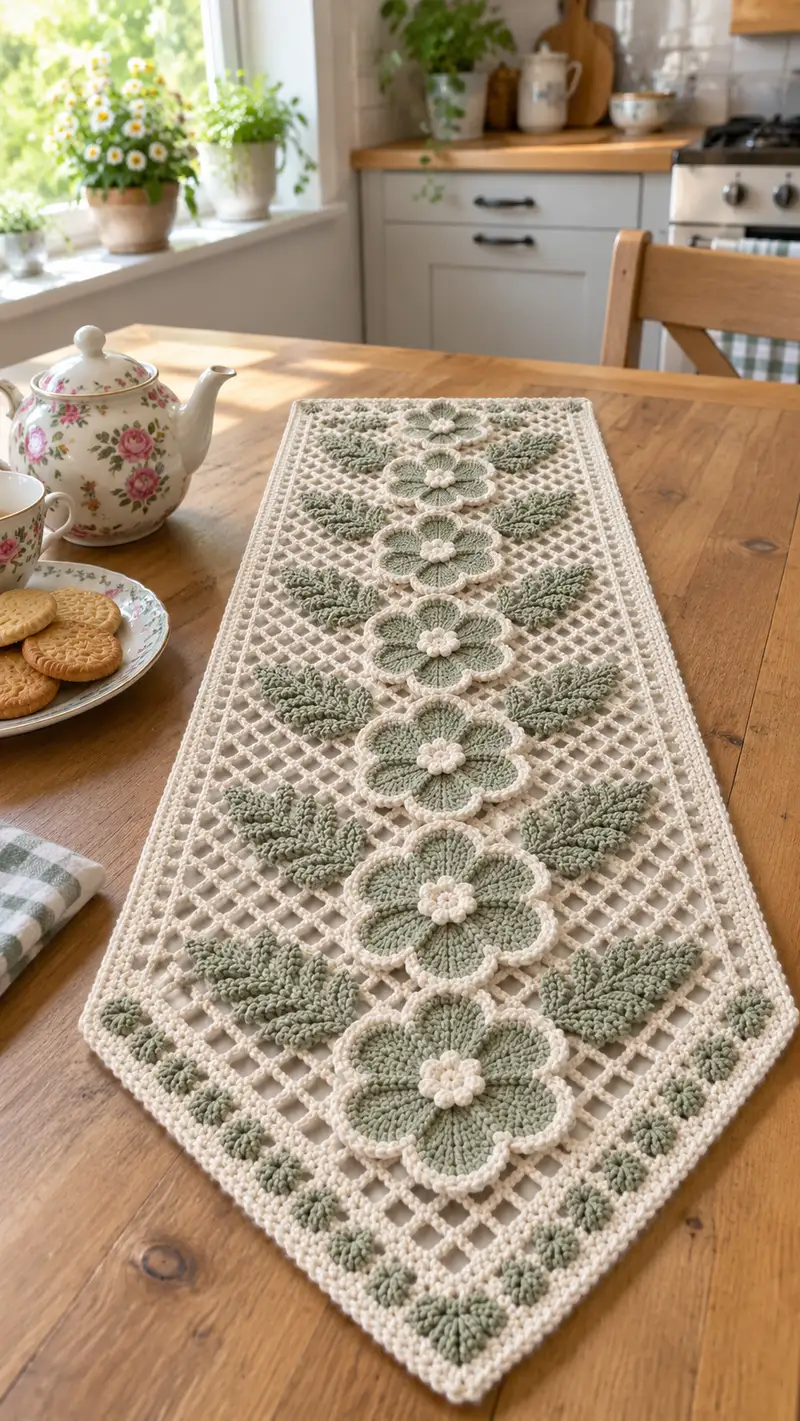
A timeless vintage-inspired table runner featuring a central row of raised six-petal flowers with sculpted leaves set on an open lattice background. Worked in soft cream and muted sage green, the runner has a delicate scalloped border and textured bobble corners that give it a handmade heirloom look. This pattern includes motif construction, mesh joining and a finished border to create a graceful table accent.
Progress Tracker
0% Complete
— Notes & Gauge :
Info :
Gauge is not critical for this decorative runner, but a 10cm/4in square worked in lattice rows (dc and chains) should measure approximately 12 dc x 6 rows. Use 4.0mm hook for the body to achieve a crisp lace look. Work tightly enough to avoid big gaps but open enough that the diamond lattice remains airy.
Info :
Color A = Cream (main lattice and outlines). Color B = Sage Green (flower petals, leaves, bobbles). Carry unused yarn inside motifs where convenient or fasten off and weave in ends at joins for a neater back.
— Flower Motif (Make 7) :
Round 1 :
Work a magic ring with Color B. 6 sc in mr (6)
Round 2 :
Inc in each st around (12)
Round 3 :
(1 sc, inc) x 6 (18)
Round 4 :
(2 sc, inc) x 6 (24)
Info :
Rounds 1-4 build a stable center. Keep stitches neat as petal foundation will anchor to these stitches. Place a marker in the first stitch of Round 5 to easily track petal placement.
Round 5 :
1 sc in each st around (24)
Round 6 :
*ch 3, sk 2 sts, sc in next st* repeat 8 times to create 8 ch-3 loops (8 loops). Sl st to first sc to finish round (8 ch loops)
Round 7 :
Working into each ch-3 loop for petals: (sl st, ch2, 5 dc, ch2, sl st) in next loop to make petal shell; repeat around for 8 petals. Finish with sl st to base (8 petals)
Info :
Each petal is a shell of 5 dc worked into a ch-3 loop. Keep petals slightly flat by pressing gently with your fingers while finishing the round. If you prefer a 6-petal look, distribute petals across 6 loops by making different loop counts in Round 6 (pattern here uses 8 petals for a fuller flower).
Round 8 :
Switch to Color A at last sl st of Round 7. Ch1, in same st: *sc around petal edge placing approximately 7 sc across each petal curve (7 sc per petal); slip to next petal edge;* Repeat for all petals to create framed petal edge. Total approx (8 petals x 7) = 56 sc (56)
Round 9 :
Work 1 sc in each sc around (56)
Round 10 :
BLO: (3 sc, dec) repeat across petals so decreases sit at petal valleys; calculate: (56 -> aim 48). (3 sc, dec) x 12 = 48 (48)
Info :
Use BLO here for a slight ridge at the base of petals—this helps define the 3D petal shape when motifs are later outlined in cream.
Round 11 :
1 sc in each st (48)
Round 12 :
Switch to Color B. Create center puff cluster: *(yo, insert hook, pull up loop) 5 times in next stitch, yo and pull through all loops, ch1 to close* Make 6 puff clusters evenly across the inner round - place every 8th stitch (6 puffs)
Round 13 :
Ch1, sc around making 1 sc between puff clusters to anchor them, approximate total 48 sc (48)
Round 14 :
Switch to Color A; round of slip stitches across back of petals: *sl st in next 2 sts, ch1* repeat to create small picot spacing for later join (48)
Round 15 :
Edge finish: sc in each st around, but where petals protrude work (sc, ch1, sc) over petal tip to accent scallop; remain sc across valley stitches. Expect approx 56-60 stitches after scallop (approx 60)
Info :
Fasten off Color A, leaving 25-30cm tail for joining. Block flower flat with petals slightly lifted so the petals sit proud of the lattice when attached. Make 7 identical large flowers.
— Small Flower Centers (Make 7, for top of each flower) :
Round 1 :
With Color A, mr, 6 sc in mr (6)
Round 2 :
Inc in each st (12)
Round 3 :
*popcorn (5 dc in same st, remove hook, reinsert, sl st in top of first dc) in next st, skip 1 st, sc in next* repeat around to create 6 tiny bumps (approx 18 sts total when sc counted)
Info :
Sew small center to each flower center with matching yarn; center sits slightly raised above puff clusters to hide puff joins.
— Leaf Motif (Make 14 pairs = 28 leaves total) :
Round 1 :
With Color B, ch6. In 2nd ch from hook: sc, hdc, dc, tr, dc, hdc, sc along chain working back across foundation to create a tapered leaf (7 sts across one side). Finish by sl st to base (formal count = 7)
Round 2 :
Turn leaf over and work (sc, sc, hdc, dc, hdc, sc, sc) along opposite side of foundation chain to create full leaf shape; sl st to join at base (14 sc around leaf perimeter approximate)
Round 3 :
Work BLO: 1 sc in each st around for a raised ridge on the leaf center vein (14)
Round 4 :
*On right side only: ch2, skip one st, dc in next st; repeat along right side creating 3 small notches to mimic serration; repeat on left side when reversing;* Fasten off leaving long tail for sewing.
Info :
Leaves pictured are layered—each visible leaf in the photos is made by stacking two leaf pieces, offset slightly, to create depth. Make two leaf pieces per full leaf and sew them together by matching bases then offsetting tips by approx 2-3 stitches.
Round 5 :
Optional ridge: With Color B, make a line of surface slip stitches down the center to create a vein. Work from base to tip with sl st across 6-8 stitches; secure and fasten off (surface detail only)
— Small Accent Pods / Bobble Clusters (Make 18) :
Round 1 :
With Color B, mr, 6 sc in mr (6)
Round 2 :
Make a tight popcorn: (5 dc in same stitch, remove hook, reinsert, sl st to top of first dc). Sl st into next st, repeat every other stitch to create clustered bobbles across one small row; fasten off (6 bumps)
Info :
These small pods form the row of bobbles along the ends and corners. Make enough to space evenly—pattern suggests 18 total small pods used across ends and sides.
— Lattice Panel (Base Mesh Panel) :
Info :
The lattice is worked in Color A on a rectangular foundation. The finished runner in the photo measures approximately 90cm long x 26cm wide; adjust your foundation chain to achieve desired width. For this pattern assume foundation ch 88 (adjustable in multiples of 4 + 4 for turning).
Foundation :
With Color A ch88 + 4 turning ch (this yields 88 mesh spaces across). Row 1: dc in 4th ch from hook (counts as dc), *ch2, sk 2 ch, dc in next ch* repeat across; turn. Approx dc count ~29 depending on repeat (29 dc)
Row 2 :
Ch3 (counts as dc), dc in top of next dc, *ch2, sk next ch-2 sp, dc in next dc* repeat to end; turn. Maintain diamond grid—each row will create an offset making diamonds.
Info :
Work a total of 10 rows of this simple diamond filet mesh to create a baseline strip, then leave similar rows above and below motif placement for later joining. Keep edges tidy by doing 1 sc in first st at the beginning of each row when shaping side borders.
Rows 3-12 :
Repeat Row 2 (dc and ch2 mesh) for 10 more rows (10 rows) creating a rectangular mesh. Keep tension even to make diamonds look square.
Info :
The central area that will hold the flowers is built by working mesh rows, stopping where a flower will be placed, then working a small ring of sc around the flower base and continuing mesh on the other side. A 'cut-out' slot is made by skipping a small number of mesh spaces then reconnecting after the motif is sewn in place.
Row 13 (Join Row for Motif Placement) :
Work dc mesh until you reach the center point where each flower will sit (measure and mark centers for 7 flowers equally spaced along runner length). At the placement, work 1 sc around the sl st/picots at the outermost round of the flower (use the long tail saved from motif Round 15) to anchor flower to the mesh; then continue dc mesh to next placement. Repeat until all flowers are anchored. Finish row and fasten off when all placements have an initial anchoring.
Info :
When anchoring, make sure flowers sit slightly over the mesh, not sinking through. Use whip stitch with the long tail to secure petals at 6-8 anchor points around each flower base. For a neater back, use ladder stitch to hide tails.
Rows 14-28 :
Continue mesh above anchored flowers for 15 rows (15 rows) to create the upper section of the runner. Mirror Rows 3-12 on the top side so the flowers are framed by an equal amount of mesh above and below.
Info :
The mesh grid on either side of the flowers acts like a frame. Work the mesh until the total runner length is achieved (for 7 flowers spaced about 11cm apart, 7 flower centers plus margins produce approx 90cm). Adjust as needed by adding or removing mesh rows between flower anchors.
— Attaching Leaves and Pods :
Info :
Arrange leaves on each side of the center flower row. For each flower, attach 2-3 leaves on each side in a staggered stacked layout: the larger layered leaf closest to flower, then a slightly smaller leaf offset towards the outer edge. Sew leaves by whip stitch along their base to the mesh and also tack through at one or two stitches near leaf tip to prevent flipping.
Leaf Attachment Step :
Place leaf so its base aligns to mesh opening between two dc columns. Use long tail left when finishing leaf Round 4 to sew through mesh at 6-8 points along base. Repeat for opposite leaf of pair. Repeat for all 7 flower placements (14 leaf pairs total).
Info :
For a natural look, rotate each leaf slightly outward so leaves form a symmetric diagonal pair from each flower. Pin leaves in place before stitching to guarantee symmetry.
Attach Small Pods :
Sew small bobble pods along the mesh ends and corners. Use even spacing: 3 pods at each pointed end (arranged in small cluster), and single pods alternating along the short triangular border sections. Fasten off and weave tails securely.
— Corner Shaping & Pointed Ends :
Info :
To create the pointed ends visible in the photo, work a triangular extension by decreasing mesh repeats toward the end. At each end of the runner, reduce two dc repeats per row every other row for eight decreases to form a point; finish with 6-8 rows of single crochet to tidy edge.
Corner Rows :
At the final triangle tip, work sc rounds to build a small band and then add a row of bobble clusters in Color B to create the seeded edge shown. Secure well and block carefully for clean point.
Info :
Blocking is essential to square the diamonds and open the mesh. Pin the runner to the desired dimensions and steam-block or wet block as recommended for your yarn fiber. Allow to dry completely before final border work.
— Border & Scalloped Edge :
Round 1 :
With Color A, sc evenly around entire runner edge including triangle points. When scing along mesh sides, place sc into dc posts and into chain-2 spaces as needed to maintain even stitch counts. Aim for approximately 2 sc per mesh diamond side. Fasten off after full round (approx 360 sc around depending on final size)
Round 2 :
Ch1, *sc in next 3 sts, (3 hdc, 3 dc, 3 hdc) in next st to form scallop shell, sc in next 3 sts, sl st to next stitch* Repeat around to form scallops along long edges and adjust for corners (approx 36 scallops)
Info :
On pointed ends place smaller shell (2 hdc, 2 dc, 2 hdc) to keep scallops proportionate. If your final border looks tight, work a preliminary round of evenly spaced hdc to create a smooth base for scallops.
Round 3 :
Working in Color A, work a picot round for definition: sc into each st of scallop edge; at shell peaks work (sc, ch3, sl st in 3rd ch) as picot. This produces a delicate loop atop each scallop (approx 36 picots)
Round 4 :
Switch to Color B for final decorative row of small bobble dots along long edges: *sc in 4 sts, make mini-pop (3 dc cluster or small puff) in next st, sc in 4 sts* repeat along edges. Fasten off and weave tails.
Info :
For a crisp edge, block again after attaching scallop and bobbles. If your yarn is cotton, steam-block lightly. Pins will help set scallops and the triangular tips properly.
— Finishing Touches & Weaving Tails :
Info :
Weave all tails into the back of the runner, following the mesh lines to hide ends. Use a yarn needle to bury ends at least 4-6 cm into the body, working back and forth through several strands to secure. Trim flush.
Info :
Block the assembled runner on a flat surface, pinning each flower and leaf carefully so petals sit slightly over the mesh. Leave until fully dry to retain shape. Lightly steam if necessary to relax bobbles.
Final Inspection :
Check all joins for security. Add extra whip stitches where petals meet mesh to avoid flipping. If any bobble feels loose, secure with additional stitches.
Info :
Store flat when not in use to prevent distortion. If laundering is necessary, hand wash gently in cool water and dry flat to preserve shape and texture.
This vintage floral lattice runner is a wonderful project that combines simple lace mesh with sculpted motifs for a beautiful heirloom piece. The mix of airy filet and raised flowers gives a refined texture that looks lovely on a wooden table or dresser. Enjoy the meditative rhythm of the mesh and the satisfying finish when petals are sewn into place — it’s a project you’ll be proud to display. 🧶🌿✨