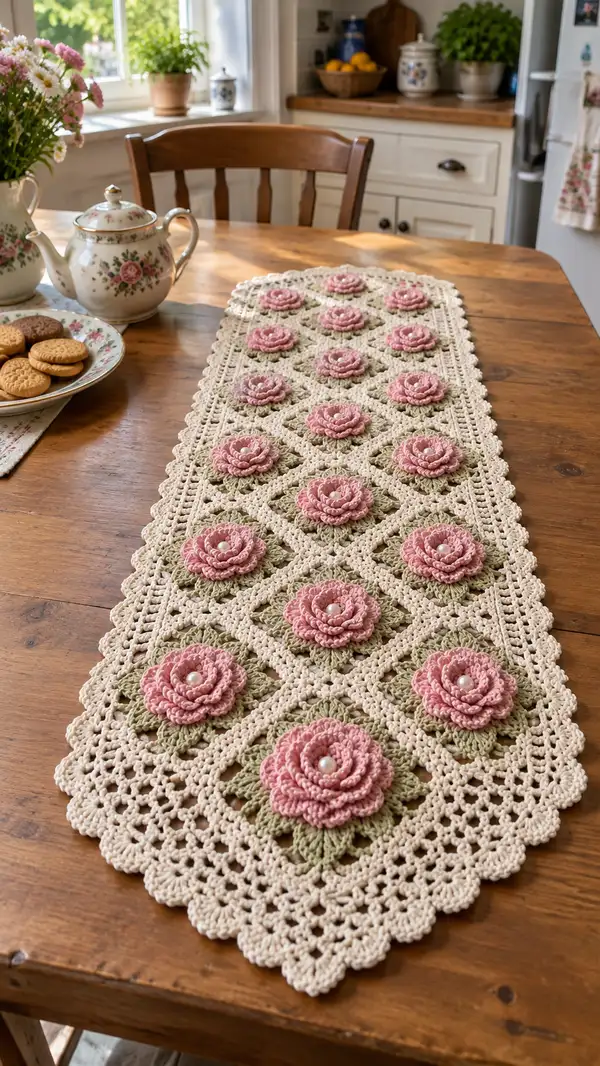
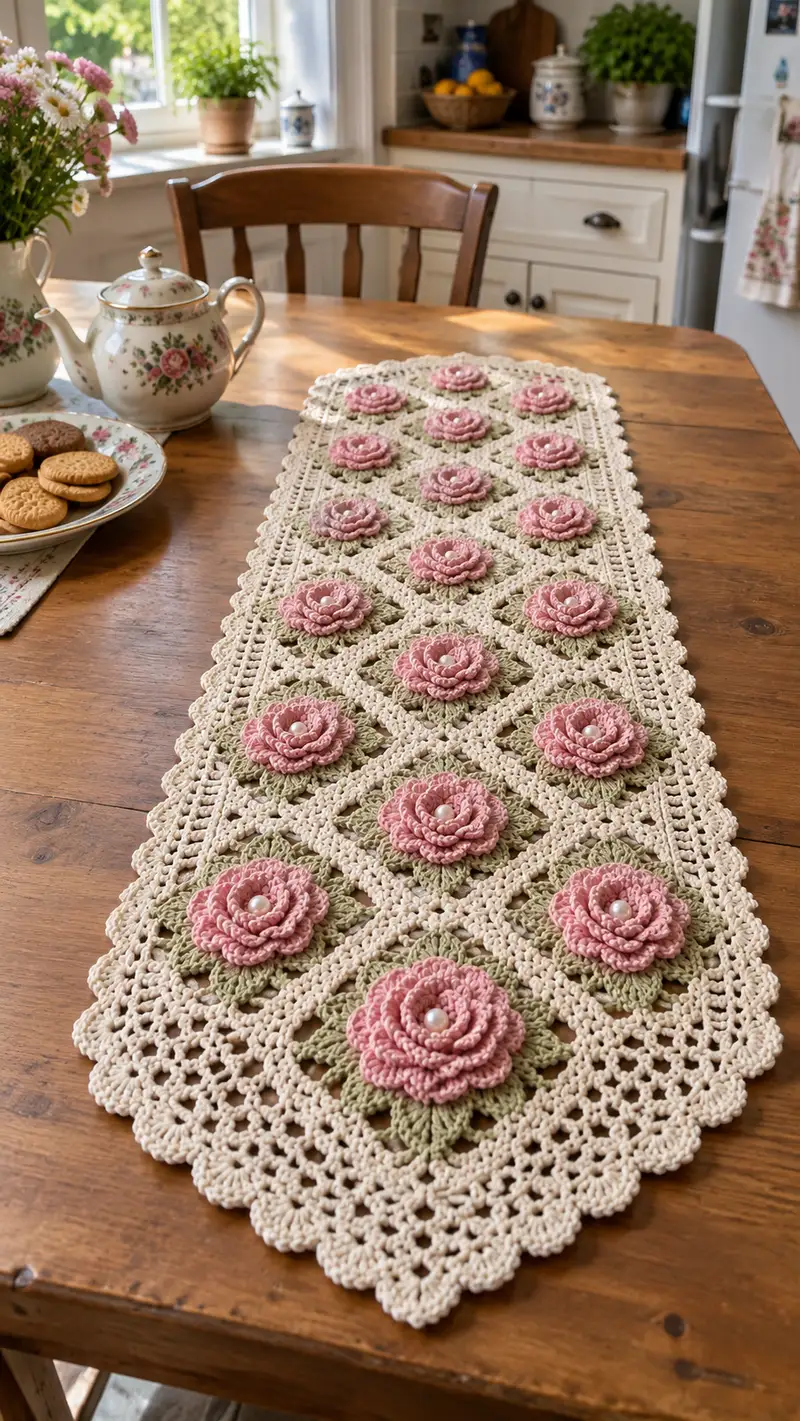
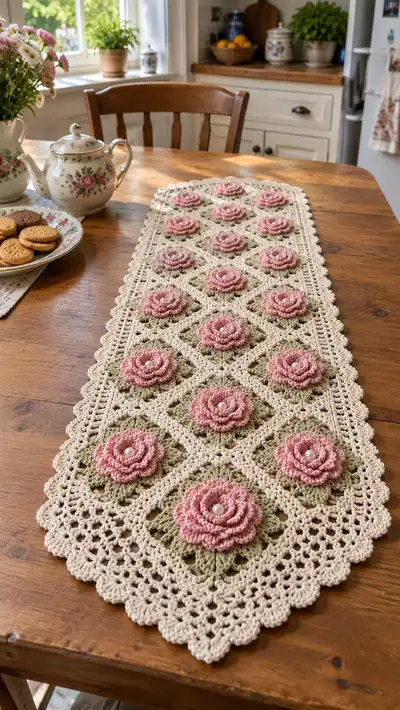
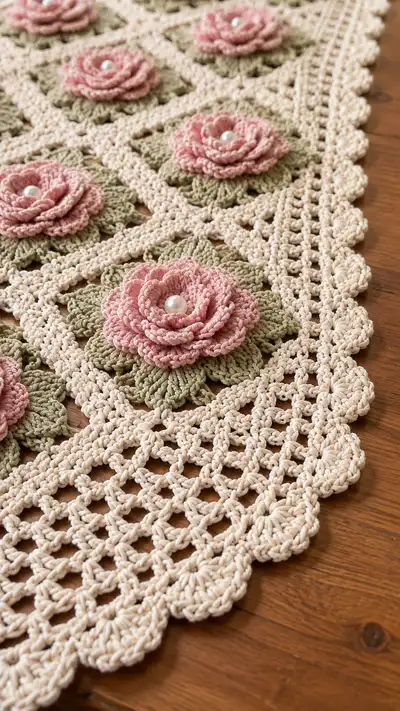
A romantic vintage-inspired table runner featuring raised 3D roses with pearl centers nestling on soft sage leaves, set into lacy cream diamond motifs. This long, elegant runner has a scalloped lace border and a delicate openwork lattice that makes it perfect for a dining table or sideboard. The pattern uses simple granny/fillet techniques with layered petal work to create sculpted flowers that really pop. Suitable for an intermediate crocheter who loves texture and assembly.
Progress Tracker
0% Complete
— Notes & Gauge :
Info :
Gauge is not critical for motif fit provided you maintain consistent tension. Typical finished diamond motif measures approximately 12cm (4.7in) corner-to-corner before blocking when using 3.5mm hook and worsted cotton. Keep a notebook for counts. US terms used throughout.
— Rose (Make 18) :
Round 1 :
With blush pink, make a magic ring, ch1, 6 sc in ring (6)
Round 2 :
Inc in each st around (12)
Round 3 :
(1 sc, inc) x6 (18)
Round 4 :
(2 sc, inc) x6 (24)
Info :
These first rounds create a compact center. Keep your tension slightly tighter than the rest so center sits neatly when petals are added.
Round 5 :
(3 sc, inc) x6 (30)
Round 6 :
1 sc in each st around (30)
Round 7 :
Ch2, *in next st work (hdc, 2 dc, hdc) forming a small petal; sl st into next st; rep from * around making 10 petals (10 petals made, approximate stitch usage 3 sts per petal)
Info :
Work petals into the top of the round; place petals evenly. If you have 30 sts and make 10 petals, place them every 3rd stitch. Slip stitch between petals keeps a clean line.
Round 8 :
Sl st into first petal base, ch3 (counts as dc), *in next petal base work (2 dc, tr, 2 dc) to make a fuller petal; sl st into next sl st between petal bases; rep around (10 petals total)
Round 9 :
Ch1, sc in same st, *ch2, skip top of next petal, sc in next sl st between petals; rep around to create a small ridge (10 sc, 10 ch2 spaces)
Round 10 :
Change to slightly larger hook (optional) for next petal layer. Into each ch2 space: (sc, hdc, 3 dc, hdc, sc) to form larger scallop petals (10 larger petals)
Info :
At this stage the rose will start to look like a flattened wheel. The next rounds create layered petals that are worked as short rows and then rolled and sewn, or worked as concentric petal layers — both options are described below.
Round 11 :
Turn work; ch1, *skip to base of a large petal and make 5 sc evenly across the top edge of that petal to create a curved petal edge; sl st to base between petals; rep around (10 petals x 5 sc = 50 sc total along the circumference)
Round 12 :
Ch3, *in next 5 sc work (2 dc, tr, 2 dc) forming a raised petal ridge; sl st into next base; rep around (10 raised petals)
Info :
Round 11-12 create the first dimensional petal layer. Keep tension loose enough to make petals 'lift' off the base but not so loose they flop. Block lightly if needed to shape petals later.
Round 13 :
Ch1, sc around securing the petal bases into the underlying round (approximately 50 sc, adjust to fit by adding occasional sc inc if needed to avoid puckering)
Round 14 :
For layer 2 petals: into every second petal base (use visual spacing) work: ch2, (3 dc, ch2, sl st) to create small overlapping petals. Aim for 10-12 petals depending on spacing.
Round 15 :
Ch1, sc around to anchor second petal layer (approx 50-60 sc; add a few increases when necessary to keep the round flat)
Info :
At this point you can either continue making concentric petal layers directly on the piece or crochet additional petal strips to sew on. The pattern continues with concentric rounds to keep assembly simpler and easier to reproduce.
Round 16 :
Change hook back to 3.5mm if you used larger; into each ch2 space of Round 14 work (sc, hdc, 3dc, hdc, sc) to form larger outer petals (matching Round 10 structure but offset to create layered effect) (approx 12 large petals)
Round 17 :
Ch1, sc evenly around petal bases to anchor (approx 60 sc). Fasten off leaving 20cm tail for sewing. Do not stuff; rose is an applique.
Info :
Optional: make two extra smaller petal layers (Rounds 18-20) if you prefer a fuller rose; make these rounds by repeating rounds 11-16 but using shorter petals so the rose builds up in tiers. Many crocheters prefer 3 petal layers total for a nice compact rose.
Round 18 :
(Optional small outer ruffle) Ch2, in each sc around work (hdc, 2 dc, hdc) in alternating scs to create a delicate outer ruffle (approx 30-40 st pattern depending on previous round) Fasten off and weave tail.
Info :
When roses are complete, sew one flat-back pearl into the center using cotton thread. Use two stitches to secure the bead on the underside so it sits centered. Make 18 roses for a 3x6 grid runner (3 columns x 6 rows).
— Leaf (Make 18, 1 per rose) :
Round 1 :
With sage green, ch6, sl st to first ch to form a small ring, ch1, 6 sc around ring (6)
Round 2 :
Inc in each st around (12)
Round 3 :
(1 sc, inc) x6 (18)
Info :
These rounds build a small disc that is the leaf hub. Petals will be worked around it to create a 4-5 pointed leaf arrangement.
Round 4 :
Ch2, *skip 3 sc, sc in next sc to mark leaf tip; rep across to create 6 anchor points, sl st to join and then proceed to build leaf shapes around marked points
Round 5 :
At each anchor point work: (ch2, 2 dc, tr, 2 dc, ch2) into the marked stitch to create a leaf lobe; sl st to next anchor; rep for 6 small lobes (6 leaf lobes)
Round 6 :
Ch1, sc around entire assembly to tidy edges and anchor lobes (approx 36 sc) Fasten off leaving long tail for sewing.
Info :
Arrange 4-6 lobes in a slight cross or circular arrangement beneath the rose. Allow edges to be lightly shaped with fingers or blocked flat to fit between diamond corners.
— Diamond Motif Base (Make 18) :
Round 1 :
With cream yarn, ch6 and join with sl st to form a ring, ch3 (counts as dc), work 15 dc into ring, sl st to top of ch3 (16 dc total) (16)
Round 2 :
Ch3, dc in same st, *ch2, 2 dc in next st; rep around to create 16 clusters separated by ch2 spaces; sl st to top of ch3 (16 clusters)
Round 3 :
Ch1, sc into first dc of a cluster, ch2, skip to next cluster and sc into center dc; rep around to create 16 sc and 16 ch2 spaces forming an open center (approx)
Info :
The diamond motif is worked on the diagonal so later you will elongate the motif into a diamond by building triangular wings. Keep central round neat because rose and leaf will be attached above this point.
Round 4 :
Work on diagonal: ch3 (counts as dc), 2 dc in same sp, *in next ch-2 space work (3 dc), rep across to make a small square, sl st to join (this round prepares corners for diagonal shaping)
Round 5 :
To begin forming a diamond corner, chain 1 and work 1 sc evenly along one side across the next 3 clusters, then at corner ch4 to turn (corner chain), continue sc along next side; repeat to shape four diagonal points (you will be creating four small corner chains of ch4).
Round 6 :
Ch3, in each side sc work 1 dc per st, at each corner work (2 dc, ch4, 2 dc) to form a diagonal corner; rep around to create a base diamond frame (st counts variable by side; aim for symmetry)
Info :
From rounds 4-6 you form a small diamond base. The next rounds will create a lattice internal grid so that when multiple diamonds are joined the lattice is continuous. Keep counts equal on all four sides for square-to-diamond clarity.
Round 7 :
Ch1, sc in each dc along side (this evens and tightens the edges). At each corner sc around the ch4 loop with 8 sc into that ch4 to make a sturdy corner (approx counts will be ~12 sc per side after corner anchoring)
Round 8 :
Ch4 (counts as tr+ch1), *skip a st, tr into next st, ch1; rep along to create an open lattice row along each side. At corners work (tr, ch2, tr) into corner scs to maintain the opening. Sl st to join.
Round 9 :
Ch1, sc in each tr and ch1 space around to solidify lattice edges. This round should result in a consistent stitch count per side; adjust with extra sc where necessary to keep shape flat.
Round 10 :
To create the inner raised diamond frame for rose placement: ch3, dc in next 4 sts, *ch1, skip 1, dc in next 5; rep to create spaced dc arches around the center; sl st to join. This forms little arch points where the leaf will tuck.
Info :
At the center leave a space large enough for the leaf hub to sit centered. Count visually and verify that your central opening is around 2cm across before attaching leaf and rose. Blocking will help even this center later.
Round 11 :
Ch1, sc around entire motif filling small gaps. Work 1 sc in each stitch and into each ch space to finish base. Fasten off leaving long tail for joining.
Info :
Make 18 diamond motifs in cream. Arrange them in a grid 3 motifs across by 6 motifs long (3x6 = 18) for the runner pictured. Adjust motif count for length desired; multiples of 3 across maintain symmetry with the border pattern described later.
— Attaching Leaf and Rose to Diamond Motif :
Round 1 :
Position one sage leaf on the center opening of the diamond motif. Use long tail from leaf to whip stitch the leaf base to the motif, centering leaf lobes at compass points (N, S, E, W roughly). Use small, invisible whip stitches through the base of the leaf hub and the underlying cream stitches (6-8 stitches).
Info :
Pin the leaf before sewing. The leaf should lie flat and slightly extend beyond the diamond edges to provide contrast when the rose is sewn on top. Sew firmly but do not pull yarn through too tight to avoid puckering the motif.
Round 2 :
Using the blush rose tail, position the rose so its base nestles above the leaf hub center. Whip stitch through the base of the rose (the last anchoring round) and the top of the leaf hub plus the surrounding cream stitches in the diamond. Stitch around the base in 6-8 places to secure.
Info :
Be mindful of bead placement: sew the pearl in the center prior to final attachment or after the rose is sewn down depending on your preference. If sewing bead after, secure it through both rose layers to prevent loss.
— Assembling Runner: Joining Diamonds (18 motifs) :
Round 1 :
Arrange motifs in a 3 x 6 grid on a blocking mat. Block each motif to exact shape before joining; pin in place for precise alignment. The motifs are joined corner-to-corner in a lattice join so that the diamond points form a continuous open lattice.
Round 2 :
To join motifs by whip stitch: align two motifs side by side so that corner stitches match. Using cream yarn and a tapestry needle, sew with whip stitch through the front loops only of each motif to create a small seam that blends into the lattice. Make three to five secure passes across each join point. Repeat until one row of 3 motifs is joined.
Round 3 :
Join rows together by matching corner chains and lattice openings. Use mattress stitch or whip stitch to create an invisible join; ensure that the diamond grid lines up so there are continuous diagonal lattice lines along the length of the runner.
Info :
Joining method affects finished look: slip-stitch join on the right side will create a visible ridge; mattress stitch or whip stitch gives a flatter, neater seam ideal for a table runner. Work slowly and pin often.
Round 4 :
After joining, weave in tails on the back of the runner and lightly steam-block the entire assembled runner flat. This helps even out join tensions and prepares for outer border attachment.
— Mid-Runner Side Panel (Stabilizing Strips) :
Round 1 :
With cream, join at one long side seam between two motifs. Ch1, sc evenly into the seam holes across the full length, working one sc every join point until you reach the runner end; turn and work back along the opposite edge of the seam with sc to create a single-row strip that fills the seam and stabilizes motifs.
Round 2 :
Ch3, work 1 dc into each sc across the strip, at corner chains of diamonds work (2 dc, ch2, 2 dc) to keep the diagonal open; rep along all seams to create continuous vertical lines in the lattice.
Info :
These mid-run strips create the open bars seen between diamond motifs. They are worked along each seam on both sides of the runner. Make sure counts are identical on both long sides for symmetry.
Round 3 :
Ch1, sc around these dc columns to neat them up and create an even face for the final border rounds. Fasten off and weave ends.
— Outer Border Edging (Scalloped Lace) :
Round 1 :
With cream, join at any corner of the assembled runner. Ch1, sc evenly around entire runner edge, placing 3 sc in each corner chain space where diamond corners meet (approx perimeter counts will vary based on runner length; aim for even spacing across length). Fasten off and weave tail.
Round 2 :
Join cream at any sc on the long edge. Ch3 (counts as dc), *skip 1 sc, dc into next sc, ch2; rep across to create an openwork picot-like lattice edge; at corners work (dc,ch3,dc) to keep the scallop; sl st to join.
Round 3 :
Ch1, sc in each stitch and ch-space around to firm up the edge. This creates a stable base for scallops.
Round 4 :
For scalloped finish: *in next 5 sc work (sc, hdc, 3 dc, hdc, sc) to form a scallop shell; skip 2 sc between scallops; rep across each long edge. At ends work additional shells to maintain symmetry. Sl st to join.
Round 5 :
Ch1, sc around each scallop edge: place 1 sc at top of each scallop and 1 sc in the ch2 gaps between scallops for stability. This tidy round gives the lace-edge pictured.
Round 6 :
Optional: Repeat the scallop shell (Round 4) once more for a fuller edge. Fasten off and weave in all ends. Block the entire runner to final measurements, pinning scallops sharply for a crisp edge.
Info :
Blocking will dramatically improve the finished look. Use pins to shape scallops and diamond points. A light steam or fabric spray set will hold the cotton shape long-term.
— Alternate Petal Construction (If you prefer sewn-on petals) :
Round 1 :
Make narrow petal strips by chaining 12, then row 1: sc in 2nd ch and across (11 sc); row 2: ch2, turn, hdc across; row 3: ch3, dc across; row 4: fasten off and make 8-12 such strips for each rose. Roll the strips layered and sew base to create a compact rose. This is an alternate method for fuller, highly dimensional roses.
Info :
This sewn-strip method allows customizing petal fullness and is easier for repeatability if you make many roses. Secure the rolled base with several small whip stitches, then attach to the leaf and motif as described earlier.
— Finishing Touches :
Round 1 :
Sew a single flat-back pearl into the center of each rose, securing with cotton thread passed through the underside in an X stitch and knotted on the wrong side. For extra security, apply a tiny dab of fabric glue on the knot.
Info :
Weave all ends to the back of the runner and trim close. Use blocking to shape scallops and ensure the runner lays flat. If placing on a table, place a felt pad in the center of each rose if you want protection from bead abrasion.
Round 2 :
Give final press/block and allow to dry completely. Store flat or rolled on a padded tube to avoid creasing the scallops.
Info :
You can vary the size by changing yarn weight and hook; for a denser, smaller runner swap to DK cotton and 3.0mm hook. To enlarge, use bulky cotton cord and a 4.5-5.0mm hook; rework motif counts as needed.
This beautiful rose diamond runner brings a romantic, vintage mood to your table with tactile, three-dimensional roses and an airy open lattice. Each neatly joined diamond and scalloped edge showcases the attention to detail in your work, and the pearl centers are the perfect delicate finishing touch. Whether displayed for afternoon tea or saved for a special dinner, this runner will make any table feel lovingly set. 🧶🌸✨