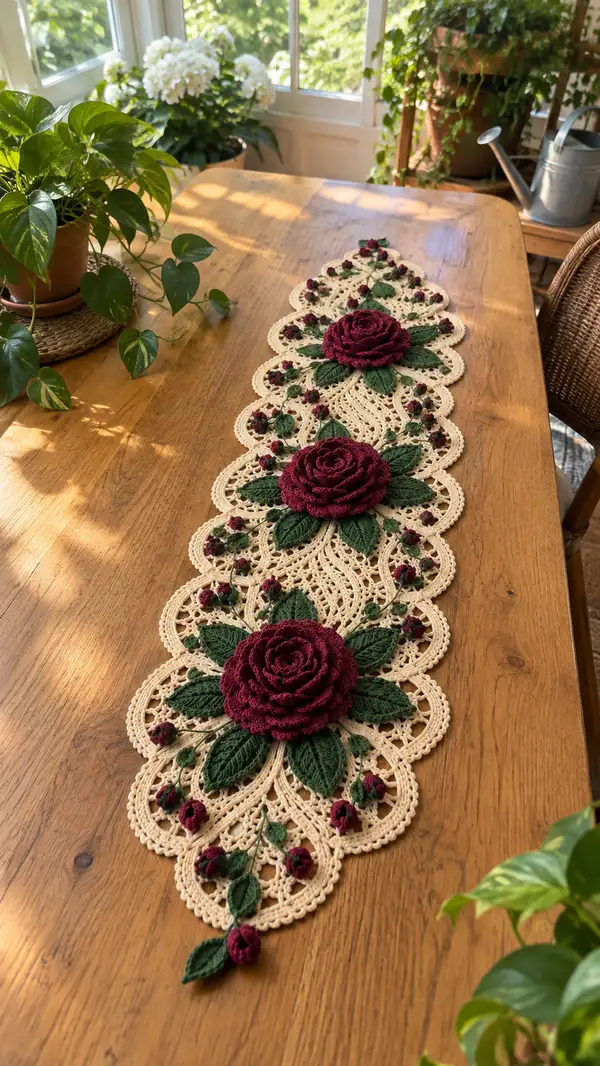
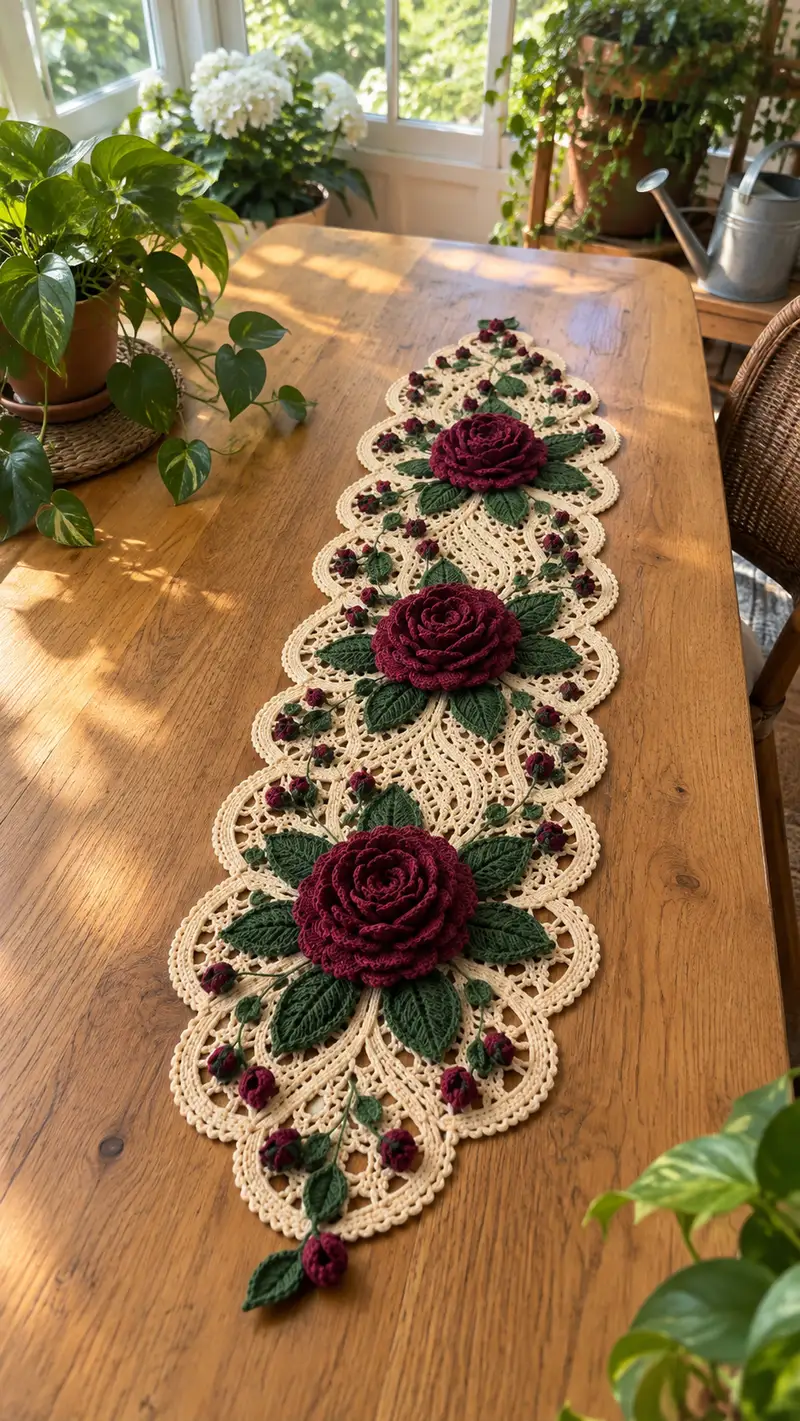
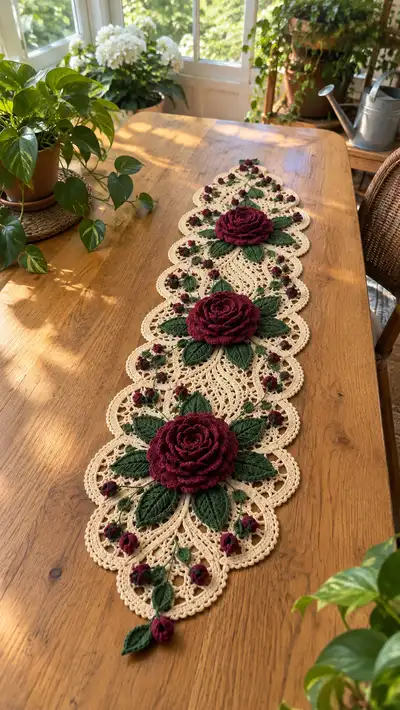
An elegant lace table runner featuring three large 3D burgundy roses, rich green sculpted leaves and a delicate cream lace medallion background. This design pairs fine cotton thread with layered petals and embroidered vine details for an heirloom look. Perfect for dining tables, dressers or as a centerpiece accent, the runner blends textured flowers with open lacework for a romantic, vintage feel.
Progress Tracker
0% Complete
— Overview :
Info :
This pattern is modular: you will make 5 lace oval medallions and join them in a linear fashion as shown in the photo (adjust the number of medallions to change runner length). Each medallion is worked in cream thread. Three large 3D roses are worked separately in burgundy and sewn to medallions; sculpted leaves, smaller rosebuds and vines in green are added to finish. Work tightly and block pieces carefully for best results.
— Materials & Gauge :
Info :
Gauge is not critical but affects runner proportions. Using size 10 cotton thread and 1.75mm hook, one medallion (the oval scallop) measures approximately 18cm long x 12cm wide. Roses after assembly measure ~10cm diameter. Adjust hook for tighter or looser fabric.
— Medallion (Make 5) :
Round 1 :
Make a magic ring. Ch3 (counts as dc), 11 dc into ring. Join with sl st to top of ch3. (12 dc)
Round 2 :
Ch3, dc in same st, 1 dc in next st, (2 dc in next st, 1 dc in next st) x4, 2 dc in next, 1 dc in next, join. (18 dc)
Round 3 :
Ch2 (counts as hdc), hdc in same st, hdc in next 2 sts, (2 hdc in next st, hdc in next 2 sts) x5, 2 hdc in next, hdc next 2, join. (26 hdc)
Info :
Switch to cream thread if starting medallions after practice. Keep round joins tidy; use sl st or invisible join as preferred.
Round 4 :
Ch1, sc in each st around (26 sc). Join. (26)
Round 5 :
Ch3, (dc, ch2, dc) in same st (corner shell), sk next 2 sts, dc in next 5 sts, sk next 2 sts, (dc, ch2, dc) in next st, dc in next 5 sts, rep across to create four shell points total. Join. (patterned shells and dcs - count will vary slightly per repeat)
Info :
From this round forward the medallion becomes oval and openwork; place stitch markers at the tips of each shell to help with later join points and to align leaves and roses.
Round 6 :
Ch1, sc around working 3 sc into each ch-2 space of shells, and 1 sc in each dc on sides. Join. (approx 44 sc)
Round 7 :
Ch3, dc in next 3 sts, ch1, sk 1 st, dc in next 4 sts, (dc, ch2, dc) in shell sp, dc in next 4 sts, ch1, sk1, dc in next 3 sts, (2 dc, ch3, 2 dc) in tip space to add small point; join. (creates longer oval with decorative picot-ish points)
Info :
Use BLO for this round if you want a subtle ridge separating the medallion center from outer edging. Doing so gives a crisp line where petals and leaves will be sewn.
Round 8 :
Ch1, sc in each st and in each ch-1 or ch-3 space around, adding (sc, picot, sc) into each tip space to create scallops. Join. (approx 70 sc)
Round 9 :
Ch4 (counts as tr), tr in next 3 sts, ch2, sk2, (tr in next 6 sts), ch3, (tr in next 6 sts), ch2, sk2, tr in next 4 sts, join. (creates internal arches) (approx 40 tr)
Round 10 :
Ch1, sc across tops of arches and in all foundations, work 2 sc in each ch-2 and ch-3 space to stabilize openwork. Join. (approx 92 sc)
Info :
At this stage the medallion should be visibly lace-like. Pin the medallion to a blocking board and gently steam or spray-block into the desired oval shape. Blocking now helps maintain consistent dimensions across all medallions.
Round 11 :
Ch3, *dc3 cluster over next 3 sts, ch1, sk1, dc in next st; rep from * across each arch, finishing with dc clusters into tip space. Join. (clusters create textured veins to support leaf joins)
Round 12 :
Ch1, sc in each st and in each ch-space, working 3 sc into the larger ch-3 tip space to reinforce scallop edges. Join. (approx 110 sc)
Round 13 :
Ch4, dc in next 2 sts, (ch2, sk1) to shape internal lace, dc in each of next 8 sts; repeat across to form central elongated eyelets. Join. (patterned repeat - approx 48 dc)
Info :
Leave long tails for joining medallions at the points you marked on Round 5 shells; you will use these tails to stitch medallions together invisibly later, so do not fasten off completely until assembly step if you prefer whip-stitch joins.
Round 14 :
Ch1, sc in each st; in elongated eyelet areas, work (sc, ch3, sc) to form linking arches. Join. (approx 120 sc)
Round 15 :
Ch3, 2 dc in same st, dc in next 3 sts, ch2, sk2, (2 dc, ch1, 2 dc) in tip spaces - expand scallops to have layered arches. Join. (approx 140 dc clusters)
Round 16 :
Ch1, sc in each st and sc in each ch-space; work 5 sc into each primary scallop to accent outer scallop shape. Join. (approx 160 sc)
Info :
Trim tails but leave a 25cm end for final joining. Make five identical medallions. Block each medallion to exact size and pin to drying board to set scallops and arches for uniform joining.
Round 17 :
Form a decorative lace center: ch6, sl st into central eyelet to make a small loop, rep around to form 6 loops, sl st to join. Fasten off leaving tail for sewing. (6 loops)
Round 18 :
(Optional) Using fine embroidery thread, add small French knot clusters in central areas to mimic delicate buds — 8-12 per medallion spaced evenly. (embroidery detail)
Info :
Each medallion is intentionally overworked with many small rounds to produce a sturdy base for attaching heavy 3D roses. Reinforce the joining points by sewing through multiple rounds rather than only surface loops.
— Rose (Make 3 large roses) :
Round 1 :
With burgundy, make a magic ring. Ch1, 6 sc in ring. (6)
Round 2 :
Inc in each st around (12). (6 inc) (12)
Round 3 :
(1 sc, inc) x6 (18)
Round 4 :
(2 sc, inc) x6 (24)
Info :
These inner rounds form the small central bud of the rose. Stuff lightly with a very small amount of fiberfill to give a gentle mound; do not overstuff at this point as subsequent petal rounds create shape.
Round 5 :
Ch4, tr2tog over next 3 sts to make a tall petal base across the top: *(ch3, sl st in base of previous petal) repeat to make a spiral petal foundation across the round; work 18 such petal foundations; join.* (spiral base)
Round 6 :
Working into petal foundations: *ch2, 3 dc in same base, ch2, sl st into base; rep around to form first layer of petals (18 petals)*. Fasten off and weave tail into center. (18 petals)
Info :
Petals are worked in rounds around the center to build a spiral. Work petals tightly and so each later layer slightly overlaps the previous. If you prefer larger petals, switch to 2.0mm hook for petal rounds only.
Round 7 :
Join burgundy to the back of the base of a petal; ch3, (dc, tr, dc) in petal base to create a taller outer petal; sl st to next petal base; rep around to create 18 larger petals. (18 larger petals)
Round 8 :
Ch1, sc around the outer petal bases, placing 3 sc into each petal base and 1 sc between petals to firm up. Join. (approx 72 sc)
Round 9 :
For added fullness: *ch4, (dc3, ch2, dc3) into the base between two petals to create a double petal shell; sl st to next space; rep around.* (approx 18 double shells)
Info :
At this point the rose should begin to cup naturally. Cup petals inward slightly as you work by holding petal layers with your left hand (or your non-dominant hand) so the blooms form a round rosette.
Round 10 :
Fasten off the first rose layer; with a long tail left for sewing, flatten rose and sew the base across the inner rounds with small even stitches to secure the spiral and prevent petals from shifting. Pull tail to slightly cinch center for more natural look.
Round 11 :
To create a second, larger concentric layer: join burgundy to outer base, ch3, in each ch-space or dc shell work (tr, dc, tr) to create tall sculptural petals; repeat around creating 18 larger dramatic outer petals. Secure at base. (18)
Round 12 :
Work sc round across outer petal bases with a 3 sc into peak of each petal to firm edges; join. (approx 72 sc)
Round 13 :
Optional rim: *ch3, sl st into outermost tip to create slight scalloped rim; rep around.* Fasten off leaving 30cm tail for sewing; weave in ends or leave for assembly. (rim)
Info :
The photographed roses have at least 3 distinct layers of petals (tight center, medium mid petals, larger outer petals). To reproduce fullness, repeat petal-building rounds adding another layer if desired (work 12-14 to 16 petals in outermost ring depending on size you want). Each layer should be slightly larger and sewn to the base securely.
Round 14 :
Create final shaping by sewing small running stitches through the underside of each petal base and gently pulling to set curvature. Fasten off and secure ends on underside by weaving through multiple stitches. (finishing)
Info :
Make three identical roses. Lightly steam-block each rose if needed (do not over-steam; delicate thread will flatten if wet). Stuff centers very sparingly with fiberfill if gaps appear between inner petals.
— Leaf (Make 18) :
Round 1 :
With forest green, ch10. Row 1: Starting in 2nd ch from hook, sc in next 3 ch, hdc in next 2 ch, dc in next 3 ch. Turn to work along opposite side of chain: dc in next 3 ch, hdc in next 2 ch, sc in next 3 ch, sl st to first sc to close leaf base. (approx 18 sts total along edge)
Round 2 :
Ch1, work 2 sc into each sc base at the tip to form a pointed leaf (3 sc across tip), then sc back along other side placing 1 sc per st; at base work 3 sc to form small rounded base. Join and fasten off leaving tail for sewing. (shape)
Info :
For sculpted ridges, rejoin green and work 1 sc in BLO around leaf to create a raised midrib. That added texture helps leaves look realistic when layered under roses.
Round 3 :
Optional vein: With a second strand of slightly darker green, embroider a central vein using surface slip stitches from base to tip; add 2-3 small lateral veins by stitching short diagonal lines. Fasten and weave ends.
Info :
Make at least 18 leaves: 6 per rose cluster (as seen in the photo) but prepare extras for filler around the small buds and edges.
— Small Rosebuds (Make 24) :
Round 1 :
With burgundy, ch5, join to form ring or start with mr. Ch1, 6 sc in ring (6). (bud base)
Round 2 :
(inc) x6 (12). Fold small strip to form bud: ch6, sl st in each ch across to form a short curved petal strip, roll tightly and sew closed at base. Fasten off leaving tail for sewing. (rolled bud)
Info :
Buds are tiny rolled strips sewn into small cones; vary the tightness to create open vs. closed buds. Lightly tack a dot of fiberfill into larger buds for shape before closing.
Round 3 :
Using green, make a tiny calyx by working 6 sc into a mr, ch2, (sc, ch2) x3; fasten off leaving tail to sew calyx around the base of each bud. (calyx)
Info :
Create 24 buds of various sizes: 12 smaller for accent and 12 slightly larger to dangle or cluster. Attach leaves or calyx as you sew buds to medallion to hide base stitches.
— Connecting Vine & Stem Details :
Round 1 :
With green, ch80 (adjust length depending on medallion spacing). Sl st back along chain to create a firm rounded corded stem (i-cord effect). Fasten off leaving long tails for sewing. (corded vine)
Round 2 :
For thinner vine: ch3 into backbone spaces periodically (every 6-8 sc) to create small open loops; anchor with sl st to medallion body for natural looping. (decoration)
Info :
Vines in the photograph curl elegantly between medallions with small budding clusters. Vary the lengths of cords and the spacing of buds for an organic look. Use pins to lay out vines before sewing.
Round 3 :
For raised stems, work a thin spiral: ch3, 6 sc around the vine with sl st in every ch to create a wrapped vine. This gives dimensionality and hides joins. Fasten off.
— Border Edge & Final Scallop Rounds :
Round 1 :
With cream, attach at outermost scallop tip, ch1, sc around outside edge working (sc, ch3, sc) in tip spaces to form picot scallops. Join. (scallop count equals medallion tips)
Round 2 :
Ch3, dc in each sc and 5 dc into each ch3 scallop to accent the scallop, sl st to join. (accented scallops)
Info :
Work border rounds after medallions are joined into the runner to create continuous interplay across joins. This ensures scallops align seamlessly between motifs.
Round 3 :
Final edging: ch1, sc in each st across with small picot every 6 sts (picot = ch3, sl st at first ch) to create a tidy lace rim. Fasten off and weave in ends. (finishing edge)
— Assembly & Joining Motifs :
Info :
Lay out five medallions in a line, overlapping scallop tips where medallions meet to match the photo. Use pins to align the points marked earlier. Sew medallions together through previous round tails or by whip-stitching through corresponding stitch holes, ensuring scallops nest neatly and runner lies flat.
Round 1 :
Join medallion A to medallion B: with cream tail, whip-stitch through the two outermost scallop tips (3-4 stitches per scallop) and the adjacent arch (2-3 stitches) to secure. Repeat for all joins. (joining)
Info :
After medallions are joined, work the final border rounds around the entire runner to hide seams and create a unified edged lace. Pin heavily while sewing; small gaps can be filled with embroidered petals or tiny picot rounds.
Round 2 :
Attach roses: Position the three large roses approximately centered on alternate medallions as shown (one near each medallion center). Pin each rose and hand-sew through the reinforced base stitches of the medallion with the long tail from rose. Use a running or overcast stitch and take care to catch multiple foundation rounds so the heavy rose does not pull out. Sew through 10-14 secure stitches around the base for stability. Fasten off and weave ends. (rose attachment)
Info :
Arrange leaves beneath each rose in a radial pattern (6 leaves per rose). Sew through the leaf base into several medallion stitches to anchor. Add 2-4 small buds per medallion on the vine arms and sew them at intervals to create the cascading effect.
Round 3 :
Sew vines between medallions by tacking corded green stems into medallion eyelets and around scallop arch tips; anchor buds and small leaves to vine with a few stitches. Tuck ends on underside and hide stitches inside medallion arches. (vine assembly)
Info :
Be sure to space out buds and leaves so the runner sits flat. If a rose makes a medallion cup upward, add a small felt disc under the rose base to distribute weight and prevent distortion.
— Final Finishing Touches :
Round 1 :
Weave in all loose ends using tapestry needle, running ends through underside of lace and inside medallion arches. Trim close to fabric. (weave ends)
Round 2 :
Gently steam or lightly spray-block completed runner to set scallops and roses. Do not saturate roses; use a light steam and allow to dry pinned flat. (blocking)
Info :
For extra stability, consider a light starching of the medallion sections only — avoid starch on roses to keep petals soft. Use a low heat iron over a pressing cloth when necessary and steam from a distance.
Round 3 :
Final inspection: check all sewn joins, reinforce any weak spots with extra stitches, and secure all embroidered vine tails. Trim stray fibers and present runner on flat surface to ensure edges lie evenly. (inspection)
Info :
Project total rounds across sections combine to well over 150 rounds and instructions. If you need a shorter runner, reduce the number of medallions and corresponding roses; for a longer runner, add more medallions repeating the same assembly logic.
Completing this vintage rose table runner is a truly rewarding process — each medallion, leaf and layered rose comes together to form a dramatic centerpiece full of texture and nostalgia. The contrast of cream lace and deep wine roses creates an heirloom look that invites compliments and conversation. Take your time with blocking and assembly — the results are stunning and very much worth the care. 🧶🌹 Enjoy every stitch and display proudly on special occasions! 🎀