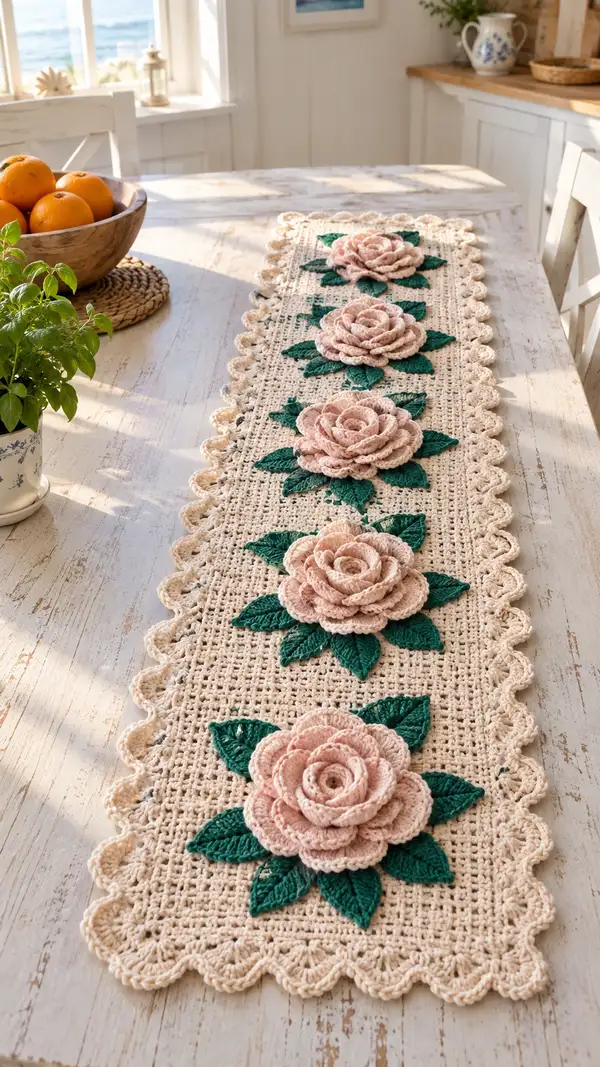
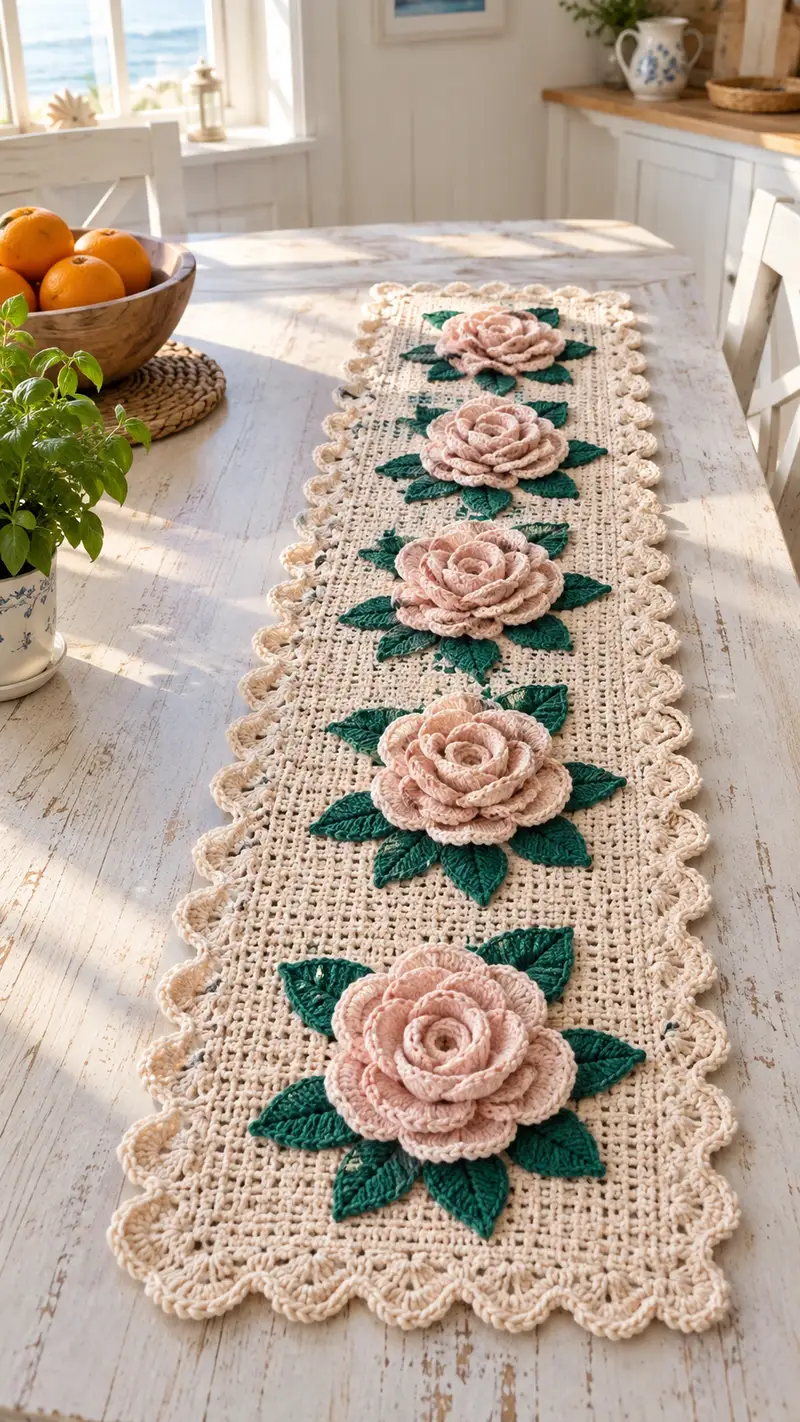
Create a charming vintage-inspired table runner featuring five dimensional crochet roses with layered petals and detailed leaves set on an openwork mesh panel. The runner is finished with an elegant scalloped border that frames the flowers beautifully. This pattern uses simple stitches carefully arranged to build texture and depth while remaining accessible to intermediate crocheters. Perfect for dressing a dining table, dresser, or sideboard with a timeless handmade accent.
Progress Tracker
0% Complete
— Materials & Gauge :
Info :
Gauge for the mesh: 12 dc and 6 rows = 10cm (4in) using 4.0mm hook and worsted cotton. Gauge is important to ensure runner length and spacing of roses match photo.
Info :
Finished size (approx): 120cm long x 24cm wide (47in x 9.5in). Size will vary with yarn, hook and tension. The foundation chain in this pattern is designed to produce a runner roughly this width.
— Base Panel (Mesh Ground) :
Row 1 :
With cream yarn, ch 121 (foundation chain). This chain length yields a mesh width of approximately 24cm. Add 3 ch (counts as first dc), dc in 4th ch from hook and in each chain across — total 119 dc (including turning ch).
Row 2 :
Ch 3 (counts as dc), *ch 1, skip next st, dc in next st*; rep from * to * across, ending with dc in top of turning ch. This starts a filet/open mesh pattern. Maintain 119 dc positions equivalency by counting ch-sps and dc placements.
Row 3 :
Ch 3, dc in same place, *ch 1, skip next ch-1 sp, dc in next dc*; rep across. Maintain consistent tension so mesh squares are even. (This row mirrors Row 2 with dc separated by ch-1 spaces.)
Info :
Use a stitch marker at the first stitch of each row; this is vital for long even strips. Check width after 10 rows and adjust tension if needed.
Row 4 :
Repeat Row 2. Keep mesh consistent and even. At the short ends you will work the turning chain into a dc or into the ch-1 space at the edge for a neat edge.
Info :
After the first 6 rows, your mesh should show neat little squares. If some squares look narrow, relax tension slightly, if too loose go down one hook size for the rest of the panel.
Info :
Mark the center row of the panel after Row 10. You will use this as a reference when positioning the central flower later. Mark also the positions for the five roses: measure and place temporary pins or thread markers at rows 12, 30, 48, 66 and 84 from the starting edge to approximate spacing for five evenly-spaced flower centers.
Row 12 :
Repeat Row 2. (Position marker for 1st rose here if following the layout.)
Info :
For an open airy look like the photo, resist the temptation to over-tighten. The mesh supports the motifs while staying light. If you prefer denser ground, work dc in every stitch (solid fabric) instead of mesh pattern and adjust positioning for motifs.
Info :
Check straightness by folding the panel lengthwise; edges should line up. If they curve, block immediately to correct before proceeding with main work. Blocking now will make assembly smoother later.
Info :
At this stage you have worked about one quarter of the runner. Re-count foundation chain and check that your row width still matches initial measurement. Use consistent blocking to control final size.
Info :
Place temporary thread markers at the column positions where each rose center will attach by counting stitches across. For neat placement align the center of each rose to the center of groups of 8-10 mesh squares depending on desired scale.
Row 30 :
Repeat Row 2. (Second flower position marker recommended here.)
Info :
If your runner is too long or too short to match the photo spacing, adjust the number of mesh repeats evenly between flower placements so all five roses remain evenly spaced.
Info :
Pause periodically and place a rose motif (unfinished) onto the marked position to ensure fit. Adjust mesh spacing if motifs overlap accidentally.
Info :
When you reach roughly 60-70% of the total rows, stop and re-check the five planned flower placement points — all markers should be equidistant. If you need a final adjustment, do it before proceeding to final rows and border.
Info :
Complete up to Row 60 repeating Rows 2 and 3 in sequence to produce a total of 60 rows for the panel. If you desire a longer runner add mesh repeats in even groups of 6 rows so spacing of roses remains even. Finish the final row with a neat dc row to prepare for the scalloped border.
Row 47-60 :
Continue repeating Row 3 and Row 2 alternately until you have completed Row 60, finishing with a solid dc or ch-3 turning chain row to give a stable edging (maintain 119 dc equivalents). Fasten off and weave in ends, leaving panel ready for blocking.
Info :
Wet-block the base panel pinned to measurements with edges straight. Allow to dry thoroughly before attaching motifs; blocking will open the mesh and make sewing easier and neater.
— Rose Motif (Make 5) :
Info :
Each rose is built in concentric layers: a small central spiral, followed by multiple petal rounds worked into chain loops that are later joined to form a flattened rosette. Work petals with a smaller hook (3.5mm) for firmer petals if desired. The rounds below describe one rose center and four concentric petal layers for a full bloom.
Round 1 :
With blush pink, make a magic ring, ch 1, work 6 sc in ring. Pull ring closed (6).
Round 2 :
Inc in each st around (6 inc) — (12).
Round 3 :
(1 sc, inc) x 6 = (18). Slip stitch to join. Fasten off if you prefer the center closed; otherwise continue to build a small spiral for petal foundation.
Info :
Option: Do not fasten off. For a spiral center work a long chain and join with scs to make the first petal layer more naturally curled. The instructions below assume you leave the center as a small disc and build petals around it.
Round 4 (Petal foundation) :
Join blush yarn to any st on Round 3. *Ch 6, sl st into next st* around to create 6 chain-loops. (6 loops). This forms the base loops for the first petal row.
Round 5 (First petal layer) :
Working into each ch-6 loop: (sc, hdc, 3 dc, hdc, sc) in each loop; sl st to join at end. This yields 6 small petals around the center—petals should be gently lifted and spread flat.
Info :
Gently steam-block or press petals flat if they curl too tightly. Keep petals slightly separated for depth so subsequent layers sit between them rather than directly on top.
Round 6 (Second petal foundation) :
Ch 8, sl st into the gap between the first and second petal from Round 5 to create offset loops; rep around to create 6-8 loops total depending on desired fullness. Aim for 8 loops for fuller bloom.
Round 7 (Second petal layer) :
Into each ch-8 loop: (sc, hdc, 5 dc, hdc, sc), sl st to join. Stagger these petals so they sit between first row petals. Fasten off and weave tail through back of motif to hide.
Info :
For each successive petal layer you increase the number of chains in loops and the number of dc in petal body — this creates larger outer petals. Keep the increase uniform to preserve circular shape.
Round 8 (Third petal foundation) :
With same blush yarn, join at base between petals, ch 10 to form 8 ch-10 loops evenly spaced around petal row (you may place 8 loops). Slip stitch to join at each placement, creating 8 loops total.
Round 9 (Third petal layer) :
Into each ch-10 loop: (sc, hdc, 7 dc, hdc, sc), sl st to join. This makes larger outer petals to form the full rose impression. Shape petals with fingers as you go to achieve natural overlap.
Round 10 (Optional fourth outer layer) :
If you want an even fuller rose, repeat foundation with ch 12 loops and work (sc, hdc, 9 dc, hdc, sc) in each loop for an additional outer petal row. Typically 3 petal layers produce the look in the photo; add a 4th only if you prefer larger flowers.
Info :
Fasten off leaving a long tail for sewing. Press or steam lightly to flatten petals into a slightly cupped rosette. Do not over-starch unless you want very stiff petals.
Round 11 (Assembly finishing) :
Weave the initial spiral tail into the back of the rose to make the center secure. For extra security add a few whip-stitches through the petal bases with matching yarn to hold layers from shifting when washed.
— Leaves (Make 15–20 clusters — 3–4 leaves per rose) :
Info :
Each rose in the photo is anchored by 3–5 pointed leaves arranged radially. Leaves are worked flat with a small central ridge using BLO or surface slip stitch for vein definition. Use deep green yarn and a 3.5mm hook for crisp shaping.
Leaf Round 1 :
With green yarn ch 12. Sc in 2nd ch from hook, sc in next ch, hdc in next, dc in next 3 ch, hdc in next, sc in next 2 ch, sl st in last ch (tip). Turn to work along opposite side of foundation chain: sc in next 2 ch, hdc in next, dc in next 3, hdc in next, sc in next 2; sl st to join at base. Fasten off — leaf measures roughly 6–7cm long.
Leaf Round 2 (Vein detail) :
Join green on back of leaf at base; work a line of sl sts or surface hdc up the center from base to tip to form a subtle raised vein. Optionally work 1 sc in base and sc2tog slightly to taper base for sewing neatness.
Info :
Block leaves slightly by pinning them flat on foam and spritzing with water. Pin a slight curve for natural appearance. Make 3–4 leaves per rose cluster; vary their sizes by making 1–2 leaves with ch 10 and others with ch 12 for natural look.
Leaf Variation :
For a textured version, after Round 1, work a row of fpdc (front post double crochet) along each side of the central dc group to create raised edges. This is optional but gives a carved feel similar to the photo's deeper veining.
— Rose Center Detail (Optional darker center) :
Round 1 :
With darker blush or coral, make a magic ring, ch 1, work 8 sc; pull tight (8).
Round 2 :
(1 sc, inc) x 4 = (12). Sl st, fasten off leaving tail to sew into center of rose before final assembly. This small button-like disc can be sewn into the center for small contrast dot if desired.
Info :
Sew the dark disc into the center of the rose by threading the long tail through the back of the petals and pulling gently so the disc sits nestled; this creates the illusion of a tightly-cupped center in fresh roses.
— Scalloped Border :
Info :
Work border after motifs are sewn on and the entire piece is blocked. The scallop consists of shell points worked evenly along the long edges and mirrored at the short ends for a finished frame.
Round 1 (Edge stabilization) :
With cream yarn and 4.0mm hook, join at a corner base st; work 1 rnd of sc all around the perimeter, placing 3 sc in each corner to keep edges square. This creates an even base for scallops — total stitch count will vary but maintain even spacing.
Round 2 (Prep row) :
Ch 3 (counts as dc), dc in each sc around, placing (2 dc, ch 1, 2 dc) in each corner sc group, sl st to join. This creates a work surface for scallop shells.
Round 3 (Scallop shells) :
*Skip 2 dc, 7 dc in next dc (shell), skip 2 dc, sl st in next dc; rep from * around. At corners replace shell with 9 dc in corner space for a rounded end. Join and fasten off. Weave in ends.
Info :
Edge spacing is crucial: adjust skip count between shells on your panel to make shells sit evenly. Some panels need skip 1 or skip 3 depending on gauge and exact row stitch counts.
Round 4 (Optional picot edge) :
For a dainty finish, work sl st between shells, then in the top of each shell work (sc, ch 3, sl st in 3rd ch) for small picots following the scallop crest. This adds extra vintage detail as seen in many heirloom table linens.
— Placement & Assembly :
Info :
Before sewing, gently pin each rose to its corresponding marker on the blocked base panel. Each rose in the photo is centered in separate sections of the mesh, with approximately 18-20cm of mesh visible between flower centers (adjust to your preferences).
Step 1 :
Position a rose motif centered on the marked row and centered width-wise on the mesh; pin through flower base in 6–8 places to avoid shifting while sewing.
Step 2 :
Sew rose to base by stitching through the backside of the rose base and into several mesh intersections beneath — use a yarn needle and matching thread. Make small, close stitches to secure the rose without pulling fabric tight; aim for invisibility.
Info :
Place leaves under and around the rose before final sewing. Arrange leaves at 120-degree increments to create a star of foliage. Sew leaves with a handful of tiny stitches at their bases to the mesh so they sit naturally around each rose.
Step 3 :
Repeat placement and sewing for all five roses and their leaf clusters. Tie off and weave ends at the back carefully to avoid bulk that could create lumps under the runner.
Step 4 :
After all motifs are sewn, re-block the entire runner gently to ensure scalloped edge sits flat and roses rest nicely on the mesh. Steam-block petals carefully to restore fullness if they flattened during sewing.
Info :
For extra security sew an anchor stitch through the middle of each rose into the mesh so the base cannot pull away with handling; do this with an invisible ladder stitch from the back if desired.
— Finishing Touches & Care :
Info :
Weave in all loose yarn tails securely and trim flush. If washing, hand wash gently in cool water and lay flat to dry. Avoid wringing which can distort flower shape. Light steam ironing from back can flatten slight bumps.
Info :
If you want slightly stiffer petals, brush a very light layer of diluted fabric stiffener on petals only, shaping by hand and allowing to dry fully before final placement on the runner.
Completing this vintage rose table runner is so rewarding — each layered rose feels like a tiny bloom you grew yourself! The combination of airy mesh, dimensional petals, and scalloped edge gives a beautiful heirloom look that makes a table truly special. Enjoy the process of building each motif and watching the design come together — then place it proudly on your table and admire your handiwork. 🧶🌸✨