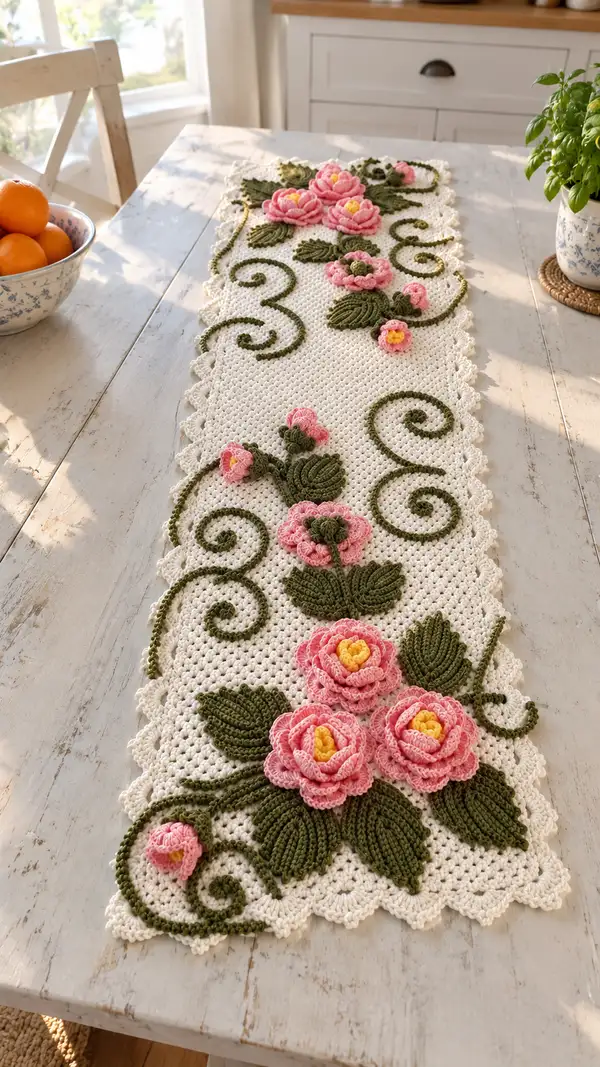
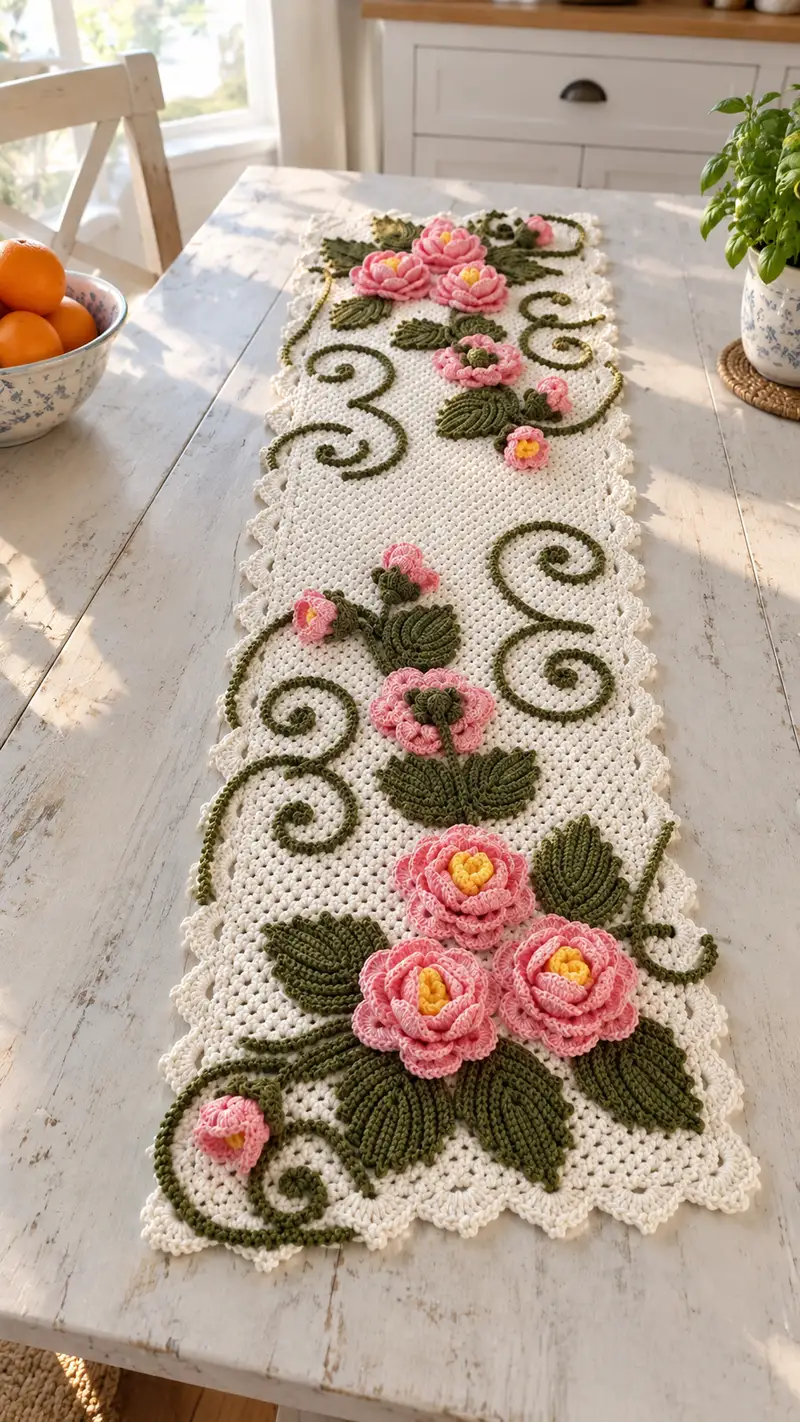
A romantic crocheted table runner with layered pink roses, textured olive-green leaves and elegant spiraled vines on a creamy background. This pattern recreates the delicate raised floral appliques and scalloped border seen in the photo, providing step-by-step instructions to build the rectangular base, make dimensional roses, create ribbed leaves and crocheted cords for the swirling stems. Perfect for a decorative dining table or as a thoughtful handmade gift.
Progress Tracker
0% Complete
— Materials & Gauge :
Info :
Gauge: 18 sc x 20 rows = 10cm (4in) in single crochet with 4.0mm hook. Adjust hook if your tension differs. Finished runner in photo measures approximately 36cm x 140cm (14in x 55in). For a different length, add or subtract foundation chains in multiples of the stitch pattern repeat described below.
— Notes :
Info :
Work base in straight rows (not in joined rounds). Always count stitches at end of each row and use stitch markers at corners/turning chains to keep edges neat. Appliques (flowers, leaves, buds, cords) are made separately and sewn on. Petals are layered to create the raised rosette look. Where the pattern instructs 'place' or 'position', pin pieces down and adjust before sewing.
— Base (Runner Body) :
Foundation :
Chain 121 (this will give a worked width of approximately 34-38cm depending on gauge). If you want a wider runner, increase foundation chains in multiples of 2.
Row 1 :
Starting in 2nd ch from hook, 1 sc in each ch across. (120 sc)
Row 2 :
Ch 1, turn. 1 sc in each st across. (120 sc)
Row 3 :
Ch 1, turn. 1 sc in each st across. (120 sc)
Row 4 :
Ch 1, turn. 1 sc in each st across. (120 sc)
Info :
Maintain even tension. Use a stitch marker on the first sc of the row to help count and keep edges straight. If you prefer a slightly more open texture as seen subtly in the photo, you can substitute Row pattern to alternating sc and hdc rows—this pattern follows dense sc for a stable base for appliques.
Row 5 :
Ch 1, turn. 1 sc in each st across. (120 sc)
Row 6-10 :
Repeat Row 2. (120 sc each row)
Info :
After first 10 rows, check width and lay runner flat. Blocking later will help even the shape; do not attach appliques until runner is blocked and dry for best results.
Row 11-20 :
Ch 1, turn. 1 sc in each st across. (120 sc each row)
Info :
If you prefer a subtle diagonal texture like a tiny mesh, on rows 12 and 14 work 1 sc, ch1, skip 1, 1 sc repeating across instead of straight sc—this is optional and will change finished look slightly.
Row 21-30 :
Ch 1, turn. 1 sc in each st across. (120 sc each row)
Info :
At this point lay out a mock arrangement of where you will place the floral clusters. Mark approximate centers using removable pins so you won't overcrowd one area. The photo shows three major clusters spaced roughly evenly along the runner length with vines linking them.
Row 31-40 :
Ch 1, turn. 1 sc in each st across. (120 sc each row)
Info :
Keep the base long enough — continue rows until you reach desired runner length. For the sample runner, continue to Row 60 for a total of 60 rows (approx 140cm length including border). Adjust rows to make runner longer or shorter. Remember to stop and measure so long appliques will fit.
Row 41-50 :
Ch 1, turn. 1 sc in each st across. (120 sc each row)
Row 51-58 :
Ch 1, turn. 1 sc in each st across. (120 sc each row)
Row 59 :
Ch 1, turn. 1 sc in each st across. (120 sc)
Row 60 :
Ch 1, turn. 1 sc in each st across. (120 sc) Fasten off and weave in ends. Block runner to measurements. Allow to dry completely before adding appliques.
Info :
Blocking: Damp block to rectangle. Pin edges straight and use gentle steam or damp towel press if using cotton blend. Let dry completely. This ensures appliques will sit flat and even on the background.
— Edging (Scalloped Lace Border) :
Info :
Work edging around runner after blocking. Edging is worked evenly along long edges and both short ends for a scalloped finish. Use same cream yarn and 4.0mm hook.
Round 1 :
Join yarn at one short end corner with a sl st. Ch1, evenly work 1 sc in each row end across the short edge (approx 60 sc, exact depends on row count); turn to work long edge, continue 1 sc in each st along long edge (approx 120 sc), then across the opposite short edge 1 sc in each row, then along the other long edge returning to start. Work evenly so corners don't pucker.
Info :
Count your stitches along one long edge to determine exact scallop spacing; you'll place one scallop every 6 stitches for this sample. Adjust scallop spacing if you have different stitch counts.
Round 2 (Scallops) :
*Sk 2 sts, in next st work (5 dc) all in same st, sk 2 sts, sl st in next st; rep from * across long edges. At short ends work 3 small scallops: *sk 1, 5 dc in next st, sk1, sl st in next; rep to shape corner.* Fasten off and weave ends.
Info :
Scallop size can be reduced to 3 dc for a daintier look on narrower runners. For consistent curvature, block again after edging if needed.
— Large Rose (Make 3) :
Info :
Each large rose is layered with a yellow center, an inner small petal round, then two or three wider petal rounds in pink to achieve the dimensional bloom. Use 3.25-3.5mm hook for firmer petals. Work petals flat in a spiral and then slightly shape as you sew them into a cup. Petal rounds below produce a finished disc approximately 10-11cm across when layered.
Round 1 :
In yellow: MR, 6 sc into ring. (6)
Round 2 :
Inc in each st around. (12)
Round 3 :
(1 sc, inc) x6. (18)
Info :
Fasten off yellow leaving a long tail to stitch into the center of the pink petal rounds. This creates the sunken center seen in the photo.
Change Color :
Join pink for petal rounds. Use slightly smaller hook if you want crisper petals.
Round 4 :
Attach pink with sl st to any stitch. Ch1, sc in same st, *ch3, skip next st, sc in next* around to create base loops for petals. (9 ch3 loops)
Round 5 (Petal Row 1) :
*In each ch3 loop work (sc, hdc, 2 dc, hdc, sc) to form a petal; sl st into next sc on base row; rep around. (9 petals)
Info :
At this stage petals will lie flat. For more volume, work a short row of loose stitches behind petals and gather slightly when sewing to base to lift petals into a cup shape.
Round 6 (Petal Row 2) :
Ch1, slip to between petals and work behind first petal: *ch4, sc between next petal bases*, repeat creating 9 ch4 spaces around. (9 ch4 loops)
Round 7 (Petal Row 2 shaping) :
*In each ch4 loop work (sc, hdc, 3 dc, hdc, sc) to create larger outer petals; sl st to base between petals; rep around. (9 larger petals)
Round 8 (Optional Outer Petal) :
If you want extra fullness, repeat Round 6 with ch5 loops and work (sc, hdc, 4 dc, hdc, sc) in each for an outermost petal layer. (9 petals)
Info :
Fasten off leaving a generous tail for sewing. Slightly gather the petal base from the underside with running stitches to form a cupped bloom. Sew yellow center into place by stitching through the base to secure layers.
— Medium Rose (Make 2) :
Round 1 :
MR, 6 sc in ring. (6)
Round 3 :
(1 sc, inc) x6. (18)
Info :
Change to pink. For medium roses, create 2 petal rounds only. Use same petal shaping as large rose but make 7-8 petals (adjust by spacing loops around the round) to achieve about 6-7cm bloom.
Round 4 :
Ch2 loop method: sl st to join, *ch3, skip 1* around to make 6-8 loops. In each loop work (sc, hdc, 2 dc, hdc, sc). Fasten off with long tail for sewing.
Info :
Tuck medium rose edges under slightly or add a small running stitch around base to gather for a natural shape. Sew centers with a tiny yellow puff or a few tight yellow stitches to mimic center seen in photo.
— Small Buds (Make 4-6) :
Round 1 :
MR, 6 sc in ring. (6)
Round 2 :
(sc, inc) x3. (9)
Round 3 :
1 sc in each st around. (9)
Info :
To shape a closed bud, work 3-4 small petals around the outer edge: in each st work sc, ch2, sc to form tiny petal loops; fold and sew base to make bud cup. Leave tail for sewing onto runner and for attaching a short stem (see stem section).
— Leaves (Make 12-14) :
Info :
Leaves in the photo show strong ribbed veins created using front post double crochet rows worked into a center foundation chain or base. Each leaf will be worked flat and produce a ribbed, slightly cupped leaf approximately 7-9cm long for large leaves and 4-5cm for smaller filler leaves.
Leaf Round 1 :
Ch 11. In 2nd ch from hook: 1 sc, 1 hdc, 1 dc, 1 tr, 1 tr, 1 dc (center peak), then on the return side work 1 dc, 1 tr, 1 tr, 1 dc, 1 hdc, 1 sc in last st. (11 sts forming symmetric leaf)
Leaf Round 2 (Ribbing) :
Turn to the right side with leaf horizontally: working into each 'center' post across the leaf's center, work fpdc along one side row and then bpdc along return stitches to create a raised vein texture: *fpdc around the post of the central peak three times, bpdc around posts on alternate rows* to create parallel ridges. (Count depends on posts you create; aim for 7-9 ribs)
Info :
An alternate method: work leaf as follows - MR foundation of 6 sc, inc on one side to form teardrop then work rows in BLO to create ribbing. The first method is easier to scale and yields consistent leaf shape like photo.
Leaf Round 3 (Edge Finish) :
Work a round of sc around the leaf perimeter to neaten edges and enforce shape. Add a small picot on the tip if desired. Fasten off with long tail for sewing. Use needle to add a small running stitch down centre to provide slight cupping.
Info :
For very pronounced ribs, use a smaller hook for the leaf after creating the base chain; front post stitches will pop forward creating leaf veins similar to the photo.
— Stems & Spirals (Crocheted Cords) :
Info :
Stems and graceful spirals are formed using a crocheted cord technique (i-cord or reversed single crochet over a foundation chain) to get a thick, tubular stem that holds shape and can be sewn in spirals onto the surface of runner.
Cord Method A (Tubular Cord) :
Ch 50 (or desired length for each vine). In 2nd ch from hook and across: work 3 sc in each chain to build thickness, or work single crochet in the back loop only across then slip stitch back along the chain to form a cord. (approx 50 sc if one sc per ch)
Round 1 :
Once the chain has a single row of sc, fold chain lengthwise and work through both sides with sl st to seal into a rope. Fasten off and block lightly to shape into spiral.
Info :
For a robust cord that holds a spiral, make cords slightly thicker by working 3 sc across each foundation ch every 5th ch and compressing lightly when sewing down. You can also crochet a short core of wire inside before closing cord if you wish to have poseable spirals—wrap wire ends to avoid prick-through.
— Small Decorative Elements (Swirls & Tendrils) :
Round 1 :
Ch 30-60 depending on spiral size. In 2nd ch from hook, 1 sc in each ch across. (29-59 sc)
Round 2 :
Turn chain into a spiral by coiling cord and tack down with small stitches along inner edge to secure spiral shape. Press lightly or block on a curved surface if needed.
Info :
Position swirls before sewing permanently: pin to runner and shape so coils are even and mirror each other along the runner's axis just as in the photo. Sew with matching yarn using small stitches along the inside and outside of spiral so it sits flat and secure.
— Assembly & Placement :
Info :
Layout all appliques on the blocked runner using pins. The photo shows three major floral groupings: one large cluster near each end and one central cluster slightly offset. Place larger leaves under rose groups and tuck smaller leaves and buds between petals. Stems connect the groups with spirals and S-shaped vines.
Step 1 :
Pin large roses first, positioning their bases to conceal any seam lines of the base. Use 6-8 sewing stitches through the base of each flower ensuring the center sits slightly above runner surface. Sew with pink tail and then tack underside to runner with cream thread to hide stitches.
Step 2 :
Arrange large ribbed leaves under each rose cluster. Sew along the central vein with whip stitch and add a couple of small invisible stitches along the outer edges to keep leaf tips from lifting. Space leaves as in photo: three leaves around each major cluster forming a fan.
Step 3 :
Attach medium roses and buds next, tucking edges beneath large petals when possible. Use small stitches at multiple anchor points (base, back and sides) to hold petals in place and create a natural overlapping look.
Step 4 :
Pin stems and spirals into place. Starting from a flower base, lay the cord in an S-shape down the runner and sew with roughly 10 evenly spaced tiny stitches through the cord and into base to secure. Anchor the cords at flower base and at vine endpoints or under leaves for neat finish.
Info :
When sewing cords and leaves, keep tension consistent: do not pull the cord so tight it distorts the base fabric. Aim for slightly loose tension so cord sits naturally on top of the fabric.
Step 5 :
Once all appliques are sewn, check for any loose areas and add extra stitches as needed. Weave in all tails to the underside and trim close.
Step 6 :
Lightly press if needed, avoiding direct high heat on yarn. For cotton, use a damp cloth between iron and petals and press gently to shape petals and leaves as desired.
Info :
Optional: Add small embroidered french knot centers or tiny bead accents (if desired) to the flower centers for more depth. If beads are used, secure tightly and ensure they won't scratch surfaces the runner will sit on.
— Finishing Touches & Care :
Info :
Care: Hand wash cold gently and lay flat to dry. Avoid tumble drying and harsh wringing. Store flat when not in use to protect three-dimensional appliques. If wrinkles appear, steam lightly on the underside only and reshape petals by hand.
Info :
Variations: Use two shades of pink and blend petals from light to dark for ombre effect; or make leaves in variegated green yarn for more naturalistic tone. You can reduce the number of rose layers for flatter motifs if you prefer subtler texture.
Completing this vintage rose table runner is a truly gratifying project—each layered rose and ribbed leaf adds personality and texture that transforms a simple table into an elegant vignette. The modular construction lets you customize color palettes and cluster arrangements to suit your home. Take your time with placement and sewing—the result is a heirloom-style accent that delights in every season. 🌸🧶