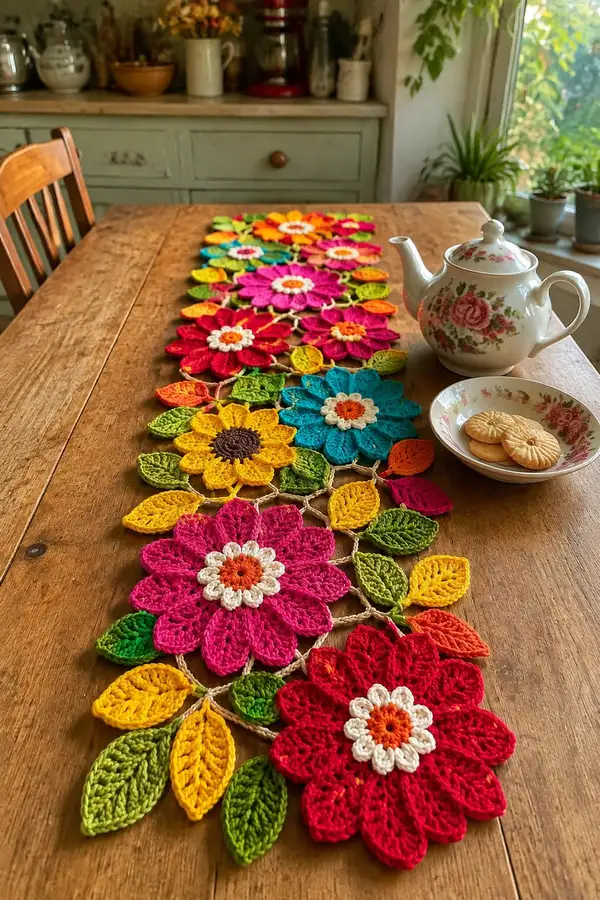
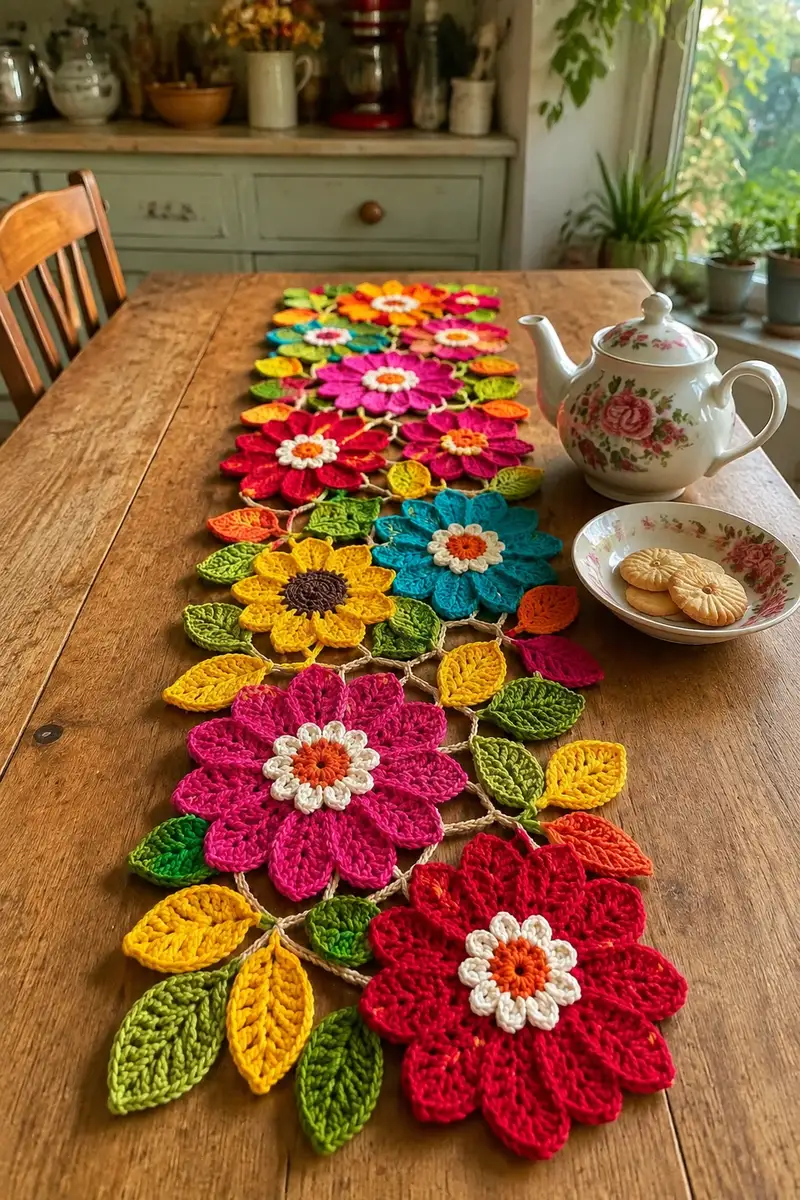
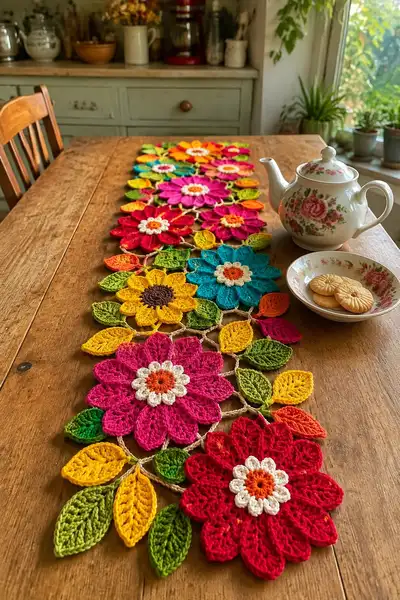
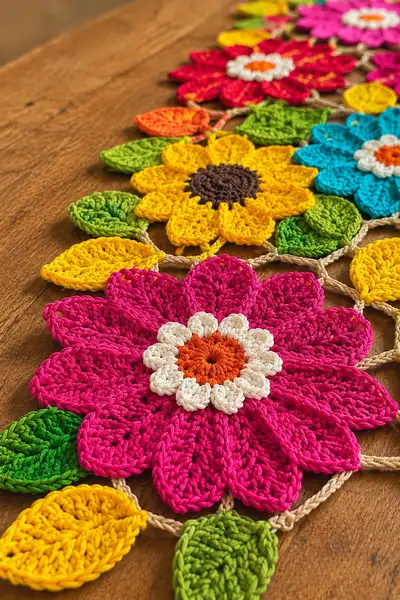
Bright, floral table runner made from joined crochet flower and leaf motifs. This pattern creates large layered flowers with textured petals, daisy-style centers and paired leaves connected by a neutral chain mesh. Perfect for a sunny table display — colorful, lightweight, and easy to customize.
Progress Tracker
0% Complete
— Flower Motif (Large Layered Flower) :
Round 1 :
With Color A (center orange in photo) make a magic ring, 6 sc in ring (6)
Round 3 :
(1 sc, 1 inc) x 6 (18)
Round 4 :
(2 sc, 1 inc) x 6 (24)
Round 5 :
(3 sc, 1 inc) x 6 (30)
Info :
These rounds create a sturdy round center. Keep tension moderate—tight enough so center holds shape but not overly tight to impede next round joins.
Round 6 :
1 sc in each st (30)
Info :
Change to Color B (cream or white) for the small daisy ring that sits around the orange center. Fasten in with an invisible join or sl st to a neat spot.
Round 7 :
With Color B: *(ch 2, 2 dc, ch 2, sl st) into next st to create tiny petal (shell)* Repeat 10 times around into evenly spaced stitches: work shell into every 3rd stitch approx. (10 shells, base count remains on center 30)
Info :
You will have created 10 small scallops that visually create the daisy ring. Use stitch markers at every shell to keep spacing even; the center circle still reads 30 sts if counting simple base stitches.
Round 8 :
Switch to main petal Color C (e.g., magenta). Working behind the small daisy ring, find the spaces between shells and prepare to attach large petals into 10 even spaces: *(sl st into next available space, ch 1) repeat x10 to position for petals
Info :
There are 10 large petals across the motif. Count and place stitch markers in the 10 positions to keep petals evenly spaced before you start building the petals.
Round 9 (Petal foundation) :
For each petal (repeat x10) work: sl st to attach at marked space, ch 3 (counts as first dc), 2 dc in same space, ch 1, 3 dc in same space. (forms a small fan base). Complete this for each of 10 petal bases.
Round 10 (Petal height 1) :
For each petal (repeat x10) - Turn to work along petal: ch 2, 1 hdc in next stitch of fan base, 3 dc across top of fan, 1 hdc, ch 2, sl st into base to fasten. This begins shaping a rounded petal.
Info :
Work one petal completely before moving to the next for consistent shape. Keep post stitches vertical and even. Use a small hook for these clustered stitches if you want extra definition.
Round 11 (Petal texture) :
For each petal (repeat x10) - Working from base: fpdc around the first dc of the fan, dc in next 3 sts, bpdc around the last dc of the fan, sl st to base. This creates a raised ridge on each side of the petal.
Round 12 (Petal finishing) :
For each petal (repeat x10) - Ch 1, sc across petal top edge (approximately 9 sc across each built petal; this is worked into loops and top stitches created previously), finish with sl st into base. Repeat around for 10 petals.
Info :
At this stage petals are substantial; gently block or steam each petal with fingers if you want a smoother curve. The repeated per-petal instructions do not change the central stitch count—they are shaping units attached to the base 30-st hub.
Round 13 :
Work 1 sc into each base stitch and into the first stitch behind each petal where indicated to create a tidy join: approximate working stitch count remains the hub count but you will have 10 assembled petals joined neatly.
Round 14 (Petal overlay row) :
With same petal color, in front loops only around the hub: 1 sc in each st FLO to create a ridge base for petals (30)
Info :
Using FLO ensures a defined ridge behind petals — this makes each petal stand out more and helps hide joins from the small daisy center.
Round 15 (Extra petal depth) :
Attach Color C behind each petal mid-edge and work: for each petal (repeat x10) join with sl st, ch 3, 2 tr in space, ch 1, 2 tr, sl st to base. Adds a faint raised ridge in petal center.
Round 16 (Textured lines) :
Using Color C, work fpdc and bpdc alternately along each petal to create 3 raised ribs: *fpdc 3, dc 3, bpdc 3* across each petal top—this is worked as a repeat per petal; repeat x10.
Info :
These ribbed textures create the sculpted look. Keep tension steady and keep the number of ribs consistent across all petals for symmetry.
Round 17 (Edge tidy) :
With Color C, sc evenly around entire motif working into petal edges and any exposed loops. For each petal top edge estimate 9 sc; total approximate sc around will be ~90 (9 sc x 10 petals). Count to ensure consistency across petals and adjust by adding or subtracting a sc between petals if needed.
Round 18 :
Fasten off petal color, weave in ends long enough to bury under a petal for neat finishing. Leave no loose tails on right side.
Info :
At this point you have a large layered flower motif: a central hub (30 base) with 10 sculpted petals and a daisy ring. Repeat this motif for each large flower needed for your runner (photo shows 8 large flowers arranged in a row). Make as many as required for desired length.
Round 19 (Optional center color change) :
If using a darker eye (chocolate) for some flowers: reattach in center and work 1 round sc in dark color around Round 1/2 hub to form a dark eye: 1 sc in each st (30)
Round 20 (Blocking prep) :
Lightly spray or steam-block each motif to shape petals. Pin flat and hold gently to shape each petal evenly. Allow to dry before joining.
Info :
Blocking is essential for this design. Do not skip — it ensures motifs lie flat and joins sit cleanly, especially important with cotton yarns.
— Small Daisy Motif (Alternate center motif) :
Round 1 :
With Color D (orange) mr, 6 sc (6)
Round 3 :
Change to cream color. *(sl st, ch 2, 2 dc, ch 2, sl st) in next st* repeat 6 times around to create six small petals. Center base remains 12.
Info :
These small daisies can be used as infill motifs between large flowers, or nested as centers of medium flowers for visual variety.
Round 4 :
Sc around daisy base into available stitches to tidy edge (12)
Round 5 :
Fasten off and weave ends. Make required number to use as alternate modules or small filler motifs.
— Leaf Motif (Make Many) :
Round 1 (Leaf foundation) :
Ch 12 with Leaf Color 1, sc in 2nd ch from hook, hdc in next, 2 dc in next, tr in next 3, 2 dc in next, hdc in next, sc in last. Turn to work on opposite side of chain: sc in last chain, hdc next, 2 dc, tr 3, 2 dc, hdc, sc. Finish with sl st to first sc. This creates a symmetrical flat leaf; total stitches approx 20–24 depending on counts.
Info :
For a plumper leaf, use a slightly larger hook or add one extra chain in the foundation. Keep both sides symmetrical by mirroring stitch placement exactly.
Round 2 (Leaf texture) :
With same leaf color, work fpdc along one side central vein: *fpdc along 3 central tr posts, then sl st across to other side and fpdc mirror 3 posts* — repeat to create a defined central rib. This is done as a row across the top and does not alter the flat shape significantly.
Round 3 (Leaf edge) :
Work sc evenly around leaf edge to tidy (approx 24 sc). Fasten off and weave in ends.
Round 4 (Smaller leaf version) :
Ch 8 foundation and repeat a scaled down version with sc, hdc, 2dc, tr, 2dc, hdc, sc mirrored. Approx 14–16 stitches. Make assorted colors (light and dark green) for layered look.
Info :
Make between 3–6 leaves per large flower depending on desired fullness. Photo shows clusters of 3–4 leaves between and beside flowers; plan accordingly.
— Alternate Flower Variation (Smaller 8-Petal Flower) :
Round 1 :
With Color E (bright blue) mr, 6 sc (6)
Round 3 :
(1 sc, inc) x 6 (18)
Round 4 :
(2 sc, inc) x 6 (24)
Round 5 :
1 sc in each st (24)
Round 6 :
Create 8 petal foundation spaces by *(2 sc, ch 3)* x8 (24)
Round 7 (Petals) :
For each petal (repeat x8) sl st into space, ch 3, 3 dc, ch 1, 3 dc, sl st to base. Repeat x8 petals.
Round 8 :
Sc around entire motif to tidy edge; approx 8 petals x 8 sc = ~64 sc depending on petal stitches. Adjust so petals look uniform.
Info :
Use this variation when you want a smaller flower to stagger along the runner for visual rhythm. Make several and alternate colors.
— Joining Mesh and Runner Assembly (Neutral Chain Lattice) :
Round 1 (Start chain length) :
With joining color (beige/tan) ch 40 to create the spacing chain that will link the first two large flowers by chain arches. Adjust chain length to space motifs further apart if desired.
Round 2 :
Turn, sl st into 2nd ch from hook, *ch 6, skip 6 ch, sl st into next ch* repeat across to create even loops. You will have approx 5 loops across a 40-ch base depending on spacing.
Info :
This neutral ladder creates airy space between modules; keep tension slightly loose but consistent so motifs sit flat without tugging petals toward each other.
Round 3 (Join first motif) :
Position first flower motif on left. Align a loop under the outer edge between two petals where you want the join. Using sl st, join lattice loop to outer petal back. Work sl st evenly to secure loop to motif at two points (both sides of the loop) so it forms a stable bridge. Repeat for each loop along motif edges where motifs will join.
Round 4 :
Make a ch-40 chain from other end of lattice to reach next motif position. Repeat loops as in Round 2, then join loops to the next motif in the same positions. This becomes a repeating unit: motif - chain - motif.
Info :
Work a test link: join two motifs first, check flatness, tension and spacing. If chain appears too tight or loose, adjust ch 2–4 on your base length accordingly and rework until spacing matches desired look.
Round 5 (Diagonal connectors) :
To stabilize the runner and create diamond joins, make short diagonal connectors between adjacent lattice loops: ch 8, sl st to the loop in the adjoining chain and sl st to the next motif—this forms a little V-shaped connector. Repeat at all recommended join points as in photo to create a honeycomb effect.
Round 6 (Leaf insertion while joining) :
When you reach positions where leaves should sit between motifs, work a leaf in place by making the leaf motif and joining its base with sl st into two or three adjacent lattice loops. Secure firmly with 3–4 sl sts so leaves don't flop free.
Info :
Leaves can be added after the full lattice is done or as you join each flower — I recommend joining leaves during assembly so placement feels natural and symmetric.
Round 7 (Full runner repeat instruction) :
Create a repeating assembly unit: Large Flower (A) + 1 chain lattice + Large Flower (B) + 1 chain lattice + Large Flower (C). Alternate with smaller flowers and daisy motifs in chosen spaces for variety. Repeat until runner reaches desired length.
Round 8 (Edge stabilization) :
Work sc along the joining chain edges where it meets petals to anchor the chain. Use 2 sc per lattice loop attachment point to create a reinforced seam and reduce flopping. Continue along whole runner.
Info :
When joining, place pins to check visual symmetry — the runner photo uses a repeating pattern of 8 large flowers and alternating smaller motifs. Mark with clips before committing with permanent joins.
Round 9 (Cross join reinforcement) :
Where three motifs meet at a point, work a small ‘flowerette’ of ch 5 and 5 sc into ring to visually anchor the join and hide small gaps. Make one at every triple intersection as needed (number depends on layout).
Round 10 :
Fasten off neutral joiner color after completing runner length. Weave in all joining tails neatly on the wrong side into lattice chains to conceal them.
Info :
Take time to weave ends through multiple joins rather than leaving a single hidden knot — this creates a stronger long-lasting join in a table runner that may be moved or washed.
— Border and Finishing Rounds :
Round 1 (Edge sc round) :
With a coordinating color (same as joiner or contrasting), work 1 sc evenly around outermost edges of entire runner to give a neat edge. Where you encounter petals, work 3 sc across the petal edge to create a scallop look. Total stitches will vary by runner length.
Round 2 (Picot edge option) :
Optional: For a refined crunchy edge, *sc, ch 3, sl st into first ch (picot)* across petals and leaf tips where appropriate to make a decorative finish. Work picots only at points where they add to the silhouette.
Round 3 (Border ridge) :
Work 1 round FLO sc around entire runner to make a subtle ridge along the border and improve durability. This round will sit on top of previous sc round.
Info :
If your yarn is cotton, a slightly tighter border helps prevent edge rolling; decrease hook by 0.25–0.5 mm for the border if necessary.
Round 4 (Final tidy) :
Slip stitch into first sc, fasten off, and weave in all ends on the wrong side. Trim ends close after weaving through several stitches.
Round 5 (Blocking) :
Lay runner flat on blocking mat, carefully pin and steam or spray with water to shape petals and leaves and even out lattice. Allow to dry fully overnight.
Info :
Blocking sets the shape and opens up lacework, especially important with cotton yarn. Use pin placement to ensure petals do not flatten but keep a natural curved silhouette.
— Finishing Touches and Embellishments :
Round 1 (Optional embroidered details) :
Use embroidery thread or thin yarn to add small French knots or straight stitches at petal bases to add interest. Secure stitches through wrong side and knot on underside.
Round 2 (Optional bead or sequin accent) :
Sew a small bead or sequin at center hubs for shimmer. Use small tack stitches and secure knot firmly in the wrong side, then weave in tail to hide.
Info :
Keep embellishments minimal so runner remains washable and safe for dining surfaces — avoid large items that catch on tableware.
Round 3 (Care instructions) :
Hand wash cold or gentle machine wash in mesh bag on delicate. Reshape when damp and dry flat. Iron carefully with steam if desired, but test colorfastness first.
Info :
If using bright dyes (jewel tones), pre-wash yarn for colorfastness if possible to avoid bleeding on lighter pieces used together.
This vibrant runner brings a garden to your table — bright petals, leafy accents and a neutral lattice that ties everything together. Each motif is a small celebration of color and texture, perfect for seasonal displays or everyday cheer. Making it is relaxing and rewarding, and the modular construction makes it easy to adapt size and palette. 🧶🌼✨