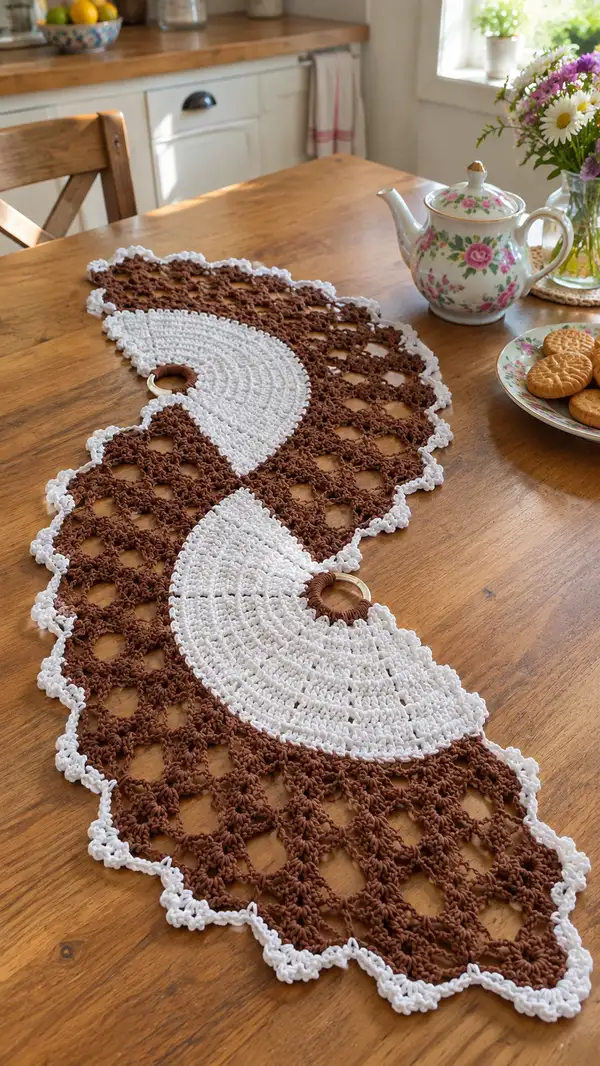
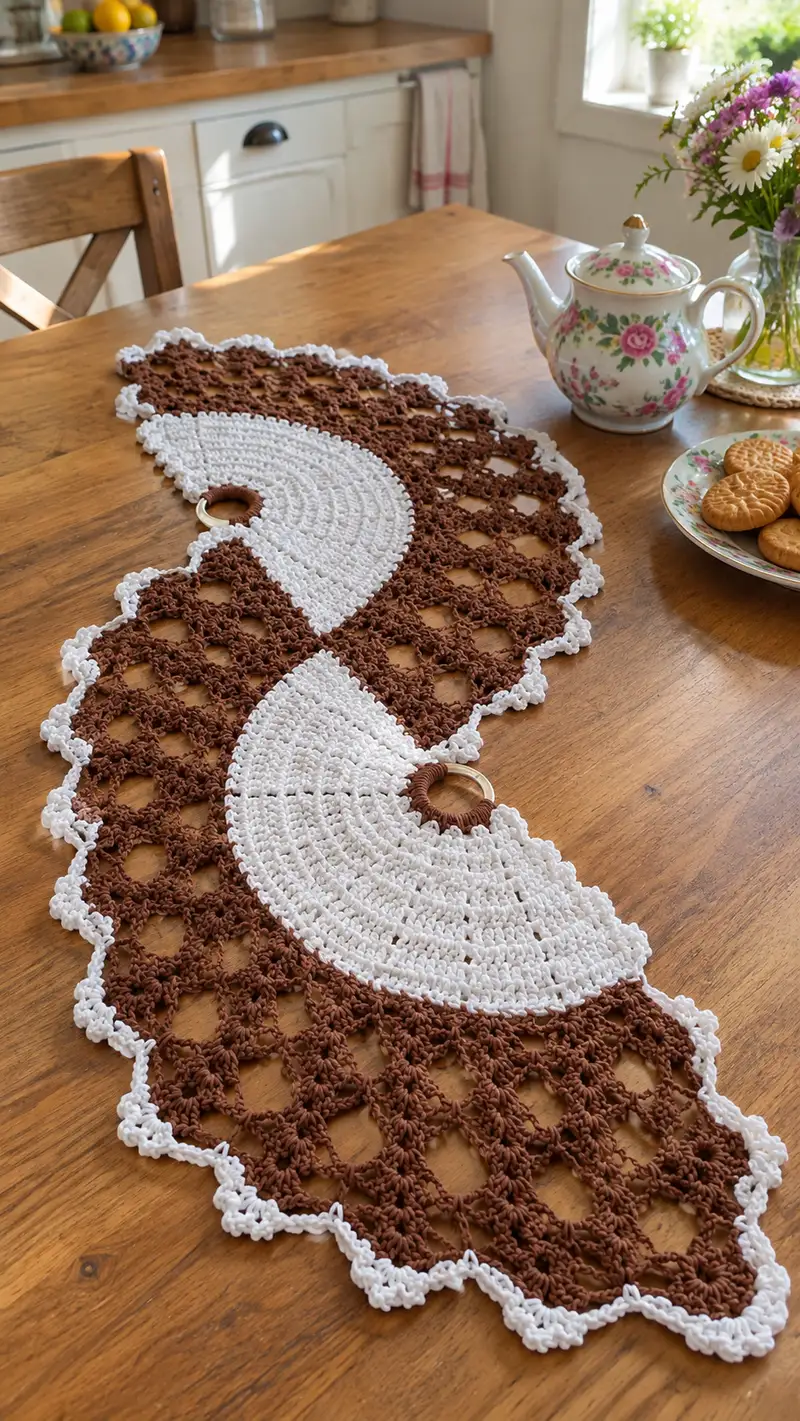
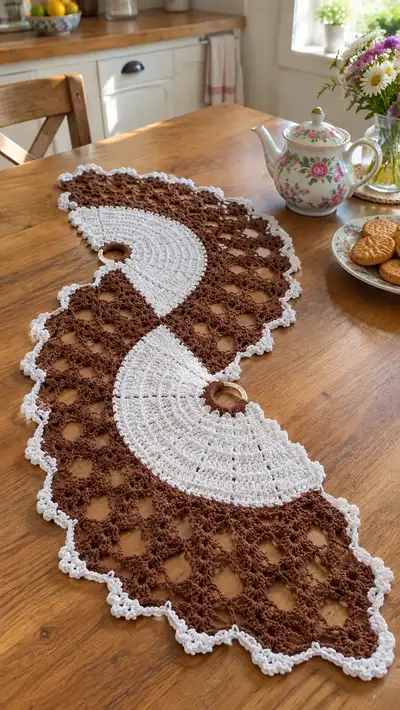
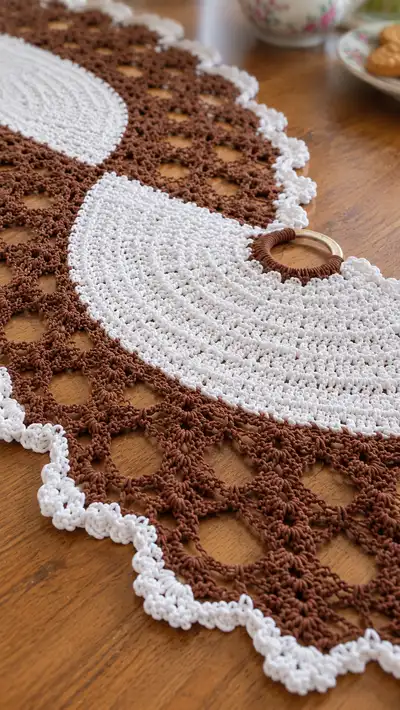
A charming two-tone table runner with fan-shaped solid semicircles and open lattice panels finished with a delicate scalloped edge. Worked in sturdy cotton cord, the runner features decorative wooden rings wrapped in yarn and a warm brown and white palette that adds vintage farmhouse charm to any table. The open lattice balances solid fans for a light, airy look that is both decorative and practical for serving. Detailed step-by-step instructions guide you through every stitch and join.
Progress Tracker
0% Complete
— Overview & Gauge :
Info :
This runner is constructed as two mirror halves: each half contains one solid semicircle 'fan' (white) and one open lattice panel (brown). The halves are joined at the center and edged with a white scallop. Gauge is approximate due to cord thickness: 7 dc x 4 rows = 2 inches when using 6.5-8mm cord. Finished length for photos is approx 36-40 inches; adjust by adding lattice repeats.
Info :
Work tightly enough so the cord yields a solid fabric and the lattice maintains shape. Use stitch markers at the start of each round/row and at motif repeat points in the lattice. Block each half lightly before assembly for best results.
— Semicircle Fan (Make 2 — one for each half) :
Round 1 :
6 sc in magic ring (6)
Round 3 :
(1 sc, inc) x 6 (18)
Round 4 :
(2 sc, inc) x 6 (24)
Round 5 :
(3 sc, inc) x 6 (30)
Info :
We are building a circle but will only use half of it visually as a semicircular fan. Keep counts exact; each round increases by 6 stitches.
Round 6 :
(4 sc, inc) x 6 (36)
Round 7 :
(5 sc, inc) x 6 (42)
Round 8 :
(6 sc, inc) x 6 (48)
Round 9 :
(7 sc, inc) x 6 (54)
Round 10 :
(8 sc, inc) x 6 (60)
Info :
At this stage the circle is broad. We will now begin shaping the semicircular form visually by adding rounds that are later trimmed or folded and joined to lattice. Keep rounds even and flat; if the fan ruffles, block it open before continuing.
Round 11 :
1 sc in each st around (60)
Round 12 :
1 sc in each st around (60)
Round 13 :
1 sc in each st around (60)
Round 14 :
1 sc in each st around (60)
Info :
These even rounds build height for the fan. For the look in the photo, use hdc or dc in later rounds to give a more open texture; swap to hdc on rounds 15-18 if you prefer a slighter drape.
Round 15 :
hdc in each st around (60)
Round 16 :
hdc in each st around (60)
Round 17 :
hdc in each st around (60)
Round 18 :
hdc in each st around (60)
Info :
Decide on fan radius now. In the sample the fan reaches roughly 10-11 rounds of even stitch height beyond increases. If you wish a larger fan add 2-4 extra even rounds here.
Round 19 :
1 sc in each st around (60)
Round 20 :
1 sc in each st around (60)
Round 21 :
(7 sc, 1 dec) x 6 (54)
Info :
Note :
We begin gentle shaping to create a slightly flattened inner edge that will meet the lattice. Decreasing rounds are subtle; do not over-decrease or the fan will pucker.
Round 22 :
(6 sc, 1 dec) x 6 (48)
Round 23 :
(5 sc, 1 dec) x 6 (42)
Round 24 :
1 sc in each st around (42)
Round 25 :
1 sc in each st around (42)
Info :
These rounds create a smoother semicircular inner edge. Stop and place the wooden ring at the center of the straight inner edge (see ring instructions below) before proceeding to the finishing rows.
Round 26 :
(5 sc, 1 dec) x 6 (36)
Round 27 :
(4 sc, 1 dec) x 6 (30)
Round 28 :
(3 sc, 1 dec) x 6 (24)
Round 29 :
(2 sc, 1 dec) x 6 (18)
Round 30 :
(1 sc, 1 dec) x 6 (12)
Info :
Fasten off leaving a long tail for stitching the semicircle to the lattice. If you prefer the exact photographed look, trim the final small circle so the inner edge is flat and large enough to position the wooden ring; you will stitch the ring in place then tuck and weave.
— Wooden Ring Wrap & Attachment (Make 2) :
Round 1 :
Thread brown cord over ring and join using sl st to ring, then wrap ring with continuous yarn to cover completely, using tight stitches (no count)
Round 2 :
When ring is covered, make 12 sc evenly spaced around inner ring edge attaching ring to semicircle inner edge: join ring to semicircle by placing ring at inner opening and sewing through ring wraps and fan rounds using yarn needle and long tail (12 attachment points)
Info :
Wrap rings first, then pin them to the semicircle inner edge. Sew through the wrapped yarn, not the wooden surface, to hold securely. Add a dot of fabric glue for extra security if desired.
— Lattice Panel (Make 2 per half, or extend length by adding more repeats) :
Info :
The lattice panel uses repeated chains and cluster motifs to create an open diamond grid. Each motif repeat measures approx 2.5-3 inches depending on cord. For the sample runner there are 8 vertical motif repeats across the panel and 10 rows of motifs lengthwise; adjust for size by adding or removing repeats.
Round 1 :
Join Brown. Ch 69, sc in 2nd ch from hook and across (68)
Round 2 :
Ch3 (counts as dc). dc in next st and across to last st, 2 dc in last ch. Turn (69)
Round 3 :
Ch1, sc across in each dc row (69)
Round 4 :
Ch5, sk 3, (dc cluster: 3 dc in next st, ch2) repeat across to last 4 sts, end ch3, dc in final st
Round 5 :
Ch1, sc in each st and in ch spaces across (maintain 69 sts/points)
Round 6 :
Ch3, *ch2, sk next sc, dc cluster (3 dc in next sc), ch2, sk next sc, dc in next sc* repeat across to end; finish with dc in last sc (creates first row of diamond openings)
Info :
Count and mark every 10 sts to keep motif repeats even. The diamond lattice is created by alternating cluster rows and sc rows. Adjust the initial ch foundation length for different runner widths; counts above are for sample width that matches photos.
Round 7 :
Ch1, sc across in each st and in each ch space (69)
Round 8 :
Repeat Round 6 to form staggered cluster row creating diamonds across (69)
Round 9 :
Ch1, sc across (69)
Round 10 :
Ch5, *skip 3 sts, dc cluster in next st, ch2* repeat across ending with dc (creates second diamond row) (69)
Round 11 :
Ch1, sc across including ch spaces (69)
Info :
Work alternating cluster rows and sc rows for a total of 20 motif rows (or more for longer runner). Each paired set of cluster rows and sc rows makes one diamond band. Count bands as you go to match the sample length: sample uses 10 diamond bands per panel section.
Round 12-31 :
Repeat Rounds 6-11 four times (this yields 8 cluster rows and 8 sc rows total across 24 rows). Maintain 69 stitch points; be attentive to ch spaces as anchor points for clusters (69)
Round 32 :
Ch1, sc across, prepare to transition to semicircle join area: sc in first 12 sts, leave remaining sts free for seam to semicircle (12)
Info :
If you prefer continuous openwork, make two full lattice panels and seam them at the center later. For the photographed layout, lattice panels are trimmed and joined to semicircles at the straight inner edge; ensure the number of sc stitches left for the seam matches semicircle inner edge stitch count for even joining.
Round 33 :
Work 12 sc across and fasten off leaving long tail for sewing to semicircle. Repeat on the opposite side of the panel so two trimmed edges are ready to attach to semicircle inner edges.
Info :
Repeat entire lattice panel to create matching panel for the other half of the runner. You may also construct the lattice as one long strip and fold to match semicircles; the counts are designed so two halves align at the center seam.
— Center Connector (Middle Diamond Join) :
Round 1 :
Join Brown to two trimmed lattice inner edges and create bridging rows: ch1, sc in edge st, ch4, sc into opposite panel edge to create small arcs; repeat to create uniform connector with ch4 loops spacing 12 attachments across
Round 2 :
Ch1, sc into each sc and into each ch space across while tightening connector loops; fasten off leaving long tail for final assembly
Info :
Work connector carefully so semicircle center points align. Pin both semicircle inner edges and lattice trimmed edges together and stitch connector loops through both pieces to create a neat join. Use plenty of pins and check alignment visually before sewing.
— White Transition Rows (work where semicircle meets lattice) :
Round 1 :
Join White at the seam. Ch1, sc evenly along the trimmed semicircle inner edge and into the first sc row of the lattice connector to create a neat white transition band. Aim for 36 sc around seam area (counts depend on earlier trims; distribute evenly)
Round 2 :
1 sc in each st around transition band to flatten and secure join (36)
Info :
This white band creates the crisp semicircle-to-lattice visual seen in the photo. If your seam counts differ, distribute sc evenly and use small variations of sc and hdc to keep the band flat.
— Outer Scalloped Edge (Worked in White — Full Runner Perimeter) :
Round 1 :
Join White to any sc on lattice outer edge. Ch1, sc in same st, *ch3, skip 2 sts, sc in next sc* across outermost edge to create picot curve base; end with sc in final st (this creates base loops around lattice diamonds)
Round 2 :
Ch1, sc in each st and in each ch3 loop (count depends on edge length; sample has 88 loops). Ensure counts are even around curves
Round 3 :
Sc across to start of first scallop point. *In next ch3 loop work: (sc, hdc, 3 dc, hdc, sc) — a 5-stitch scallop. Skip next 3 loops and repeat across to create scallop points around entire runner perimeter (approx 22 scallops around each panel depending on size)
Info :
Scallop point placement is crucial for a neat finish. If points land unevenly, add a single sc in selected loops to move the scallop slightly until spacing looks balanced. Block after scalloped edge is complete for crisp points.
Round 4 :
Ch1, sl st into each stitch around scallop to tidy edges, fasten off leaving long tail for weaving (no count)
Info :
For a pronounced white rim as in the photo, work an additional round of single crochet or picots in contrast color over the scallop edge to make it pop. Use a smaller hook for tighter scallops if desired.
— Decorative Bead and Final Detail Rows :
Round 1 :
With brown, weave in around the wooden rings and around any visible seam area using slip stitches to create a tidy border around the ring (no numerical count; tack evenly in 12-16 places)
Round 2 :
With white, sc around ring junction and fasten off; weave ends under several stitches for secure finish
Info :
If adding beads or tassels, attach now at scallop points evenly spaced. The runner in the photo is bead-free to maintain a soft, vintage look.
— Blocking & Finishing :
Info :
Lightly wet-block the completed runner to open lattice and flatten semicircles. Pin to a flat surface and shape scallops carefully. Allow to dry completely before removing pins. Weave all ends into the back of stitches and trim close.
Info :
Check the seams where semicircles meet lattice; if small gaps appear add small whip stitches using matching color yarn to close. Add a dab of fabric glue under wrapped rings for extra hold if needed.
Info :
Variation tip: To lengthen runner, add extra lattice motif bands in multiples of the motif repeat. To shorten, remove full motif bands to maintain symmetry.
— Troubleshooting & Tips (multiple Info sections) :
Info :
If semicircle curls at edges, block and add an extra round of sc evenly spaced to flatten. For puckering at seams, unpick a few stitches and redistribute tension then resew. Keep long tails for joining and weave them through multiple stitches for strength.
Info :
To get the pictured crisp look, use cotton cord with minimal stretch. Acrylic t-shirt yarn will work but cotton lays flatter and shows stitch definition best. Use a hook that yields a firm fabric — test on a small sample first.
This vintage-inspired table runner pattern brings handmade charm to mealtimes and gatherings. The interplay of solid semicircles, open lattice, delicate scallops, and wooden ring details makes each stitch feel purposeful and pretty. Whether you keep it for your farmhouse table or gift it to a friend, this runner adds warmth and personality to any space. I hope you enjoy making it as much as I did — happy stitching and lovely tables ahead! 🧶🏡