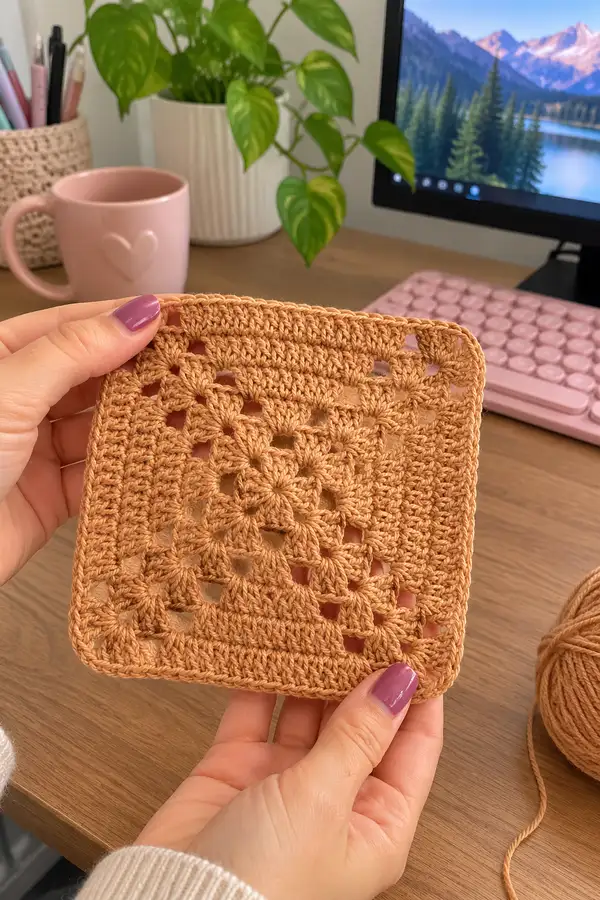
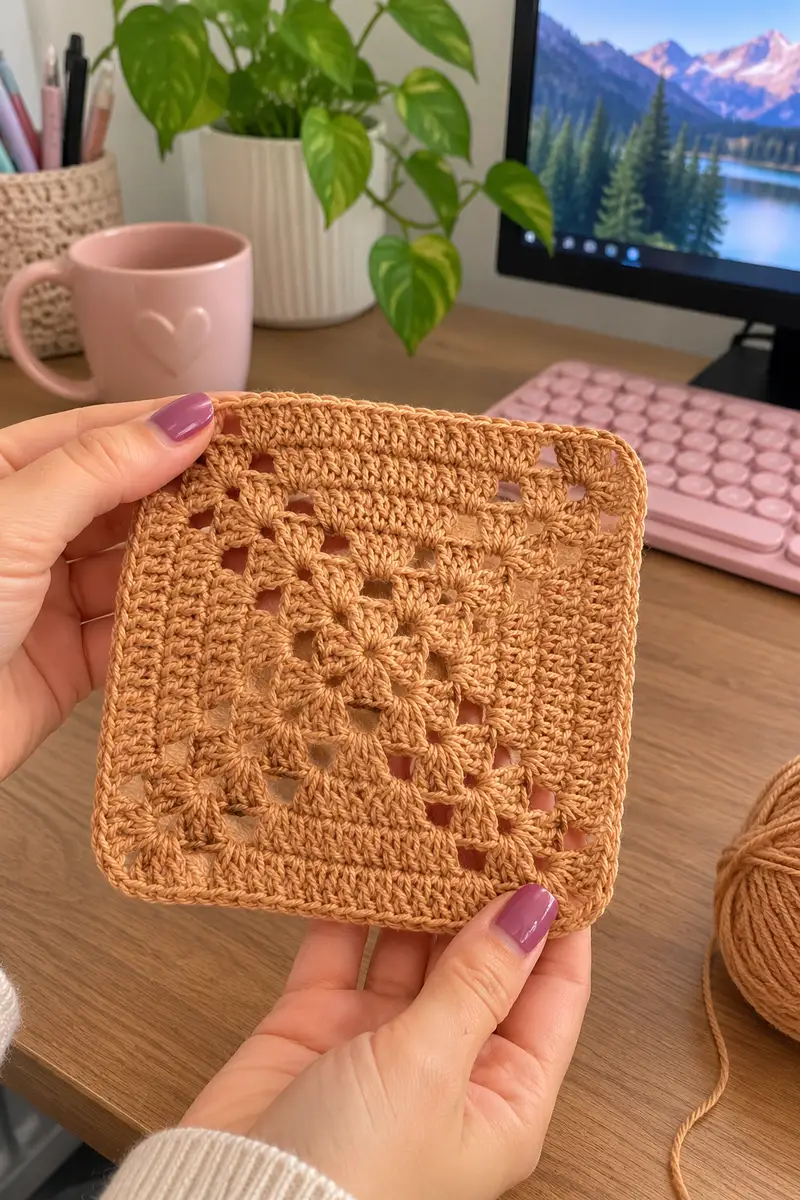
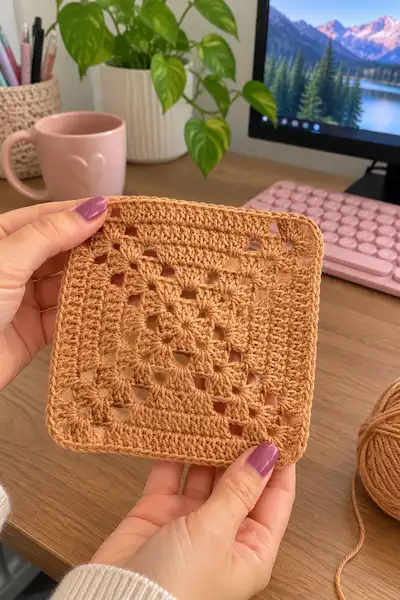
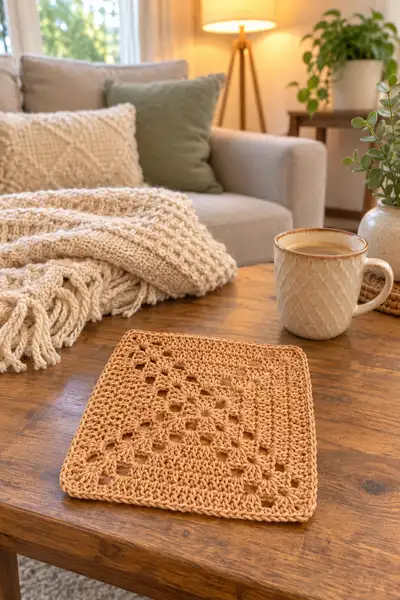
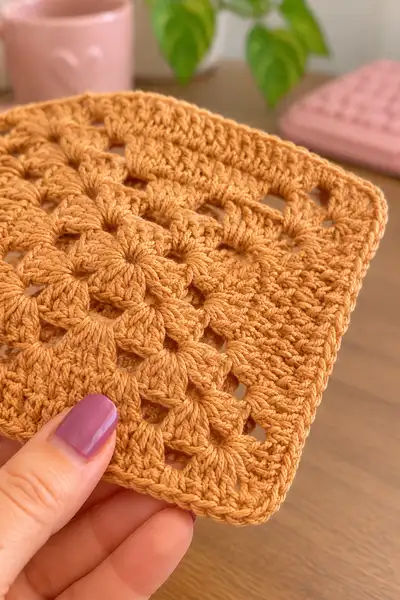
Create a warm, caramel-colored granny square bedspread made from oversized lace diamonds and cozy solid rounds. This pattern recreates the pictured square motif — a floral puff center that expands into a solid lacy square and finishes with a rounded, neat edge for joining. Ideal to assemble many identical squares into a sumptuous bedspread with a relaxed, textured farmhouse look.
Progress Tracker
0% Complete
— Notes & Gauge :
Info :
This pattern is written in US terms. Gauge is not critical for a bedspread but will affect final size. Sample gauge: 12 dc x 8 rows = 10cm/4" in solid dc after blocking when using 5.0mm hook and worsted cotton-blend yarn. Make a sample square and block to check your preferred drape.
Info :
Puff stitch used: yarn over, insert hook, pull loop up (repeat to create 5 loops on hook), yarn over, pull through all loops, ch1 to secure (counts as 'puff'). For a softer puff use 4 loops instead of 5.
— Motif (Center Floral Cluster) :
Round 1 :
Make a magic ring, ch3 (counts as dc), 2 dc in ring, ch2, *(3 dc in ring, ch2)* repeat 2 more times, join with sl st to top of beginning ch3. You will have 4 cluster groups separated by ch2 corner spaces (12 dc total + 4 ch2 spaces).
Round 2 :
Work into the first ch2 corner space: (3 dc, ch2, 3 dc). *In the next ch2 space work (3 dc, ch2, 3 dc); repeat in each corner ch2 space.* Join with sl st to top of beginning ch3. Each corner now contains 6 dc (3dc + 3dc) with a ch2 between; total dc = 24 plus side 3dc groups (none yet). (24 dc)
Info :
Round 2 forms your first 'corner cluster' that creates the square shape. Keep tension even and make sure the ch2 corners are loose enough to pivot the next round comfortably.
Round 3 :
Ch3 (counts as dc), 2 dc in same corner sp (the ch2), ch2, 3 dc in same corner sp (the other side of ch2). *Along the side between corners work 3 dc into the gap between corner clusters; then in the next corner space work (3 dc, ch2, 3 dc).* Repeat for all four sides. Join. You now have 4 corner clusters and 4 side clusters. Total dc now 36 (12 clusters x 3 = 36).
Round 4 :
Ch3, 2 dc in first corner ch2 sp, ch2, 3 dc in same corner ch2 sp; *skip the first side cluster gap and work 3 dc into the next side gap (you will have two side cluster gaps per side now), continue working 3 dc in each side gap; in every corner ch2 work (3 dc, ch2, 3 dc).* Repeat around and join. Count: there are now 4 corners and 8 side clusters (12 clusters total). Total dc = 36 clusters x? (explain cluster math below) — for practical carrying forward simply treat each '3dc' group as a cluster; your square expands outward symmetrically.
Info :
At this stage check that your corners lay flat; if they pucker, pull a tiny bit more slack in corner ch2 spaces in the next round. Conversely, if the square cups, use a slightly larger hook or loosen tension.
Round 5 :
Repeat Round 4: In every corner work (3 dc, ch2, 3 dc). Between corners work 3 dc in every side gap. Join with sl st. The square will feel more open and lacy now; you are building the floral/diamond lattice outward.
Round 6 :
Ch3, 2 dc in first corner, ch2, 3 dc in corner; *work 3 dc in each side gap across the side (there will now be 3 side gaps per side), in the next corner do (3 dc, ch2, 3 dc).* Join. This is the last 'cluster-only' round before shifting into alternating puff/cluster textures that mimic the photographed motif.
Info :
If you want a more pronounced floral center like the reference photo, after Round 6 add a textured puff round as described next. Otherwise, you can continue repeats of the granny-cluster rounds until you reach your preferred square size.
Round 7 :
Textured puff round: Facing the center, work into each of the four corner ch2 spaces: ch3, 2 dc in corner ch2 sp, ch1, *now in the first side gap after the corner work a 5-loop puff, ch1, skip next chain space and work a puff in the following gap; continue working a puff stitch in every other side gap along the side (this creates the diamond lace). Return to next corner and work (3 dc, ch2, 3 dc). Repeat around. Join with sl st. The puff clusters create little raised petals that echo the photo.
Info :
To make the 5-loop puff: yarn over, insert hook into space, pull up loop; repeat 4 more times (5 loops on hook), yarn over, pull through all loops, ch1 to secure. Keep the base of each puff at the location specified for symmetry.
Round 8 :
Ch3, 2 dc in corner, ch2, 3 dc in corner; *work 3 dc in each gap between puffs across the side (this will fill and secure puffs), and in the next corner work (3 dc, ch2, 3 dc).* Join. The puffs should nestle down into the filled dc between them, forming a textured diamond pattern on each side.
Info :
Inspect the square at this point—puffs will flatten slightly. If a side looks sparse, you can work an extra dc into that side gap on the following round to even tension; symmetry is more important than exact stitch counts for a handmade look.
Round 9 :
Repeat a regular granny expansion round: ch3, 2 dc in corner, ch2, 3 dc in corner; *work 3 dc in each side gap (you will have more side gaps now), maintaining puffs' placement below; in corners work (3 dc, ch2, 3 dc).* Join. Your motif center is now fully established and textured (this round normalizes the structure for the transition to solid rounds).
Round 10 :
Ch1, sc in same st and evenly across the round working 1 sc in each stitch and 1 sc into each ch2 corner space (work 3 sc in each corner ch2 to round them nicely). Join with sl st to first sc. This sc round compresses the cluster edges slightly to start a flatter surface for solid dc rounds.
Info :
Use this single crochet round as a leveling round. It reduces openness and gives you a reliable foundation for subsequent solid double crochet rounds which create the bedspread diamonds seen in the photo.
— Square Expansion: Solid Double Crochet Rounds :
Round 1 :
Ch3 (counts as dc). Work 1 dc in each sc around, placing (3 dc, ch2, 3 dc) in each corner sc group (i.e., in the corner space created by prior round’s 3 sc). Join with sl st. Count note: if previous round had 120 sts, this round will have the same number of dc stitches distributed; keep the beginning ch3 as dc.
Round 2 :
Ch3, 1 dc in each dc across the side, (3 dc, ch2, 3 dc) in each corner. Join. This begins the gradual solidification of the square sides and formation of the diamond shapes. Continue working even in rounds until your square measures approximately 21–24cm/8–9.5" (this size is used for the pictured bedspread square; adjust as desired).
Info :
Measure often. The pictured sample was worked to ~9" square after blocking. The square is easier to assembly if all squares are blocked to the same measurement; keep a ruler handy and measure diagonals to avoid skewing.
Round 3 :
Repeat Round 2. Keep your tension even. If you prefer a softer drape, switch to a slightly larger hook for these dc rounds; the center lacy area is already stabilized by previous rounds.
Round 4 :
Repeat Round 2. This is typically a good time for a subtle color change if you want a running border or halo effect—see color-change Info below.
Info :
Color change option: To add a halo round, change yarn at the last pull-through of the last dc of the round. Carry the old color loosely along the back of your work or break and weave in ends. For a single-color bedspread the next rounds simply continue in main color.
Round 5-12 :
Work even rounds of 1 dc in each dc across the sides, with (3 dc, ch2, 3 dc) in each corner. After each two or three rounds, check shape and measure. Continue until your piece reaches the target square size—for a bedspread like the photo use approximately 9" per square, which here is reached around Round 8–12 depending on your gauge and hook size.
Info :
If you want the photograph’s dense outer field, stop at a smaller size and move to the smoothing border (below). If you want larger squares for a quicker project, continue dc rounds until you reach 12–14" squares.
— Outer Rounds & Rounded Corners (Shaping for Soft Edge) :
Round 1 :
Ch2 (counts as hdc), hdc in same st and in each st around but work (hdc, ch2, hdc) in each corner ch2 space to make corners a touch less angular. Join with sl st to top of ch2.
Round 2 :
Ch1, sc in each st around, working 3 sc in each corner ch2 to round the corner. Join with sl st. This sc round compresses outer stitches and gives a smooth, tidy edge ready for the finishing rounds.
Info :
The photographs show gently rounded corners rather than sharp 90-degree corners. The hdc/sc rounds above are key to reproducing that soft silhouette — keep the corner clusters with three stitches to maintain corner strength for joining.
Round 3 :
Ch3, 1 dc in each sc around, placing (2 dc, ch1, 2 dc) in each corner space if you want a slightly open corner, or (3 dc, ch1, 3 dc) for a fuller rounded corner. Join and fasten off if you finished your square size here. Weave in ends.
Info :
For the pictured edge, I used (3 dc, ch1, 3 dc) in corners and then a final slip-stitch piped row for a clean finish. You can choose either; both look lovely when all squares are joined.
— Finishing Round (Edge Smoothing & Piping) :
Round 1 :
Join main color if you broke yarn. Working from the right side, ch1, sc evenly around the square placing 3 sc into each corner ch1 (or ch2) to make neat rounded corners. Join with sl st. This creates a uniform outer edge across all squares for easier joining.
Round 2 :
For a piped edge: ch2, *sl st into next 3 sts, ch2, sl st into next 3 sts; repeat around. This creates a subtle ridge that looks like the smooth edge in the images. Fasten off and weave in ends. Block square flat to final dimensions before assembly.
Info :
Blocking tip: use steam or wet blocking for cotton-blend yarns. Pin square to exact size and let dry completely. For consistent bedspread assembly, block every square to the same measurement and dry completely before joining.
— Join-As-You-Go (JAYG) Method — Add-on Border Rounds While Making Final Square :
Info :
Join-as-you-go is perfect for this repetitive square. Work up to the last outer smoothing round of a new square, then instead of finishing it, align the new square with a completed one and slip-stitch or single crochet through the finished square’s outer sc row while working the outer round of the new square. This creates a nearly invisible seam and saves sewing time.
Round 1 :
Work new square up to the final sc round. On the final sc round ch1, sc until you reach the side where you will join. When you arrive at a stitch that aligns with the adjacent square's outer sc row, insert hook through both the new square stitch and the corresponding stitch in the existing square and sl st through both; continue with sc in next new square st, sl st in corresponding existing square st, repeating across the side. In corners, work (3 sc joined) to secure corner junctions. Continue around to attach additional squares. Fasten off at end of side or round and weave ends.
Info :
JAYG works best when both squares are blocked and the outer sc row is even. Keep tension gentle as you join so you don’t pull the seam tight and distort the square edges.
— Alternative Assembly: Seam Sewing Method (Invisible Mattress Stitch) :
Info :
If you prefer seams, arrange your blocked squares on a large flat surface in your desired bedspread layout. Use matching yarn and a tapestry needle to mattress-stitch through the outermost sc rounds. Pin squares to hold placement before sewing. Sew from the wrong side for a seamless right-side appearance.
Round 1 :
Sew squares by joining outer sc rows with mattress stitch: whip small stitches through the back bumps of the outer sc rounds of each adjacent square, pulling snugly but not tight. For each seam, make 6–8 passes per 9" square side (adjust density for desired seam visibility/strength). When sewing corners, use additional stitches to secure the intersection points. Weave ends securely and trim.
Info :
When sewing seams, place your thumb inside squares to check tension and alignment. If a seam pulls a corner inward, loosen a few stitches and rework to maintain flatness.
— Blanket Border & Finishing Rounds (work after all squares are joined) :
Border Round 1 :
With bedspread assembled and laid flat, join yarn at any corner. Ch3 (counts as dc), work dc along the exposed edge into each sc or dc (about 1 dc per 3–4mm of work) placing (3 dc, ch2, 3 dc) in each corner junction seam to preserve corners. Join. This creates a continuous outer frame.
Info :
For a bedspread sized to queen with 9" squares you may have ~6 x 7 squares depending on your layout — plan border proportions to suit your assembly. Work border rounds to create a balanced frame around the bedspread.
Border Round 2 :
Ch3, 1 dc into each dc around keeping corners (3 dc, ch2, 3 dc). Join. Repeat for 3–6 rounds until the border depth looks balanced relative to bedspread body. For the sample, I used 4 rounds of dc followed by a final decorative shell round.
Info :
Add an even-numbered dc round after an odd-numbered dc round to keep edge symmetry; measuring the bedspread across and down during these rounds helps maintain rectangular shape.
Border Round 3 :
Decorative shell round: Join contrasting color if desired, ch1, sc in same st, *skip 2 sts, (5 dc) in next st (shell made), skip 2 sts, sc in next st; repeat around making 3 sc in each corner ch2 space to hold shell pattern. Fasten off and weave in ends. This shell gives a delicate finished scallop similar to the soft fall in the images.
Info :
If you prefer a squared border, work an additional sc round then a crab stitch (reverse sc) round to create a rope-like finish instead of scallops.
— Alternate Finishes & Styling Tips :
Info :
To make the bedspread more cottage-core, add tassels at each corner every 2–3 squares along the border. For a more modern look, use a simple two-row border in the same color as the squares. To create texture contrast, try a chunky yarn for the border only.
Info :
To make pillow shams to match, use the same motif and add 2–3 rounds of extra height (dc rows) to match the pillow size, then finish with the same border used on the bedspread.
— Care Instructions :
Info :
Wash cotton-blend bedspreads on a gentle cold cycle and dry flat or tumble low if the yarn label allows. Re-block after washing to restore drape. Store folded and avoid hanging which can distort square shapes over long periods.
This cozy warm caramel granny square bedspread brings a calming, textured look to any bedroom. Each square combines a floral puff center with solid, lacy rounds to create beautiful depth and soft drape. The repeatable motif makes it a meditative project to stitch while you relax, and the final border ties everything together for a professional finish. 🧶✨ Whether you make one square or enough to cover your bed, this pattern invites creativity and a long-lasting handmade heirloom. Enjoy every stitch and the slow joy of crafting a comfortable, inviting space. 🌙