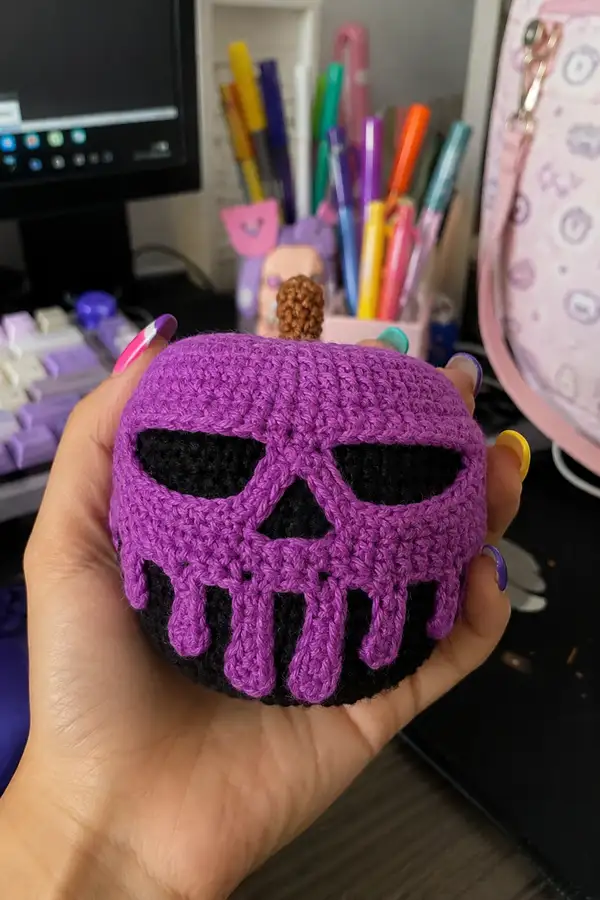
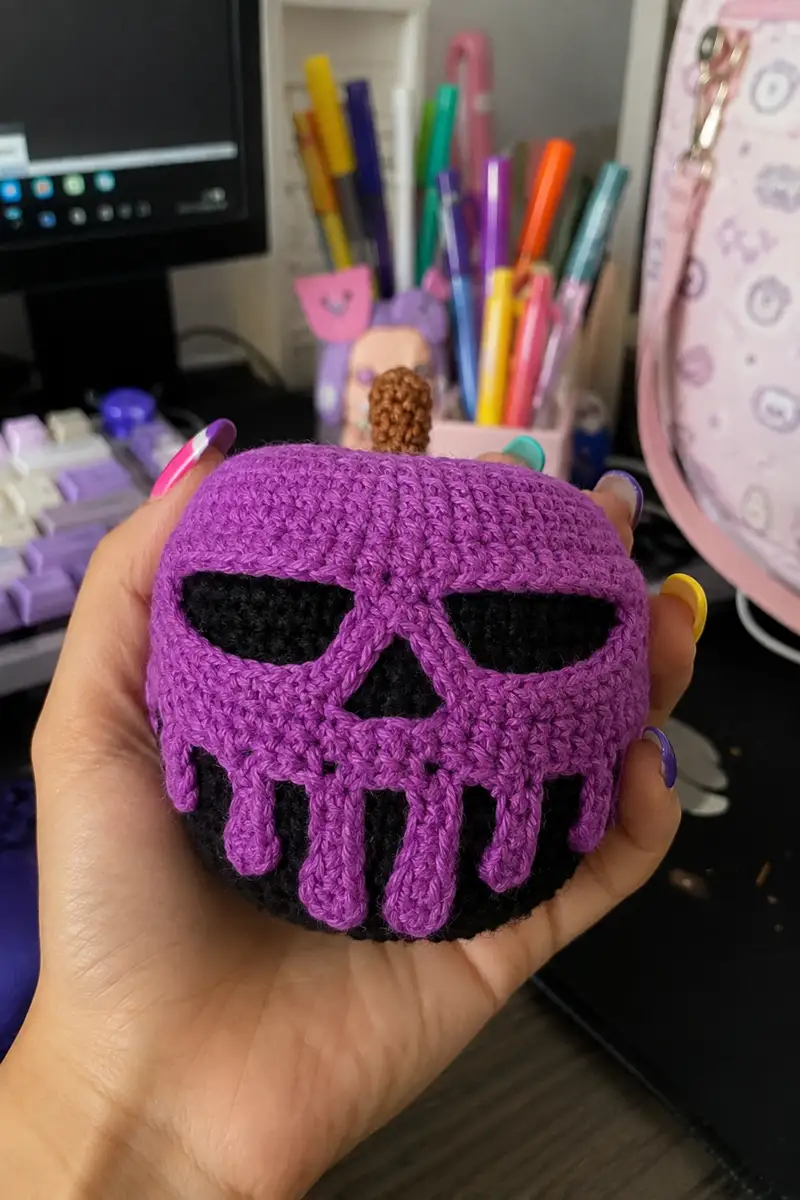
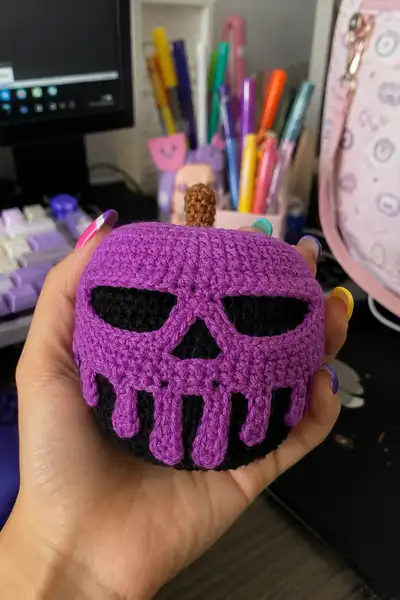
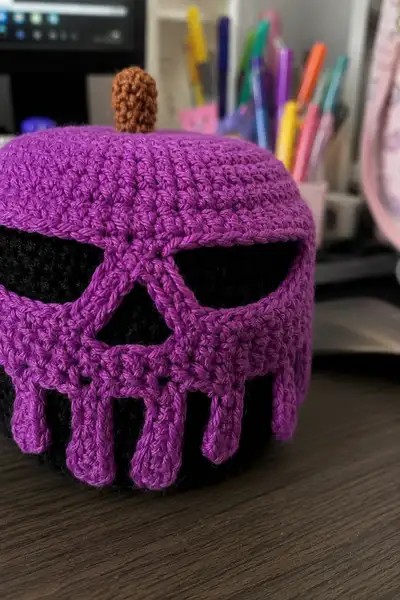
A spooky-cute poisoned apple amigurumi with a deep black core and a dripping purple skull overlay. This small plush features clean skull eye and nose cutouts, a scalloped drippy skirt, and a little brown stem on top. Perfect as a Halloween decoration or a creepy-cute gift, the contrasting colors and sculpted drips give this apple serious character.
Progress Tracker
0% Complete
— Top Half / Head (Upper sphere) :
Round 1 :
6 sc in magic ring (6)
Round 3 :
(1 sc, 1 inc) x 6 (18)
Round 4 :
(2 sc, 1 inc) x 6 (24)
Round 5 :
(3 sc, 1 inc) x 6 (30)
Round 6 :
(4 sc, 1 inc) x 6 (36)
Round 7 :
(5 sc, 1 inc) x 6 (42)
Round 8 :
(6 sc, 1 inc) x 6 (48)
Round 9-20 :
1 sc in each st (48)
Info :
These even rounds create the dome shape of the apple. Keep tension even and use a stitch marker to mark the first stitch of each round. The top area will later hold the little stem.
Round 21 :
(6 sc, 1 dec) x 6 (42)
Round 22 :
(5 sc, 1 dec) x 6 (36)
Info :
Begin lightly stuffing the top half now using small amounts of fiberfill. Stuff just enough to round the dome but not firm; you'll add more stuffing after joining to the lower half.
Round 23 :
(4 sc, 1 dec) x 6 (30)
Round 24 :
(3 sc, 1 dec) x 6 (24)
Round 25 :
(2 sc, 1 dec) x 6 (18)
Round 26 :
(1 sc, 1 dec) x 6 (12)
Round 28-30 :
1 sc in each st (6) for 3 rounds to form a small neck tube for a neat join to lower half (6)
Info :
Fasten off leaving a 20-25 cm tail for sewing. Finish stuffing top portion to a comfortable medium-firmness. This piece will be sewn to the body/bottom half to form the full sphere if you are making the apple as two pieces.
— Bottom Half / Body :
Round 1 :
6 sc in magic ring (6)
Round 3 :
(1 sc, 1 inc) x 6 (18)
Round 4 :
(2 sc, 1 inc) x 6 (24)
Round 5 :
(3 sc, 1 inc) x 6 (30)
Round 6 :
(4 sc, 1 inc) x 6 (36)
Round 7 :
(5 sc, 1 inc) x 6 (42)
Round 8 :
(6 sc, 1 inc) x 6 (48)
Round 9-18 :
1 sc in each st (48)
Info :
The lower half matches the upper dome so the two halves join smoothly. If you prefer to crochet the apple as one continuous piece, skip one of the halves and work continuous increases then decreases — this pattern uses two halves for easier stuffing and for fitting the skull overlay precisely.
Round 19 :
(6 sc, 1 dec) x 6 (42)
Round 20 :
(5 sc, 1 dec) x 6 (36)
Round 21 :
(4 sc, 1 dec) x 6 (30)
Round 22 :
(3 sc, 1 dec) x 6 (24)
Round 23 :
(2 sc, 1 dec) x 6 (18)
Round 24 :
(1 sc, 1 dec) x 6 (12)
Info :
Before closing completely, stuff the bottom half fairly firmly so the apple sits nicely in the palm. Ensure the lower curve is smooth and even; add stuffing in small handfuls to avoid lumps.
Round 26 :
Use remaining tail and sew the opening closed if working halves separately, but leave thread long for sewing to the top half. If you are joining halves, align neck tubes and sew around with mattress or whip stitch using the long tail for an invisible seam. Weave in ends.
— Purple Skull Overlay (Cap) :
Info :
Make the overlay as a slightly domed cap that will sit over the black apple and have shaped openings for the skull eyes and nose. This overlay is crocheted in purple and designed to be sewn on, exposing the black base through eye and nose cutouts. Work with a slightly smaller hook (e.g., 3.0mm) if you want a neater fabric for the overlay.
Round 1 :
6 sc in magic ring (6)
Round 3 :
(1 sc, 1 inc) x 6 (18)
Round 4 :
(2 sc, 1 inc) x 6 (24)
Round 5 :
(3 sc, 1 inc) x 6 (30)
Round 6 :
(4 sc, 1 inc) x 6 (36)
Round 7 :
(5 sc, 1 inc) x 6 (42)
Round 8 :
(6 sc, 1 inc) x 6 (48)
Round 9-12 :
1 sc in each st (48)
Info :
These rounds form the dome of the overlay. Stop and hold this piece against your black apple to check how far down it will fall — the skull's eyebrow ridge will be formed later and should sit around rounds 10-12 of the base so the eyes align.
Round 13 :
1 sc in next 6 sts, (2 sc in next st, sl st into next st) x 6 across to start forming a slightly raised brow line (54 including slip stitch joins but maintain 48 worked sc — the sl st sequence is decorative)
Round 14 :
1 sc in each st (48) — work into back loop only for a subtle ridge if desired (BLO) on this round
Info :
Mark the positions for eye openings: with the overlay held on the apple, use pins to mark the left and right eye centers. Eyes should be roughly 10-12 stitches apart (edge-to-edge), depending on size. Also mark the center triangle for the nose between eyes about 6-8 stitches down from eyebrow line.
Round 15 :
1 sc in each st until you reach the first marked eye edge, then ch 5, skip 5 sts (this creates an opening), continue 1 sc until the second eye edge, ch 5, skip 5 sts, finish the round (48 worked, with 2 ch spaces forming eye openings)
Info :
These chain spaces create the eye holes. You can adjust the number of chains and skipped stitches to widen or narrow the eye windows. Use a contrasting stitch marker to remember the first skipped stitch of each eye.
Round 16 :
1 sc in each st and in each ch around the eye openings to create a tidy edge (48)
Round 17 :
Work across to the nose marker: chain 3, skip 3 sts to open a small triangular nose space, continue sc in each st to finish round. Then round of sc across making sure the nose chain is centered between eye openings (48)
Info :
At this stage you'll have two eye openings and a small triangular nose chain area. If you prefer a cleaner triangular nose, you can leave the nose location as a small hole and later finish the edge by working sc around the hole, shaping the triangle by stitching only along two sides.
Round 18 :
1 sc in each st (48)
Round 19 :
1 sc in next 6 sts, (sc2tog) across the center front 6 sts to define a shallow eyebrow ridge, 1 sc each remaining sts (42)
Info :
Work the rest of the overlay so the front edge that will sit over the eyes has a slightly defined rim. Keep the fabric flexible so it can be eased and sewn to the black base.
Round 20-22 :
1 sc in each st (42)
Round 23 :
Fold the overlay edge inward slightly and crochet 1 round of sc through both layers (join with sl st) to give a finished edging that will sit flush with the apple (42)
Info :
Fasten off leaving long tail for sewing. Place overlay on the stuffed black apple and pin carefully aligning eye and nose holes so the black base shows through. The overlay should drape down roughly halfway down the apple to create the dripping skull skirt effect.
— Drip Appliques (Make 7 — sizes vary slightly) :
Info :
Make seven drip pieces to sew around the lower rim of the overlay. Vary lengths to mimic natural dripping. Use purple yarn and a smaller hook (3.0 mm if available) for crisp shaping. The stitch counts below give a range of drip sizes — make the number of each size as listed to match the image: 2 short, 3 medium, 2 long.
Small Drip A (Make 2) Round 1 :
6 sc in magic ring (6)
Round 2 :
1 sc in each st (6)
Round 3 :
(1 sc, inc) x 3 (9)
Round 4 :
1 sc in each st (9)
Round 5 :
(2 sc, inc) x 3 (12)
Round 6 :
1 sc in each st (12) — shape the tip by working a slip stitch round around the tapered bottom then fasten off, leaving long tail for sewing
Info :
Sew the narrow end of the drip to the overlay lower edge so the wider bulb faces downward. Stuff the bulb lightly if desired to keep shape.
Medium Drip B (Make 3) Round 1 :
6 sc in magic ring (6)
Round 2 :
1 sc in each st (6)
Round 3 :
(1 sc, inc) x 3 (9)
Round 4 :
1 sc in each st (9)
Round 5 :
(2 sc, inc) x 3 (12)
Round 6 :
1 sc in each st (12)
Round 7 :
(3 sc, inc) x 3 (15)
Round 8 :
1 sc in each st (15) — taper top with a round of sl st and fasten off with tail for sewing
Large Drip C (Make 2) Round 1 :
6 sc in magic ring (6)
Round 2 :
1 sc in each st (6)
Round 3 :
(1 sc, inc) x 3 (9)
Round 4 :
1 sc in each st (9)
Round 5 :
(2 sc, inc) x 3 (12)
Round 6 :
1 sc in each st (12)
Round 7 :
(3 sc, inc) x 3 (15)
Round 8 :
1 sc in each st (15)
Round 9 :
(4 sc, inc) x 3 (18)
Round 10 :
1 sc in each st (18) — finish with sl st round along the top edge where you will attach to overlay, fasten off leaving long tail for sewing
Info :
Sew the drips to the lower edge of the overlay. Space them evenly with the two longest drips near the center front and shorter ones toward the sides. Pin into place before sewing to ensure even spacing and a natural dripping silhouette.
— Skull Eye & Nose Edge Finishing :
Info :
To make neat, crisp eye and nose openings that reveal the black base beneath, work a finishing round of slip stitches or single crochet around each chain space or cut opening. If you used chain gaps earlier, work sc around the hole, inserting your hook into the chain space and adjacent stitches to create a secure rim. If you need to open the hole bigger, carefully remove stitches with a tapestry needle and then work sc around the raw edge.
Round 1 (Eye Rim) :
Work sc around the perimeter of each eye opening, inserting evenly to create a smooth oval (work approximately 14-18 sc per eye depending on chosen size)
Round 2 (Nose Rim) :
Work sc around the small triangular nose area to define edges (approx 8-10 sc total)
Info :
Take the overlay off and place it over the black base. The black base should show through the eye and nose openings. Adjust by opening or reducing the opening edging as needed until placement looks balanced and expressive.
— Stem :
Round 1 :
6 sc in magic ring with brown (6)
Round 2 :
1 sc in each st (6)
Round 3 :
1 sc in each st (6)
Round 4 :
(1 sc, inc) x 3 (9)
Round 5-9 :
1 sc in each st (9) — work 5 rounds to reach a short stem height (9)
Round 10 :
(1 sc, dec) x 3 (6)
Round 11 :
1 sc in each st (6)
Info :
Fasten off leaving a long tail. Stuff the stem very lightly or not at all for a slightly flattened look. Use the tail to sew the stem firmly into the top center of the overlay or directly into the apple top if you did not build the overlay to accept it. Reinforce with 6-8 stitches around the base of the stem so it stays upright.
— Extra Surface Detail (Stitched Drip Rim & Teeth Holes) :
Info :
To mimic the scalloped skull teeth line and perforations seen in the reference, use surface single crochet or a contrasting small slip stitch to create small vertical bars between drips. You can also embroider tiny stitch holes across the skull mouth line to create the feeling of separate teeth segments.
Step 1 :
With purple yarn and a yarn needle, surface crochet a shallow curve across the overlay, just above where the drips begin, to form the mouth line. Use evenly spaced small stitches (about every 3-4 sts) to create perforation points.
Step 2 :
Weave small vertical bars down from that mouth line where you want cramped teeth separators — insert needle under a few stitches, come up a few stitches lower, and pull through to form a short vertical stitch; repeat for each separator.
Info :
These little details make the skull feel carved and add depth to the overlay. Keep stitches small and neat for a delicate tooth-like effect.
— Assembly & Final Finishing :
Info :
Before sewing anything permanently, pin the overlay and drips to the stuffed apple base, checking alignment of the eye and nose holes so the black shows through beautifully. Take time here — slight shifts drastically alter expression.
Step 1 :
With long tail from the overlay, position it over the black apple and pin in place. Ensure central symmetry by aligning the overlay front ridge with the apple's central seam or stitch marker.
Step 2 :
Sew the overlay to the apple using small whipstitches or ladder stitch around the rim. Work in sections: sew the top front first, then the sides, then the back, stopping to check eye alignment. Use many small stitches to keep attachment invisible.
Step 3 :
Sew each drip to the underside of the overlay lower edge with the long tails left from finishing the drips. Reinforce with a few stitches into the apple base so drips do not flop outward; you want them to hang naturally downward.
Step 4 :
Sew the stem into the top center of the overlay or into the apple's top neck tube if you made the halves and have a reinforced stitch area. Make sure the stem is centered and secure with several passes through both overlay and apple.
Info :
Weave in all tails into the inside of the apple and trim close. If any openings need to be tidied, pick up corresponding stitches and work a small finishing round of sc to stabilize the rim.
This Halloween poisoned apple amigurumi is a wonderful little project that combines fun shaping with dramatic details. The black core and purple skull overlay create a striking contrast, and the drips add motion and character. It’s compact, quick to complete, and makes a perfect seasonal ornament or gift. 🧶🍎 I hope you enjoy making this spooky-cute plush as much as I enjoyed designing the steps — happy stitching! 🎃