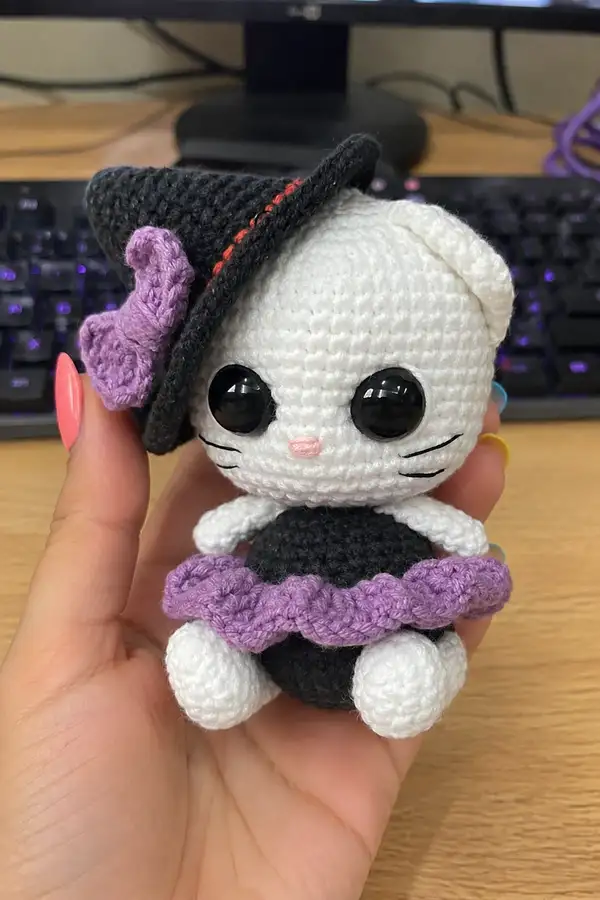
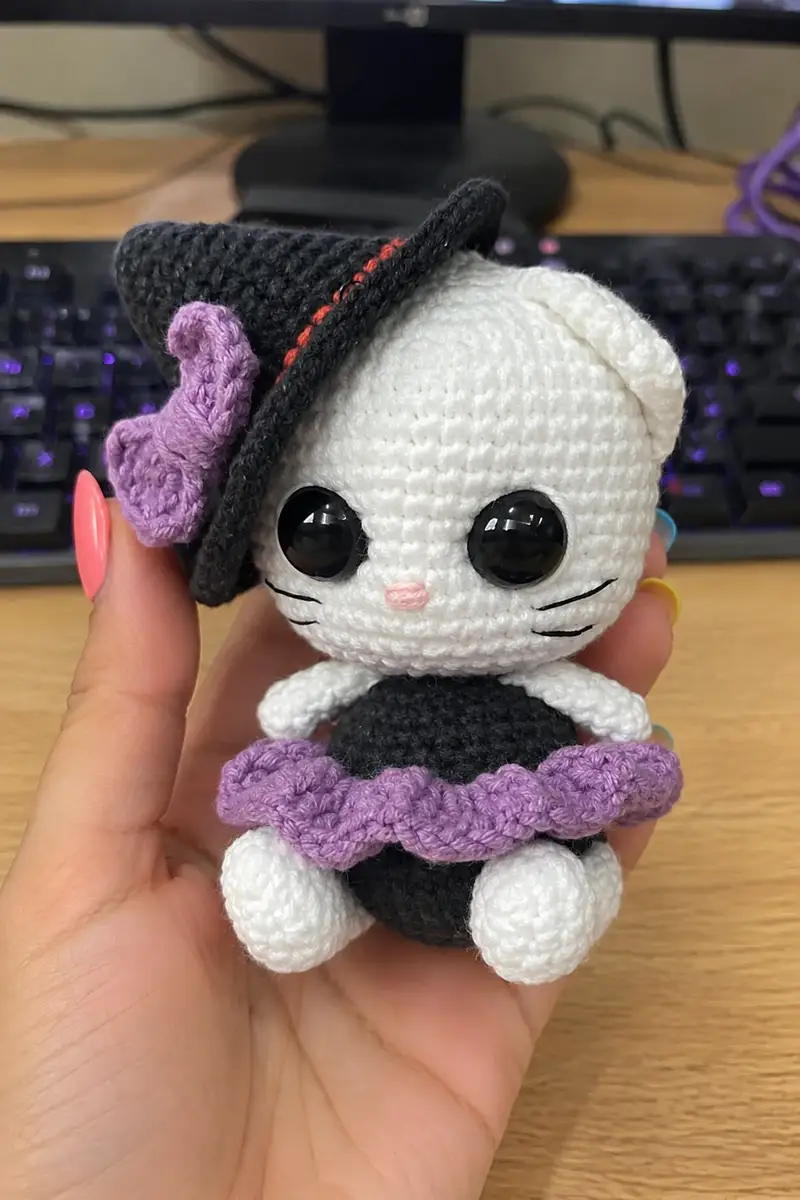
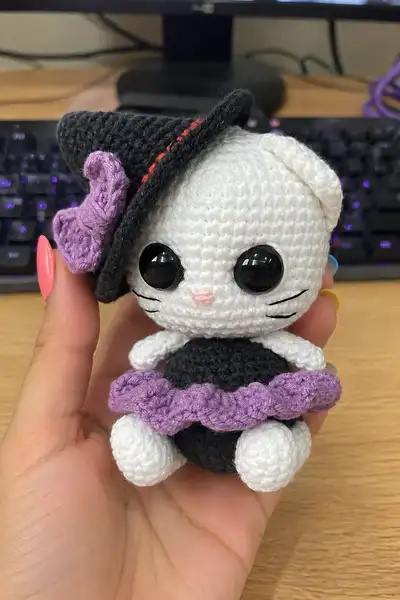
Create an enchanting palm-sized witch cat named Willow with this detailed amigurumi pattern. Willow features a soft white head and limbs, a deep black dress and hat, a purple ruffled skirt and bow, embroidered whiskers and a tiny pink nose. The pattern includes step-by-step round-by-round instructions, assembly tips, and finishing details to recreate every visible element.
Progress Tracker
0% Complete
— Head :
Round 3 :
(1 sc, inc) x 6 (18)
Round 4 :
(2 sc, inc) x 6 (24)
Round 5 :
(3 sc, inc) x 6 (30)
Round 6 :
(4 sc, inc) x 6 (36)
Round 7 :
(5 sc, inc) x 6 (42)
Round 8 :
(6 sc, inc) x 6 (48)
Round 9-12 :
1 sc in each st (48)
Info :
Place safety eyes between rounds 12-13, approximately 10-12 stitches apart depending on desired look. For this face position, place eyes so the top of the eye sits roughly on the same row as round 13. Use a stitch marker to mark the leftmost eye placement, then count across for the second eye.
Round 13-16 :
1 sc in each st (48)
Info :
Embroider a small horizontal line for the mouth or leave plain. The nose will be embroidered in light pink between the eyes one row below the eye center. Mark whisker placement: three small horizontal lines on either side beginning 1-2 rounds below eye centers.
Round 17 :
(6 sc, dec) x 6 (42)
Round 18 :
(5 sc, dec) x 6 (36)
Info :
Begin stuffing the head firmly but not overly tight. Use small amounts of stuffing frequently to ensure even shape. Stuff more in the forehead and cheeks to maintain the round amigurumi look.
Round 19 :
(4 sc, dec) x 6 (30)
Round 20 :
(3 sc, dec) x 6 (24)
Round 21 :
(2 sc, dec) x 6 (18)
Info :
Stop decreasing when you reach 18 stitches. This opening will serve as the neck base to attach to the body. Keep neck stitches live; do not close completely. Fasten off later leaving a long tail for sewing if you prefer, but leaving the round open is recommended to stitch directly to the body.
Round 22-25 :
1 sc in each st (18) x4 rounds to lengthen neck (18)
Info :
If you prefer a slightly longer neck, add additional even rounds here in multiples of one. Maintain consistent tension so the neck sits smoothly on the body. Do not overstuff the neck area because it will be compressed when sewn to the body.
Round 26 :
Fasten off leaving a 25-30cm tail for sewing to body. Weave tail through stitches around neck opening to close slightly if needed before sewing but leave enough opening to align with body top.
— Face Embroidery :
Info :
Using pink yarn and a yarn needle, embroider a small triangular nose centered one row below the eye center. Use satin stitch or a few tiny surface stitches to create a smooth tiny nose, approximately 4-6 mm wide. With black embroidery floss, stitch three whisker lines on each side: start at the cheek center and make three short straight stitches angled slightly downward for a sweet expression.
— Ears (Make 2) :
Round 3 :
(1 sc, inc) x 6 (18)
Round 4 :
1 sc in each st (18)
Round 5 :
(2 sc, dec) x 6 (12)
Round 6 :
1 sc in each st (12)
Round 7 :
(1 sc, dec) x 4 then 1 sc x4 (8)
Round 8 :
Fasten off leaving long tail for sewing. Fold slightly at base to create upright ear shape. Sew each ear to head top approximately between rounds 6-8 on the top of the head, spacing them about 12 stitches apart measured across the crown.
Info :
Pin ears and adjust angle before sewing. Slight forward tilt makes Willow look curious and cute. For a softer ear fold, add a small amount of stuffing or a tiny felt stiffener inside the base.
— Body :
Round 3 :
(1 sc, inc) x 6 (18)
Round 4 :
(2 sc, inc) x 6 (24)
Round 5 :
(3 sc, inc) x 6 (30)
Round 6 :
(4 sc, inc) x 6 (36)
Round 7-10 :
1 sc in each st (36)
Info :
Change to black yarn for the dress/body now if you worked the head in white. Carry the white yarn inside the head if preferred, or fasten off at the neck and sew later. Use a stitch marker to mark the front center so you can place the skirt and hat correctly later.
Round 11-16 :
1 sc in each st (36)
Info :
Begin stuffing body moderately from round 14 onward. Keep the bottom unstuffed until legs are sewn in to help shape the hips. Stuff the torso firmly enough to hold shape but leave some give for sewing the head.
Round 17 :
(4 sc, dec) x 6 (30)
Round 18 :
(3 sc, dec) x 6 (24)
Round 19 :
(2 sc, dec) x 6 (18)
Round 20-22 :
1 sc in each st (18)
Info :
Stop stuffing at round 20-21 to allow sewing the head into the opening. The top of the body (rounds 20-22) should be slightly empty so the head can be set and flattened into place for a smooth seam.
Round 23 :
Fasten off leaving long tail for sewing head. Do not close bottom yet; leave a larger tail for final closure after legs are attached and body is filled.
— Arms (Make 2) :
Round 3 :
(1 sc, inc) x 6 (18)
Round 4-6 :
1 sc in each st (18)
Info :
Stuff the hand area firmly so the arm keeps a defined rounded paw. Use small amounts of stuffing and press into shape while crocheting further rounds.
Round 7 :
(2 sc, dec) x 4 + 2 sc (14)
Round 8-12 :
1 sc in each st (14)
Round 9-12 Info :
For a little arm bend, insert a single pipe cleaner or wrap a small piece of craft wire inside before final stuffing. Bend wire gently at mid-arm for natural poseability. Ensure wire ends are wrapped with yarn to avoid sharp edges.
Round 13 :
(1 sc, dec) x 4 + 2 sc (10)
Round 14-16 :
1 sc in each st (10)
Round 17 :
Fasten off leaving long tail for sewing. Sew arms to sides of body aligning the top of the arm around body rounds 9-11 for a natural attachment height. Make sure arm seams are even on both sides.
— Legs (Make 2) :
Round 3 :
(1 sc, inc) x 6 (18)
Round 4 :
(2 sc, inc) x 6 (24)
Round 5-7 :
1 sc in each st (24)
Info :
Shape the foot by stuffing firmly and molding the toe area. Flatten slightly on the front to form a rounded paw that sits well when sewn to the body base.
Round 8 :
(3 sc, dec) x 6 (18)
Round 9-12 :
1 sc in each st (18)
Round 13 :
(2 sc, dec) x 6 (12)
Round 14-17 :
1 sc in each st (12)
Round 18 :
Fasten off leaving long tail for sewing. Position legs at bottom of body starting at body rounds 1-3, spaced evenly so the paws rest flat when seated. Sew legs firmly with ladder stitch for stability.
— Tail (Optional) :
Round 2-3 :
1 sc in each st (6)
Round 4 :
6 inc along one side to create a curled shape, or sc in each st if you prefer a thin tail (12)
Round 5-10 :
1 sc in each st to desired length (12)
Round 11 :
Fasten off leaving long tail for sewing. Attach tail to back center of body around round 8-10 to sit tucked under skirt. Sew securely and shape into a curl if desired.
— Hat Cone :
Round 3 :
(1 sc, inc) x 6 (18)
Round 4 :
(2 sc, inc) x 6 (24)
Round 5 :
(3 sc, inc) x 6 (30)
Round 6 :
(4 sc, inc) x 6 (36)
Round 7 :
(5 sc, inc) x 6 (42)
Round 8 :
(6 sc, inc) x 6 (48)
Round 9-13 :
1 sc in each st (48)
Info :
Work the cone until it measures approximately the same height as the head from crown to chin (about 7-9 rounds even after increases). This will produce a tall witch hat with a point. You can shorten or lengthen at will by adding or removing even rounds.
Round 14 :
(6 sc, dec) x 6 (42)
Round 15 :
(5 sc, dec) x 6 (36)
Round 16 :
1 sc in each st (36)
Info :
Do not stuff the hat cone. If you wish the hat to be more rigid, insert a thin piece of cardboard or felt inside the brim later or use a stiffer yarn. Keep cone slightly flexible so it can lean over the head.
Round 17 :
Fasten off the cone top leaving a tail to join to brim. You will crochet the brim separately and sew or join it to the cone base.
— Hat Brim :
Round 1 :
Join yarn to cone base (where cone ends) and sc evenly around base to create starting round (36)
Round 2 :
(5 sc, inc) x 6 (42)
Round 3 :
(6 sc, inc) x 6 (48)
Round 4 :
(7 sc, inc) x 6 (54)
Round 5 :
(8 sc, inc) x 6 (60)
Round 6 :
1 sc in each st (60)
Info :
Once you reach approximately 60 stitches, the brim will be wide enough to fold slightly. Work 1-2 extra even rounds if you like a thicker brim. For a turned-up edge, work 1 sc in BLO for one round to create a ridge and then fold the brim slightly.
Round 7 :
Optional: 1 sc in each st BLO (60) to create a defined edge. Fasten off and weave in ends. Sew the hat to the head at a slight angle, stitching through the cone base to the top of the head.
Info :
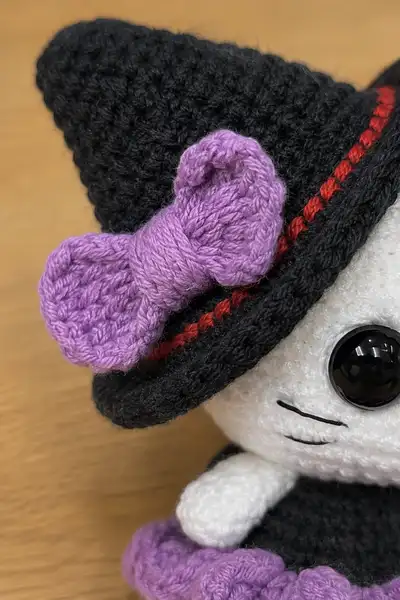
For the red band detail, embroider or surface crochet a small line around the hat brim one round above the brim using Red yarn. Use whip stitch or surface slip stitch for crisp color banding.
— Bow (Purple) :
Round 1 :
ch 16, sc in 2nd ch from hook across (15)
Round 2 :
ch1, turn, sc across (15)
Round 3 :
Repeat Round 2 for 6 rows (15) to create a small rectangle
Info :
Fold rectangle in half widthwise and sew short edges together to form a loop. Flatten and wrap a small length of the same yarn around the middle to form a bow knot. Fasten and hide ends securely. Sew the bow to the hat brim at the side, styling the loops slightly open for a plush look.
— Skirt Ruffle :
Round 1 :
With purple yarn, join to body at round 11 (or desired waistline), ch1, sc around the 36 base stitches (36)
Round 2 :
(ch3, skip 1, sl st next) repeat around to create a base for shells (36)
Round 3 :
In each ch-3 space work (2 dc, ch1, 2 dc) shell stitch around (36 shells)
Round 4 :
Work a second row of shells offset into the ch1 spaces for a fuller ruffle: (2 dc, ch1, 2 dc) into each ch1 space (36 shells)
Info :
Attach the skirt so it sits over the hips. If your skirt looks too small, work shells into each sc instead of spaces or increase chain foundation. Fasten off and weave in ends on the inside so the ruffle flares outward neatly.
— Finishing Details :
Info :
Sew head to body using the long tail from the body or head depending on preference. Insert head opening onto the top of the body and use mattress/whip stitch to attach evenly around the neck opening. Stuff more into the body top if needed to create a smooth join. Attach arms to sides, legs to bottom, and ears to head top as described earlier.
Info :
Sew the hat in place on the head slightly off-center or pin and sew only a few secure stitches so the hat can be removed later. Place the bow on the hat brim and tack down with a few stitches on the inside of the brim so it sits firmly but can be adjusted slightly for style.
Info :
Embroider details: use black yarn for whiskers—three short straight stitches on each cheek. For the mouth, a small horizontal stitch between the whiskers and just below the nose creates a sweet expression. Use pink for a tiny nose stitched with satin stitch or a small triangle of several close stitches.
Info :
Secure safety eyes with washers before final stuffing. Ensure they sit symmetrically. If you prefer sewn eyes, embroider an oval shape with black yarn or floss and add a tiny white embroidered highlight for shine.
Info :
Weave all tails into the body at least 3-4 rows and trim close. If desired, add a small dab of fabric glue to the base of the hat or bow to keep them extra secure. For safety with small children, stitch everything on tightly and avoid using loose embellishments.
This charming Willow amigurumi brings a tiny touch of magic to your handmade collection. Every stitch adds personality — from her oversized glossy eyes to the playful ruffled skirt and tilted witch hat. Making her is a satisfying project that blends basic amigurumi techniques with whimsical accessory work. Enjoy the process, and cherish the finished friend you created! 🧶🎃