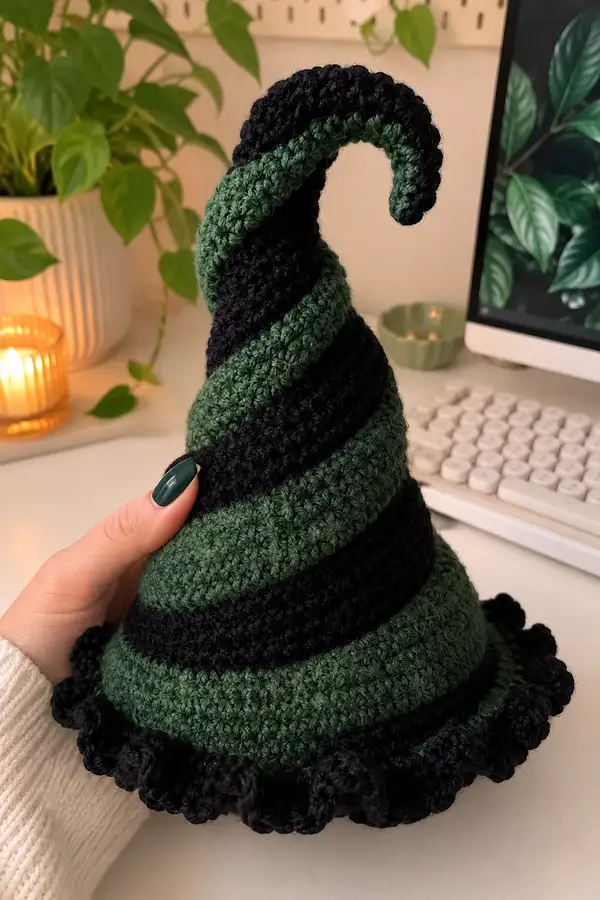
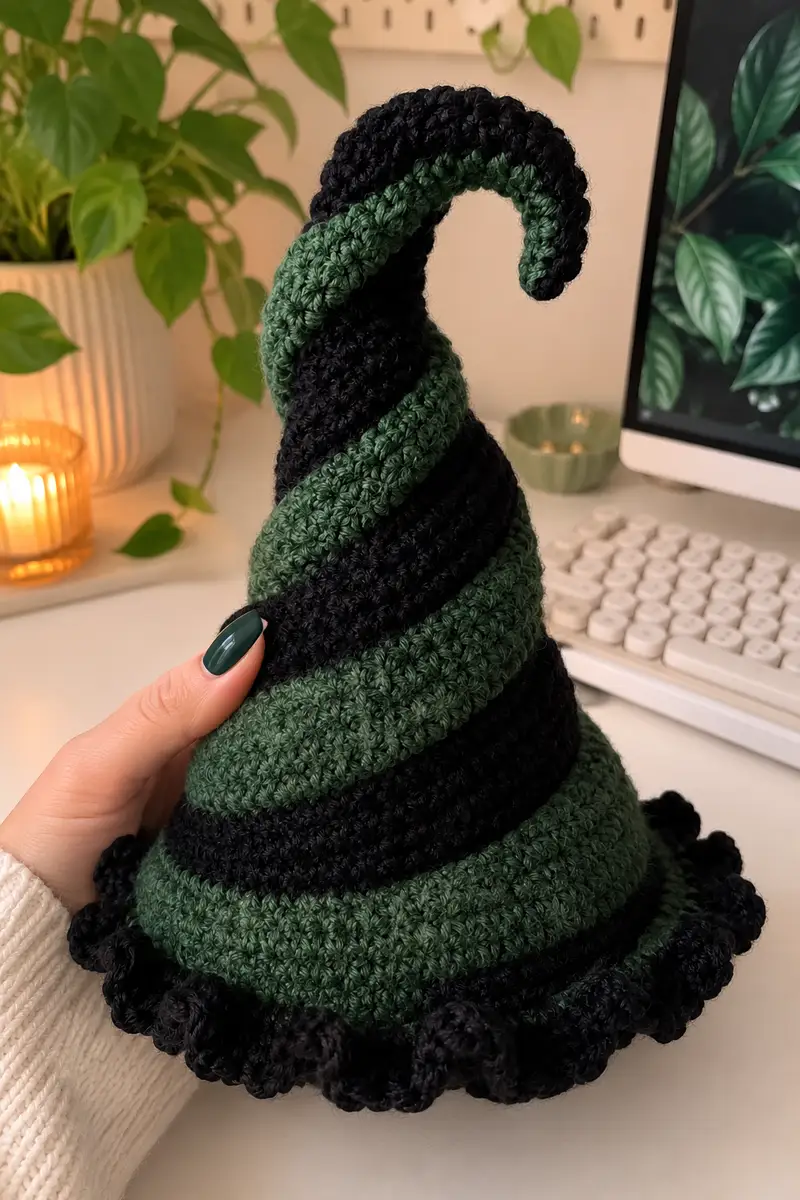
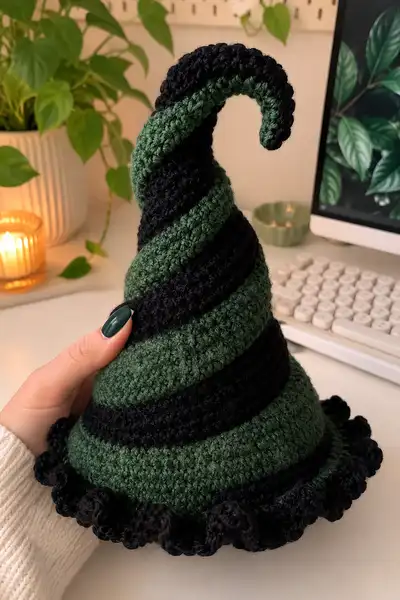
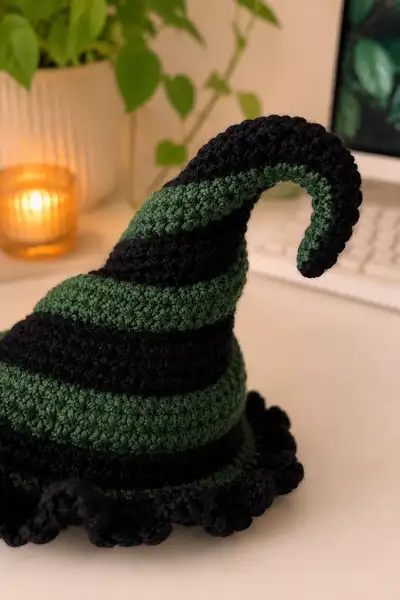
Make a whimsical corkscrew witch hat with bold dark green and black spiral stripes, a sturdy pointed spire and a chunky bubbly ruffle brim. This decorative hat features tight single-crochet texture, continuous spiral striping and a hand-curled tip that holds its shape. Perfect as a tabletop Halloween accent, costume topper, or shelf companion.
Progress Tracker
0% Complete
— Crown (Hat Top, worked in the round) :
Round 1 :
6 sc in magic ring (6)
Round 3 :
(1 sc, inc) x 6 (18)
Round 4 :
(2 sc, inc) x 6 (24)
Round 5 :
(3 sc, inc) x 6 (30)
Round 6 :
(4 sc, inc) x 6 (36)
Round 7 :
(5 sc, inc) x 6 (42)
Round 8 :
(6 sc, inc) x 6 (48)
Round 9 :
(7 sc, inc) x 6 (54)
Round 10 :
(8 sc, inc) x 6 (60)
Info :
At the end of Round 10 you have established a comfortable crown base of 60 sts. This will create the inner circumference that sits over your head or forms the interior of the decorative hat. From this point we will work in continuous rounds (spiral) to build the cone shape; place a stitch marker at your first stitch and move it up every 8-12 rounds to keep track of position. Working in continuous rounds (no join) helps the stripes spiral naturally.
Round 11-16 :
1 sc in each st (60) (work 6 rounds) (60)
Info :
These rounds create the lower crown height. If you are making a wearable hat, try this on now to check crown fit. If you want a taller or shorter crown, adjust by adding/subtracting even rounds (1 sc in each st) before proceeding to the cone shaping. Prepare to begin stripe sequence: the pictured hat alternates dark green and black in broad bands approximately 6 rounds thick. We'll start the cone stripe sequence in the next section.
— Spire / Cone (long tapered point with spiral stripes) :
Info :
Work this section in continuous spiral rounds to form the long taper and to encourage the diagonal stripe effect. Change colors every 6 rounds (unless you prefer thinner or thicker stripes). Carry the unused yarn up the inside or break and weave tails - I recommend carrying when possible to avoid many ends. For a decorative stiff curl, lightly stuff and optionally insert craft wire through the narrow tail later; see Assembly notes.
Round 1 (Spire) :
1 sc in each st (60) (60) — continue in same color as Round 16
Round 2-6 (Spire) :
1 sc in each st (60) (work 5 rounds) (60)
Info :
Change color at the beginning of Round 7 (Spire) to create the first stripe contrast. To form the diagonal spiral appearance, do not join or slip-stitch between color changes; finish the final stitch of the color and continue with the new color in the next stitch — carrying the previous yarn inside the hat or fastening off and weaving in later.
Round 7 (Spire) :
Change to contrasting color (Color B). 1 sc in each st (60) (60)
Round 8-12 (Spire) :
1 sc in each st (60) (work 5 more rounds in Color B) (60)
Round 13 (Spire) :
Change to Color A. 1 sc in each st (60) (60)
Round 14-18 (Spire) :
1 sc in each st (60) (work 5 more rounds in Color A) (60)
Info :
We will begin gentle decreases every 7th round to taper the cone while maintaining wide stripe bands. The decrease pattern reduces 6 stitches each decrease round: (X sc, dec) x 6 which keeps counts in multiples of 6 for symmetry and neat spiral wrap. Continue to alternate color bands every 6 rounds. The stitch math below is consistent: each decrease round subtracts 6 stitches.
Round 19 (Spire) :
(7 sc, dec) x 6 (54)
Round 20-24 (Spire) :
1 sc in each st (54) (work 5 rounds) (54)
Round 25 (Spire) :
(6 sc, dec) x 6 (48)
Round 26-30 (Spire) :
1 sc in each st (48) (work 5 rounds) (48)
Info :
Continue changing colors at the start of a 6-round band to maintain broad stripes. Each decrease round is placed after 6 even rounds of single crochet to keep band width consistent. Keep your tension even and move your stitch marker every time you complete a block of 6-12 rounds so that you always know the hidden 'start' of the spiral.
Round 31 (Spire) :
(5 sc, dec) x 6 (42)
Round 32-36 (Spire) :
1 sc in each st (42) (work 5 rounds) (42)
Round 37 (Spire) :
(4 sc, dec) x 6 (36)
Round 38-42 (Spire) :
1 sc in each st (36) (work 5 rounds) (36)
Round 43 (Spire) :
(3 sc, dec) x 6 (30)
Round 44-48 (Spire) :
1 sc in each st (30) (work 5 rounds) (30)
Info :
At this point the cone is shaping and the wide stripes are visible. If you want a more dramatic diagonal stripe, offset color changes by 1-2 stitches occasionally: at the start of a new color band, slip the first stitch in the next stitch instead of the usual spot. This subtle shift creates a spiral line; test on a small sample if unsure.
Round 49 (Spire) :
(2 sc, dec) x 6 (24)
Round 50-54 (Spire) :
1 sc in each st (24) (work 5 rounds) (24)
Round 55 (Spire) :
(1 sc, dec) x 6 (18)
Round 56-60 (Spire) :
1 sc in each st (18) (work 5 rounds) (18)
Round 61 (Spire) :
6 dec (6)
Info :
Rounds 49-61 bring the cone to a narrow 6-st tube. From here we build a long narrow stalk of 6 sts to create the curled tip. If you plan to insert wire, leave a long tail and do not fasten off completely; you will feed the wire through the narrow tube later and pad around it. Lightly stuff the narrow stalk as you go — too much stuffing can prevent a smooth curl.
Round 62-84 (Spire - Narrow stalk) :
1 sc in each st (6) (work 23 rounds) (6)
Info :
This long 6-st stalk provides the length for the corkscrew curl seen in the photo. Work it in spiral so the stripes continue to run diagonally: change color every 6 rounds or as desired. If your stripes start to stack directly instead of spiraling, you can alter the start of a color band by skipping the first stitch of a band to offset it slightly and create the corkscrew look.
Round 85 :
(1 sc, dec) x 2 (4)
Round 88 :
2 dec (0) - do not cut yarn; leave long tail for finishing the tip and for threading wire if inserting
Info :
Finish the very tip by flattening the last stitches and closing with a needle if desired, or leave the small opening to feed wire. If you closed the tip completely but plan to insert wire, instead make a small long tail tube to thread wire through before closing fully. Do not overstuff the narrow tip — light padding gives a smooth, flexible curl.
— Brim Base (Create a flat ring to attach to base of crown) :
Info :
The brim is worked separately and sewn to the lower edge of the crown (the round where the hat sits). For easiest attachment, make the brim base the same stitch count as your crown round where the hat sits. In this pattern the crown lower band is 60 sts. If your crown circumference differs, adjust the brim base to match stitch count when sewing.
Round 1 (Brim) :
6 sc in magic ring (6)
Round 2 (Brim) :
6 inc (12)
Round 3 (Brim) :
(1 sc, inc) x 6 (18)
Round 4 (Brim) :
(2 sc, inc) x 6 (24)
Round 5 (Brim) :
(3 sc, inc) x 6 (30)
Round 6 (Brim) :
(4 sc, inc) x 6 (36)
Round 7 (Brim) :
(5 sc, inc) x 6 (42)
Round 8 (Brim) :
(6 sc, inc) x 6 (48)
Round 9 (Brim) :
(7 sc, inc) x 6 (54)
Round 10 (Brim) :
(8 sc, inc) x 6 (60)
Round 11-12 (Brim) :
1 sc in each st (60) (work 2 rounds) (60)
Info :
At the end of Round 12 you have a flat brim disc with the same 60 sts circumference that will match the hat crown. If your crown had a different count, continue increasing around to reach the matching stitch count. The brim disc should be relatively flat; if it cups, add one or two rounds of even sc to adjust, if it ruffles instead, reduce the increase rate.
Round 13-14 (Brim - Stabilizing) :
1 sc in each st (60) (work 2 rounds) (60)
Info :
These extra rounds create a sturdy base for the ruffle. You can optionally work these rounds in BLO to create a small ridge where the ruffle will attach: 1 sc in each st BLO (60).
— Brim Ruffle (Chunky bubbly picot edge) :
Info :
The ruffle creates the bubbly, bouncy edge seen in the photo. It is worked into the outer round of the brim. For a chunky ruffle we use shell clusters (for example 5 dc shell or multiple hdc clusters) and a small picot detail. Use the same color as the last stripe on the brim or black for contrast like the sample.
Round 1 (Ruffle) :
Attach Color B (black) to outermost stitch; *ch2, 5 dc in next st (shell), sl st in next 2 sts; rep from * around to end (create 12 shells) — adjust rep count so shells distribute evenly (approx 12 shells) (60)
Round 2 (Ruffle Picot) :
*sl st to center of first shell, ch3, sl st in 3rd ch (picot), sl st to next shell center; rep from * around. Fasten off and weave ends (60 decorative picots)
Info :
If you prefer a denser ruffle, use ch2, (hdc, dc, hdc) in each shell center instead of shells. For a crisp, chunky look use a slightly smaller hook (3.25mm) and ensure shells are evenly spaced. Block the brim lightly to open shells if needed.
Alt Ruffle Option :
For the exact chunky bubble effect in the photo you can work a 6-st cluster: *in next st work (2 dc cluster, ch1, 2 dc cluster) all in the same st, sl st in next st; rep around. This produces a puffier scallop. Use BLO on the brim base before working this to create a raised join.
Info :
Keep a count of shells or clusters and pin them to the brim base to ensure they sit evenly before final finishing. The photo shows the ruffle worked in black to present a defined edge against the green; choose whichever color you like for contrast.
— Finishing Tip: Curl and Support :
Info :
To achieve the corkscrew curl at the tip: after completing the narrow stalk, insert a length of craft wire if you want a poseable curl. Thread the wire through the center of the narrow tube and bend the wire into a gentle spiral. Stuff lightly around the wire to give the curl a smooth rounded profile. If you prefer no wire, stuff the narrow stalk firmly and use your fingers to shape a natural spiral by rolling and pinching the fabric until it sets; a few drops of steam-blocking (careful) can help set the curl on acrylic or blended fibers.
Info :
Weave all color ends in neatly along the inside of the hat. If you carried yarn for stripes, tuck carried strands alongside the inside of the cone and use a yarn needle to finish ends. Use a few strategic stitches to secure the last stitch at the tip so the curl holds.
Info :
If making a wearable hat, check fit and comfort: add a soft crochet or fabric lining ring for comfort around the head if the brim edge is stiff. A safety-lined seam or soft bias fabric strip sewn into the inner rim helps wearable comfort.
This Witch's Brew hat is a playful mix of structure and whimsy—bold spirals, a corkscrew tip and a chunky ruffle make it a standout piece for seasonal decor or costume fun. Each stitch contributes to its personality, so take your time and enjoy the shaping process. 🧶✨ Big or small, this hat will add a handcrafted charm to any nook in your home. Happy hooking and be sure to share a photo when you’re done! 🎃