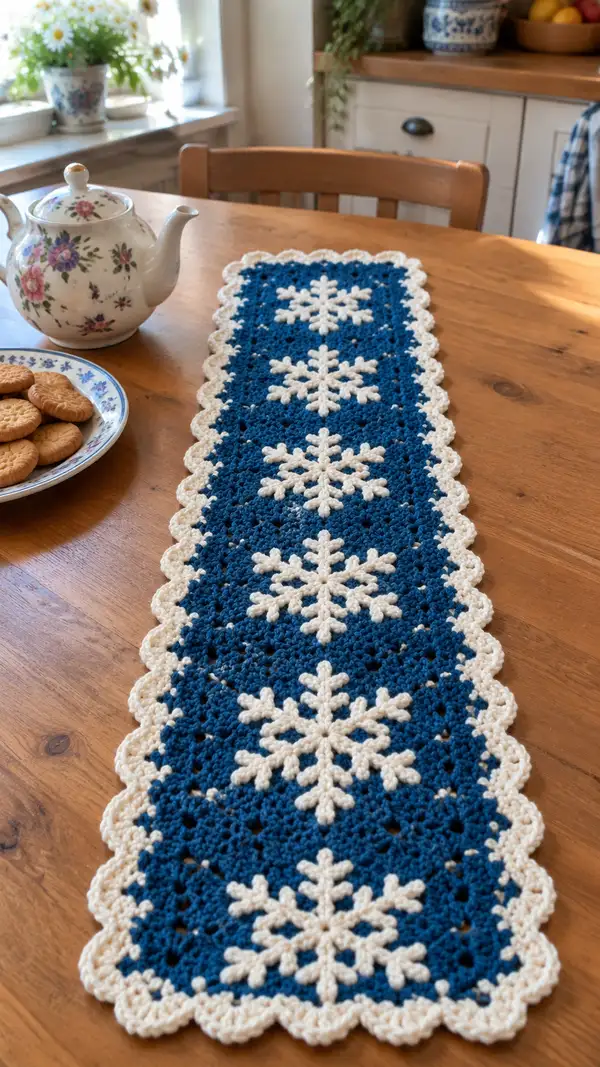
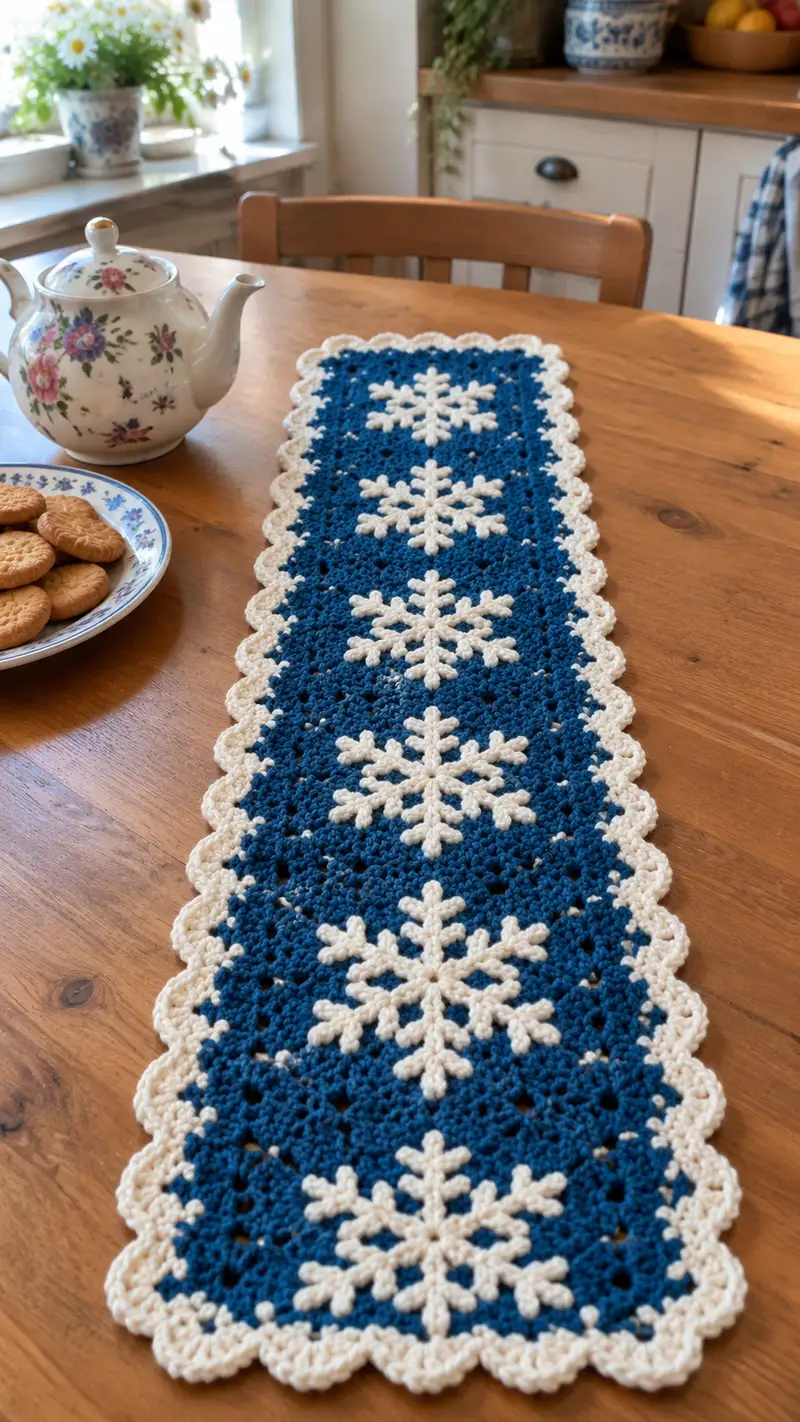
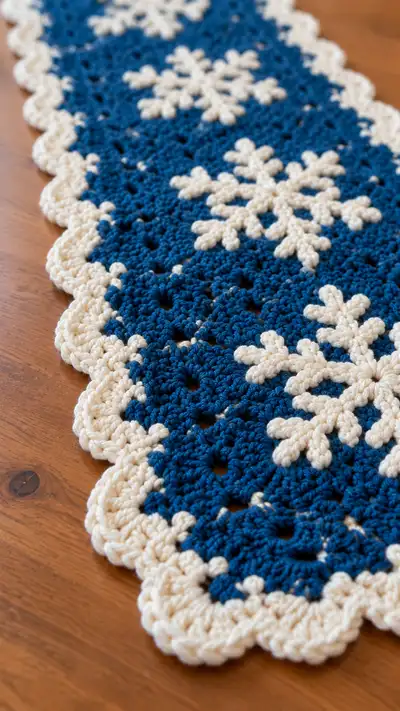
A cozy, elegant table runner featuring cream snowflake appliques on a deep blue openwork field with a scalloped cream border. Designed to sit center-table with five evenly spaced snowflakes, this runner mixes classic granny-style clusters with raised snowflake appliques for a seasonal centerpiece. The contrast of deep blue and soft cream creates a crisp winter look that dresses a wooden table beautifully.
Progress Tracker
0% Complete
— Notes :
Info :
This pattern describes creating modular rectangular panels and separate snowflake appliques that are sewn on. All panels use the same rounds and are joined using a tidy join-as-you-go seam, then finished with a scalloped border. Work tightly enough to avoid stuffing showing through; if you prefer a softer drape, go up one hook size. Gauge is not critical but consistent tension across panels is.
— Snowflake Applique (Make 5) :
Round 1 :
Make a magic ring, ch 1, 6 sc into ring. Pull ring closed. (6)
Round 2 :
Inc in each st around. (12)
Round 3 :
(1 sc, inc) x 6. (18)
Round 4 :
(2 sc, inc) x 6. (24)
Info :
Use cream yarn for the snowflake. Keep tension slightly looser for the arms to lie flat on the blue panel. Change to 3.5mm hook if you prefer crisper points.
Round 5 :
(3 sc, inc) x 6. (30)
Round 6 :
(4 sc, inc) x 6. (36)
Round 7 :
(5 sc, inc) x 6. (42)
Round 8 :
1 sc in each st around. (42)
Info :
Mark six evenly spaced anchor points to form the six snowflake arms. Place a stitch marker in the center of each 7-stretch around the current circle (every 7th stitch approximates even spacing with 42 sts).
Round 9 :
Working from RS, *ch 6, sl st into marked anchor point (counts as spur for arm), ch 3, sl st back into same anchor point; move to next anchor point; rep from * five more times to create 6 small loops. Finish with sl st to join. (6 loops made)
Round 10 :
Turn work to begin building arms: Work into each ch-6 loop as follows: *(sl st into loop, ch 2, (hdc, dc, tr) in loop, ch 2, sl st back into loop). Repeat for each of 6 loops. (6 formed arm bases)
Round 11 :
For each arm: join with sl st at base, ch 1, 1 sc into base, ch 3, (1 sc, ch 3) three times to form three small branch positions along arm stem, then 1 sc at tip. Repeat on each arm. (6 full arm stems)
Info :
Arms are symmetrical; work slowly and use stitch markers to identify the center of each arm if needed. Keep branches evenly spaced for uniform snowflake shape.
Round 12 :
Working on the first branch of each arm: in each ch-3 branch, work (sc, ch 3, sc) to make a small picot branch. Repeat each time for the three branches on each arm. (18 small picot branches total)
Round 13 :
At each arm tip: ch 2, 3 hdc in last sc, ch 2 and sl st to attach back to arm tip. This gives a rounded tip. Repeat for each arm. (6 rounded tips)
Round 14 :
Working behind the arms, pick up the central circle by working 1 sc in each of the 42 sts to re-establish a stable interior ring. (42)
Info :
Check symmetry and tweak picot sizes by pulling lightly on branch loops. If a branch looks large, steal a chain or replace hdc with sc for that branch.
Round 15 :
Embellish each arm by inserting hook through strand between central circle and arm base, ch 2, work 3 sc around the arm stem to make a slightly raised ridge; sl st back to center. Repeat for all six arms. (subtle raised ridge created)
Round 16 :
Working all around the center, *ch 1, sc in next st; rep around for a neat edging. (42)
Round 17 :
Surface detail: using slip stitch surface crochet, trace each arm outline with sl sts to add relief for the snowflake. Move evenly and stop at each tip. (surface tracing complete)
Round 18 :
Fasten off leaving a 20-25cm tail for sewing. Weave tail to wrong side and secure. Block lightly by pinning to a flat surface and misting to hold shape.
Info :
Sew appliques onto panels before the border is worked: place each snowflake centered in the panel repeat and sew through the center ring and along arm bases with small whip or invisible stitches. Use matching cream yarn and secure tightly.
— Rectangular Panel Module (Make 5 panels; each panel holds one centered snowflake) :
Round 1 :
With deep blue, ch 6, join with sl st to form a ring, ch 3 (counts as dc), 11 dc into ring, join to top of ch-3 with sl st. (12 dc)
Round 2 :
Ch 3, dc in same st, *ch 2, 2 dc in next dc; rep from * around, join. (12 2-dc clusters separated by ch-2 sps)
Round 3 :
Sl st into next ch-2 sp, ch 3 (counts as dc), 2 dc in same sp, ch 1, 3 dc in next ch-2 sp, ch 1; rep around to form 12 shell clusters separated by ch-1 sps; join. (12 shells)
Round 4 :
Sl st to center top of a shell, ch 3, (2 dc, ch 2, 3 dc) in each ch-1 sp around to increase into a small 12-shell circle. Join. (12 shells)
Info :
This construction begins as a motif that will be expanded into a rectangular repeat. Keep the circle centered and flat; if cupping occurs, block gently before proceeding to outward rounds.
Round 5 :
Ch 3, dc in same st, *ch 1, dc in next dc, ch 1, (3 dc, ch 1, 3 dc) in next ch-2 corner; rep to expand. This round establishes the first square-like corners. Join. (count varies but maintain shell corners)
Round 6 :
Working into sides, create alternating groupings: in each side sp work (dc, ch 2, dc), between shells work 1 dc into next space. Maintain four corner shell clusters. Join. (approx 48–56 dc total depending on spacing)
Round 7 :
Ch 1, sc in each dc across each side to create a more solid strip, and make ch-3 corners where needed to keep edges straight. Join. (solidified side edges)
Info :
From Round 8 onward, you will expand the motif into a rectangle rather than a perfect square. Identify the two long edges (these will become runner length) and increase shell repeats along those edges to elongate the panel.
Round 8 :
Ch 3, dc in same st, *dc in next 2 sts, (3 dc, ch 2, 3 dc) in corner shell, dc in next 6 sts to extend length; rep across opposite sides to add an extra shell repeat on the long edges. Join. (panel elongated)
Round 9 :
Work 1 sc in each stitch around for two rounds to even the edge and decrease visible holes. (same stitch count maintained)
Round 10 :
Ch 3, turn and work cluster pattern across the long edges: (2 dc, ch 1, 2 dc) in each ch-1 space along the long edges to create decorative openwork rows; work 1 dc in each sc on short sides. Join. (openwork on long edges established)
Round 11 :
Repeat Round 9: 1 sc in each st around to stabilize the worked openwork. (stable edge)
Info :
After Round 11 you should have a small rectangular module approximately 14 cm wide by 22 cm long (approximate—your gauge will vary). Block this module to final size before continuing to make multiple modules.
Round 12 :
Increase the long edges again: In the center of each long side, create (3 dc, ch 2, 3 dc) additional shell clusters every 8 stitches to lengthen each panel. Join. (panel length increases by ~4–6 cm depending on clusters)
Round 13 :
Work two rounds of 1 sc in each st to even the surface and ensure a neat base for applique placement. (even edge)
Round 14 :
Work a decorative fill row: *ch 3, sk 1 st, sc in next st; rep across short sides, and on long sides place (dc, ch 1, dc) in each shell top to create a lacy mesh. Join.
Round 15 :
Repeat Round 13: 1 sc in each st around to stabilize mesh. (consistent edge)
Info :
At this stage decide how many panels you will join. The pictured runner uses five panels with one snowflake each spaced evenly; you can make more or fewer panels to fit your table. Make all panels the same block size by careful counting and blocking.
Round 16 :
Increase long-edge repeats a final time: add one shell repeat in the exact middle of each long side by working (3 dc, ch 2, 3 dc) centered on the side. Join. (final panel length set)
Round 17 :
Work 3 rounds of 1 sc in each st around to create a solid edge that will be used for seam joining and sewing the snowflake flat. (edge ready for tacking)
Round 18 :
With RS facing, count the central region and mark the center point of the panel. This is where the snowflake will be sewn. Use pins to place snowflake before permanent sewing. (center marked)
Round 19 :
Sew the snowflake applique to the panel: with the cream tail, start at one arm base, take a small stitch through the panel center and through the center ring of the snowflake, continue to tack each arm base every 3–4 mm to ensure the arms are flat and secure. Tie off and weave in ends. (snowflake attached)
Info :
Sewing tip: use small whipstitches underneath the raised arm bases so that stitches remain invisible on the RS. Anchor the center well, then tack each arm base into the underlying shell spaces to keep everything aligned.
Round 20 :
Make a second snowflake in the same manner and center it in the next panel; repeat panels until you have all desired repeats (recommended 5 panels for the runner pictured). (make 5 snowflakes total)
Round 21 :
After applique placement, work one round of sc around the full panel in cream if you want a framed look for each panel. (optional contrasting frame)
Round 22 :
Fasten off and block each panel to identical dimensions. Use pins and a tape measure to match corners and edges. Allow to dry fully. (panels blocked)
— Joining Panels (Join-as-you-go technique for a seamless look) :
Info :
Join panels on the long edges so the runner becomes a continuous strip. We'll join panels into a column: place panel A (RS up) and panel B (RS down) aligning long edges. We'll join with slip stitch through both panel edges using deep blue to create a nearly invisible seam, then pick up with cream border later.
Round 1 :
With RS of Panel A facing, join yarn at long edge corner with sl st. Ch 1, *sl st in next 3 sts of Panel A, insert hook into corresponding 3 sts of Panel B and sl st through all 3 loops; rep across entire long edge. Fasten off. (joined long edge)
Round 2 :
Repeat join for each pair of panels until all panels are joined in a straight column. Ensure panels are oriented identically so snowflakes read in the same direction. (full column assembled)
Info :
For a slightly raised seam, work a second pass of sl sts from the RS into the seam to neaten and flatten joining stitches. Pin panels first to prevent shifting while joining.
Round 3 :
After joining, work 1 round of sc across the seam on both RS and WS to level the seam and make it ready for border stitches. (seam reinforced)
— Outer Scalloped Border (worked in cream) :
Round 1 :
Join cream yarn at one short end corner. Ch 1, evenly place 1 sc in each stitch across the short edge and around the long edge working into the outermost sc rounds of panels; chain 2 in corners to preserve shape. Join with sl st to first sc. (even edging established)
Round 2 :
Ch 3, *skip next 2 sts, (5 dc in next st), skip next 2 sts, sc in next st; rep around to create a scallop shell every 3–4 sts depending on panel stitch count. Work (sc, ch 2, sc) in corner spaces to keep scallops turning corners. Join. (first scallop row complete)
Info :
Adjust spacing of shells to produce 12–14 scallops along each long edge; spacing should be consistent for corners to align with short-edge scallops. Use extra sc in short edges to maintain symmetry.
Round 3 :
Ch 1, sc in each dc of the shell shells' centers to stabilize, then in each 5-dc shell work (sc, ch 2, sc) into the middle dc to create a small picot for added texture. Join. (scallop centers stabilized)
Round 4 :
For deeper scallops, in each 5-dc shell from Round 2 work (2 dc, tr, 2 dc) all into the center dc of the shell to create pronounced shells. In corner shells work (2 dc, tr, 2 dc) to preserve rounded corners. Join. (deep scallop row complete)
Info :
For the runner pictured, two rows of scallops give the finished thick border. If you prefer a lighter border, stop after Round 2. Blocking will open scallops evenly.
Round 5 :
Work one final round of sc around to tidy scallop bases and conceal joining threads beneath the shells. Fasten off and weave in all ends on the WS. (border finished)
— Finishing Touches & Optional Decorative Dots :
Round 1 :
With a small amount of cream yarn and a tapestry needle, add tiny French-knot style dots (3 sc cluster sewn) at each junction point inside the blue field to mimic the little cream dots visible in the fabric. Space evenly between shell clusters. (dots added)
Info :
These tiny dots are optional but add a handcrafted detail that echoes the snowflake color. They are sewn instead of crocheted to avoid altering the panel geometry.
Round 2 :
Final blocking: Lay runner flat, pin scallops to even spacing and measure lengths and widths. Mist with water and allow to dry fully. Steam lightly with an iron on low (use a pressing cloth) if needed to flatten high spots. (final blocking complete)
Round 3 :
Care instructions: Hand wash or machine wash gently in cold water in a delicates bag, reshape and dry flat. Avoid heavy agitation which can distort scallops over time. (care notes)
Info :
If you prefer a longer runner, add extra panel modules and repeat the joining and border sequence. Panels are modular and scale linearly: add one more panel increases length by the panel length (after blocking).
Your finished snowflake runner will be a beautiful seasonal centerpiece — crisp cream snowflakes floating on a deep blue field, trimmed in a soft scalloped border. Each panel and applique comes together like a little piece of winter embroidery. I hope this pattern becomes one of your favorite handmade holiday traditions. 🧶❄️ Happy stitching and enjoy making a beautiful table accent! 🎉