About This WOLF HAND PUPPET Amigurumi Pattern
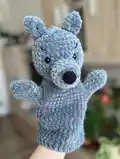
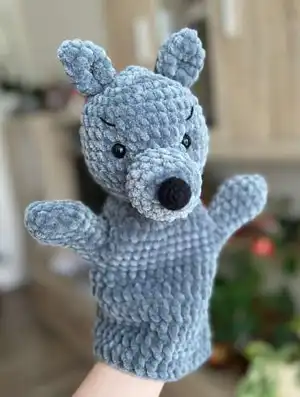
This pattern teaches you how to crochet a 27 cm (10") wolf hand puppet using super-bulky plush yarn for a soft, toy-like feel. You will crochet the head, muzzle, nose, ears, arms and body, and learn simple assembly techniques. The instructions include stitch counts, placement notes, and helpful photo guidance for accurate shaping.
The design is worked mostly in continuous rounds with clear increase and decrease sequences for shaping. Finished puppet is ideal for play, storytelling, and as a handmade gift.
Why You'll Love This WOLF HAND PUPPET Amigurumi Pattern
I absolutely love this pattern because it transforms soft plush yarn into a charming, poseable hand puppet that children and adults adore. I enjoy the quick progress you see as each piece comes together, especially the satisfying shaping of the head and muzzle. The construction balances simple amigurumi techniques with clever assembly steps that make the final puppet sturdy and expressive. It is a great way for me to share a joyful, handmade toy that can be completed in just a few hours.
Switch Things Up
I love customizing this pattern with color changes — try a lighter gray muzzle or inner ear to add contrast.
You can make a mini version by using thinner yarn and a smaller hook for a pocket-sized puppet or keyring friend.
I sometimes embroider different expressions by changing eyebrow position to give the wolf a playful or sleepy look.
Swap the plastic eyes for safety-stitched eyes if you prefer a fully hand-stitched toy for babies or daycare-safe gifts.
Try adding a tiny crocheted scarf or hat using leftover yarn to give your puppet character and seasonal charm.
For a sturdier, posable puppet, insert thin wire into the arms before assembly to allow adjustable poses during play.
Use variegated or speckled plush yarn for a unique furry texture that hides small stitch inconsistencies.
Make a whole set of woodland creatures using the same body pattern but change head details to create foxes, bears, or rabbits.
I sometimes stitch felt teeth or small felt accessories for story props—just glue or hand-stitch them securely for durability.
If you want a softer mouth area, use a lighter stuffing and place a small piece of felt inside the muzzle before sewing to add structure.
Common Mistakes & How to Fix Them
✗ Skipping stitch markers during rounds can cause you to lose the beginning of each round; place a marker at the start of every round to keep your stitch counts accurate.
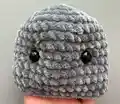
✗ Forgetting to insert safety eyes at the recommended rounds will misplace facial features; attach the eyes between rounds 10 and 11 with 7 SC between them as instructed.
✗ Overstuffing the muzzle or head can cause bulging and distort shaping; stuff gradually and shape gently while following the round instructions.
✗ Not leaving long sewing tails when indicated results in difficult assembly later; leave the recommended 20 cm tails for sewing and secure them when attaching pieces.