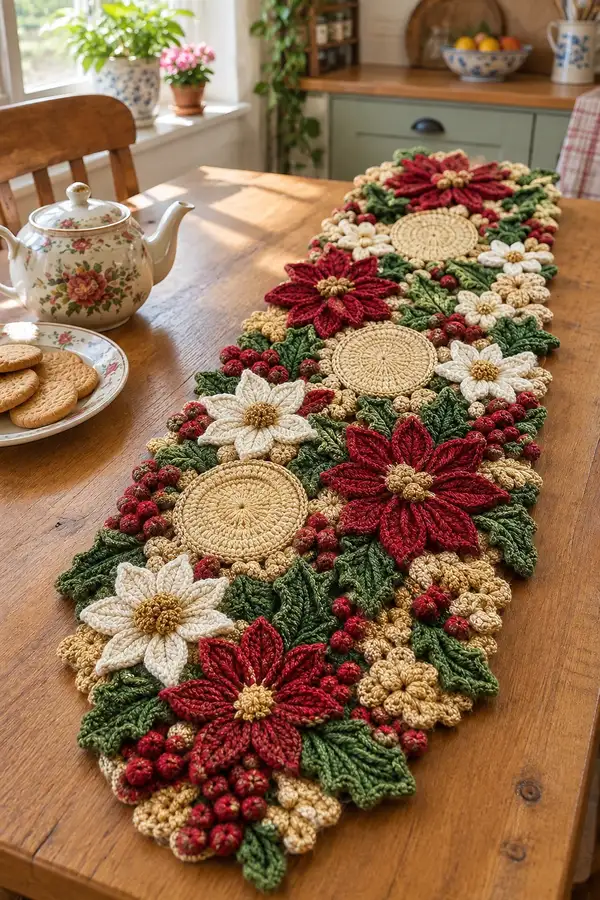
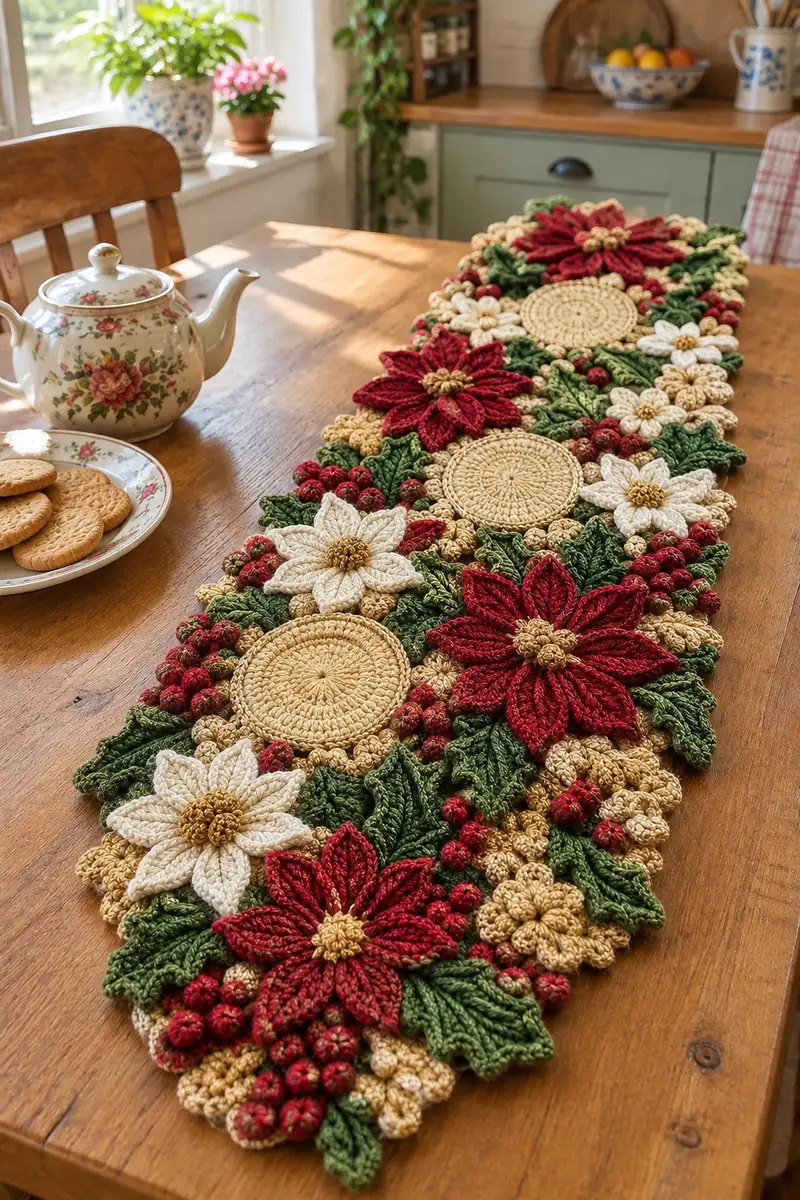
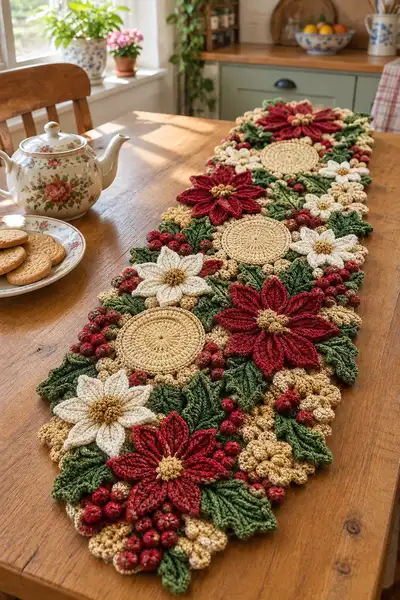
Create a festive, layered poinsettia table runner with dimensional flowers, berries and leaves for holiday decorating. This richly textured runner features deep red poinsettias, cream flowers and gold accents built from separate motifs and joined into a long runner. The finished piece sits beautifully on a wooden dining table and works as a centerpiece for tea and treats.
Progress Tracker
0% Complete
— Materials & Gauge :
Info :
Gauge is not critical for an openwork runner but for consistency measure medallion diameter. Using 3.5 mm hook with worsted cotton expect approx 10 cm (4 inches) diameter for round medallion after blocking. Adjust hook if you prefer tighter or looser fabric. Work tightly for crisp 3D petals.
— Center Medallion (make 3 to 4) :
Round 3 :
(1 sc, inc) x 6 (18)
Round 4 :
(2 sc, inc) x 6 (24)
Round 5 :
(3 sc, inc) x 6 (30)
Info :
At this point medallion is forming flat. Keep stitches even; if you see cupping, stop increasing earlier. For a slightly cupped medallion leave out final increase round to reduce diameter by one round.
Round 6 :
(4 sc, inc) x 6 (36)
Round 7 :
1 sc in each st (36)
Round 8 :
1 sc in each st BLO (36)
Info :
Work BLO on round 8 to create a ridge for decorative scallop join. You can substitute a round of hdc to make the medallion slightly thicker.
Round 9 :
(3 sc, 1 inc) x 6 (42)
Round 10 :
1 sc in each st (42)
Round 11 :
Slip stitch around then fasten off leaving long tail for joining. Weave tail into back and secure.
Info :
After making medallion, wet-block or steam gently and pin flat to maintain circular shape. Make 3-4 medallions and set aside for later joining.
— Medallion Scallop Edge (optional, around each medallion) :
Round 1 :
With medallion face up, join yarn in outermost loop of any stitch, ch1, *(sc, ch2, sc) in next st, skip next st; rep from * around, join with sl st to first sc. Adjust spacing to have 12-14 scallops depending on medallion circumference.
Info :
This decorative scallop will help the medallion sit integrated among petals and small flowers. Fasten off and weave ends.
— Large Poinsettia Flower (make 4 large red flowers) :
Info :
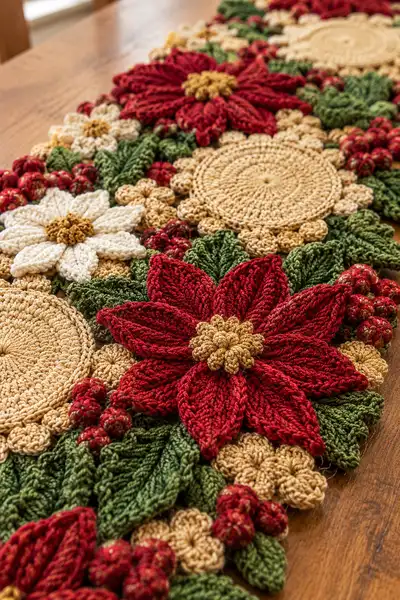
Each large poinsettia is built with a small central disk and eight elongated petals crocheted and shaped individually then joined to the center. Petals use front post stitches and treble clusters to create height and ribbing.
Poinsettia Center Round 1 :
6 sc in MR (6)
Round 3 :
1 sc in each st (12)
Round 4 :
Slip stitch to finish center and leave long tail for sewing petals. Fasten off center yarn. Make a cluster of 8-10 small popcorns into center with gold yarn (see bobbles section) and sew to middle when complete.
Info :
Make the center small and slightly raised. Use metallic gold or warm beige to contrast with red petals.
Petal (make 8 per flower) Round 1 :
Ch 9, 1 sc in 2nd ch from hook, 1 hdc in next, 1 dc in next, 3 tr in next ch (forming the tip), then working back down the opposite side of chain: 1 dc, 1 hdc, 1 sc; sl st to join at base. Fasten off leaving long tail for sewing. (counts vary by stitch type but petal measures approx 6 cm)
Info :
These are simple chain petals; to make them 3D and ribbed substitute the center chains with tr clusters worked in the row below for height. For consistent width make each petal with exact stitch sequence and tension.
Petal Variation (ribbed petal) Round 1 :
Ch 10, 1 sc in 2nd ch from hook, 1 hdc in next, 1 dc in next 2 chs, 1 tr, 1 dtr at center ch, then reverse: 1 tr, 2 dc, 1 hdc, 1 sc; sl st to base. Fasten off. Repeat for 8 petals.
Info :
To add strong vertical ribbing, after making all petals, use a contrasting thread to couch a central running stitch down each petal’s center to pull into a pronounced ridge, or use a few rows of fpdc and bpdc when creating the petal so the rib is built into the petal.
Poinsettia Assembly Round :
Arrange 8 petals evenly around center disk. Pin in place so the petals overlap slightly at their bases. Using long tails, sew each petal to the center with whip stitch through center and first 2 rounds of petal base. After sewing all petals, secure and weave in ends.
Info :
Make sure petals are offset so seams are hidden beneath adjacent petals. Slightly curve petals upward when sewing to create 3D shape.
— Small Star/Cream Flower (make 6) :
Round 3 :
1 sc in each st (12)
Info :
These small star flowers are 6-petal stars. Petals are made directly from round 3.
Round 4 (petals) :
*ch 4, [sl st] back into base to form petal loop, ch 2, sl st into next st; rep from * around to make 6 loops. Fasten off and shape petals outward. Sew a small gold popcorn cluster in center (see bobble instructions)
Info :
Vary petal height by changing ch count to 3 or 5. Use cream for the petals and gold for small centers.
— Small 5-Petal Flower (gold clusters) (make 10-12) :
Round 2 :
*(ch 3, 3 dc in same st, ch 3, sl st) into next st to create small puff petal; rep from * around for 5 petals, join and fasten off. (5 petals)
Info :
These small golden flowers act as filler and also sit beneath leaf clusters to build depth. Work tightly to keep them small and compact.
— Berry Bobble (make many clusters of 3-6 berries) :
Round 3 :
*Make a bobble: (yo, insert, pull through, yo, pull through 2) x4 on same stitch to form bobble, then close bobble by finishing sequence and sl st into next st; rep 3 times around to create 3 small bobbles in cluster. Fasten off leaving tail for sewing. (clusters are made of 3 bobbles)
Info :
If you prefer a smooth round berry, make a small tight amigurumi ball: MR 6 sc, 6 inc (12), 1 sc around (12), fasten, sew closed and stuff lightly. Use bobbles for texture and smaller scale.
— Medium Golden Seed Clusters (make many) :
Round 2 :
*Ch 2, 3 dc in same st, sl st into next st; rep from * around for 6 mini petals or clusters. Fasten off leaving tail for sewing. These are used around medallion edges and petals.
Info :
Use metallic yarn for sparkly seeds or a slightly different warm gold to create contrast with the medallion discs.
— Elongated Leaf (make 20-28) :
Round 1 :
Ch 15, 1 sc in 2nd ch from hook, 1 hdc in next, 3 dc in next 6 chs forming the wide middle, 1 hdc, 1 sc, then along opposite side of foundation ch work 1 sc, 1 hdc, 3 dc in next 6 chs, 1 hdc, 1 sc; sl st to join at base. Fasten off leaving a tail for sewing.
Info :
For a sculpted leaf use fpdc and bpdc alternately across the middle of the leaf to create a visible midrib and veins. Alternatively, stitch veins with yarn needle after blocking by couching thin yarn down the center and sewing faint diagonal veins.
Round 2 (vein shaping) :
With right side facing, rejoin yarn at leaf base, ch1, *fpdc around center 3 stitches for raised vein, then bpdc either side for texture; rep if necessary to create 3-4 ribbed ridges. Fasten off and block leaf flat with slight curl at tip.
Info :
Block leaves over a slight curve to mimic natural leaf shape; pin edges slightly downward while wet-blocking to set shape permanently.
— Small Rounded Leaf (make 18-24) :
Round 1 :
Ch 9, 1 sc in 2nd ch from hook, 1 hdc, 3 dc in next 4 chs, 1 hdc, 1 sc, work back along foundation ch 1 sc, sl st to join. Fasten off.
Info :
These small leaves fill gaps between petals and medallions. Work in slightly different shades of green for a natural look.
— Joining & Layout Preparation :
Info :
Before joining, block all motifs flat. Arrange the runner on a large table or blocking mat. Layout sequence typically is: half medallion + poinsettia + medallion + poinsettia + medallion (for a 3-medallion narrower runner) or medallion alternating with large flowers to desired length. Small gold flowers and berries sit at gaps and edges. Pin everything in place carefully, matching edges so leaves and petals overlap naturally to form a continuous border.
Joining Step 1 :
Using long tail from each medallion or a matching yarn, use whip stitch to tack medallions to their adjacent leaf bases and flower centers. Stitch through back loops of medallion and base stitches of petals or leaves so seam is hidden. Make sure medallions are level with flowers; test spacing and re-pin as needed.
Info :
Start joining from the center of the runner and work outward to ensure symmetry. Use pins liberally while sewing; the organic arrangement is important to the overall look.
Joining Step 2 :
Sew large poinsettias to base medallions by attaching petal bases and a few stitches at petal tip overlaps to neighboring leaves or small flowers. Reinforce the center by sewing the gold popcorn cluster to both the center disk and the petal bases so the flower stays raised.
Info :
Where gaps remain, fill with small golden flowers and berry clusters. Sew tiny clusters so they sit elevated just above the background to give layered depth.
— Decorative Edge & Final Attachment Rounds :
Edge Round 1 :
With contrasting gold yarn, join anywhere on outer edge, ch1, *sc evenly around outermost outlines of leaves and flowers, working 2 sc in concave corners to keep runner flat; rep around and join with sl st. (Count depends on assembled perimeter)
Info :
This round unifies the different elements and reduces gaps. Work loosely where petals overlap to avoid puckering.
Edge Round 2 (picot scallop) :
*Ch 3, sl st in next st to form picot, skip 2 sts, sc in next; rep around to form decorative edging; finish and weave ends. This soft scallop complements the layered motif edges.
Edge Round 3 (optional crocheted lace fill) :
For a more finished lace, work alternating chains and slip stitches bridging small gaps between motifs: *sl st into motif A, ch4, sl st into motif B; rep across gaps. Fasten off and secure.
Info :
If your runner gaps too much between major motifs, add bridging leaves or mini clusters sewn into those gaps before working the final edge rounds.
— Alternative Petal Construction (Layered Petals for extra depth) :
Round 1 :
Make inner petal layer: ch8, 1 sc in 2nd ch, 1 hdc, 2 dc, 1 hdc, 1 sc; fasten off. Make outer petal layer: ch12 with central long stitches (tr,dtr,tr) to form longer petal and sew outer layer behind inner for strong 3D effect. Repeat for all petals.
Info :
Layered petals increase the round counts dramatically but deliver dramatic depth. Use smaller hook for inner layer so it sits neatly under the outer petals.
— Extra Texture: Working Raised Veins and Ridges :
Round 1 :
To create a pronounced vein on leaves or petals, rejoin yarn at base of leaf, ch1, work 6-8 fpdc along center of the leaf in a single row, then finish with sc around base. This forms a raised midrib that catches light and shadow.
Info :
Use a slightly darker green for the fpdc rib or the same yarn held doubled for an extra pronounced ridge. This technique adds visual interest when photographed under directional light.
— Finishing Touches & Weaving Ends :
Info :
Once all motifs are joined and edges completed, carefully weave in all ends into the underside of the runner with a yarn needle. Ensure that any joining threads are secured with a few back stitches for strength. Steam-block the whole runner lightly to settle seams and flatten any slight waves.
Final Step :
Trim stray fibers and inspect the underside to make sure no loose tails will catch on table use. Lay runner on table and arrange additional small decorations (pine sprigs, candles) as desired for display.
Info :
Store runner flat if possible or rolled on a tube to avoid crease lines. If you must fold, place tissue between folds to protect raised petals.
Completing this festive runner is immensely rewarding — it brings together texture, colour and holiday spirit into a beautiful table centerpiece. Each stitched petal and leaf layers into a joyful, tactile arrangement that will brighten your holiday gatherings. Display it with candles and seasonal greenery, and enjoy the compliments that follow! 🎄🧶✨