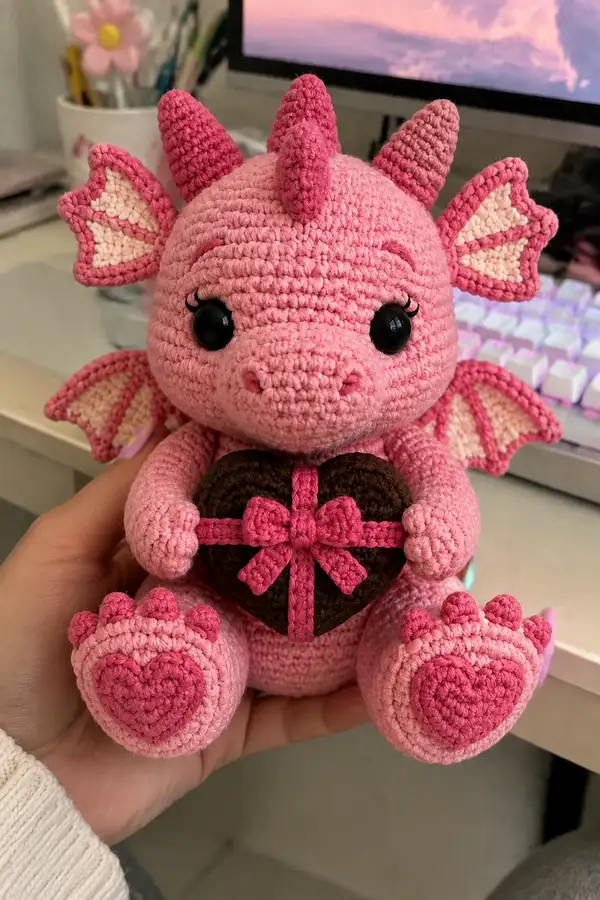
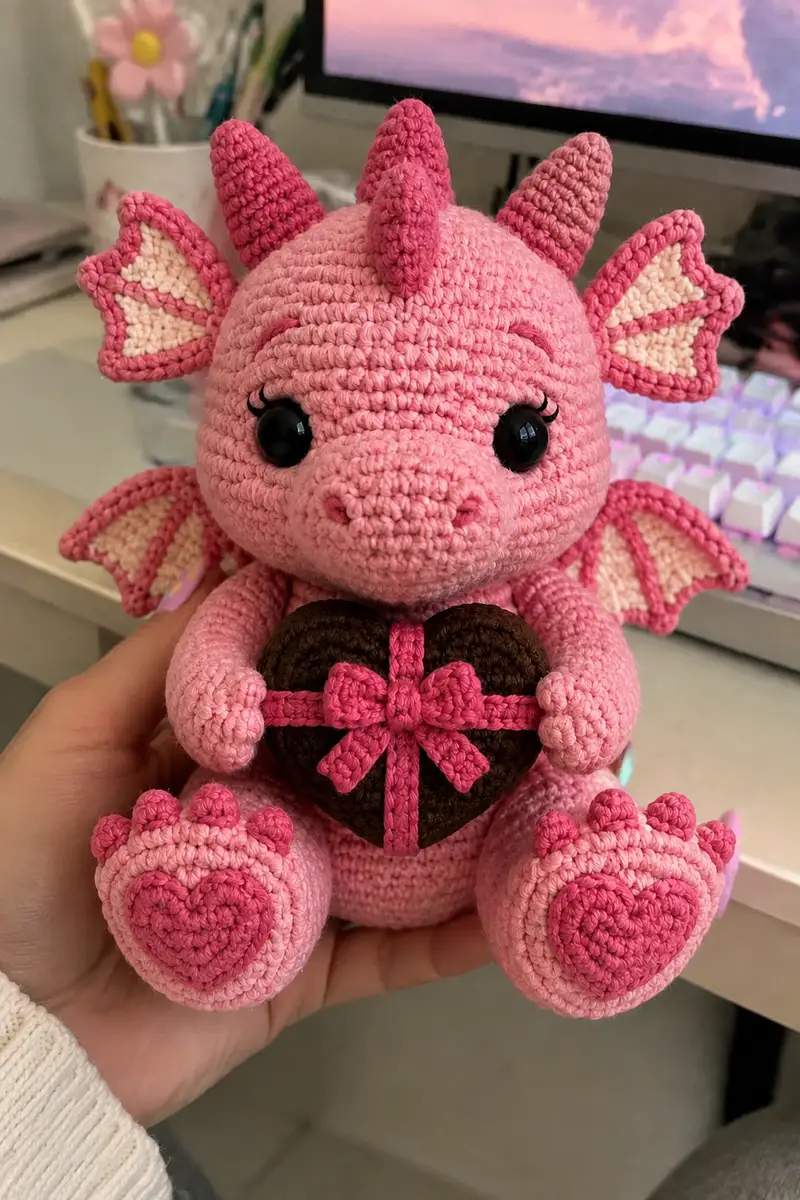
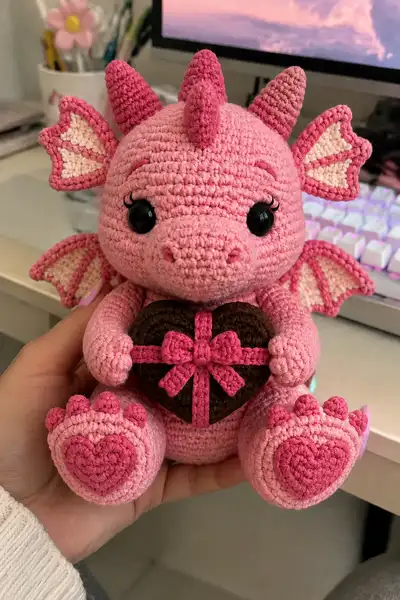
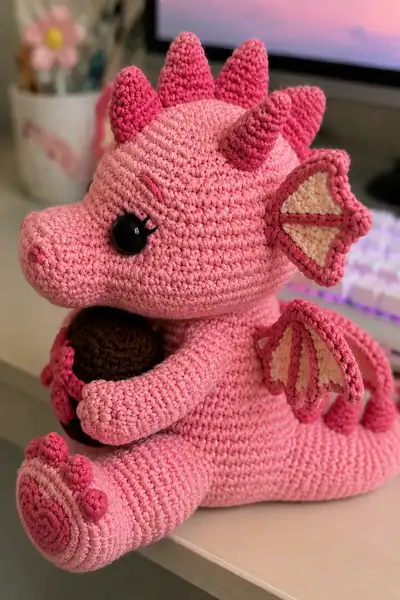
Create a squishy, candy-pink dragon amigurumi holding a chocolate heart box with an adorable bow. This pattern recreates the plush, rounded head, expressive safety eyes with tiny lashes, layered scalloped wings with cream interiors, heart-shaped paw pads and tiny horns and spikes down the back. Detailed round-by-round instructions and assembly guidance make this an engaging intermediate project with charming results.
Progress Tracker
0% Complete
— Head :
Round 1 :
6 sc in magic ring (6)
Round 3 :
(1 sc, 1 inc) x 6 (18)
Round 4 :
(2 sc, 1 inc) x 6 (24)
Round 5 :
(3 sc, 1 inc) x 6 (30)
Round 6 :
(4 sc, 1 inc) x 6 (36)
Round 7 :
(5 sc, 1 inc) x 6 (42)
Round 8 :
(6 sc, 1 inc) x 6 (48)
Round 9 :
(7 sc, 1 inc) x 6 (54)
Round 10-15 :
1 sc in each st (54)
Info :
Insert safety eyes between rounds 13-14 (count from top of head) spaced approximately 10 stitches apart (measure visually: eyes are ~10 sts between centers with 54 sts circumference). Mark the first stitch of each round with a stitch marker.
Round 16-18 :
1 sc in each st (54)
Info :
Optional: embroider small lashes with black yarn on the outer top of each eye using 3 small vertical stitches arcing outward. Place nostril placement later when snout is joined.
Round 19 :
(7 sc, 1 dec) x 6 (48)
Round 20 :
(6 sc, 1 dec) x 6 (42)
Info :
Begin stuffing the head firmly but evenly. Use small amounts of fill to maintain roundness around the eyes, add more as shape forms. Keep stuffing moderate to allow neck join later.
Round 21 :
(5 sc, 1 dec) x 6 (36)
Round 22 :
(4 sc, 1 dec) x 6 (30)
Round 23 :
(3 sc, 1 dec) x 6 (24)
Round 24 :
(2 sc, 1 dec) x 6 (18)
Round 25 :
(1 sc, 1 dec) x 6 (12)
Info :
Leave the opening slightly larger now — the snout will be joined onto rounds 26-30 area. Finish stuffing head to desired firmness, focusing more fill in upper head than neck area.
Round 26 :
1 sc in each st (12)
Round 27 :
(1 sc, 1 inc) x 6 (18)
Round 28 :
(2 sc, 1 inc) x 6 (24)
Round 29-31 :
1 sc in each st (24)
Info :
These rounds form the neck opening where body will attach. Fasten off leaving a 20-25 cm tail for sewing. Reinforce top of head with a few hidden stitches around eye area if needed.
— Snout :
Round 1 :
6 sc in magic ring (6)
Round 3 :
(1 sc, 1 inc) x 6 (18)
Round 4 :
(2 sc, 1 inc) x 6 (24)
Round 5-8 :
1 sc in each st (24)
Info :
Work in continuous rounds. After round 8 decrease slightly on the bottom to create a slightly oval profile that will be sewn onto head front. Start stuffing lightly from round 5 onwards.
Round 9 :
(2 sc, 1 dec) x 6 (18)
Round 10 :
(1 sc, 1 dec) x 6 (12)
Info :
Leave a long tail for sewing. Stuff snout quite firmly so the nose projects nicely. Position snout on head so it aligns under safety eyes and sew securely with whip stitch all around. Use top stitches to create two small sewn nostrils by bringing needle through twice each side to form little dimples.
— Head Horns & Spikes (Make 5; 3 medium back spikes, 2 small horns) :
Horn Type A (Make 3 medium) Round 1 :
6 sc in magic ring (6)
Round 3 :
(1 sc, 1 inc) x 6 (18)
Round 4 :
1 sc in each st (18)
Round 5 :
(3 sc, 1 dec) x 4 + 2 sc (14)
Round 6 :
1 sc in each st (14)
Round 7 :
(2 sc, 1 dec) x 3 + 2 sc (11)
Round 8 :
1 sc in each st (11)
Round 9 :
Fasten off leaving long tail for sewing. Lightly stuff leaving base slightly flat for stable sewing (11)
Info :
Place medium horns along the top center of head: center one slightly forward and the others spaced behind evenly. Sew firmly through head stitches and reinforce with extra stitches at the base.
Horn Type B (Make 2 small) Round 1 :
6 sc in magic ring (6)
Round 3 :
(1 sc, 1 inc) x 6 (18)
Round 4 :
(2 sc, 1 dec) x 6 (12)
Round 5 :
1 sc in each st (12)
Round 6 :
Fasten off leaving tail for sewing. Lightly stuff (12)
Info :
Small horns are positioned slightly forward on the head near brow level. Sew in place and tack down with 2-3 passes. Trim and weave ends inside head.
— Ears (Make 2) :
Outer Ear Round 1 :
6 sc in magic ring (6)
Round 3 :
(1 sc, 1 inc) x 6 (18)
Round 4 :
(2 sc, 1 inc) x 6 (24)
Round 5 :
1 sc in each st (24)
Round 6 :
BLO 1 sc in each st (24)
Round 7 :
Fold ear flat, join with sl st along short edge to shape scallop, fasten off leaving long tail for sewing
Inner Ear (Make 2) Round 1 :
6 sc in magic ring (6)
Round 3 :
(1 sc, 1 inc) x 6 (18)
Round 4 :
1 sc in each st (18)
Info :
Sew inner ear to outer ear centering the cream panel. Edge both pieces with darker pink single crochet around to create defined scalloped border. Position ears at head sides between rounds 8-11 and sew with small hidden stitches so they slightly fan outward.
— Body :
Round 1 :
6 sc in magic ring (6)
Round 3 :
(1 sc, 1 inc) x 6 (18)
Round 4 :
(2 sc, 1 inc) x 6 (24)
Round 5 :
(3 sc, 1 inc) x 6 (30)
Round 6 :
(4 sc, 1 inc) x 6 (36)
Round 7 :
(5 sc, 1 inc) x 6 (42)
Round 8 :
(6 sc, 1 inc) x 6 (48)
Round 9 :
(7 sc, 1 inc) x 6 (54)
Round 10 :
(8 sc, 1 inc) x 6 (60)
Round 11-18 :
1 sc in each st (60)
Info :
These rounds build the main torso. If you'd like a flatter bottom for sitting, work last few body rounds with a slightly tighter tension or insert a small stiff felt oval inside the base after sewing legs for stability.
Round 19 :
(8 sc, 1 dec) x 6 (54)
Round 20 :
(7 sc, 1 dec) x 6 (48)
Round 21 :
(6 sc, 1 dec) x 6 (42)
Info :
Begin stuffing body firmly from the bottom up. Add more stuffing as you decrease to keep a plump, stable torso. Stop stuffing slightly before the neck opening to allow easy head attachment.
Round 22 :
(5 sc, 1 dec) x 6 (36)
Round 23 :
(4 sc, 1 dec) x 6 (30)
Round 24 :
(3 sc, 1 dec) x 6 (24)
Round 25 :
(2 sc, 1 dec) x 6 (18)
Round 26 :
1 sc in each st (18)
Round 27 :
(1 sc, 1 inc) x 9 (27)
Round 28 :
1 sc in each st (27)
Info :
Rounds 27-28 form the neck cavity. Pin head into opening to check fit before sewing. Attach head by mattress or whip stitch, matching round lines, and tighten stitches to make an invisible seam.
— Arms (Make 2) :
Round 1 :
6 sc in magic ring (6)
Round 3 :
(1 sc, 1 inc) x 6 (18)
Round 4-5 :
1 sc in each st (18)
Round 6 :
(3 sc, 1 dec) x 4 + 2 sc (14)
Round 7-12 :
1 sc in each st (14)
Info :
Stuff hand area more firmly to create a rounded palm. Leave openings at top lightly stuffed because arms will be sewn flat to chest to create hugging pose. If you want poseable arms, insert thin floral wire before final stuffing and secure ends wrapped in yarn.
Round 13 :
(2 sc, 1 dec) x 3 + 2 sc (11)
Round 14 :
1 sc in each st (11)
Round 15 :
(1 sc, 1 dec) x 3 + 2 sc (8)
Round 16-20 :
1 sc in each st (8)
Info :
Fasten off leaving a long tail for sewing. Position arms on either side of body roughly between body rounds 14-20, curving inward to hug the heart. Sew through front and back of arm opening into body rounds for a secure attachment. Add extra small stitches at wrist to hold heart snugly.
— Legs (Make 2) :
Foot Round 1 :
6 sc in magic ring (6)
Round 3 :
(1 sc, 1 inc) x 6 (18)
Round 4 :
(2 sc, 1 inc) x 6 (24)
Round 5 :
1 sc in each st (24)
Round 6 :
(2 sc, 1 dec) x 6 (18)
Round 7-10 :
1 sc in each st (18)
Info :
Foot is slightly flattened on top where paw pads are sewn. After round 10, stuff firmly and place paw pad later. Begin leg shaft by continuing from round 11 upwards without stuffing too tightly until shaft finish where leg meets body.
Round 11 :
(1 sc, 1 inc) x 6 (24)
Round 12-18 :
1 sc in each st (24)
Round 19 :
(3 sc, 1 dec) x 6 (18)
Round 20 :
(2 sc, 1 dec) x 6 (12)
Round 21 :
Fasten off leaving long tail for sewing to body (12)
Info :
Place legs at bottom of body centered on base. Space them symmetrically approximately 8-10 stitches apart (depending on final body circumference). Sew with sturdy stitches and add extra reinforcement through base for stability. If you want the dragon to sit with feet forward, angle slightly outward when sewing.
— Paw Pads & Toes :
Paw Pad Heart (Make 2) Round 1 :
6 sc in magic ring (6)
Round 2 :
ch 1, in same st: sc, hdc, 2 dc, hdc, sc, sl st to form small heart shape; adjust to symmetry. Fasten off leaving tail for sewing
Info :
Alternatively crochet a small spiral circle and shape into heart by strategic increases/decreases. Sew heart pad centered onto top of foot and topstitch with matching darker pink to emphasize shape.
Toes (Make 6) Round 1 :
6 sc in magic ring (6)
Round 3 :
1 sc in each st (12); fasten off leaving short tail
Info :
Sew three toe bumps across top of each foot, spacing evenly over the front edge of the foot. Use darker pink for contrast. Position center toe slightly forward and two side toes slightly angled.
— Tail :
Round 1 :
6 sc in magic ring (6)
Round 3-7 :
1 sc in each st (12)
Round 8 :
(2 sc, 1 dec) x 3 + 3 sc (9)
Round 9-12 :
1 sc in each st (9)
Round 13 :
(1 sc, 1 dec) x 3 (6)
Round 14-18 :
1 sc in each st (6); fasten off leaving long tail for sewing
Info :
Attach a few small spikes down the top of the tail using small cones (see Horn Type B pattern reduced by 2 rounds). Sew tail into back center of body at approx body round 10, curving tail slightly to create a cuddly posture.
— Wings (Make 2 layered pieces) :
Inner Wing (cream) Round 1 :
6 sc in magic ring (6)
Round 3 :
(1 sc, 1 inc) x 6 (18)
Round 4 :
(2 sc, 1 inc) x 6 (24)
Round 5 :
1 sc in each st (24)
Info :
Inner wing forms the soft pale panel. Work evenly and block lightly if needed for even edges.
Outer Wing (darker pink) Round 1 :
ch 1, join to edge of inner wing and sc evenly around the outer edge to create scalloped border (24); round 2: *3 sc in one st, sl st in next* repeat to create scallops
Round 3 :
Join a contrasting darker pink and form three raised ridge ribs: ch 1, work 3 dc in selected sections to create three ribs across inner panel; work in FLO on previous round to make ridges if desired
Round 4-6 :
1 sc around to tidy edge; fasten off leaving tail for sewing
Info :
Sew wings to back near shoulder area (body rounds 8-12) so they slightly stick out. Add a few hidden stitches under base to secure and shape wings slightly upward for a whimsical pose.
— Chocolate Heart Box (Base and Lid) :
Heart Base - Start with brown yarn Round 1 :
6 sc in magic ring (6)
Round 3 :
(1 sc, 1 inc) x 6 (18)
Round 4 :
(2 sc, 1 inc) x 6 (24)
Round 5 :
(3 sc, 1 inc) x 6 (30)
Round 6-8 :
1 sc in each st (30)
Round 9 :
(3 sc, 1 dec) x 6 (24)
Round 10 :
(2 sc, 1 dec) x 6 (18)
Round 11 :
(1 sc, 1 dec) x 6 (12)
Round 12 :
Stuff lightly then 6 dec (6) - but do not close fully: instead flatten slightly and start shaping top of heart by sewing two lobes together using mattress stitch. Fasten off leaving long tail.
Info :
Heart is worked as two semi-domes joined to form a heart silhouette. After creating base, create lid piece identical in size but without closing fully so it can be placed over base if desired. The pictured heart is solid (no removable lid) – if you prefer a lid, leave a shallow opening.
Heart Decoration - Pink Strap and Bow Round 1 :
With darker pink, ch 2, 12 sc into chain to create flat strap (12)
Round 2 :
Sl st to join and make another mirror strap perpendicular. Fasten off. For bow: make 2 small rectangles: ch 6, sc in each ch back and forth for 4 rows, fold, wrap a small long chain around center and stitch to secure into bow shape. Sew bow to front center of heart and run straps around heart to be sewn in place.
Info :
Use thin ribbon-like crocheted straps to tie the look together. Sew straps carefully along heart edges so they look like a wrapped chocolate with a bow tied at front.
— Bow Embellishment :
Round 1 :
ch 8, sc across (7)
Round 2-4 :
Turn and sc across shaping into a small rectangle (7 sts x 3 rows)
Round 5 :
Fold rectangle in half and stitch edges together, wrap a short long chain around the middle and stitch to secure. Fasten off and sew to heart.
Info :
Sew bow centered on heart and secure strap ends under bow to appear as if they continue around the heart. Hide ends inside heart by weaving them through several stitches.
— Assembly Notes :
Info :
Pin all parts before sewing: position head centered on body opening, arms on either side hugging the heart at body rounds 14-20, legs centered on base, wings slightly above mid-body. Check angles in a 3D view before final stitches.
Info :
When sewing parts together, use the long tails left from each piece. Use ladder stitch or whip stitch and sew through both pieces for secure seams. Hide ends into body by weaving through several stitches.
Info :
For a more professional finish, place a few small reinforcing stitches with a doubled thread at points that will receive more strain (under arms, between legs and body bottom).
Info :
Final facial embroidery: using darker pink yarn, couch or stitch two soft brows just above eyes (two short curved raised lines). Use black yarn to add 2-3 short lashes at outer corners of each eye. For cheeks, you can use very light blush powder or fabric-safe paint lightly dabbed and sealed.
Info :
Weave in all yarn tails. If you find gaps where stuffing shows, tighten surrounding stitches or add a small amount of extra stuffing pulled into gaps with a blunt needle.
This adorable pink dragon amigurumi brings big personality in a compact, cuddle-ready design. Each section — from the rounded snout and sweet lashes to the scalloped wings and heart-shaped paw pads — is made with care for a polished finished piece. As you stitch the parts together, you’ll see the character come alive with charm and a loving pose holding a chocolate heart. 🧶💕✨ Make one as a special gift or a whimsical addition to your shelf — every stitch is worth it!