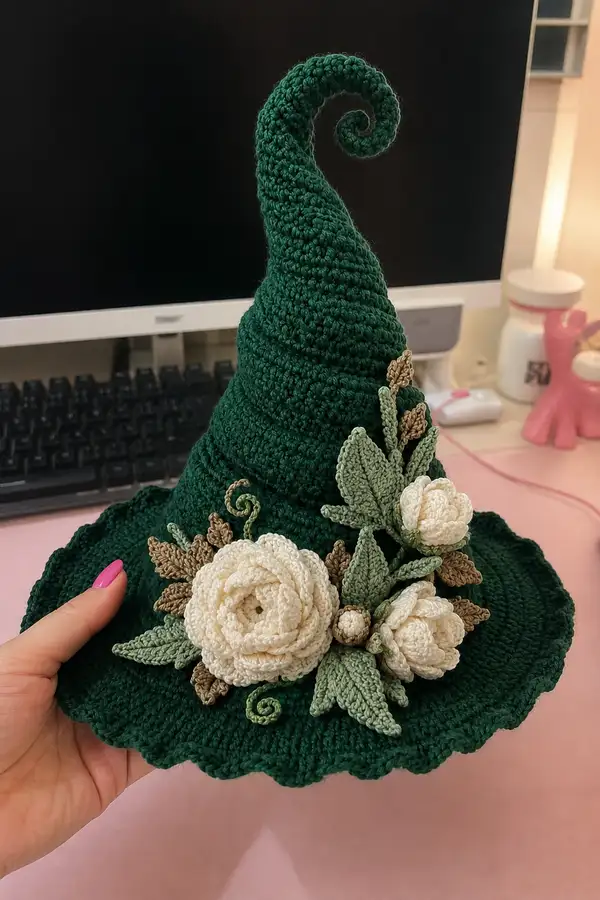
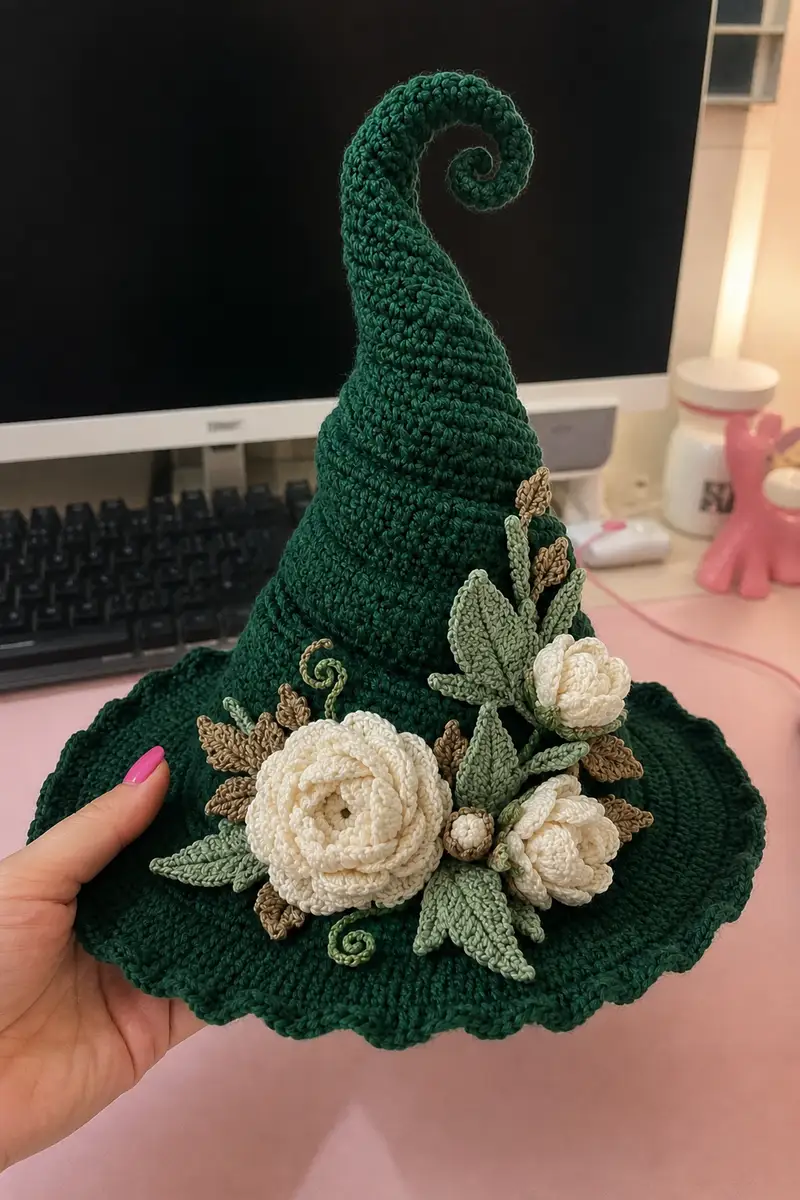
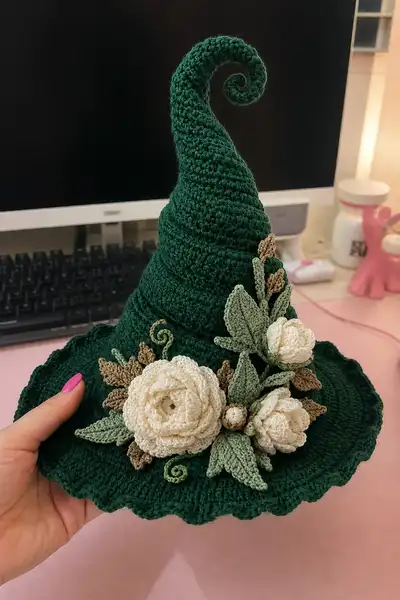
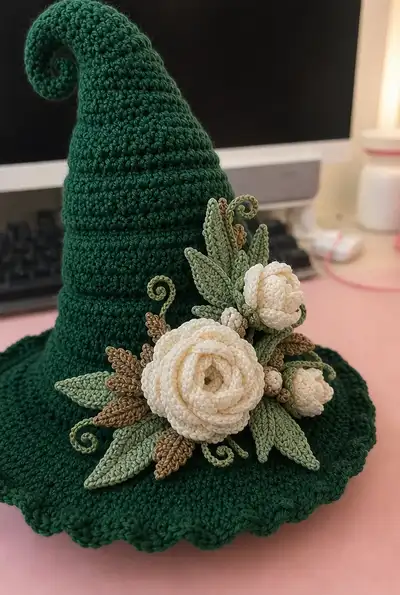
A dramatic, structured witch hat crocheted in deep emerald green with a tall spiraled tip and a wide scalloped brim. Adorned with three ivory peonies, layered sage leaves and little curled tendrils for a romantic, botanical finish. This pattern includes step-by-step rounds for crown, spiral tip, wide brim and all floral embellishments. Perfect as a decorative prop or a stunning wearable for costume and display.
Progress Tracker
0% Complete
— Crown (base of hat) :
Round 1 :
6 sc in magic ring (6)
Round 3 :
(1 sc, inc) x 6 (18)
Round 4 :
(2 sc, inc) x 6 (24)
Round 5 :
(3 sc, inc) x 6 (30)
Round 6 :
(4 sc, inc) x 6 (36)
Round 7 :
(5 sc, inc) x 6 (42)
Round 8 :
(6 sc, inc) x 6 (48)
Round 9 :
(7 sc, inc) x 6 (54)
Round 10 :
(8 sc, inc) x 6 (60)
Round 11 :
(9 sc, inc) x 6 (66)
Round 12 :
(10 sc, inc) x 6 (72)
Round 13 :
(11 sc, inc) x 6 (78)
Round 14 :
(12 sc, inc) x 6 (84)
Info :
At this point the crown circumference measures approximately the inner circle of the brim. Place a stitch marker at the start of each round and change to the continuous spiral method if you prefer seamless shaping.
Round 15-22 :
1 sc in each st around (84)
Info :
Work even for these rounds to build height. Try the hat on a foam head or measure against your head/prop as you go. If you need more height before transitioning to the spiral tip, add an extra 2-6 even rounds here.
Round 23 :
(12 sc, dec) x 6 (78)
Round 24 :
(11 sc, dec) x 6 (72)
Round 25 :
(10 sc, dec) x 6 (66)
Info :
Begin to narrow slightly where the spiral tip will join. Do not stuff the crown; it should remain open so you can sew or attach the spiral tip securely from inside. Keep rounds tidy for neat attachment.
Round 26 :
(9 sc, dec) x 6 (60)
Round 27 :
(8 sc, dec) x 6 (54)
Round 28 :
(7 sc, dec) x 6 (48)
Round 29 :
(6 sc, dec) x 6 (42)
Info :
Stop here for now and set the crown aside. This reduced opening is where the spiral tip will be joined; if you prefer a longer spiral tip start attaching at round 26 instead.
— Spiral Tip (make 1 long tapered spiral) :
Round 1 :
6 sc in magic ring (6)
Round 3 :
(1 sc, inc) x 6 (18)
Round 4 :
(2 sc, inc) x 6 (24)
Round 5 :
(3 sc, inc) x 6 (30)
Info :
We start the spiral with a small cone. If you plan to insert wire for a poseable tip, run a thin pipe-cleaner through the center after round 5 before continuing.
Round 6-12 :
1 sc in each st around (30)
Info :
Work even for several rounds to create length. The spiral will be curved by offsetting stitch counts later and by shaping as you decrease.
Round 13 :
(3 sc, inc) x 6 (36)
Round 14-22 :
1 sc in each st around (36)
Round 23 :
(4 sc, inc) x 6 (42)
Round 24-32 :
1 sc in each st around (42)
Info :
To encourage the spiral curve, every 6-8 rounds make a gentle stagger by adding BLO rounds on one side of the cone: work 1 sc BLO for one full round to create a ridge that helps the cone twist as it narrows.
Round 33 :
(4 sc, dec) x 6 (36)
Round 34 :
(3 sc, dec) x 6 (30)
Round 35 :
(2 sc, dec) x 6 (24)
Round 36 :
(1 sc, dec) x 6 (18)
Info :
Stuff the spiral tip lightly but firmly enough to hold shape. Insert the optional wire or pipe-cleaner to help shape the curl. To curl into the tight spiral shown, fold the tip toward itself and secure by whipstitching through the inner spiral layers as you go.
Round 38 :
Fasten off leaving long tail for attaching to crown. Stuff firmly but not overstuffed (6)
Info :
Join spiral tip to crown: place the tip inside the crown opening created earlier (round 28-29) and sew with mattress or invisible stitch through both fabrics around entire join. Reinforce with a second pass of stitches for security.
— Brim (work flat disc and scalloped edge) :
Info :
You can crochet the brim as a separate flat circle and sew it to the bottom edge of the crown, or work it directly onto the crown by increasing from the crown base. This pattern uses a separate brim worked from a starting circle then sewn to the crown base for cleaner shaping.
Round 1 :
6 sc in magic ring (6)
Round 3 :
(1 sc, inc) x 6 (18)
Round 4 :
(2 sc, inc) x 6 (24)
Round 5 :
(3 sc, inc) x 6 (30)
Round 6 :
(4 sc, inc) x 6 (36)
Round 7 :
(5 sc, inc) x 6 (42)
Round 8 :
(6 sc, inc) x 6 (48)
Round 9 :
(7 sc, inc) x 6 (54)
Round 10 :
(8 sc, inc) x 6 (60)
Round 11 :
(9 sc, inc) x 6 (66)
Round 12 :
(10 sc, inc) x 6 (72)
Round 13 :
(11 sc, inc) x 6 (78)
Round 14 :
(12 sc, inc) x 6 (84)
Round 15-18 :
1 sc in each st around (84)
Info :
Work the brim flat — if the circle begins to ripple, reduce increases in the last increase round by skipping 2-4 increases evenly; if the brim cups upward, add a small increase round. Aim for a flat disc that measures about 12-13 inches diameter for an adult prop; adjust as needed.
Round 19 :
Change to scalloped edging: *sk 2, 5 dc in next st, sk 2, sl st in next st* repeat around to create gentle scallops (approx 28 scallops) (84)
Round 20 :
Fasten off leaving long tail for sewing to crown. Block brim flat and pin scallops so each scallop has even shape.
Info :
Sew brim to crown: align the brim's center with the crown base and sew around using mattress stitch. Use pins to secure even seam before stitching, and weave ends neatly on the inside.
— Large Ivory Peony (Make 1 - layered spiral flower) :
Info :
This peony is constructed as a spiraled strip of petal rounds that is then coiled into a rosette and layered. Work with a smaller hook (3.0mm) for crisp petals. Each 'Round' below is actually a row in the petal strip; counts are given for clarity.
Round 1 :
Ch 36, join with sl st to form loop (36)
Round 2 :
Round of 36 sc in each ch around (36)
Round 3 :
*(ch 3, skip 1, sc) repeat across to form base picot edge* (approx 18 picots) (36)
Round 4 :
Work first petal row along strip: *ch 8, 1 sc in next st* repeat across (creates 18 petal chains) (18 petals)
Round 5 :
Attach to first ch-8, 1 sc, 3 dc, tr, 3 dc, 1 sc across chain to form a large petal; repeat across (18 large petals)
Info :
After forming this first petal layer, leave a long tail for sewing. Roll the strip inward to test how tight the center will be. The peony builds by adding successively larger petal layers to the outer edge of the spiral.
Round 6 :
Add second petal layer: continue the spiral with ch 10 loops spaced to create 12-14 larger petals (12-14 petals)
Round 7 :
Work petals with 1 sc, 5 dc, tr, 5 dc, 1 sc across each ch-10 loop (12-14 large outer petals)
Round 8 :
Continue spiral adding a third rounded petal row using ch 12 loops with taller stitches: (1 sc, 7 dc, tr, 7 dc, 1 sc) (10-12 petals)
Info :
If your peony seems too flat, reduce chain lengths between petals and add a small sl st between petal anchors to pull them up slightly. Adjust tension to keep petals soft and layered.
Round 9 :
Add finishing outside petal row: ch 8 loops and work 1 sc, 3 dc, tr, 3 dc, 1 sc for delicate outer fringe (10-12 petals)
Round 10 :
Fasten off leaving a 20-30cm tail. Coil the strip from the center outward forming a layered rosette. Use the long tail and a yarn needle to stitch through the base of each petal layer to hold the rosette together. Secure tightly and weave ends in.
Info :
Use small stitches through the underside of petals as you coil to secure each layer invisibly. Pin the rosette on a block or towel if needed to maintain shape while securing.
— Small Ivory Peony (Make 2) :
Round 1 :
Ch 20, join to loop (20)
Round 2 :
20 sc in loop (20)
Round 3 :
Work ch 6 loops across for small petals (approx 10 petals)
Round 4 :
On each ch-6: 1 sc, 3 dc, tr, 3 dc, 1 sc (10 petals)
Round 5 :
Optional second petal round: ch 8, petal (1 sc,5 dc,tr,5 dc,1 sc) around (8-10 petals)
Round 6 :
Fasten off leaving long tail. Coil and sew as for large peony to form two smaller rosettes.
Info :
Small peonies serve as secondary blossoms and should be attached slightly offset from the large peony for a natural cluster. Make two or three depending on your decorative preference.
— Leaves (Make 8-10 in two sizes) :
Leaf Small - Round 1 :
Ch 8
Leaf Small - Round 2 :
1 sc in 2nd ch from hook, hdc in next, dc in next 2, hdc, sc, sl st to base (7)
Leaf Small - Round 3 :
Turn and repeat along opposite side to form a symmetrical leaf: sc, hdc, dc x2, hdc, sc. Fasten off. (approx 14 sts total around)
Leaf Small - Info :
Use FLO on the second pass to create a central ridge if desired. Make 4-6 small leaves in sage color to tuck under flowers.
Leaf Large - Round 1 :
Ch 12
Leaf Large - Round 2 :
1 sc in 2nd ch from hook, hdc, dc x4, hdc, sc across (11)
Leaf Large - Round 3 :
Turn and mirror stitches to create full leaf: sc, hdc, dc x4, hdc, sc. Sl st to base. Fasten off. (approx 22 sts around)
Leaf Large - Round 4 :
Block leaves flat and use a running stitch down center with matching yarn to create a defined midrib and gentle curve as pictured.
Info :
Make 4-6 large leaves and 4 smaller ones so you can layer them under the peonies. Shape leaves with steam or wet-blocking for a crisp look.
— Seed Pods & Tiny Round Buds (Make 3-4) :
Round 3 :
1 sc around (12)
Round 4 :
(1 sc, dec) x 4 (8)
Round 5 :
Fasten off leaving tail; stuff lightly and shape into an oblong pod. For elongated pods use mr 5 and adjust increases similarly.
Info :
Make a mix of tiny buds and slightly longer pods in brown and ivory to create contrast among leaves. Attach to stems or sew into the cluster directly.
— Curled Tendrils (Make 4-6) :
Round 1 :
Ch 35, turn and 1 sc in 2nd ch and in each ch to end (34)
Round 2 :
Working into row: for each ch-34 strip, sc 2 in first st, sc 1 in next 2, 2 sc in next, sc in next 2 repeat to encourage curl (approx 40)
Round 3 :
Gently coil the strip into a spiral. Use the working tail to sew the coil closed or use hot glue for a faster secure hold. Fasten off and shape.
Info :
Tendrils can be made by wrapping the crocheted strip around a pencil and steaming or wetblocking to hold a spiral. Make 4-6 tendrils in sage and dark green to echo the photo.
— Assembly Preparations :
Info :
Block and shape all components before final assembly: block brim flat, shape leaves, steam set petals lightly so rosettes maintain form. Arrange pieces on brim to check composition before sewing.
Info :
Placement suggestion: Large peony slightly off-center on front-right brim, two small peonies clustered adjacent, leaves fanning outward, seed pods tucked between layers and tendrils curving outward for movement.
— Finishing Touches :
Round 1 :
Sew the large peony onto the brim: using long tail from flower, position coil at desired location and stitch through the base of the coil to the brim at 8-10 points around the base to secure (invisible mattress style).
Round 2 :
Sew the two small peonies in place slightly overlapping the large flower to create depth. Make sure stitches pass through brim fabric and the underside of each flower base for stability.
Round 3 :
Arrange leaves under and around the flowers and sew the base of each leaf to the brim and to the underside of the flower bases. Use smaller stitches to keep seams invisible.
Round 4 :
Sew seed pods and buds into gaps between petals and leaves, then tack tendrils so they coil outward resembling vine curls. Trim and weave in all yarn tails neatly to the inside of the brim.
Info :
For extra security, add a few stitches through the underside of the brim and into the inner crown to anchor heavy embellishments. Avoid pulling too tightly to prevent puckering the brim.
Round 5 :
Optional: apply diluted fabric stiffener to the brim edge and scallops if you want a firmer edge that keeps its shape. Allow to dry fully on a flat blocked surface.
Info :
Step back and photograph from different angles before permanently stitching; small adjustments in placement can dramatically change the final aesthetic.
Finishing this emerald spiral hat is such a satisfying experience—watching the dramatic cone and whimsical curl come to life is pure magic. The ivory peonies soften the look and add a romantic, vintage feel that elevates the entire piece. This is a perfect showpiece for holidays, costumes or as a shelf accent. Enjoy every stitch and the delightful reveal when the flowers are finally arranged! 🌿🧶