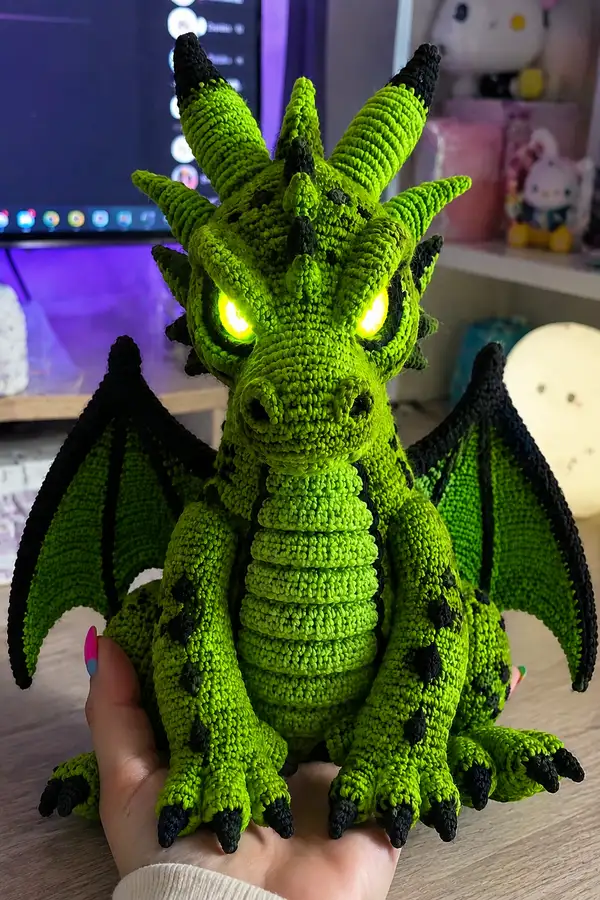
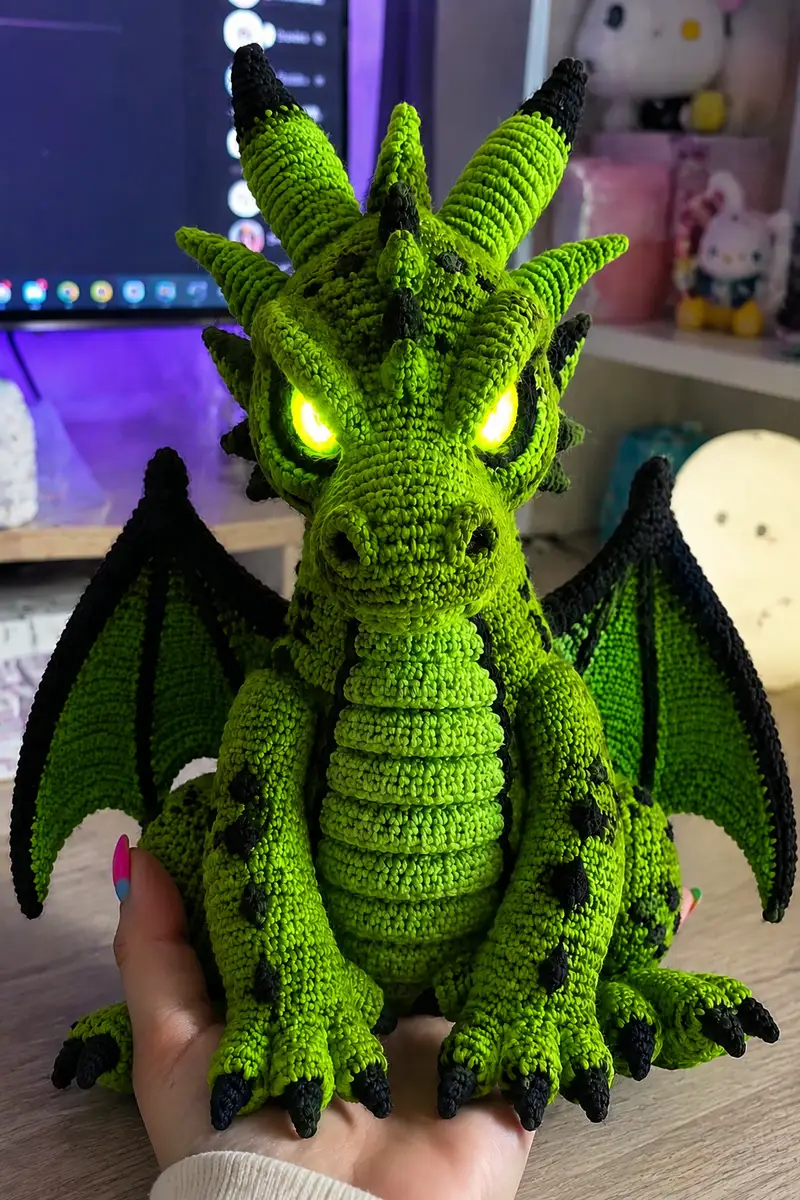
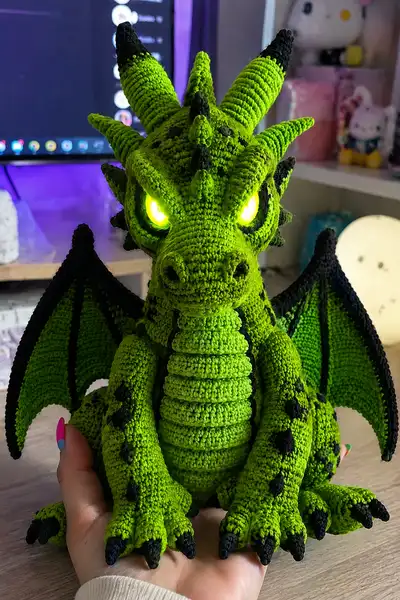
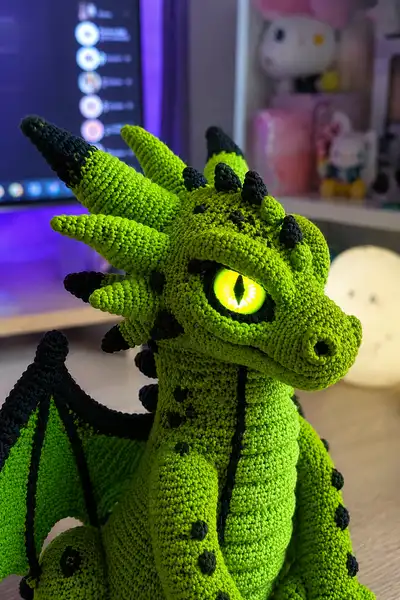
This bold amigurumi dragon features neon toxic-green plush texture with deep black accents and dramatic glowing LED eyes. Full of sculpted details — ridged belly, articulated claws, curled tail, wing membranes and rows of spines — this pattern walks you step-by-step to create a striking seasonal or display piece. The pattern includes LED eye integration tips and careful assembly notes so your dragon will sit, pose and shine exactly like the pictured model.
Progress Tracker
0% Complete
— Head :
Round 1 :
6 sc in magic ring (6)
Round 3 :
(1 sc, 1 inc) x 6 (18)
Round 4 :
(2 sc, 1 inc) x 6 (24)
Round 5 :
(3 sc, 1 inc) x 6 (30)
Round 6 :
(4 sc, 1 inc) x 6 (36)
Round 7 :
(5 sc, 1 inc) x 6 (42)
Round 8 :
(6 sc, 1 inc) x 6 (48)
Round 9-12 :
1 sc in each st (48) — work 4 rounds even to build crown height (48)
Info :
Eye sockets will be worked into rounds 13-16 area. Decide which round you want the eyes centered (recommended between R13 and R14). Mark the first stitch of R13 with a marker to help later placement.
Round 13 :
1 sc in next 4 sts, ch 2 (eye space), skip 2 sts, 1 sc in next 16, ch 2 (eye space), skip 2, 1 sc in remaining sts (44 + 2 ch spaces) — creating two small openings for eyes
Info :
Test-fit LED bezels or safety eye backs in the ch-2 spaces to ensure they sit flush with the shell. If openings are too tight, enlarge by replacing ch2 with ch3 and adjust counts accordingly.
Round 14 :
Work 1 sc in each sc and 1 sc around each ch-2 space to close into socket rims (48)
Round 15-16 :
1 sc in each st (48) — these rounds add depth around eyes (48)
Round 17 :
(6 sc, 1 dec) x 6 (42)
Round 18 :
(5 sc, 1 dec) x 6 (36)
Info :
Begin gentle stuffing now to stabilize the skull. Stuff enough to keep the crown rounded but leave the front slightly unders stuffed so the muzzle/snout can be sewn on tightly later.
Round 19 :
(4 sc, 1 dec) x 6 (30)
Round 20 :
(3 sc, 1 dec) x 6 (24)
Round 21-22 :
1 sc in each st (24) — these rounds set height for forehead and brow (24)
Round 23 :
(2 sc, 1 dec) x 6 (18)
Round 24 :
(1 sc, 1 dec) x 6 (12)
Round 25 :
6 dec (6) — leave opening large enough to attach snout piece; do not close. Fasten off leaving long tail for sewing.
Info :
Do not fully close R25; the opening is the base for sewing the separate snout/muzzle. Keep a stitch marker in the first stitch of the round to record head orientation for spines and horns placement.
— Snout / Muzzle :
Round 1 :
6 sc in magic ring (6)
Round 3 :
(1 sc, inc) x 6 (18)
Round 4 :
(2 sc, inc) x 6 (24)
Round 5 :
1 sc in each st (24)
Round 6 :
(3 sc, inc) x 6 (30)
Round 7 :
1 sc in each st (30)
Round 8 :
(4 sc, inc) x 6 (36)
Round 9-10 :
1 sc in each st (36) — build length of muzzle (36)
Info :
At R10 decide nostril placement — you will shape two hollow nostril openings by crocheting partial cylinders and sewing them into position later. Mark the central axis stitch on underside for alignment with head opening.
Round 11 :
(5 sc, dec) x 6 (30)
Round 12 :
(4 sc, dec) x 6 (24)
Round 13 :
1 sc in each st (24)
Round 14 :
(3 sc, dec) x 6 (18)
Round 15 :
(2 sc, dec) x 6 (12)
Round 16 :
(1 sc, dec) x 6 (6)
Round 17 :
6 sc (6) — do not close; leave long tail for sewing to head
Info :
Lightly stuff the muzzle so it keeps shape but remains slightly flexible to sew smoothly into the head opening. Use the long tail and whip stitch to sew the base around the head R25 opening, aligning center marks for symmetry.
— Nostrils (Make 2) :
Round 1 :
6 sc in magic ring (6)
Round 3 :
1 sc in each st (12)
Round 4 :
(1 sc, dec) x 4 (8)
Round 5 :
1 sc in each st (8) — leave tail for sewing into muzzle tip to create recessed nostril
Info :
Sew the nostril cups into place at muzzle tip. Use a small dab of fabric glue inside if desired to help hold before stitching. Position both nostrils evenly on either side of the central seam.
— Ribbed Belly Panel :
Round 1 :
10 sc in magic ring (10) — this creates a long rib strip worked in rows and seamed to body
Round 2-3 :
Ch1, turn, 1 sc in each st (10) — work back and forth to build ribs (10)
Info :
Work at least 10-12 rows to make the first rib. We will create 8-10 ribs and then seam them into a stacked strip. Use BLO on the outer edge of each row to create a distinct ridge.
Rows 4-48 :
Continue 1 sc across (10) until you have 8-10 ribs of approximately equal height. Fasten off leaving long tail for sewing. Each rib will be seamed as an individual band onto the front center of the body to create the layered look.
— Body :
Round 1 :
6 sc in magic ring (6)
Round 3 :
(1 sc, inc) x 6 (18)
Round 4 :
(2 sc, inc) x 6 (24)
Round 5 :
(3 sc, inc) x 6 (30)
Round 6 :
(4 sc, inc) x 6 (36)
Round 7-10 :
1 sc in each st (36) — these rounds build torso width (36)
Info :
If you plan a contrast panel on the belly, change to black yarn now and work 2 rounds BLO to create a neat boundary, then change back to green. For this model we will stitch ribbed belly panels on later for a three-dimensional effect.
Round 11 :
(5 sc, inc) x 6 (42)
Round 12-16 :
1 sc in each st (42) — build height of chest (42)
Info :
Begin attaching ribbed belly strips as you reach R14-R16 for proper vertical alignment. Pin each rib in place first then whip stitch through the body fabric and rib edge for a secure seam.
Round 17 :
(6 sc, inc) x 6 (48)
Round 18-22 :
1 sc in each st (48) — widen and shape lower torso (48)
Round 23 :
(6 sc, 1 dec) x 6 (42)
Round 24 :
(5 sc, 1 dec) x 6 (36)
Info :
Stuff the body moderately firm beginning at R22 to give a sturdy seated posture. Keep the top of the body less firmly stuffed so the head can be sewn on snugly for expression control.
Round 25 :
(4 sc, 1 dec) x 6 (30)
Round 26 :
(3 sc, 1 dec) x 6 (24)
Round 27 :
(2 sc, 1 dec) x 6 (18)
Round 28 :
(1 sc, 1 dec) x 6 (12)
Round 29 :
6 dec (6) — fasten off leaving long tail for sewing to base or optional plastic disc
Info :
Before closing, insert a thin plastic disc or a bit of cardboard (covered) into the flat base for stability if desired. Sew bottom closed with mattress stitch around disc edge for firm base.
— Front Legs / Arms (Make 2) :
Round 1 :
6 sc in magic ring (6)
Round 3 :
(1 sc, inc) x 6 (18)
Round 4-6 :
1 sc in each st (18) — form base of foot/paw (18)
Info :
At round 6 create toe separations by inserting small stitch divisions later. We will crochet claws separately and sew them to the toes for sharp silhouette.
Round 7 :
(2 sc, inc) x 6 (24)
Round 8-11 :
1 sc in each st (24) — shaping wrist and lower arm (24)
Round 12 :
(3 sc, 1 dec) x 6 (18)
Round 13-16 :
1 sc in each st (18) — upper arm length (18)
Round 17 :
(2 sc, 1 dec) x 4, 1 sc in next 2 sts (14) — start shoulder taper (14)
Round 18 :
1 sc in each st (14) — leave long tail for sewing
Info :
Stuff the paw firmly and the arm body moderately. If you want poseable arms insert a short length of florist wire before stuffing; fold wire ends inward and secure with tape to avoid poking out.
— Claws (Make 6 for front paws) :
Round 1 :
4 sc in magic ring (4)
Round 3 :
1 sc in each st (8)
Round 4 :
(1 sc, dec) x 2 (6)
Round 5 :
1 sc in each st (6) — fasten off leaving tail for sewing
Info :
Make additional claws in black. Sew three claws evenly along the front of each paw, shaping the toes slightly by pulling a short thread between claw bases to create slight separations.
— Hind Legs (Make 2) :
Round 1 :
6 sc in magic ring (6)
Round 3 :
(1 sc, inc) x 6 (18)
Round 4 :
(2 sc, inc) x 6 (24)
Round 5-8 :
1 sc in each st (24) — shape foot (24)
Info :
Hind feet are larger—increase toe base if you want a broader foot. Add a flat sole by closing with a short oval seam at the bottom later for improved sitting stability.
Round 9 :
(3 sc, inc) x 6 (30)
Round 10-14 :
1 sc in each st (30) — lower leg (30)
Round 15 :
(4 sc, 1 dec) x 5, 1 sc in final 2 sts (26)
Round 16-18 :
1 sc in each st (26) — upper leg (26)
Round 19 :
(3 sc, 1 dec) x 4, 2 sc (22)
Round 20 :
(2 sc, 1 dec) x 4, 2 sc (18)
Round 21 :
1 sc in each st (18) — leave tail for sewing
Info :
Stuff the hind foot firmly with a flat base to help the dragon sit upright. Sew the legs to the lower body at rounds 24-26, spacing them evenly to create a stable seated posture.
— Tail :
Round 1 :
6 sc in magic ring (6)
Round 3 :
(1 sc, inc) x 6 (18)
Round 4-6 :
1 sc in each st (18) — build thickness (18)
Round 7 :
(2 sc, dec) x 6 (12)
Round 8-12 :
1 sc in each st (12) — tapering tail length (12)
Round 13 :
(1 sc, dec) x 4 (8)
Round 14 :
1 sc in each st (8) — attach small end and leave long tail for sewing or curl shaping
Info :
If adding wire for poseability, feed a length of florist wire through the tail before stuffing from R4 onward. Fold and secure wire ends at the base with tape inside the body to prevent poking out.
— Wing Membrane (Make 2) :
Round 1 :
Ch 15, sc in 2nd ch from hook and across (14) — foundation chain for wing width
Round 2 :
Ch1, turn, 1 sc in each st (14)
Round 3 :
Ch1, turn, 1 sc in next 2 sts, inc, 1 sc in next 8 sts, inc, 1 sc in last 2 sts (16)
Round 4 :
1 sc in each st (16)
Round 5 :
Ch1, turn, (1 sc, inc) at start edge to create curve, 1 sc across, (1 sc, inc) at other edge (18)
Round 6-8 :
1 sc in each st (18) — widen membrane gradually (18)
Round 9 :
Change to black yarn — 1 sc in each st BLO to create a crisp ridge edge (18)
Info :
Create the wing fingers by crocheting separate tapered cones (pattern below) and sewing them along the outer ridge of the membrane at even intervals. The black ridge round forms a clean border for the wing.
Round 10-14 :
1 sc in each st (18) — build wing curve and attach to body later (18)
Round 15 :
Sl st around and fasten off leaving long tail for sewing to arm socket and back.
— Wing Finger / Ridge (Make 3 for each wing) :
Round 1 :
6 sc in magic ring (6)
Round 3 :
(1 sc, inc) x 6 (18)
Round 4-7 :
1 sc in each st (18) — lengthen finger (18)
Round 8 :
(2 sc, dec) x 4, 2 sc (14)
Round 9 :
1 sc in each st (14) — fasten off leaving tail for sewing to membrane edge
Info :
Sew three fingers per wing into membrane at regular intervals. Use a strong whip stitch and reinforce with extra thread where finger meets membrane for durability.
— Large Horn / Crest (Make 3 for head) :
Round 1 :
6 sc in magic ring (6)
Round 3 :
(1 sc, inc) x 6 (18)
Round 4 :
(2 sc, inc) x 6 (24)
Round 5-8 :
1 sc in each st (24) — lengthen horn
Round 9 :
(2 sc, dec) x 6 (18)
Round 10 :
(1 sc, dec) x 6 (12)
Round 11 :
1 sc in each st (12)
Round 12 :
6 dec (6) — fasten off leaving a long tail for sewing
Info :
Use one large horn at center top of head and two slightly smaller versions at crown sides. For black-tipped horns change to black yarn at R7 and continue with black for R8-R12 to create pointed black tips.
— Small Spikes / Scales (Make 8-10) :
Round 1 :
4 sc in magic ring (4)
Round 3 :
1 sc in each st (8)
Round 4 :
(1 sc, dec) x 2 (6)
Round 5 :
6 sc — fasten off leaving tail for sewing
Info :
Stitch these small spikes down the center of the head and along the back. Position them evenly and sew with tight stitches; reinforce with extra knots at the base of each spike for durability.
— Decorative Bobble Scales (Make 12-16) :
Round 1 :
Ch 1, insert hook in chosen stitch on piece, yo, pull up loop (repeat 5 times in same st), yo and pull through all loops, ch1 to close bobble — this forms a 5-loop puff/bobble
Info :
Work bobbles randomly across shoulders, sides and tail for organic texture. Use black yarn for contrast and sew down ends securely so bobbles do not loosen with handling.
— Eye Sockets & LED Integration :
Info :
Use the ch-2 eye sockets created at Head R13. Fit LED bezels or LED eye modules into the sockets from inside the head. If your LED module requires a backing plate, secure it between R12-R14 area. Test LEDs before final assembly. If using battery-operated LEDs, ensure battery pack will sit behind the head inside the body, or you can route a thin cable down the neck into the body where the battery pack can be hidden.
Round 1 (Eyelid Rim) :
With black yarn, 1 sc around eye hole to create a distinct rim (approx 10 sts around each socket) — work evenly to frame LED (10)
Info :
Create a narrow eyelid by working 2-3 rounds in black around the top half of the eye socket only, pulling slightly tighter to create a half-lidded, fierce expression. Sew eyelid down on top edge to hold shape.
Round 2 (Optional Crocheted Iris) :
In neon yellow: 6 sc in magic ring (6), 6 inc (12), 1 sc in each (12) — fasten off and stitch in front of LED to give a glowing iris effect if desired (12)
Info :
If using bright LED modules, a thin neoprene or felt washer behind the LED helps diffuse the light and prevents hot spots. Ensure ventilation for LED modules and avoid direct glue on electronics; use hot glue sparingly around casing edges only.
— Assembly Prep Info :
Info :
Pin head to body first to determine angle — for this model the head is slightly forward-leaning with eyelids half-closed. Use strong mattress stitch to attach head to body opening (match Head R25 to Body R25). Sew all seams twice for durability, and weave in ends through several stitches.
— Final Finishing Touches :
Info :
Sew arms to Body at R18-20 sides, legs at Body R24-26 bottom. Attach wing bases to upper back where R18-20 meet shoulder seam. Sew rim of wings to shoulder seam and reinforce with extra stitches on both sides. Attach horns and spikes symmetrically: large horn at central crown (align with head marker), two side horns a few stitches back, then small spikes down the neck and spine. Add bobble scales and embroidered pupils by stitching a vertical black slit over the LED ring.
Info :
For final definition, outline belly ribs and wing finger seams with a single-strand black embroidery using overcast stitches — this creates the high-contrast lines seen in the reference and sharpens silhouette for lighting.
This fierce, glowing dragon is a stunning project that blends sculpting and electronics into one showstopping amigurumi. Every ridge and scale you crochet builds not just shape but personality — the glowing eyes bring a bit of theatrical magic perfect for displays or Halloween nights. Sewing the pieces together is the satisfying final act where the dragon’s character truly emerges. Enjoy the meditative rhythm of the ribs and spikes as you assemble — and then bask in the glow of your handmade, slightly mischievous friend. 🧶🐉✨