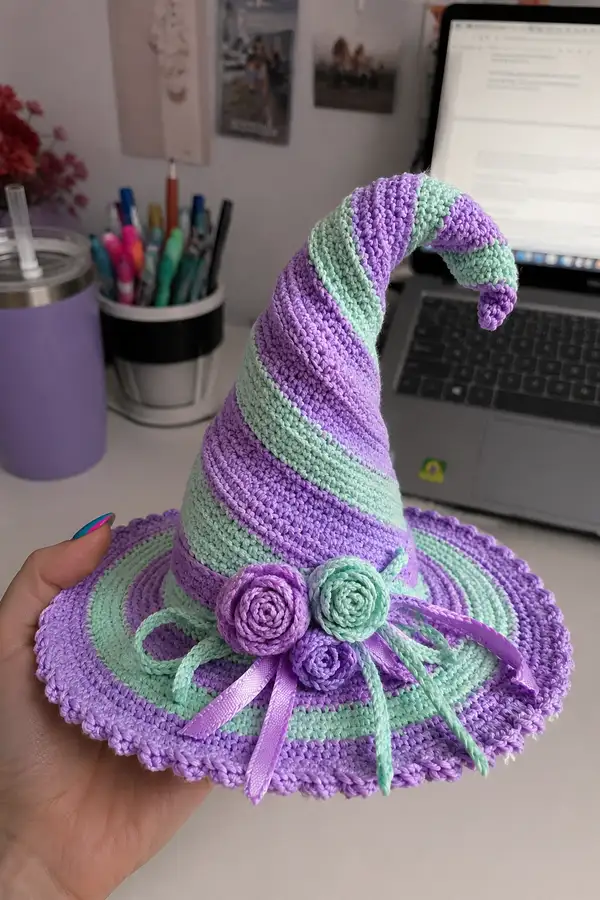
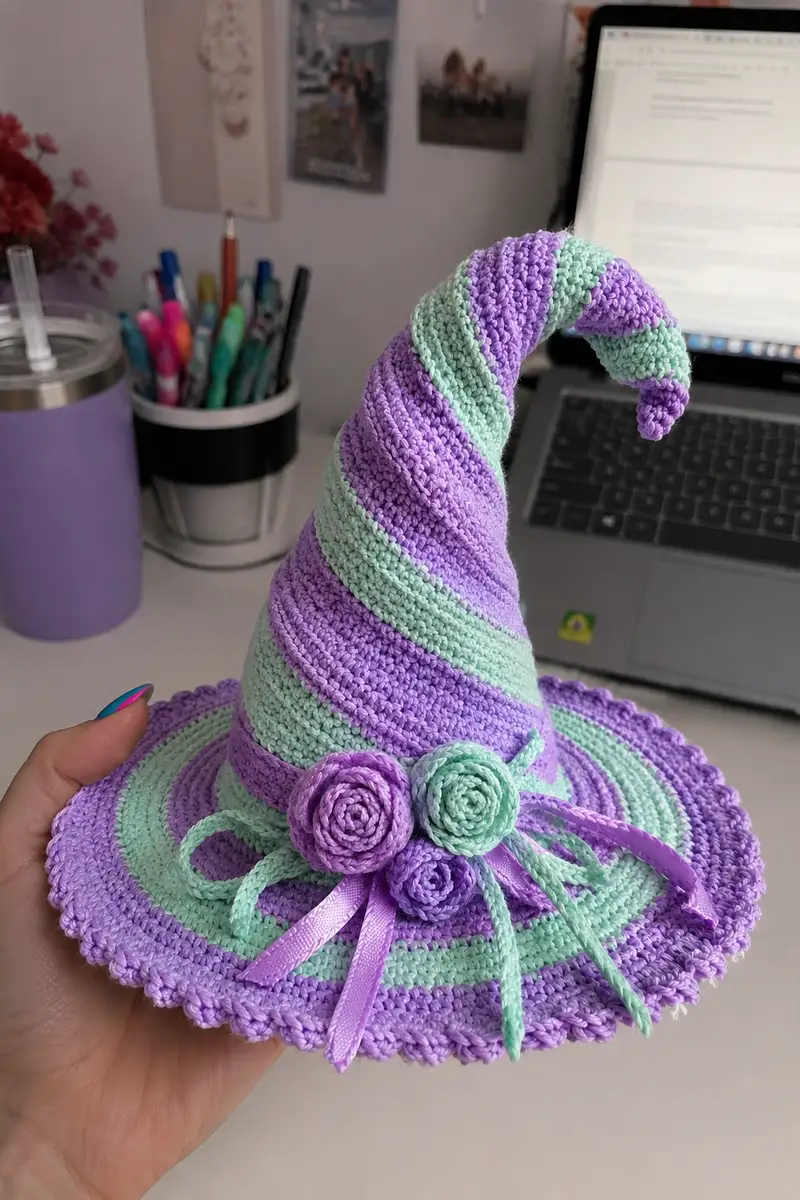
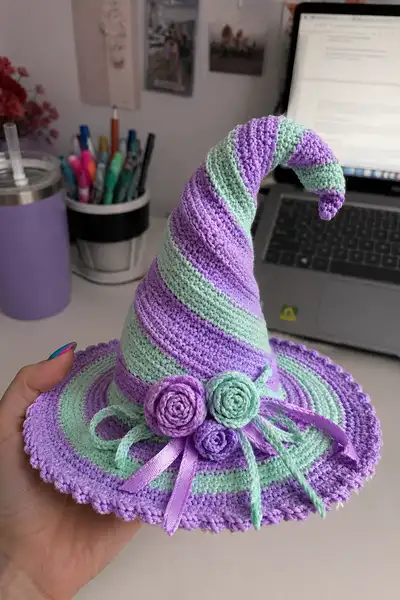
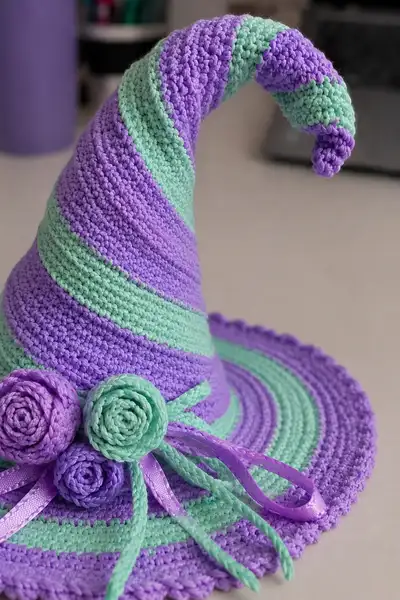
A charming spiral witch hat worked in alternating lilac and mint stripes, featuring a wide rippling brim, a tall curled cone, and three woven ribbon roses with braided tendrils. This decorative accessory uses tight stitches for structure and neat scalloped edging for a finished, professional look. Perfect as a seasonal decoration, photo prop, or whimsical costume accent.
Progress Tracker
0% Complete
— Notes Before You Start :
Info :
Gauge: Not critical for decorative hat but aim for dense fabric. Tight single crochet yields best structure. Measure brim width as you go; this pattern will produce a brim approx. 12-15cm and overall hat height approx. 25-28cm when following rounds below using DK/light yarn and 3.0mm hook.
Info :
Colorwork: This hat alternates lilac and mint bands. Change colors every 4 rounds for a strong stripe width similar to the photo. Use invisible color change at the last stitch of the previous round or carry yarn inside if you plan to keep the hat interior tidy.
— Brim (Worked Flat in Rounds) :
Round 1 :
6 sc in magic ring (6)
Round 3 :
(1 sc, inc) x 6 (18)
Round 4 :
(2 sc, inc) x 6 (24)
Round 5 :
(3 sc, inc) x 6 (30)
Info :
Begin establishing your stripe: change to mint (if starting in lilac) after finishing Round 5 so the first visible stripe band sits on the brim center. Carry yarn neatly or fasten off and join next color.
Round 6 :
(4 sc, inc) x 6 (36)
Round 7 :
(5 sc, inc) x 6 (42)
Round 8 :
(6 sc, inc) x 6 (48)
Round 9 :
(7 sc, inc) x 6 (54)
Info :
Keep consistent tension; if brim begins to ruffle or cup, adjust increase frequency. To flatten further, perform one round with fewer increases (e.g., skip an increase pattern) to level out fabric.
Round 10 :
(8 sc, inc) x 6 (60)
Round 11 :
(9 sc, inc) x 6 (66)
Round 12 :
(10 sc, inc) x 6 (72)
Round 13 :
(11 sc, inc) x 6 (78)
Info :
Change color if you are following the pictured banding — alternate back to lilac now. For a spiral appearance later on the cone, keep color stripes consistent in the brim but the cone will be worked with offset bands.
Round 14 :
(12 sc, inc) x 6 (84)
Round 15 :
(13 sc, inc) x 6 (90)
Round 16 :
(14 sc, inc) x 6 (96)
Round 17 :
(15 sc, inc) x 6 (102)
Info :
If you prefer a slightly narrower brim, stop increasing earlier; if wider, continue the same increase logic another 1-2 rounds. For the pictured size stop after Round 18-20 depending on your tension.
Round 18 :
(16 sc, inc) x 6 (108)
Round 19 :
(17 sc, inc) x 6 (114)
Round 20 :
(18 sc, inc) x 6 (120)
Round 21 :
(19 sc, inc) x 6 (126)
Info :
To create the ridge and band line that will receive the crown base, work one round in BLO (back loops only) next. This gives a little lip for the crown to sit on and helps the hat keep its shape.
Round 22 :
1 sc in each st BLO (126)
Round 23 :
1 sc in each st (126)
Round 24 :
1 sc in each st (126)
Round 25 :
1 sc in each st (126)
Info :
At this point, mark the center point of the brim where the crown will be attached. We will create a slightly smaller circular crown piece that will be sewn or crocheted onto the brim center to begin the cone.
— Crown Base (Inner Circle That Joins Brim to Cone) :
Round 1 :
6 sc in magic ring (6)
Round 3 :
(1 sc, inc) x 6 (18)
Round 4 :
(2 sc, inc) x 6 (24)
Round 5 :
(3 sc, inc) x 6 (30)
Info :
This small circle will fit into the center of the brim opening. If your brim center hole is larger, add one more increase round to match circumference. Place this circle onto the brim center and either sew using whip stitch or join by single crochet through both layers for a clean join.
Round 6 :
1 sc in each st (30)
Round 7 :
1 sc in each st (30)
Info :
Join crown base to brim: align the crown base center on the brim center, pin or clip it in place, then either slip-stitch around through both layers or whip stitch with matching yarn. If you want a seamless join, use a join-as-you-go method: pick up loops from brim and crown alternately as you single crochet around.
— Cone (Tall Spiral Cone Worked in Continuous Rounds) :
Round 1 :
With crown base joined, pick up 30 sts from the last round and continue: 1 sc in each st (30)
Round 2 :
1 sc in each st (30)
Round 3 :
1 sc in each st (30)
Round 4 :
1 sc in each st (30)
Info :
Begin spiral shaping: we will alternate sets of even rounds with occasional increases to gradually expand and allow the cone to beginto curve. Change color after Round 4 to create the next horizontal band. Change color every 4 rounds for the pictured wide stripe effect.
Round 5 :
(5 sc, inc) x 5 (35)
Round 6 :
1 sc in each st (35)
Round 7 :
1 sc in each st (35)
Round 8 :
1 sc in each st (35)
Info :
Change color for the next stripe now. To encourage a spiral slant similar to the photo, stagger the location of increases by shifting the first increase of each increase round one stitch forward relative to the previous increase round. This stagger causes the bands to travel diagonally as you build height.
Round 9 :
(6 sc, inc) x 5 (40)
Round 10 :
1 sc in each st (40)
Round 11 :
1 sc in each st (40)
Round 12 :
1 sc in each st (40)
Info :
Continue to change color every 4 rounds to create alternating bands. If color joins show, weave tails along the inside rounds or use small invisible knots before weaving.
Round 13 :
(7 sc, inc) x 5 (45)
Round 14 :
1 sc in each st (45)
Round 15 :
1 sc in each st (45)
Round 16 :
1 sc in each st (45)
Info :
At Rounds 13-16 the cone will begin to bulge gently; this creates the graceful shape before the tip tapers. If you prefer a straighter cone, reduce increases by performing an inc round every 6 rounds instead.
Round 17 :
(8 sc, inc) x 5 (50)
Round 18 :
1 sc in each st (50)
Round 19 :
1 sc in each st (50)
Round 20 :
1 sc in each st (50)
Info :
Carefully maintain the stagger when placing increases. Mark the first increase stitch of each increase round to maintain the diagonal spiral direction across color changes.
Round 21 :
(9 sc, inc) x 5 (55)
Round 22 :
1 sc in each st (55)
Round 23 :
1 sc in each st (55)
Round 24 :
1 sc in each st (55)
Info :
Switch color every 4 rounds again. At this stage, the cone is expanding steadily. If the spiral slant is too steep, reduce the number of increases per increase round by one (i.e., perform (10 sc, inc) x 5 instead of (9 sc, inc) x 5) — but be consistent every increase round.
Round 25 :
(10 sc, inc) x 5 (60)
Round 26 :
1 sc in each st (60)
Round 27 :
1 sc in each st (60)
Round 28 :
1 sc in each st (60)
Info :
Now that the cone is wide enough, we will work several rounds of even height to build cone length and facilitate the spiral diagonal. Continue alternating colors every 4 rounds for the signature banding.
Round 29-32 :
1 sc in each st (60)
Round 33 :
(8 sc, dec) x 6 (54)
Round 34 :
1 sc in each st (54)
Round 35 :
1 sc in each st (54)
Round 36 :
1 sc in each st (54)
Info :
Begin tapering: we will decrease gradually across a number of rounds to pull the cone into a long point ready for curling. Stuffing is minimal — the hat cone is mostly structural fabric. If you want a stable curl at the tip, plan to insert a short length of millinery wire or pipe cleaner before closing.
Round 37 :
(7 sc, dec) x 6 (48)
Round 38 :
1 sc in each st (48)
Round 39 :
1 sc in each st (48)
Round 40 :
1 sc in each st (48)
Info :
To prepare for curling the tip, leave a long yarn tail at the last opening so you can sew the tip into a tight spiral or slip a wire inside. If inserting wire, push it in now through the center axis and wrap with a small bit of yarn or tape to prevent sharp ends from poking out.
Round 41 :
(6 sc, dec) x 6 (42)
Round 42 :
1 sc in each st (42)
Round 43 :
1 sc in each st (42)
Round 44 :
1 sc in each st (42)
Round 45 :
(5 sc, dec) x 6 (36)
Info :
At approx. Rounds 41-45 your cone should be noticeably tapered. Decide how long you want the curled tip; for the photo, a long taper ending in a small spiral was used. Continue tapering gradually for a smooth curve.
Round 46 :
1 sc in each st (36)
Round 47 :
1 sc in each st (36)
Round 48 :
(4 sc, dec) x 6 (30)
Round 49 :
1 sc in each st (30)
Round 50 :
(3 sc, dec) x 6 (24)
Round 51 :
1 sc in each st (24)
Round 52 :
(2 sc, dec) x 6 (18)
Round 53 :
1 sc in each st (18)
Round 54 :
(1 sc, dec) x 6 (12)
Info :
Start curving: with a few rounds left, draw the tip into a spiral by sewing through the last rounds or by crocheting a final tighter spiral. If using wire, bend the wire gently into the desired curl and wrap with leftover yarn to encase it. Do not overstuff the cone; a little flexibility allows a neat curl.
Round 56 :
Fasten off leaving long tail. Use tail to sew hole closed securely and shape tip into a small spiral or curl. Weave tail inside cone securely and trim close.
— Cone Spiral Styling Tips :
Info :
To emphasize the spiral diagonal effect of the bands, ensure the first increase stitch in every increase round is shifted 1-2 stitches from the previous increase round. This controlled offset produces a consistent diagonal and matches the pictured spiral wrapping.
Info :
If your color stripes appear stacked vertical rather than diagonal, adjust the stagger of increases by moving markers and reworking the last increase round with a one-stitch offset.
— Scalloped Brim Edge & Decorative Round :
Round 1 :
Join lilac at edge. *Sk 1 st, 5 dc in next st, sk 1 st, sl st in next st* around to create shells. Depending on your final brim stitch count (126), adjust repeats to place shells evenly: (shell and sl st) x 42 approx.
Round 2 :
1 sc in each st around over shells and gaps to tidy edge (126)
Info :
For a neat finished look, block the brim on a flat surface using pins and a gentle steam or damp cloth — reshape scallops and allow to dry fully before attaching trims.
— Hat Band (worked as a long strip and attached) :
Round 1 :
Ch 6. Row 1: sc in 2nd ch from hook and each ch across (5). Turn.
Round 2-60 :
1 sc in each st (5) — work until band length equals brim inner circumference. Measure band against the brim center (approx 30cm). For pictured hat aim for approx 55-60 rounds of a narrow band to create a rope-like thickness; alternatively double the band to create a thicker sash.
Info :
Make two bands if you want a braided look: create three strips and braid loosely before sewing to hat as pictured. Use matching colors and then tack in a few stitches to fix braid shape.
Round 61 :
Fasten off leaving long tail for sewing. Sew band around base of cone where crown base joins the brim, overlapping ends and securing with small whip stitches.
— Spiral Roses (Make 3 — small, medium, large) :
Rose Small (Rose A) Round 1 :
Ch 30 (or 20 for smaller). Row 1: sc in 2nd ch from hook and across. (29 sc)
Rose Small Round 2 :
Turn, ch 1, *2 sc in next st, 1 sc in next st* rep across to add slight flare. Fasten off leaving long tail.
Rose Small Round 3 :
Lay strip flat, starting at one end, roll strip tightly into a spiral. Use the long tail to stitch the base of the spiral securely through all layers with whipstitches to form a rose. Tighten as desired to match photo proportions.
Info :
Make two other roses: Rose B ch 36 then sc across for medium, Rose C ch 24 then sc across for smallest. Alternatively adjust chain length to alter diameters. Use contrasting colors: one mint, two lilac, or vice versa to mimic the photo.
Rose Medium Round 1 :
Ch 36, sc across (35 sc). Fasten off leaving long tail.
Rose Medium Round 2 :
Optional: on second pass add gentle increases to give fullness: *2 sc in next st, sc next* across. Roll and sew as above.
Rose Large Round 1 :
Ch 48, sc across (47 sc). Fasten off, roll and sew to form rose. Use firmer stitches (smaller hook) for tighter coil that looks like pictured spirals.
Info :
To make spiraled rope decorations (thin tendrils), chain to desired length (15-25 ch), then sc back along chain tightly to create a slender cord. Affix around band as pictured, leaving several for trailing loops.
— Assembling Roses and Bands :
Info :
Pin band across hat where crown meets brim. Arrange three roses in a cluster shifted slightly to one side (as in photo). Glue or sew each rose in place through the base using small stitches. Add braided or twisted cords and ribbon loops behind roses for that flowing effect.
Info :
Ribbon: cut 3 x 15cm lengths of lilac ribbon. Fold in half to create loops. Secure ribbon under rose cluster by sewing through the band and rose base. Tuck ends under and glue with tiny dot of fabric glue if necessary to hold shape.
— Final Finishing & Stabilizing :
Info :
Weave all tails into interior rounds and trim. If cone requires extra stiffness, sew a thin strip of interfacing or felt inside the cone body before final closure. For a more permanent curl at the tip, thread flexible wire through and curve gently then encase with a short crochet tube of yarn to keep wire from showing.
Info :
Blocking: Gently dampen hat with spritz of water and shape on a flat surface for the brim, pin scallops evenly. Allow to dry completely. Steam blocking from a safe distance can also help set curves in the cone.
Info :
Optional Embellishments: Add beads, sequins, or a light dusting of glitter glue to the rose centers for extra sparkle. Secure any small elements with glue in addition to stitches for durability.
— Variations & Size Adjustments :
Info :
To scale up for adult costume size, increase brim rounds by 2-4 more increase rounds (maintaining increase pattern) and add height to the cone by repeating even rounds before tapering. Conversely, stop increases earlier for a child-sized or mini hat.
Info :
To make a floppy hat, use a bulkier yarn and larger hook; for a sturdier decorative hat use cotton thread or sport weight yarn and slightly smaller hook and consider interior interfacing for stiffness.
Info :
Care: Hand wash gently and reshape while damp. Avoid machine washing if hat contains wired structure or glued embellishments.
This lilac and mint spiral witch hat makes a delightful handmade accessory — dramatic, whimsical, and wonderfully photo-ready! Each stripe, scallop, and rose comes together to create a storybook piece you can proudly display or wear. The full pattern walks you through every round and finishing step so your hat turns out neat and sturdy. Have fun stitching and styling your magical creation! 🧶🌸