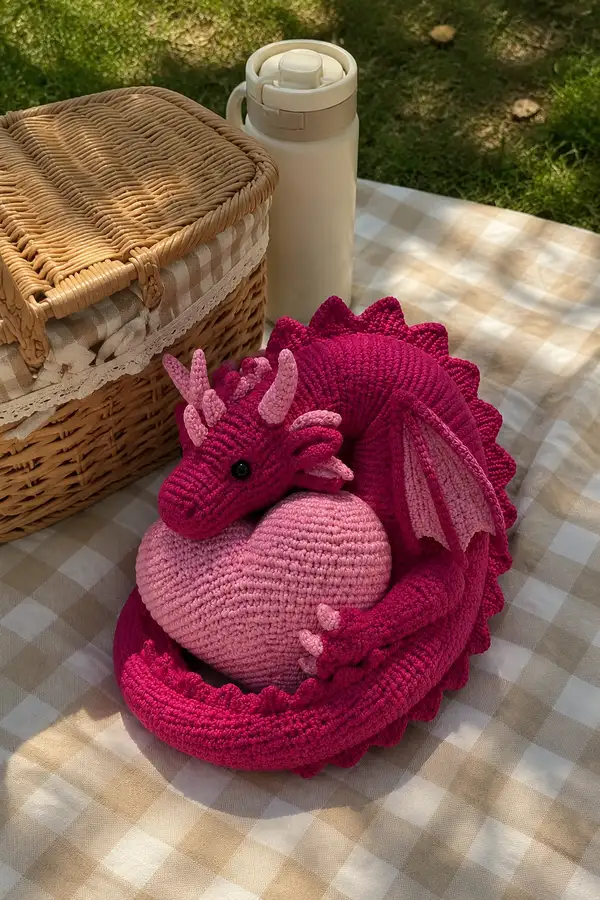
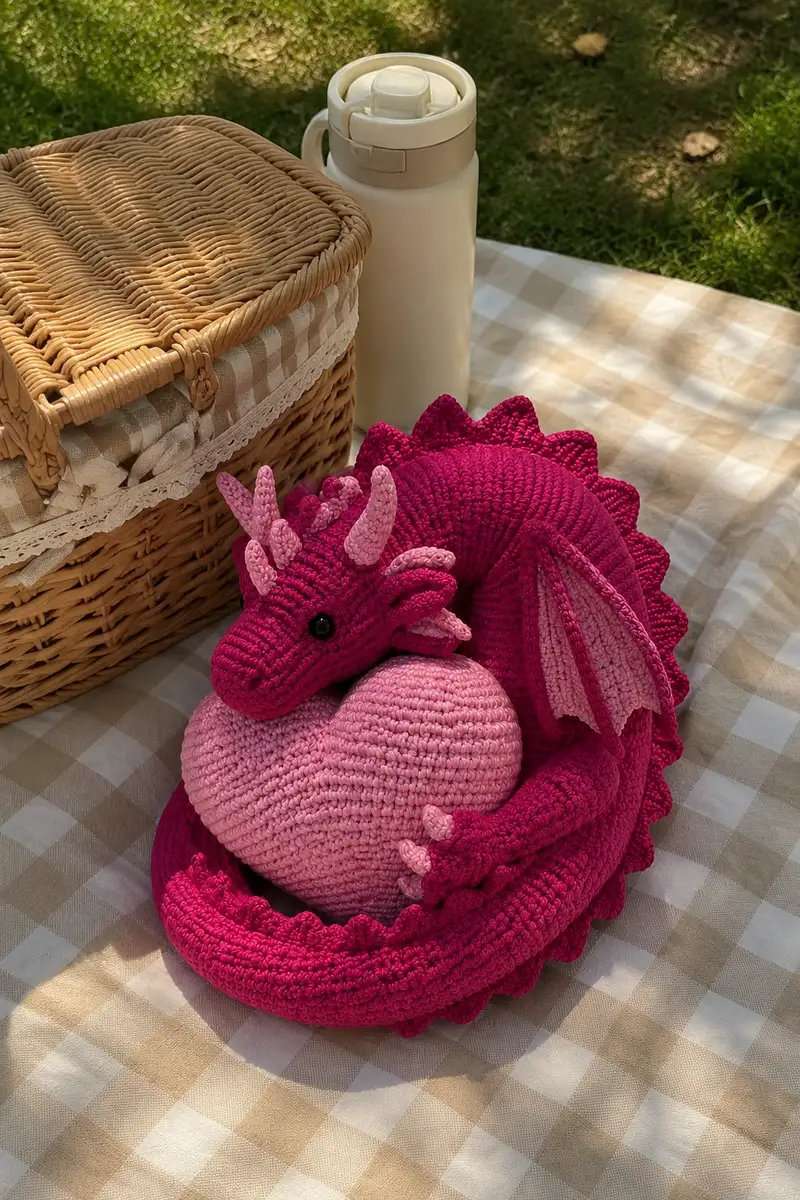
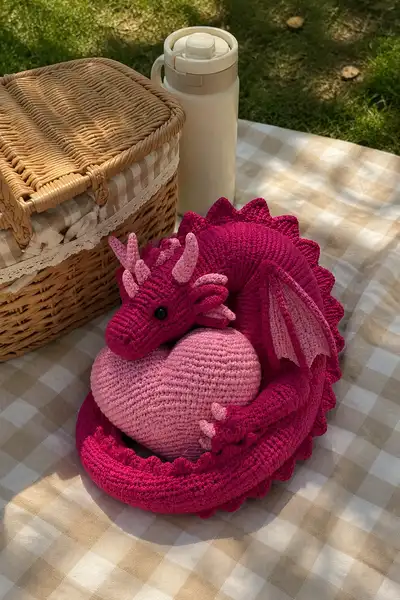
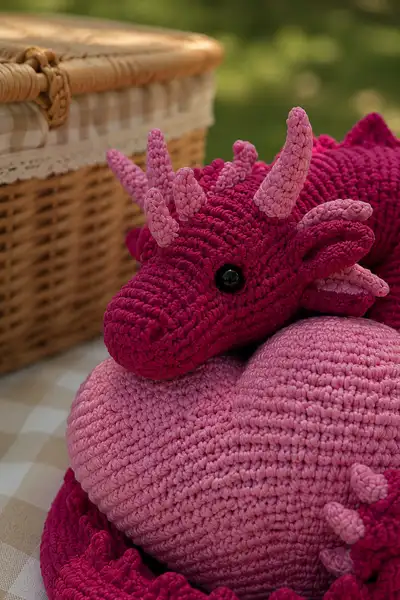
Create an enchanting magenta dragon cuddling a soft pink heart — a romantic, whimsical amigurumi perfect for gift-giving or home display. This pattern recreates the curled body, textured dorsal frill, delicate horns and wings, and the large heart cushion seen in the photos. Detailed step-by-step rounds, assembly tips and shaping notes included for an accurate, expressive finished piece.
Progress Tracker
0% Complete
— Head :
Round 1 :
6 sc in magic ring (6)
Round 3 :
(1 sc, inc) x 6 (18)
Round 4 :
(2 sc, inc) x 6 (24)
Round 5 :
(3 sc, inc) x 6 (30)
Round 6 :
(4 sc, inc) x 6 (36)
Round 7 :
(5 sc, inc) x 6 (42)
Round 8 :
(6 sc, inc) x 6 (48)
Round 9 :
(7 sc, inc) x 6 (54)
Round 10 :
(8 sc, inc) x 6 (60)
Info :
Use deep magenta. Place stitch marker in first stitch of each rnd. This head is elongated to form the snout; counts use increases to create oval shaping.
Round 11 :
1 sc in each st (60)
Round 12 :
1 sc in each st (60)
Round 13 :
1 sc in each st (60)
Info :
Position safety eyes between rounds 14-16 laterally; plan approx 12-14 sts apart depending on how expressive you want the face. Mark centerline along top of snout to align horns and frills.
Round 14 :
1 sc in each st (60)
Round 15 :
1 sc in each st (60)
Round 16 :
1 sc in each st (60)
Round 17 :
(8 sc, dec) x 6 (54)
Round 18 :
(7 sc, dec) x 6 (48)
Info :
Begin goldilocks stuffing—start adding fiberfill. For the snout, keep stuffing firm but not rock-hard. Insert safety eyes now and secure washers before final stuffing if using safety eyes.
Round 19 :
(6 sc, dec) x 6 (42)
Round 20 :
(5 sc, dec) x 6 (36)
Round 21 :
(4 sc, dec) x 6 (30)
Round 22 :
(3 sc, dec) x 6 (24)
Info :
As head begins to narrow toward the neck, add more stuffing so the cheeks and brow keep shape. Use a stuffing tool or back of a crochet hook to reach snout tip.
Round 23 :
(2 sc, dec) x 6 (18)
Round 24 :
(1 sc, dec) x 6 (12)
Info :
Fasten off leaving a long tail for sewing to body if you plan to attach head separately. If continuing into neck and upper body as one piece, do not fasten off; instead pick up stitches for neck section described in body.
— Snout extension (optional detail rounds if you prefer longer snout) :
Round 1 :
Working from tip outward before closing head: sl st 6, ch 1, 6 sc around tip to elongate (6)
Info :
This optional step is only if you want a slightly more pronounced snout. It adds texture and a rounder nose profile.
— Neck & Partial Torso Join (if making head separate) :
Info :
If you fastened off earlier, leave long tail and sew head to body at body rounds 1-6 later. If continuing, pick up 12 sts around the neck opening and work the next section to join seamlessly into the body base.
— Body (main torso and chest - makes the curled core) :
Round 1 :
6 sc in magic ring (6) - if attaching head, start with 12 sts picked up instead and skip to Round 4
Round 3 :
(1 sc, inc) x 6 (18)
Round 4 :
(2 sc, inc) x 6 (24)
Round 5 :
(3 sc, inc) x 6 (30)
Round 6 :
(4 sc, inc) x 6 (36)
Info :
Work first 6 rounds in deep magenta. This base will attach to head later. Decide whether you want the head sewn to body or crocheted together; sewing gives easier positioning for the curled pose.
Round 7 :
1 sc in each st (36)
Round 8 :
1 sc in each st (36)
Round 9 :
1 sc in each st (36)
Round 10 :
1 sc in each st (36)
Info :
From this point begin shaping for a broad chest that will cup the heart. Keep rounds even to build height, then create tapering toward the back for tail attachment.
Round 11 :
(4 sc, inc) x 6 (42)
Round 12 :
1 sc in each st (42)
Round 13 :
1 sc in each st (42)
Round 14 :
(5 sc, inc) x 6 (48)
Round 15 :
1 sc in each st (48)
Info :
At rnds 14-16 the body is at its widest; this is where the heart will sit. If you want a deeper chest, add an extra even rnd or two before decreasing.
Round 16 :
1 sc in each st (48)
Round 17 :
(6 sc, dec) x 6 (42)
Round 18 :
(5 sc, dec) x 6 (36)
Round 19 :
(4 sc, dec) x 6 (30)
Info :
Begin stuffing the torso lightly here—enough to keep chest plump but allow the body to curl. If you want a poseable core, insert flexible wire along the lower belly before continuing tail rounds.
Round 20 :
1 sc in each st (30)
Round 21 :
1 sc in each st (30)
Round 22 :
(3 sc, dec) x 6 (24)
Round 23 :
(2 sc, dec) x 6 (18)
Round 24 :
(1 sc, dec) x 6 (12)
Info :
Fasten off leaving a long tail if you plan to sew the tail on separately. If integrating tail, continue without fastening off and proceed to tail shaping instructions below.
— Tail (long curled tail, worked from body out or as separate piece) :
Round 1 :
Pick up 6 sts at tail base where indicated and work 6 sc in mr (6)
Round 3 :
(1 sc, inc) x 6 (18)
Round 4 :
(2 sc, inc) x 6 (24)
Round 5 :
(3 sc, inc) x 6 (30)
Info :
Work the tail longer than you think — it needs to curl fully around the heart. Insert optional wire or pipe cleaner before stuffing to keep poseable curl. If using wire, thread it through center as you go.
Round 6-12 :
1 sc in each st (30) — work 7 rounds even to build length
Round 13 :
(3 sc, dec) x 6 (24)
Round 14 :
1 sc in each st (24)
Round 15 :
(2 sc, dec) x 6 (18)
Round 16 :
1 sc in each st (18)
Round 17 :
(1 sc, dec) x 6 (12)
Info :
Do not overstuff the tail tip; keep tail tip slightly denser near base for balanced curl. Fasten off leaving long tail for sewing or continue to create textured scallop edging on tail next.
Round 19 (Scalloped edging setup) :
Rejoin at tail base edge and work 1 sc in each st around (30)
Round 20 :
*Skip next st, 5 dc in next st, skip next st, sl st in next st* repeat around to create scalloped dorsal frill (approx 15 shells)
Info :
For a more pronounced ruffle, work shells of 6 dc or 7 dc. Use deep magenta for outer scallops. Attach smaller inner scallops in lighter pink later between shells for layered look.
— Dorsal Frill / Spikes (make 18-22 varying sizes) :
Spike Small - Make 8 :
Round 1: 6 sc in mr (6). Round 2: (1 sc, inc) x 3 (9). Round 3: 1 sc in each st (9). Round 4: (1 sc, dec) x 3 (6). Round 5: 6 sc (6). Fasten off leaving tail for sewing.
Spike Medium - Make 6 :
Round 1: 6 sc in mr (6). Round 2: (1 sc, inc) x 3 (9). Round 3: (2 sc, inc) x 3 (12). Round 4: 1 sc in each st (12). Round 5: (2 sc, dec) x 3 (9). Round 6: (1 sc, dec) x 3 (6). Fasten off leaving tail for sewing.
Spike Large - Make 6 :
Round 1: 6 sc in mr (6). Round 2: 6 inc (12). Round 3: (1 sc, inc) x 6 (18). Round 4: 1 sc in each st (18). Round 5: (2 sc, dec) x 6 (12). Round 6: (1 sc, dec) x 4, 4 sc (8). Round 7: 8 sc (8). Fasten off, leave tail for sewing.
Info :
Sew spikes along the dorsal seam from head to tail base using the long tails. Alternate sizes for a natural ridged effect. Place larger spikes around the shoulder and mid-back area where photos show pronounced plates.
— Horns & Frilly Head Appendages (make 3 large horns and 2 small side horns + 4 little frill pieces) :
Large Horn (Make 3) :
Round 1: 6 sc in mr (6). Round 2: (1 sc, inc) x 3 (9). Round 3: (2 sc, inc) x 3 (12). Round 4-6: 1 sc in each st (12) — work 3 rounds even. Round 7: (2 sc, dec) x 3 (9). Round 8: (1 sc, dec) x 3 (6). Round 9: 6 sc (6). Fasten off leaving long tail for sewing. Use light pink yarn for horns to match photos.
Small Horn (Make 2) :
Round 1: 6 sc in mr (6). Round 2: (1 sc, inc) x 3 (9). Round 3-4: 1 sc in each st (9). Round 5: (1 sc, dec) x 3 (6). Round 6: 6 sc (6). Fasten off leaving tail.
Head Frill Petal (Make 4) :
Ch 6, starting in 2nd ch from hook: sc, hdc, dc, hdc, sc. Fasten off leaving tail to sew as layered frill between horns and ears.
Info :
Stuff horns very lightly or not at all so they remain slightly flexible. Arrange three larger horns down the centerline of the head with two smaller horns near the brow either side. Sew seams neatly and use pins to check placement before sewing permanently.
— Ears / Cheek Frills (Make 2) :
Round 1 :
Ch 8, sc in 2nd ch from hook and across (7), rotate to work in rounds: 3 sc along end, 7 sc along other side (17)
Round 2 :
(1 sc, inc) x 5, 7 sc (22)
Round 3 :
1 sc in each st (22)
Round 4 :
1 sc in each st BLO (22) to create a ridge; fasten off leaving tail for sewing into head sides
Info :
Sew ear flaps slightly backward and above cheek area. Add small light-pink inner ear by making a half oval of 7-9 sc, then sew inside the ear for detail.
— Eyes & Facial Embroidery :
Info :
Insert 12mm safety eyes between head rounds 14-15 approximately 12-14 sts apart, centered on each side of the snout. If using embroidered eyes, embroider after stuffing using satin stitch for glossy look.
Embroidered Nostrils :
With dark pink or black yarn, embroider two short vertical stitches at snout tip, slightly apart. Knot securely and weave tail inside head.
— Front Limbs / Arms (Make 2) :
Round 3 :
(1 sc, inc) x 6 (18)
Round 4 :
1 sc in each st (18)
Round 5 :
(2 sc, inc) x 6 (24)
Info :
Work hand/paw proportion slightly flattened to create a paddle-like claw that cups the heart. Add 3 small claws later on palm tip.
Round 6-9 :
1 sc in each st (24) - work four rounds even to build forearm
Round 10 :
(3 sc, dec) x 6 (18)
Round 11-14 :
1 sc in each st (18)
Round 15 :
(2 sc, dec) x 6 (12)
Round 16 :
(1 sc, dec) x 4, 4 sc (8)
Round 17 :
1 sc in each st (8)
Round 18 :
6 dec (4) - for a small flat palm; fasten off leaving tail for sewing
Info :
Before closing the palm, stuff hand firmly. Sew three small claws by making tiny cones (6 sc in mr, 2 rounds) in light pink and attach to front paw tip. Position arms so they wrap naturally around the heart when sewn to body rounds 12-16.
— Hind Legs / Feet (Make 2) :
Round 3 :
(1 sc, inc) x 6 (18)
Round 4 :
(2 sc, inc) x 6 (24)
Round 5 :
(3 sc, inc) x 6 (30)
Round 6-8 :
1 sc in each st (30) to build foot pad
Round 9 :
(3 sc, dec) x 6 (24)
Round 10 :
1 sc in each st (24)
Round 11 :
(2 sc, dec) x 6 (18)
Round 12 :
1 sc in each st (18)
Round 13 :
(1 sc, dec) x 6 (12)
Round 14 :
6 dec (6) - fasten off leaving tail for sewing
Info :
Stuff feet firmly so the dragon sits stably. Sew feet to body bottom at rounds 2-6, slightly splayed for balance. Add three small claws as with front limbs using small cones in light pink.
— Wings (Make 2) :
Wing Base (Deep Magenta) :
Round 1: Ch 10, sc in 2nd ch from hook and across (9), ch 1, turn work and sc back along the opposite side of foundation chain (18)
Round 2 :
1 sc in each st (18)
Round 3 :
(2 sc, inc) x 4, 2 sc (22)
Round 4 :
1 sc in each st (22)
Inner Wing (Light Pink) :
Make matching smaller panel: Ch 8, sc in 2nd ch from hook (6), sc back along other side to make oval (12). Work 2 rounds even and fasten off. Sew inner panel inside outer wing in light pink for contrast.
Wing Edge Detail :
Work 1 rnd of sc around wing edge in deep magenta. For ruffled edge: *sc, ch2, 3 dc in same st, ch2, sc* repeat along outer curve.
Info :
Sew wings to the back slightly behind the shoulder area (body rnds 10-14). Angle them slightly forward so they appear to fold around the heart. Stuff wings very lightly or leave flat for natural drape.
— Heart Cushion :
Heart Half (Make 2 identical halves) Round 1 :
6 sc in mr (6)
Round 3 :
(1 sc, inc) x 6 (18)
Round 4 :
(2 sc, inc) x 6 (24)
Round 5 :
(3 sc, inc) x 6 (30)
Round 6 :
1 sc in each st (30)
Round 7 :
(4 sc, inc) x 6 (36)
Round 8-10 :
1 sc in each st (36)
Round 11 :
(4 sc, dec) x 6 (30)
Round 12 :
(3 sc, dec) x 6 (24)
Round 13 :
1 sc in each st (24) - fasten off half leaving tail for joining
Info :
Make two mirror halves then sew together with mattress stitch leaving a small opening to stuff. Use a lighter pink cotton yarn for heart. Stuff very firmly to get the plump rounded look seen in photo.
Join Heart Halves :
Sew halves together around edge for first 3/4, stuff firmly, then finish closing. Add a round of sc around the finished seam to neaten if desired (about 60 sc around).
Heart Finishing Ruffle (Optional) :
With BLO or 1 rnd of shells (5 dc shell spaced every 4 sc) around heart edge to create a soft scallop for the dragon to rest hands on.
— Small Details: Claws, Paw Pads, and Inner Spikes :
Claw Small Cone (Make 12) :
Round 1: 6 sc in mr (6). Round 2: (1 sc, inc) x 3 (9). Round 3: 1 sc in each st (9). Round 4: (1 sc, dec) x 3 (6). Fasten off leaving tail and sew 3 onto each paw.
Paw Pad (Optional)
Ch 6, sc 5, turn and sc back through foundation for a flat tear-drop shape. Sew to paw underside before attachment to body.
Info :
Use light pink for claws to contrast the deep magenta. Sew claws evenly spaced with center claw slightly forward to emulate a gripping look.
— Assembly Instructions & Final Shaping :
Info :
Stuff all pieces thoroughly as described. Use pins to position head, limbs, wings, and spikes before sewing. Weave tails through interior to attach with a strong yarn needle and matching yarn.
Completing this curled magenta dragon is a rewarding, tactile journey—every scalloped spine and layered horn adds personality. The soft heart cushion makes the piece immediately lovable and gift-ready. Finish it with neat sewing and a gentle steam-block (if using cotton) to set shape. I hope your dragon becomes a treasured keepsake or a heartfelt present! 🧶💖