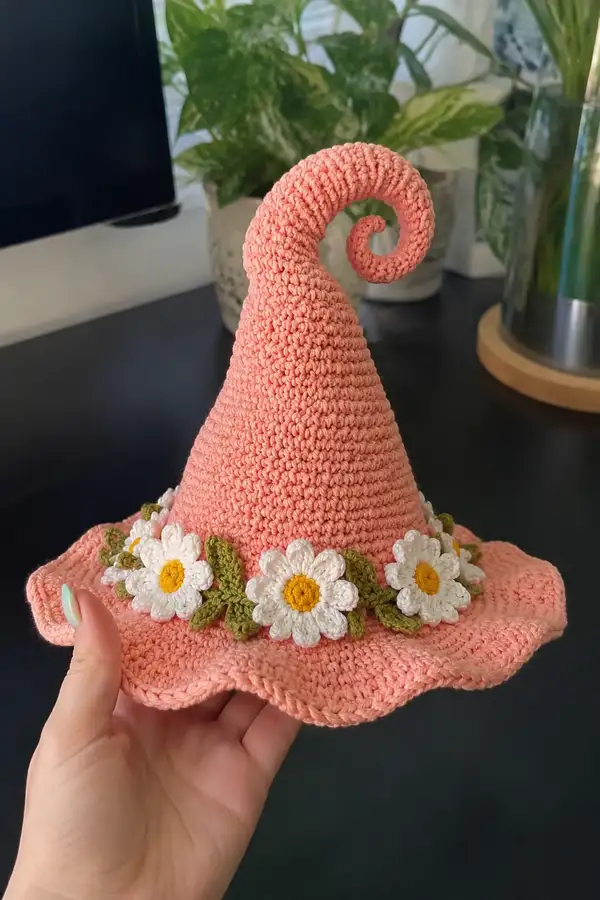
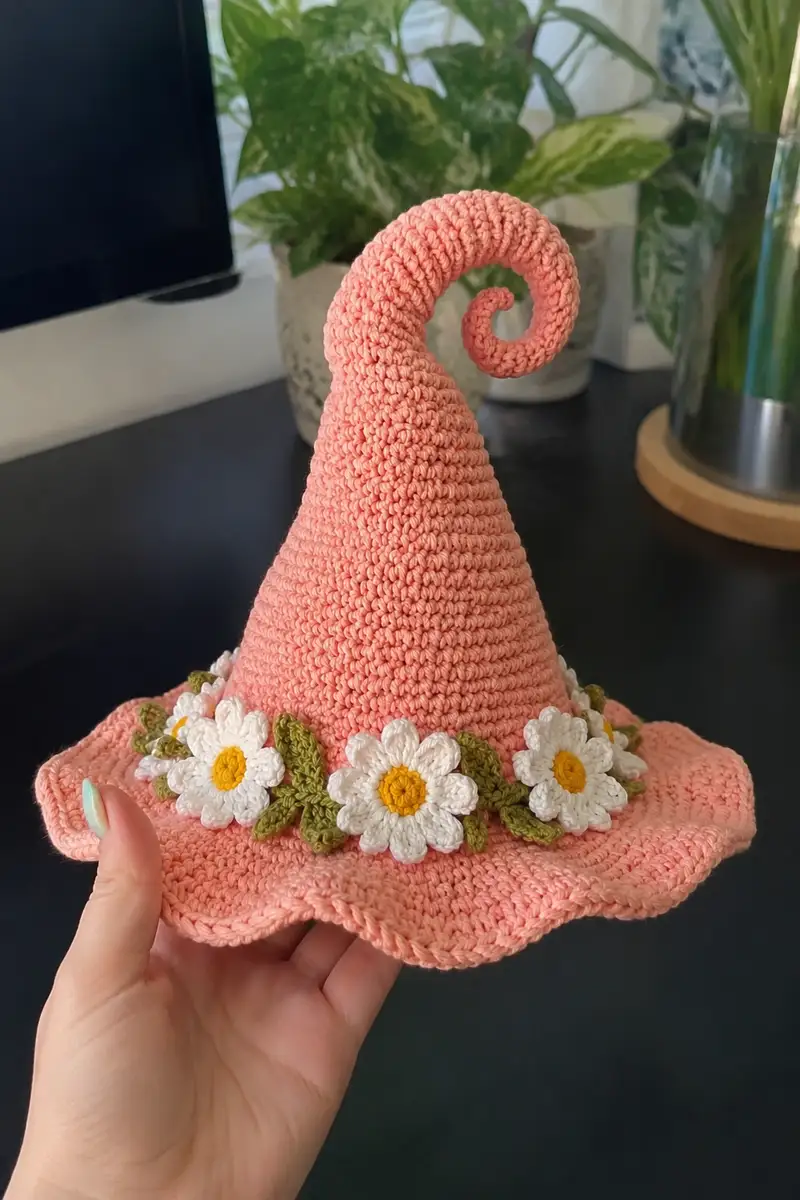
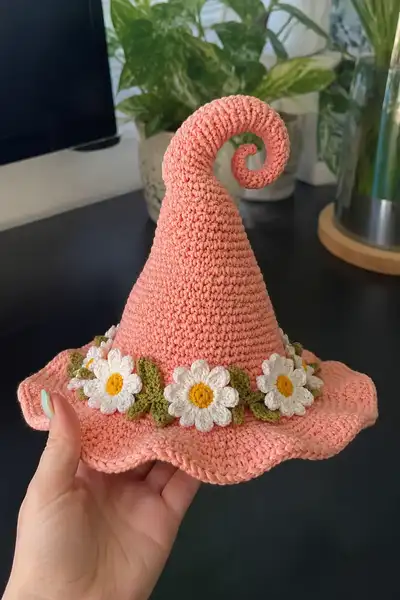
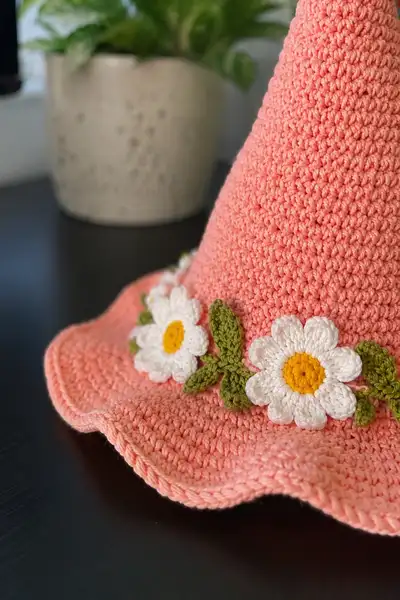
A whimsical oversized witch hat crocheted in a soft peach cotton yarn, featuring a dramatic curled spiral tip and a wide wavy brim trimmed with delicate white daisies and olive-green leaves. The pattern includes clear, incremental rounds for the cone, a separate curled-tip tube for the spiral, a scalloped brim, and instructions to crochet and attach daisy motifs and leaves. Ideal for seasonal decor, costume accents, or as a charming shelf ornament.
Progress Tracker
0% Complete
— Notes Before You Start :
Info :
This pattern is worked in continuous spiral rounds for a seamless look on the cone and tip. Use a stitch marker and move it after each round. Gauge is not critical, but working tightly will produce a firmer, better-shaped hat. The hat pictured measures approximately 12-13 inches tall to the tip bend and about 13-14 inches across the brim, made with worsted cotton and a 3.5mm hook. Adjust hook size or rounds to change overall size.
Info :
Color names used: 'Peach' = main body, 'White' = petals, 'Yellow' = centers, 'Olive' = leaves. Replace with your favorite colors. Carry ends inwards or weave them in as you go for a tidy finish.
— Cone (Main Hat Body) :
Round 1 :
6 sc in magic ring (6)
Round 3 :
(1 sc, inc) x 6 (18)
Round 4 :
(2 sc, inc) x 6 (24)
Round 5 :
(3 sc, inc) x 6 (30)
Round 6 :
(4 sc, inc) x 6 (36)
Round 7 :
(5 sc, inc) x 6 (42)
Round 8 :
(6 sc, inc) x 6 (48)
Round 9 :
(7 sc, inc) x 6 (54)
Round 10 :
(8 sc, inc) x 6 (60)
Info :
At round 10 you have formed the base circumference for the cone (60 sts). This will be roughly the junction where the brim attaches later. If you want a larger brim or base, you can add one extra repeat here: (9 sc, inc) x 6 = 66 sts before working even rounds.
Round 11-18 :
1 sc in each st (60) (work 8 rounds even to build height)
Info :
Work each round in spiral (no joining). Move stitch marker up each round. These even rounds determine the height of the lower cone; work more or fewer rounds to change how tall the cylindrical portion is before tapering starts.
Round 19 :
(8 sc, inc) x 6 (66)
Round 20 :
1 sc in each st (66)
Round 21 :
(9 sc, inc) x 6 (72)
Round 22-24 :
1 sc in each st (72)
Info :
Rounds 19-24 add a slight flare to the middle of the cone, giving the hat its graceful taper. If you prefer a straighter cone, omit rounds 19 and 21 and continue even in 60 sts for several rounds, then begin shaping.
Round 25 :
(8 sc, dec) x 6 (66)
Round 26 :
(7 sc, dec) x 6 (60)
Round 27 :
(6 sc, dec) x 6 (54)
Round 28 :
(5 sc, dec) x 6 (48)
Info :
Begin tapering the cone by working controlled decreases. Keep stuffing or shaping materials aside — this cone is worked solid and doesn't require stuffing, but if you wish to add a thin inner form for stability, insert craft foam or interfacing later before joining brim.
Round 29 :
(4 sc, dec) x 6 (42)
Round 30 :
(3 sc, dec) x 6 (36)
Round 31 :
(2 sc, dec) x 6 (30)
Round 32 :
(1 sc, dec) x 6 (24)
Info :
Rounds 29-33 narrow the cone to a small diameter (12 sts). This creates the shoulder where the curled tip will later be attached. Fasten off leaving a long tail for sewing the tip base. Do not finish the top completely if you plan to crochet the curled tip in continuous connection — instead, fasten off but keep the last loop if joining.
— Curled Tip (Make 1 Tube for the Spiral) :
Info :
The curled tip is formed as a narrow tube worked in continuous rounds and then encouraged to spiral by adding a small number of increases on the outer side, or by bending and stitching the tube into a spiral. For a poseable curl, insert craft wire or pipe cleaner before closing the tip. Start with a magic ring and work a tight tube.
Round 1 :
6 sc in magic ring (6)
Round 2 :
1 sc in each st (6)
Round 3-6 :
1 sc in each st (6) (work 4 rounds even to lengthen small tube)
Info :
If you want a slightly thicker tube, switch to 7 sc in a round by increasing once and then work even in 7 sts. The photos show a relatively tight 6-st tube that is then coaxed into a spiral by gradual increases on the outside edge.
Round 7 :
(3 sc, inc) x 2 (8) - (work a slight outward increase at one or two points to favor curling)
Round 8 :
1 sc in each st (8)
Round 9 :
(4 sc, inc) x 2 (10)
Round 10-12 :
1 sc in each st (10)
Info :
Work several rounds increasing only on the outside edge to bias the tube to curl naturally as you shape it. An easy method is to increase 1 stitch every 2-3 rounds on the outermost working side so the outer row grows slightly faster than the inner, producing a spiral when coiled.
Round 13 :
(5 sc, inc) x 2 (12)
Round 14-20 :
1 sc in each st (12) (work additional rounds until tube measures desired curl length, approx 8-12 rounds more)
Round 21 :
Work 6 sc, then fold tube into a spiral shape, hold in place and sl st through both layers at the fold points to secure (12)
Info :
Insert wire if you want the spiral to hold a rigid curl. To hide the wire, thread it into the tube before you close the top end and then secure the end by stitching over the wire with a few extra sc rounds. If you prefer a purely crocheted curl, use more increases on the outer edge and press/steam block into shape.
Round 22 :
1 sc in each st around both layers as you stitch the spiral flat where needed (12)
Round 23 :
Fasten off leaving long tail for sewing the tip to cone. Weave in ends inside the tube or through the cone to hide them.
— Brim (Wide Wavy Scalloped Edge) :
Info :
The brim is worked from the base of the cone outward. Join yarn at the round where the cone base is even (we used round 10/11 area with 60 sts). The brim uses increases and a scalloped edge worked with dc and hdc to create gentle waves.
Round 1 (join) :
Join peach yarn to any base stitch of the 60-st round. Ch1, 1 sc in same st and 1 sc in each st around (60). Sl st to first sc to semantically close if you prefer a joined round, but working in joined rounds here helps form a neat brim.
Round 2 :
(1 sc, ch1, skip 1) x around (60) - this creates a slight spacer to work the outward rounds evenly
Round 3 :
Work in FLO: (2 sc in next ch-1 space, 1 sc in next sc) rep around (approx 90) - check counts as ch-1 spaces create additional stitches; target approx 90 sts
Info :
Rounds 2-3 add body to the brim. If your count differs because of ch spaces, maintain even increases so the brim lays flat — if the brim ruffles, reduce increases; if it cups upward, add increases.
Round 4 :
1 sc in each st around (90)
Round 5 :
(4 sc, inc) x 18 (108)
Round 6-8 :
1 sc in each st (108) (work 3 rounds even to widen brim)
Info :
The number of brim stitches depends on how many increases you made in round 3. Aim for a smooth, slightly flared disk that is larger than the cone base. The pictured brim has a pronounced scallop; create this with alternating shell rounds below.
Round 9 :
Preparing for scallops: (1 sc, skip 1, 5 dc in next st, skip 1, 1 sc) x around to create shell anchor points. Adjust spacing to make about 12-16 scallops around the brim depending on desired scallop size.
Round 10 :
Join shells: sc between shells and around to neaten (count will vary; work one sc between each shell and two sc at shell peaks to stabilize)
Round 11 :
Sc in each st around to tidy edges (approx same count)
Round 12 (edge) :
Picot or reverse single crochet: (sc, ch3, sl st into top of sc) at peaks of scallops to emphasize waves; alternate with 2 sc at shell valleys for stability
Info :
Blocking: Pin the brim into desired wavy shape on a blocking mat and lightly steam or wet-block. Pin scallop peaks up slightly to make a crisp wavy finish. Allow to dry completely before removing pins.
Round 13 :
Fasten off and weave ends. If you want a stiffer brim, insert a circle of craft felt or light interfacing between cone base and brim before final sewing, or crochet an inner ring to slip inside for support.
— Decorative Daisy (Make 6) :
Info :
Each daisy is worked in three parts: center (yellow), petals (white), and optional backing round to flatten. Use 3.0-3.5mm hook for tight petals. Make six daisies or as many as you want for the garland.
Center Round 1 :
With Yellow: mr, 6 sc in mr (6)
Center Round 2 :
(inc) x 6 (12)
Center Round 3 :
1 sc in each st (12). Fasten off yellow, leave tail to stitch center to petals.
Petal Round 1 :
Join White to any st of center. *(ch3, 3 dc in next st, ch3, sl st in same st) - this forms one petal. Sl st into next center st to position for next petal.* Rep from * to * around to make 6-8 petals total depending on size (use 8 petals for fuller daisy as pictured)
Petal Round 2 :
Work a second layer of petals if desired: join in the gap between petals and repeat petal stitch for a double petal look. Fasten off leaving long tail for sewing.
Info :
Make petals tight and even by keeping tension firm. Press petals flat and use a little starch spray if you want them to hold shape. Use yarn needle to sew center firmly to petals from backside, pulling center slightly to create a small raised mound like the photo.
— Leaf (Make 12-14) :
Round 1 :
With Olive: ch6, sc in 2nd ch from hook, hdc, 2 dc, hdc, sc, sl st to finish (creates small leaf shape). Fasten off leaving tail for sewing.
Info :
Alternatively, for larger leaves: ch10, (sc, hdc, 3 dc, 3 dc, hdc, sc) across chain and sl st back to base to create a fuller leaf. Block leaves flat before attaching for neat finishing.
— Decorative Band (Optional Vine) :
Round 1 :
With Olive: ch long chain to fit around base of cone (approx 10-12 inches for pictured hat). Sl st into cone base at desired start position to anchor. You can crochet a simple vine by ch1 at each stitch and sc into every 3rd brim stitch to secure vine placement.
Round 2 :
Make small embroidered branches: *sl st 3, ch4, sl st to cone base to create a loop* repeat along vine for attachment points for daisies and leaves. Fasten off and weave ends.
Info :
Pin the band around the cone at the seam where the brim meets the hat. Space daisies evenly and temporarily pin to check arrangement before sewing securely.
— Assembly & Finishing Touches :
Info :
Layout daisies and leaves along band before sewing. Measure spacing so placement is balanced — the pictured hat has five daisy clusters spaced evenly around the front half with leaves tucked between petals.
Step 1 :
Sew the curled tip to the cone: position tube base at the small 12-st opening from cone round 33, pin in place then use mattress stitch or whipstitch with peach tail to sew tube securely around the opening. Weave tail through adjacent stitches to anchor strongly.
Step 2 :
Attach the brim: position the brim over the cone base (the brim was worked joined and fitted to the base round earlier). Using peach yarn tail from brim, sew the brim to the cone base with small whipstitches through both layers, keeping stitches even and hidden on the underside.
Step 3 :
Sew vine/band around the cone base with small stitches. Tuck additional leaves under petals and secure with small stitches. Use leftover tails from daisy centers to sew centers down through petals and knot inside to hide ends.
Step 4 :
Optional: Insert a circle of thin craft felt inside the brim to help it hold shape. Stitch felt to inner brim edge with small stitches, then weave ends and tuck them away.
Info :
Blocking final piece will set the scalloped brim and smooth the cone. Use pins on a blocking mat and lightly steam (without touching yarn directly) or wet-block and let dry. If using wire in the tip, bend into desired curl and then stitch a few tacking stitches to hold the spiral shape permanently.
Step 5 :
Trim all ends and weave them into the inner seams. If desired, add a couple of stitches to the inside of the cone to create a small loop for hanging as decor.
— Optional Size Adjustments & Variations :
Info :
To make a smaller hat, reduce early increases to target 48 sts at the brim base instead of 60 by stopping increases one or two rounds earlier. For a taller cone, add extra even rounds before tapering. To make a more whimsical tip, increase tube length and pattern of increases so the spiral is larger.
Info :
To get a firmer brim suitable for wearing, use a heavier cotton or two strands held together for brim rounds only, or add a lightweight plastic canvas circle trimmed to size and inserted between brim rounds before final join.
Info :
If you want a hat to sit on a person's head rather than be decorative, size to head circumference (measure head, then subtract 1-1.5 inches for negative ease) and make cone base circumference equal to that number in stitches using gauge adjustments.
Info :
Care: Wash gently by hand using cool water and reshape while damp. Avoid high heat from irons; steam carefully if needed. Cotton may soften a bit with washing, so reinforce with inner support if necessary.
This charming peach witch hat is a lovely combination of structural crocheting and playful detailing. Each scallop and daisy adds personality and the curled tip brings a whimsical focal point to your creation. It makes a wonderful seasonal decoration, costume accent, or thoughtful handmade gift — and the process is just as delightful as the finished piece. 🧶🌼✨ Have fun making it your own and don’t forget to share your finished hat!