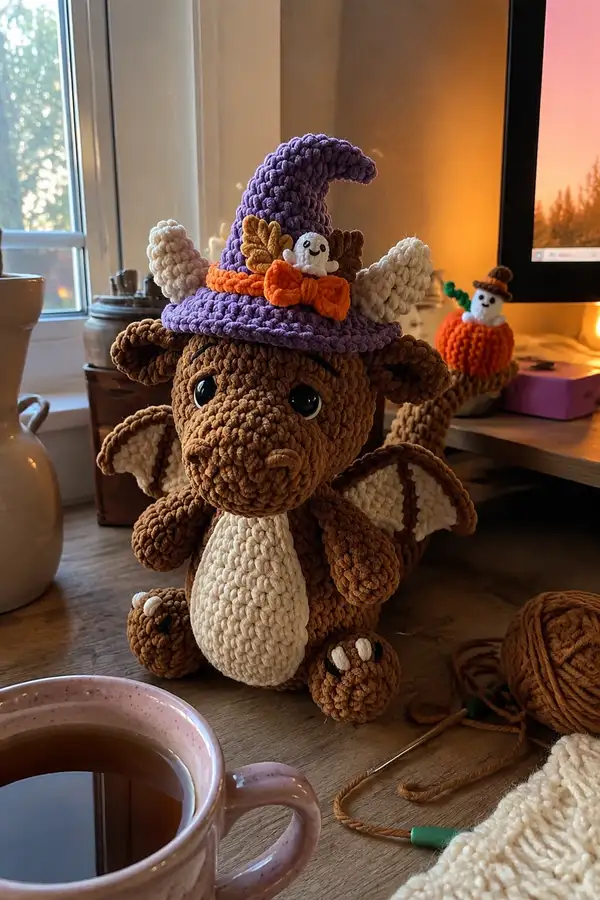
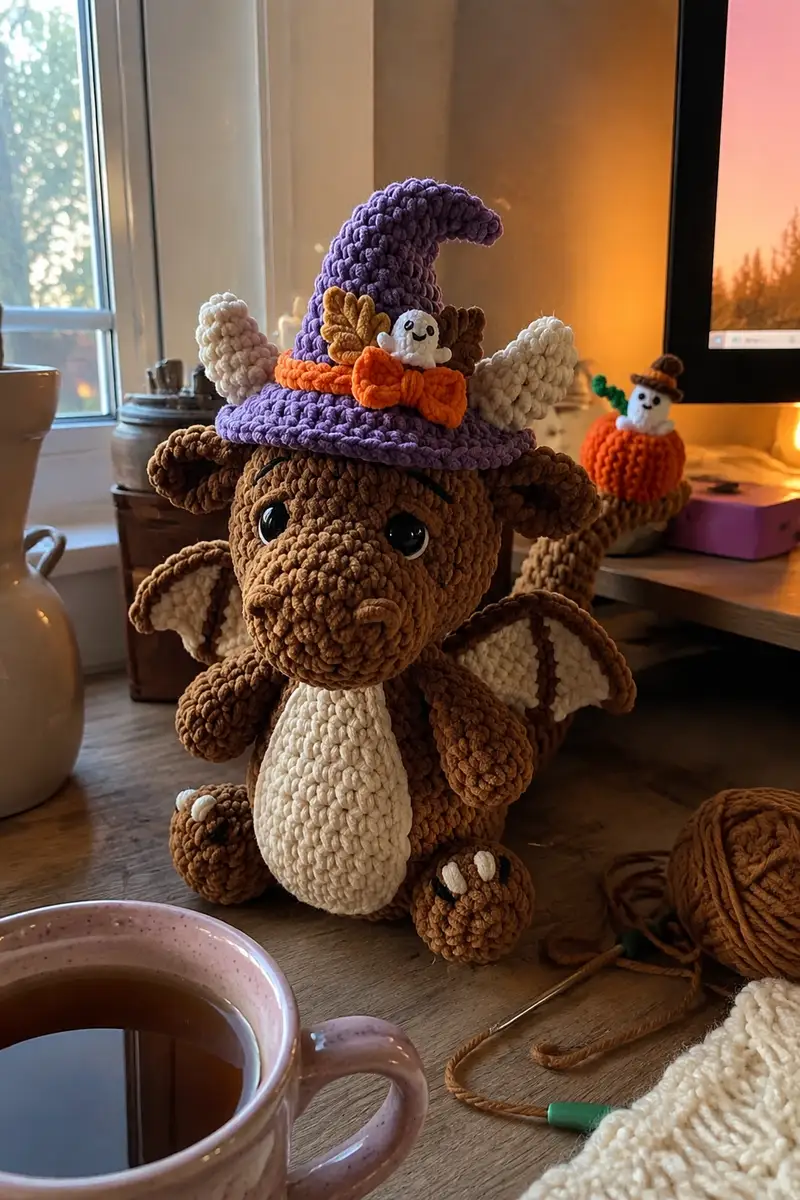
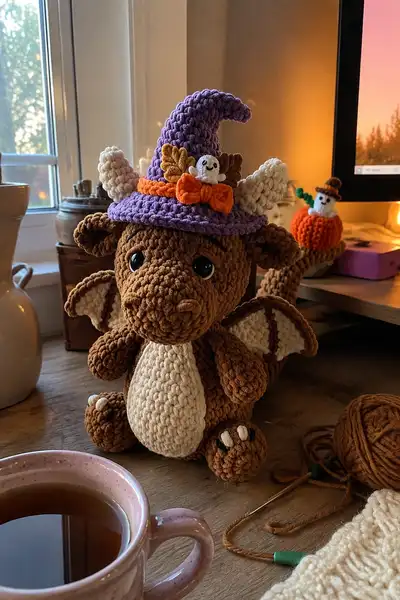
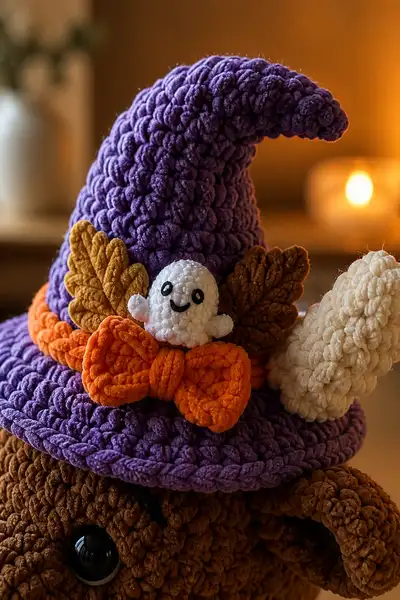
Create a cuddly little Halloween dragon wearing a purple witch hat, orange bow and tiny ghost companion. This plush dragon features a soft brown body, cream belly and wing linings, poseable shaped wings and sweet embroidered face details. The pattern includes a decorative brimmed witch hat with puff texture, a removable bow and tiny ghost and leaf accents for seasonal charm. Perfect for gifting or seasonal display, this amigurumi has lots of character and crochet-friendly construction.
Progress Tracker
0% Complete
— Head :
Round 1 :
6 sc in magic ring (6)
Round 3 :
(1 sc, inc) x 6 (18)
Round 4 :
(2 sc, inc) x 6 (24)
Round 5 :
(3 sc, inc) x 6 (30)
Round 6 :
(4 sc, inc) x 6 (36)
Round 7 :
(5 sc, inc) x 6 (42)
Round 8 :
(6 sc, inc) x 6 (48)
Round 9 :
(7 sc, inc) x 6 (54)
Round 10-14 :
1 sc in each st (54)
Info :
Place safety eyes between rounds 13-15. With 54 sts around, place eyes on round 14 approximately 12-14 stitches apart center-to-center for the gentle, wide-eyed expression. Use stitch markers to mark each eye spot first so they will be symmetrical.
Round 15 :
1 sc in each st (54)
Round 16-18 :
1 sc in each st (54)
Info :
If you want embroidered eyebrows like the photo, mark a point 2-3 stitches above each eye and plan to embroider a slight curve after assembly. Begin stuffing the head lightly from round 16, increasing firmness toward round 20.
Round 19 :
(7 sc, dec) x 6 (48)
Round 20 :
(6 sc, dec) x 6 (42)
Info :
Begin filling the head firmly now, pushing the stuffing into the cheeks and around the eyes to fill cavities. Use small amounts at a time so you can shape the muzzle area that will be defined in the next rounds.
Round 21 :
(5 sc, dec) x 6 (36)
Round 22 :
(4 sc, dec) x 6 (30)
Round 23 :
(3 sc, dec) x 6 (24)
Info :
Create the muzzle ridge: On round 24 you will work short shaping rounds to produce a muzzle protrusion. Keep stuffing the lower face area more firmly than the crown for a rounded snout.
Round 24 :
(2 sc, dec) x 6 (18)
Round 25 :
(1 sc, dec) x 6 (12)
Info :
Fasten off leaving a long tail for sewing. Finish stuffing the head through the opening and close with an invisible decrease or whip stitch. Weave the tail into the final rounds for a clean finish. If you plan to sew the head to the body, do not close completely — leave a 6-8 cm opening to attach later and stuff lightly more at the neck to make a solid join.
— Snout / Muzzle detail :
Round 1 :
6 sc in magic ring (6)
Round 3 :
(1 sc, inc) x 6 (18)
Round 4 :
1 sc in each st (18)
Round 5 :
(2 sc, dec) x 4, 2 sc (14)
Round 6 :
1 sc in each st (14)
Info :
Stitch the snout onto the lower center of the head using the long tail. Sew thoroughly around, pulling slightly so the snout nestles into the head and the stitches blend. Add two small embroidered nostrils with dark brown or black yarn by making tiny satin stitch dots aligned on round 2-3 of the snout front.
— Body :
Round 1 :
6 sc in magic ring (6)
Round 3 :
(1 sc, inc) x 6 (18)
Round 4 :
(2 sc, inc) x 6 (24)
Round 5 :
(3 sc, inc) x 6 (30)
Round 6 :
(4 sc, inc) x 6 (36)
Round 7 :
(5 sc, inc) x 6 (42)
Round 8 :
(6 sc, inc) x 6 (48)
Round 9 :
(7 sc, inc) x 6 (54)
Round 10-13 :
1 sc in each st (54)
Info :
Change to cream yarn for belly starting round 14 if you want the belly to be worked in-continuous rounds. Alternatively, create a separate belly panel and sew it on later. For a neat edge where belly meets body, work the first round of the belly in BLO to create a subtle ridge.
Round 14 :
Change to cream yarn; 1 sc in each st BLO (54)
Round 15-18 :
1 sc in each st (54)
Info :
Begin stuffing the body from the bottom up once you have at least 3 rounds without increases. Keep stuffing medium-firm so the toy can sit but still feel soft. Stop stuffing lightly at the top to allow room for neck attachment.
Round 19 :
(7 sc, dec) x 6 (48)
Round 20 :
(6 sc, dec) x 6 (42)
Round 21 :
(5 sc, dec) x 6 (36)
Round 22 :
(4 sc, dec) x 6 (30)
Round 23 :
(3 sc, dec) x 6 (24)
Round 24 :
(2 sc, dec) x 6 (18)
Round 25 :
(1 sc, dec) x 6 (12)
Info :
Leave the opening of the body unclosed if you plan to sew the head on using a ladder stitch or whip stitch. If you will attach legs first then close, leave enough space to position limbs before closing entirely. Continue stuffing firmly to the top for a stable neck joint.
Round 26 :
Fasten off leaving long tail for sewing head and legs (do not close completely if you are joining the head directly here)
— Arms (Make 2) :
Round 1 :
6 sc in magic ring (6)
Round 3 :
(1 sc, inc) x 6 (18)
Round 4 :
(2 sc, inc) x 6 (24)
Round 5-7 :
1 sc in each st (24)
Info :
Stuff the hand portion firmly to create a rounded paw shape. If you want tiny claws, embroider later with cream yarn or crochet tiny ovals and sew on.
Round 8 :
(2 sc, dec) x 6 (18)
Round 9-11 :
1 sc in each st (18)
Round 12 :
(1 sc, dec) x 6 (12)
Round 13 :
1 sc in each st (12)
Round 14 :
Fasten off leaving long tail for sewing (make sure arm is lightly stuffed — paw firm, arm slightly less firm) (12)
Info :
Sew arms to sides of body aligning top of arm (round 2-3 of arm) with body rounds 16-18 for a natural shoulder position. Add a few extra whip stitches through body and arm to secure them firmly.
— Legs (Make 2) :
Round 1 :
6 sc in magic ring (6)
Round 3 :
(1 sc, inc) x 6 (18)
Round 4 :
(2 sc, inc) x 6 (24)
Round 5 :
(3 sc, inc) x 6 (30)
Round 6-9 :
1 sc in each st (30)
Info :
Create the sole shaping if you prefer: on the first round of the sole, use slip stitches around the inner ellipse to flatten slightly before continuing. Embroider three cream nail claws onto top of each foot later or crochet three tiny oval toes (see Toe Detail below).
Round 10 :
(3 sc, dec) x 6 (24)
Round 11 :
(2 sc, dec) x 6 (18)
Round 12-15 :
1 sc in each st (18)
Round 16 :
(1 sc, dec) x 6 (12)
Round 17 :
Fasten off leaving long tail for sewing; stuff foot firmly and leg portion slightly less firmly (12)
Info :
Sew legs to bottom of body aligning each leg opening with body rounds 2-4. Position so the dragon can sit upright; add extra stitches through body and leg top to stabilize the join.
— Belly Panel (Optional separate panel) :
Round 1 :
6 sc in magic ring (6)
Round 3 :
(1 sc, inc) x 6 (18)
Round 4 :
(2 sc, inc) x 6 (24)
Round 5-6 :
1 sc in each st (24)
Info :
Make a flat oval by working 12 sc in the center of one side for a longer belly if you prefer. Block slightly and then sew to the cream area on the body using a whip stitch to match the seam from round 14 body.
— Ears / Horns (Make 2) :
Round 1 :
6 sc in magic ring (6)
Round 3 :
(1 sc, inc) x 6 (18)
Round 4 :
(2 sc, inc) x 6 (24)
Round 5 :
1 sc in each st (24)
Round 6 :
(2 sc, dec) x 6 (18)
Round 7 :
(1 sc, dec) x 6 (12)
Info :
Flatten each piece slightly when stitching to the head so they cup and appear pointed like small dragon horns/ears. Sew them symmetrically to the head top behind the eyes (around head rounds 6-8). The photo shows the ear/horn shape folded to create a slight curl; you can fold and tack the inner base with a few hidden stitches to hold shape.
— Wings (Make 2) :
Inner Wing (Cream) Round 1 :
6 sc in magic ring (6)
Round 3 :
(1 sc, inc) x 6 (18)
Round 4 :
(2 sc, inc) x 6 (24)
Round 5 :
(3 sc, inc) x 6 (30)
Round 6-7 :
1 sc in each st (30)
Info :
Work these as flat rounds to produce a semi-oval inner wing. Block flat before attaching the outer brown rim so it keeps shape. Optionally place a small piece of thin wire running along the top edge (encased in stitches) to help wings hold pose.
Outer Wing Rim (Brown) Round 1 :
Attach brown yarn to one edge of inner wing with sl st, ch1 then 1 sc in same st and evenly sc around the outer edge adding 4 extra sts on the curved outermost edge to create a pronounced scallop (approx 34-36 sc depending on tension)
Round 2 :
1 sc in each st around (34-36)
Round 3 :
Work 1 sc in each st BLO to create a ridge (34-36)
Round 4 :
Fasten off leaving tail for sewing
Info :
Sew wings to upper back of body centered between rounds 8-12. Angle wings slightly outward and back as in the photo for a natural pose. If you used wire, make sure the wire ends are wrapped in yarn and well hidden inside stitches.
— Tail :
Round 1 :
6 sc in magic ring (6)
Round 3 :
(1 sc, inc) x 6 (18)
Round 4-8 :
1 sc in each st (18)
Round 9 :
(2 sc, dec) x 6 (12)
Round 10-12 :
1 sc in each st (12)
Round 13 :
(1 sc, dec) x 4, 2 sc (8)
Round 14 :
1 sc in each st (8)
Round 15 :
Fasten off leaving long tail for sewing. Stuff tail lightly so it remains flexible but has enough body to be posed (8)
Info :
Sew the tail to the lower back of the body around rounds 2-5 so the tail sits naturally when the dragon is seated. Add a little stuffing to the base to make the connection stable and add extra sewing passes for security.
— Little Claws / Toes (Make 6 small pieces) :
Round 1 :
4 sc in magic ring (4)
Round 3 :
Fasten off leaving tail and stuff minimally. Sew three to each foot front spaced evenly as claws.
Info :
Sew claws using cream yarn onto the top front of each foot aligning with the toes. Embroider small black lines behind each claw for depth if desired.
— Witch Hat (Purple) :
Brim Round 1 :
With purple, ch 2, 8 hdc in 2nd ch from hook (8) — or begin with mr: 8 sc in mr (8)
Brim Round 2 :
(1 hdc, inc) x 8 (16)
Brim Round 3 :
(2 hdc, inc) x 8 (24)
Brim Round 4 :
(3 hdc, inc) x 8 (32)
Brim Round 5 :
(4 hdc, inc) x 8 (40)
Brim Round 6 :
1 hdc in each st (40)
Info :
To create a flat brim, you may work hdc in FLO on the last round to give a subtle rolled edge. Block the brim flat by pinning and spraying lightly with water or steam and allowing to dry.
Crown Round 1 :
Join purple to the inner round of the brim, ch1, 1 sc in each st around (40)
Crown Round 2 :
(3 sc, inc) x 10 (50)
Crown Round 3 :
1 sc in each st (50)
Crown Round 4 :
(4 sc, inc) x 10 (60)
Crown Round 5-8 :
1 sc in each st (60)
Info :
To get the textured bobble-puff look similar to the photo, you can substitute many of the even rounds with puff stitches: *puff in next st, sc in next st* repeat around for a dense textured surface. Use consistent puff stitch counts (e.g., 3 loops per puff) so the texture is uniform.
Crown Round 9 :
(4 sc, dec) x 10 (50)
Crown Round 10 :
1 sc in each st (50)
Crown Round 11 :
(3 sc, dec) x 10 (40)
Crown Round 12-15 :
1 sc in each st (40)
Crown Round 16 :
(2 sc, dec) x 10 (30)
Crown Round 17 :
1 sc in each st (30)
Crown Round 18 :
(1 sc, dec) x 10 (20)
Crown Round 19-22 :
1 sc in each st (20)
Crown Round 23 :
(1 sc, dec) x 6, leave remaining 8 sts unworked to create a curved point (14)
Round 24 :
Work in spiral decreasing occasionally to taste to form a tapered point — dec every 3rd st until you reach 6-8 sts then fasten off and close (approx 10-14 rounds spent decreasing) (6-8)
Info :
Stuff hat lightly at the tip if you want it to hold a curve. You can insert a small length of flexible wire inside the top 6-10 rounds to position the curl. The brim attaches around the body head area; hat can be removable or sewn to head at a few stitches.
— Hat Band & Bow (Orange) :
Band Round 1 :
With orange yarn chain enough to wrap around inside of brim (measure your brim circumference). Join with sl st to form a ring that fits snugly inside the brim.
Band Round 2-3 :
1 sc in each ch around for two rounds to make a sturdy band
Info :
The band should be slightly looser than the brim interior so it can be slid on and off. You can secure the band to brim with a few hidden stitches if desired.
Bow Piece :
Chain 10, sc in 2nd ch from hook and across (9 sc). Turn, ch1 and sc across 8-10 rows to build a rectangular piece about 3-4 cm wide. Fasten off, fold into bow shape and wrap orange yarn tightly around middle several times to form knot. Sew the finished bow to the band.
Info :
You can adjust the chain/row counts to make the bow larger or smaller to suit your hat size; secure with extra stitches through the bow knot to keep it firmly attached to the band.
— Tiny Ghost (Make 1 for hat and 1 for pumpkin) :
Round 1 :
6 sc in magic ring (6)
Round 3 :
(1 sc, inc) x 6 (18)
Round 4-6 :
1 sc in each st (18)
Round 7 :
(1 sc, dec) x 6 (12)
Round 8 :
Fasten off leaving tail. Do not stuff heavily — a small pinch of stuffing is enough for a plush tiny ghost (12)
Info :
Sew ghost arms: make 2 tiny rounds of 6 sc, fasten off leaving tail. Attach arms to ghost sides at rounds 3-4 with a few stitches each. Embroider face using black yarn — two small round eyes and a smiling mouth as in the photo.
— Decorative Leaves (Make 2-4) :
Leaf Round 1 :
Chain 8, sc in 2nd ch from hook, hdc in next, dc in next 2, hdc next, sc next, sl st into starting ch to create curved leaf (approx 7 sts)
Round 2 :
Work along one side of chain: sc, hdc, dc, tr, dc, hdc, sc. Repeat along other side to finish leaf and sl st into base. Fasten off and weave in tail (makes small veined leaf).
Info :
Make 2-3 leaves in mustard/golden brown and attach behind the bow on the hat band to mimic the layered look. Sew securely and hide ends inside hat fabric.
— Hat Cream Puff Accent (Make 1) :
Round 1 :
6 sc in magic ring (6)
Round 2-3 :
1 sc in each st (6)
Round 4 :
Fasten off leaving tail and shape into a puff by sewing the bottom closed; attach to hat side as pictured (6)
Info :
This cream puff looks like a little cloud and sits opposite the bow for balance. It can be sewn firmly to the brim edge so it will not detach during display.
— Assembly Notes :
Info :
Sew head to body by matching head base to the top opening of body. Use mattress stitch or whip stitch, inserting the needle through corresponding rounds to create an even seam. Stuff head and body so the neck joint is firm and neat. Use extra passes of thread where the head will carry the hat so the doll can sit upright without the head wobbling.
Info :
Sew ears/horns and hat to the head so that the hat sits slightly forward. Attach eyes and embroider eyebrows and mouth after sewing the head to the body to ensure alignment with the body posture.
Info :
Weave in all tails into adjacent fabric and trim closely. Use small amounts of fabric glue inside the hat band knot if the bow tends to shift; otherwise secure with a few catch stitches to the band.
This adorable Halloween dragon is a delightful blend of cuddly proportions and seasonal charm — complete with a puff-textured purple witch hat, cheerful orange bow and tiny smiling ghost accents. As you sew each part together you'll watch the character come to life, from the expressive eyes to the little claws and wing details. Make one for a shelf, as a gift, or as a cozy decorative companion for fall displays. 🎃🧶✨