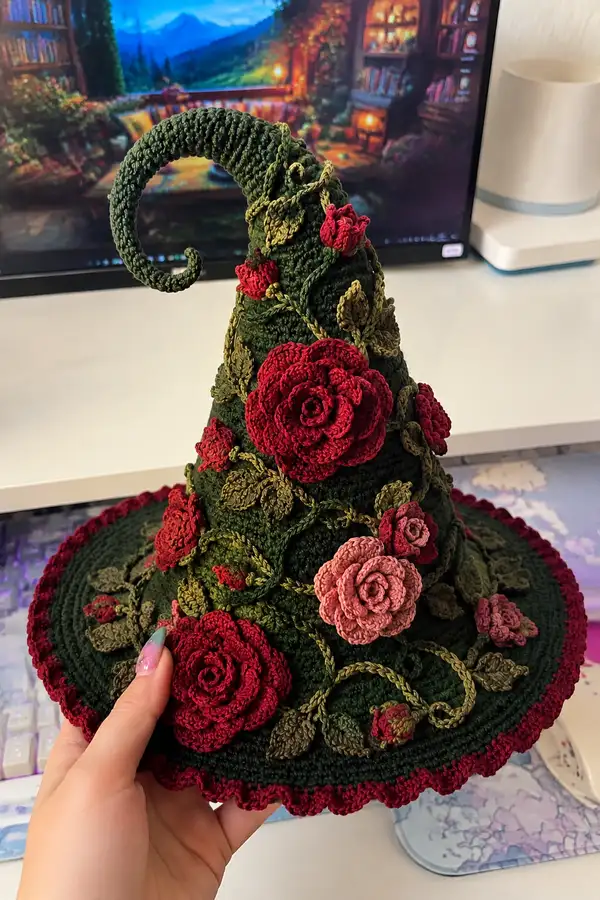
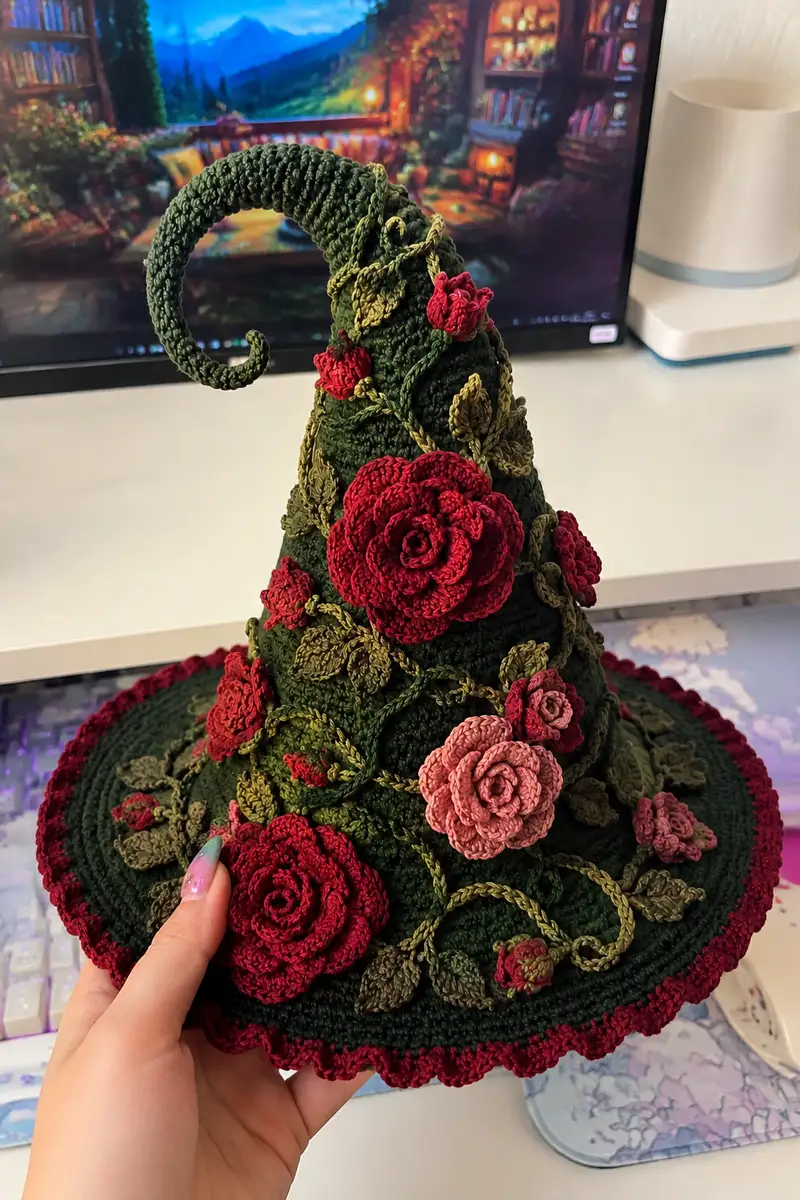
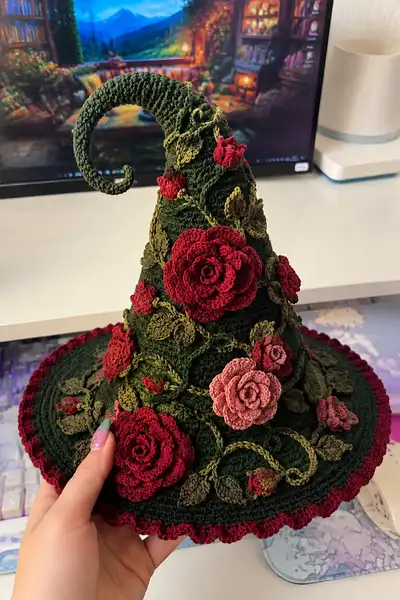
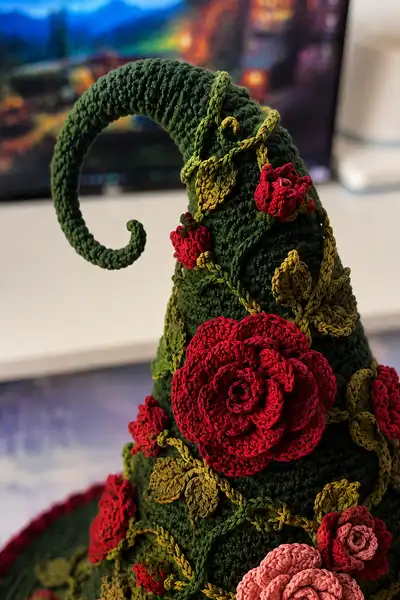
A whimsical spiral witch hat richly decorated with layered roses, winding vines, and sculpted leaves. Worked in worsted cotton for crisp shaping, this hat features a tall curled tip, wide structured brim, and a delicate scalloped edge. The deep forest green base is accented with variegated olive vines and multi-tonal roses in crimson and blush. Perfect as a statement accessory or costume piece, this pattern breaks the project into clear components for cone, brim, tip, flowers, leaves and vines.
Progress Tracker
0% Complete
— Materials & Gauge :
Info :
Gauge and fabric density are important for hat structure. Aim for approximately 14 sc x 16 rows = 10cm using 3.5mm hook in worsted cotton, worked tightly so stuffing and appliques do not show through. Use a hook 0.5-1mm smaller than the yarn label if needed for dense amigurumi-like fabric.
— Brim (worked flat, base for cone attachment) :
Round 1 :
6 sc in magic ring (6)
Round 3 :
(1 sc, inc) x 6 (18)
Round 4 :
(2 sc, inc) x 6 (24)
Round 5 :
(3 sc, inc) x 6 (30)
Round 6 :
(4 sc, inc) x 6 (36)
Round 7 :
(5 sc, inc) x 6 (42)
Round 8 :
(6 sc, inc) x 6 (48)
Round 9 :
(7 sc, inc) x 6 (54)
Round 10 :
(8 sc, inc) x 6 (60)
Round 11 :
(9 sc, inc) x 6 (66)
Round 12 :
(10 sc, inc) x 6 (72)
Info :
These first 12 rounds create a firm foundation. If you want a slightly larger brim, continue increasing another 2-4 rounds following the same pattern. For the pictured hat I worked to Round 14 (84 sts) and used that inner row as my cone-attachment line.
Round 13 :
(11 sc, inc) x 6 (78)
Round 14 :
(12 sc, inc) x 6 (84)
Info :
Mark this round with a removable stitch marker if you plan to sew the cone to the brim at this point. Round 14 (84 sts) is used in this pattern as the inner join row between brim and cone; you may alter to suit head size.
Round 15 :
1 sc in each st (84)
Round 16 :
1 sc in each st BLO (84)
Round 17-20 :
1 sc in each st (84)
Info :
Working a BLO round creates a small ridge where the cone will join and helps the brim keep its shape. If you prefer a softer brim, skip the BLO and work plain sc rounds.
Round 21 :
(8 sc, inc) x 9 (93)
Round 22 :
(9 sc, inc) x 9 (102)
Round 23 :
(10 sc, inc) x 9 (111)
Round 24 :
(11 sc, inc) x 9 (120)
Info :
Rounds 21-24 increase the outer brim for a wider decorative edge; adjust or stop earlier for a smaller brim. Keep counts accurate: each round adds 9 increases because the starting rounds after 84 sts are worked in groups of nine when expanding a large circle (you can map increases evenly).
Round 25 :
1 sc in each st (120)
Round 26 :
1 sc in next st, *ch2, skip 1 st, 1 sc in next* - repeat around to create subtle eyelet texture (approx 40 ch2-spaces)
Info :
If you prefer a denser brim like the photo (no eyelets), work R26 as 1 sc in each st. The pictured hat uses a close fabric with a decorative scallop edge; eyelets are optional for lace effect.
Round 27 :
Scallop edge: *skip next st, 5 dc in next, skip next st, sl st in next* repeat around to give a ruffled scalloped trim (approx 40 scallops)
Info :
Fasten off and weave in ends neatly. Block the brim lightly to smooth out shape; apply light starch or hat stiffener if you desire a rigid brim. Keep the inner join (Round 14) accessible for attaching the cone.
— Cone (base-up shaping to tall point) :
Info :
Work cone separately from brim and sew it to Round 14 (84 sts) on the brim, or build the cone directly from that round by working up from the brim inner round. This cone is constructed base-up: join yarn at your prepared brim attachment point, or start from a magic ring and work increases to 84 sts if making separately.
Round 1 :
6 sc in magic ring (6)
Round 3 :
(1 sc, inc) x 6 (18)
Round 4 :
(2 sc, inc) x 6 (24)
Round 5 :
(3 sc, inc) x 6 (30)
Round 6 :
(4 sc, inc) x 6 (36)
Round 7 :
(5 sc, inc) x 6 (42)
Round 8 :
(6 sc, inc) x 6 (48)
Round 9 :
(7 sc, inc) x 6 (54)
Round 10 :
(8 sc, inc) x 6 (60)
Round 11 :
(9 sc, inc) x 6 (66)
Round 12 :
(10 sc, inc) x 6 (72)
Round 13 :
(11 sc, inc) x 6 (78)
Round 14 :
(12 sc, inc) x 6 (84)
Info :
If you worked the brim and left Round 14 free, align cone Round 14 (84 sts) with brim Round 14 (84 sts) and test fit by pinning with sewing pins. The cone should comfortably fit the inner brim circle without puckering.
Round 15-40 :
1 sc in each st (84)
Info :
These even rounds form the tall straight wall of the cone. Work as many rounds as needed to achieve desired height; pictured hat used 40 even rounds for a long, dramatic cone. Place a marker every 10 rounds to keep count.
Round 41 :
(11 sc, dec) x 6 (78)
Round 42 :
(10 sc, dec) x 6 (72)
Round 43 :
(9 sc, dec) x 6 (66)
Round 44 :
(8 sc, dec) x 6 (60)
Info :
Begin tapering the cone to produce the signature point. These evenly spaced decreases reduce circumference by 6 stitches each round. Keep tension consistent and check for lumps.
Round 45 :
(7 sc, dec) x 6 (54)
Round 46 :
(6 sc, dec) x 6 (48)
Round 47 :
(5 sc, dec) x 6 (42)
Round 48 :
(4 sc, dec) x 6 (36)
Info :
As the cone narrows, stitch counts drop predictably. Ensure your decreases are worked as sc2tog for a neat invisible decrease and to avoid bulky seams inside the hat.
Round 49 :
(3 sc, dec) x 6 (30)
Round 50 :
(2 sc, dec) x 6 (24)
Round 51 :
(1 sc, dec) x 6 (18)
Info :
Fasten off leaving long tail for sewing if you will hand-sew the cone to the brim. At this point the cone is a closed pointed top. For the curled tip used in the photo, we will create a spiral tip separately and attach it to the top center, or alternatively, leave a longer opening at the top before final closure to insert the tip wire and tube.
— Curled Tip Tube (poseable internal core) :
Info :
The curled tip in the photos is a tubular spiral that is firm yet bendable. Work a narrow tube and insert thin floral wire, or crochet a spiral 'hose' and stuff lightly. The tube is then seamed into the cone top and curled to shape.
Round 1 :
Make a chain of 40 (or desired length) then join with sl st to form a ring, careful not to twist (40 ch joined)
Round 2 :
Ch1, 1 sc in each ch around (40)
Round 3-12 :
1 sc in each st (40)
Info :
Make the tube as long as you want the curled tip to be. For the pictured long spiral with a tight curl at the end, a 12-round tube of 40 sts gave a good length. If you prefer a longer curl, add more length in multiples of 4-6 chains.
Round 13 :
Stuff tube lightly with fiberfill (do not overstuff) and insert 18-22 gauge wire down the center. Fold and bend wire to desired curl, leaving a small tail inside the cone to sew into the top securely
Round 14 :
Fasten off leaving long tail for sewing. If you want a spiral with a textured outer surface, work alternating BLO and FLO rounds for subtle ridges before stuffing.
Info :
To attach: sew tube opening to the top center of the cone (the small MR closure) with secure whipstitches, then shape the curl by bending wire carefully. Cover joint with a small flower or leaf for a neat finish.
— Large Rose (make 3-4) :
Info :
Roses are made by creating a long spiral strip of petals and then rolling and sewing. Work the spiral flat, using repeated petal rows, then roll from center outwards to form layered petals. Use deep crimson for the main large roses as in photo.
Round 1 :
With 3.0mm hook and crimson yarn, ch 60 (or 60-80 for larger roses) - leave long tail for sewing center
Round 2 :
Sc in 2nd ch from hook and each ch across (59) - turn work and do not join; you will work along one long edge to create petals
Round 3 :
*ch3, skip next st, sl st in next* across the length to create loops for petals (approx 20 loops)
Round 4 :
Working into each loop: (sc, hdc, 3 dc, hdc, sc) in each loop to form a petal. Repeat across the entire strip
Round 5 :
On the opposite long edge, repeat loops: *ch3, skip next st, sl st* across, then work petal clusters into those loops: (sc, hdc, 4 dc, hdc, sc)
Info :
Alternate petal heights as you move along to create a full layered look. You can add an extra row of larger petals at the outer edge for a more dramatic bloom.
Round 6 :
Repeat a final outer petal row: make loops and work (sc, hdc, 5 dc, hdc, sc) into each loop for a ruffled outer edge
Round 7 :
Fasten off, leaving long tail. Roll the strip tightly from one end to create the rose center, then stitch through the base at regular intervals to secure. Adjust petals, tugging them outward for a natural appearance.
Info :
If you prefer layered petals in concentric spirals, create a spiral base by making 2-3 long strips of decreasing length and stack them when rolling; this adds volume without making a single very long strip.
— Medium Rose (make 4-6) :
Round 1 :
Ch 40, sc in 2nd ch and across (39)
Round 2 :
*ch3, skip next, sl st* across to form loops (approx 12 loops)
Round 3 :
Work into each loop: (sc, 2 dc, sc) for tighter, smaller petals. Repeat along whole strip
Round 4 :
Repeat outer petal row with slightly taller clusters: (sc, hdc, 3 dc, hdc, sc)
Round 5 :
Fasten off leaving long tail and roll into rose, securing with small hidden stitches at base
Info :
Use slightly lighter blush pink for some medium roses to create contrast and depth. Vary strip lengths to create variety in bloom sizes.
— Small Rosebud (make 8-12) :
Round 1 :
Ch 12, sc in 2nd ch and across (11)
Round 2 :
*ch2, skip next, sl st* across to create 4-5 loops
Round 3 :
Into each loop: (sc, hdc, 3 dc, hdc, sc) - leave strip unrolled and roll lightly so the bud is compact; secure at base
Info :
Rosebuds are tacked to the hat with a few invisible stitches and positioned at ends of vines or tucked near larger roses for realism.
— Leaves (make 16-24) :
Round 1 :
Ch 12, sc in 2nd ch and next 4 (5 sc) then 3 hdc in next, 3 dc in next, 3 hdc in next, sc in remaining chs across. Turn and sc across back edge to form both sides of leaf (approx 10-12 sts total)
Round 2 :
Repeat leaf shape or work a textured leaf: ch 10, *sl st in next, hdc in next 2, 2 dc in next, hdc in next 2, sl st* - fasten off
Info :
Work leaves in variegated olive shades or two-toned yarn for natural vein variation. Block leaves flat and add a few surface stitches down the middle for a raised vein if desired.
Round 3 :
For vein detail: Using contrasting darker green, embroider a line of sl st down the center and small V veins to each side. Secure ends and weave in.
— Vines (twisted cords) :
Round 1 :
Make a chain of 120 (or desired length for one vine), then work 1 sc into 2nd ch from hook and across to create a firm cord (approx 119 sc)
Round 2 :
Alternatively work crochet i-cord: ch 30, fold, work sc through both loops along chain edge to make a thick cord; continue until desired length
Round 3 :
Twist cords slightly and block; use a few stitches to tack into position on hat when arranging vines
Info :
Make multiple cords of varying lengths, braid small sections or create loops to wrap around the cone. The pictured hat uses three main vine lines cascading down the cone and several short tendrils around roses.
— Assembly & Placement :
Info :
Arrange large roses first to anchor the look: position one large rose front-right, another back-left, and a third slightly lower; place medium roses and buds in clusters and weave vines between them. Pin pieces to the cone and brim before sewing to ensure pleasing composition.
Round 1 :
Sew cone to brim: align cone base (Round 14 = 84 sts) with brim Round 14 (84 sts). Using yarn tail from cone, whipstitch evenly through both edges matching every stitch. Use an even tension to avoid puckers
Info :
After cone is attached, reinforce seam with a second pass if needed. Use small hidden stitches to attach vines and leaves, then overlay roses on top of seams and vine junctions to hide joins.
Round 2 :
Secure vines by stitching along their length at intervals (every 6-10 stitches) so they lay flat against the cone and follow the desired curve
Round 3 :
Sew leaves at vine junctions and under petals with a few secure whipstitches. Tuck small buds by the base of larger roses and secure tightly.
Info :
Use disappearing thread or matching yarn for nearly invisible attachment. If a wire is used in the tip, also tack the wire tail to the cone interior to secure the curl permanently.
— Extra Decorative Detailing :
Round 1 :
For vine ivy texture, use sl st or reverse sc to create raised twisted stitches along vine cords before sewing them on
Round 2 :
For leaf edging, work a tiny picot edge around the leaf: *dc, ch3, sl st in 3rd ch* around outer edge for delicate serration
Round 3 :
Add bead centers: sew a small seed bead or French knot (embroidery floss) into the center of a few roses for sparkle
Info :
Small accents like bead centers, few embroidered tendrils, or a slightly variegated yarn for leaves elevate realism. Use pins to preview each accent before permanent attachment.
— Finishing Touches :
Round 1 :
Weave all loose ends into the interior of the hat and trim closely. Use a yarn needle to bury ends in the cone fabric to prevent unraveling
Round 2 :
Steam-block the hat gently on a rounded form (platter or head-block) to shape the cone and set the brim. Avoid direct heat on wool blends; use a damp cloth and steam sparingly on cotton
Info :
For wearable stability, consider sewing a small ribbon or narrow elastic inside the brim that fits comfortable to the wearer's head size. This helps the hat stay in place while worn.
You did it — a magical Big Rose Garden Spiral Witch Hat that combines structural crochet with romantic floral appliques, perfect for costuming or display. Each rose and leaf adds personality and charm, turning the hat into a wearable piece of art. Celebrate every stitch — this handcrafted accessory makes a stunning statement and a wonderful gift. 🌹🧶✨