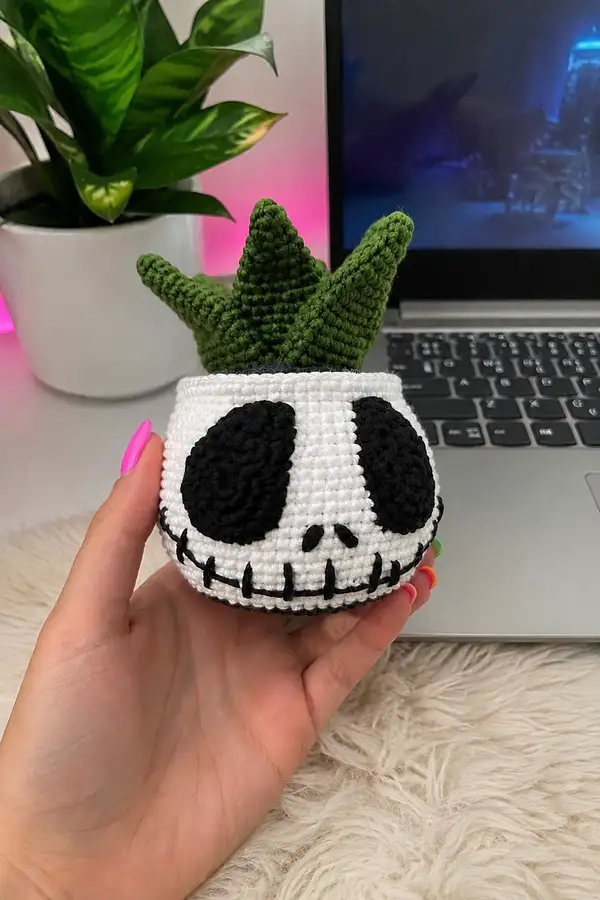
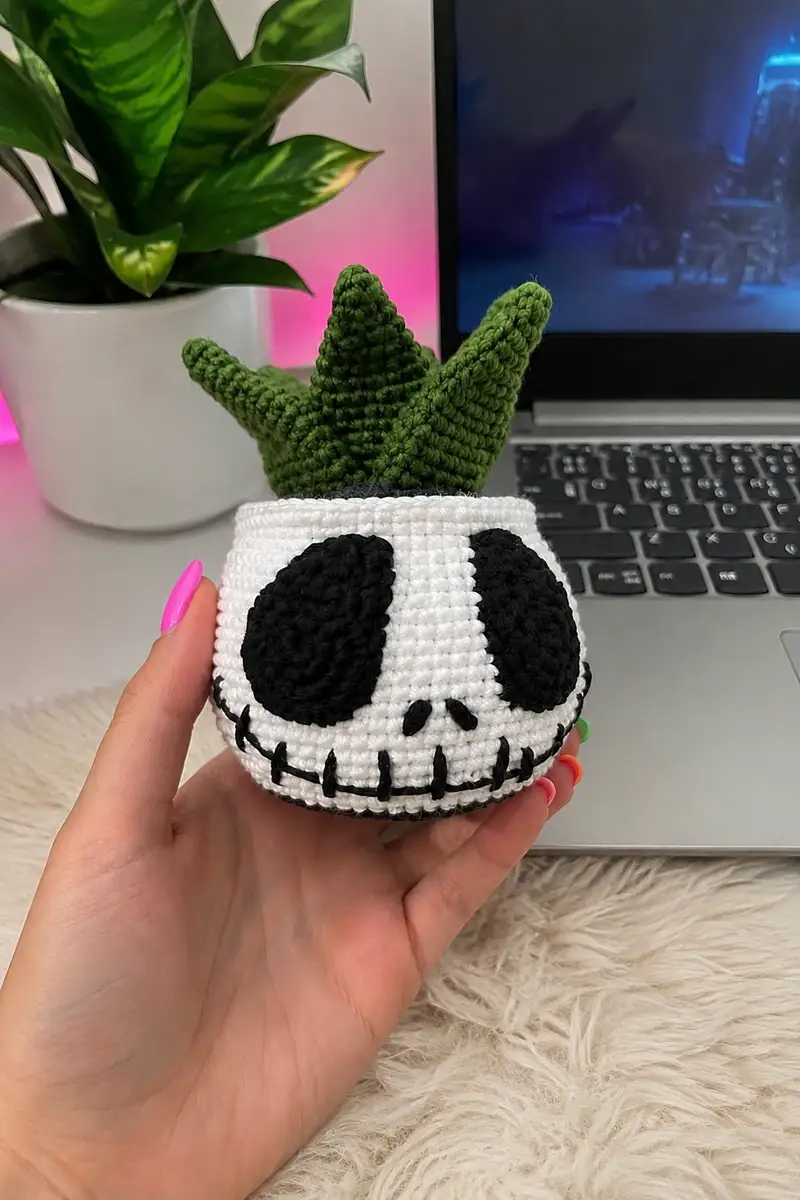
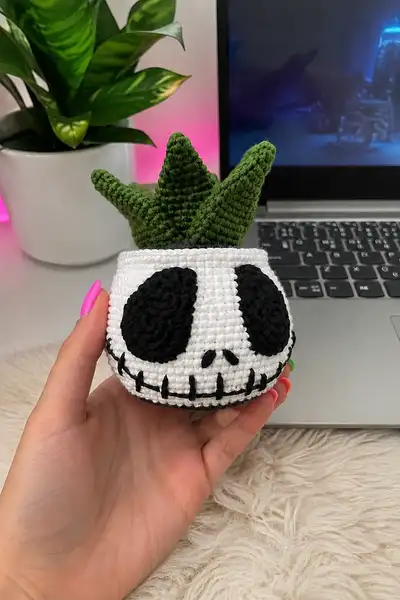
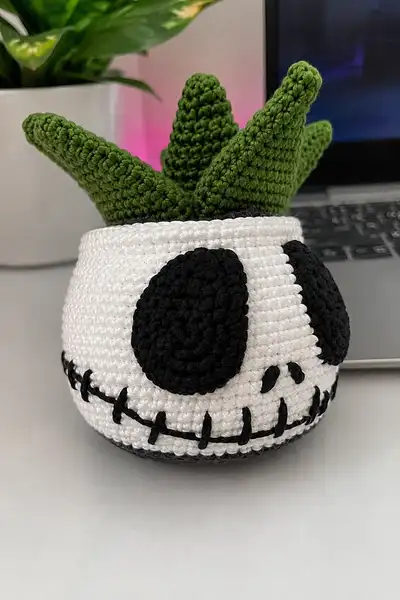
A charming skull-shaped crochet planter that doubles as a cute amigurumi pot for a small handmade succulent. This pattern recreates the white skull pot with black eye patches and stitched mouth, and a lush cluster of green crocheted succulent leaves that fit snugly inside. Worked in continuous rounds with clear shaping, this project makes a great desk accent or unique gift.
Progress Tracker
0% Complete
— Skull Pot (Body) :
Round 1 :
6 sc in magic ring using Dark Charcoal (6)
Round 3 :
(1 sc, 1 inc) x 6 (18)
Info :
These first 3 rounds form the base rim in Dark Charcoal. This gives the planter a solid base and clean dark edge visible around the bottom. Keep these rounds tight and do not stuff yet.
Info :
Change to White yarn on last stitch of Round 3 by pulling White through and working Round 4 with White to create the main skull color. Carry the Dark Charcoal inside the pot or fasten off securely.
Round 4 :
(2 sc, 1 inc) x 6 (24)
Round 5 :
(3 sc, 1 inc) x 6 (30)
Round 6 :
(4 sc, 1 inc) x 6 (36)
Round 7 :
(5 sc, 1 inc) x 6 (42)
Round 8 :
(6 sc, 1 inc) x 6 (48)
Round 9 :
(7 sc, 1 inc) x 6 (54)
Round 10 :
(8 sc, 1 inc) x 6 (60)
Info :
You should have 60 sts after Round 10; this circumference forms the widest part of the pot. Use a stitch marker to mark the start of rounds; we will now build up height in even rounds.
Round 11-18 :
1 sc in each st (60)
Info :
Work 8 rounds even to create the skull's mid-curve. Check for even tension so the face embroidery will sit smooth. At the end of Round 14 measure height — the skull face area will occupy about 6-8 even rounds.
Round 19 :
(8 sc, 1 dec) x 6 (54)
Round 20 :
1 sc in each st (54)
Info :
Begin placing features: the two black eye appliques will be positioned symmetrically at the front. Mark the center front stitch (use a removable marker) and test-fit appliques before sewing.
Round 21 :
(7 sc, 1 dec) x 6 (48)
Round 22 :
1 sc in each st (48)
Round 23 :
(6 sc, 1 dec) x 6 (42)
Round 24 :
1 sc in each st (42)
Info :
Round 23-24 bring the pot into a slightly narrower lower face curve. This is a good time to tack the bottom of your appliques in place temporarily (pins or small basting stitches) to check spacing for the nose and mouth.
Round 25 :
(5 sc, 1 dec) x 6 (36)
Round 26 :
1 sc in each st (36)
Round 27 :
(4 sc, 1 dec) x 6 (30)
Round 28 :
1 sc in each st (30)
Info :
These rounds form the lower jaw area and will sit behind the embroidered stitched smile. Leave the body fairly open — we will create an internal small soil disk later and close the pot slightly so the succulent sits snugly.
Round 29 :
(3 sc, 1 dec) x 6 (24)
Round 30 :
1 sc in each st (24)
Info :
At Round 30 you have a smaller opening. We'll add 1-2 rounds of Dark Charcoal atop the white to define the top rim. Change to Dark Charcoal in the last stitch of Round 30.
Round 31 :
1 sc in each st using Dark Charcoal (24)
Round 32 :
1 sc in each st using Dark Charcoal (24)
Info :
These two rounds create the inner rim/soil edge. You can optionally work the last round in BLO to create a small ridge so the succulent sits more snugly. Fasten off leaving a 20-30 cm tail for weaving in.
Round 33 :
Change back to White on next stitch and work 1 sc in each st around (24)
Info :
Fasten off leaving long tail to sew bottom shut or weave into the pot bottom if you prefer the pot fully closed. Most planters are open; if you want to close slightly to hold the soil disk, weave the tail through the top loop and cinch slightly, but allow enough opening for the succulent base piece.
— Bottom Finishing (optional) :
Info :
If you would like a sturdier base you can make a small circular disk, sew it across the bottom, or leave the opening and insert a felt or plastic coaster inside for stability. To close: use the long tail and stitch through remaining 24 sts in rounds of paired decreases until closed.
— Eye Appliques (Make 2) :
Round 1 :
6 sc in magic ring using Black (6)
Round 3 :
(1 sc, 1 inc) x 6 (18)
Round 4 :
(2 sc, 1 inc) x 6 (24)
Round 5 :
(3 sc, 1 inc) x 6 (30)
Round 6-7 :
1 sc in each st (30)
Info :
These rounds produce a flat disc that will be shaped slightly into an oval by sewing down edges and stretching the top slightly. To make a teardrop/oval, after Round 7 use a short decrease shaping on the top edge to create the narrower top: Round 8: (3 sc, 1 dec) x 6 (24)
Round 8 :
(3 sc, 1 dec) x 6 (24)
Round 9 :
1 sc in each st (24) — Fasten off leaving long tail for sewing
Info :
Block lightly if you want a flatter applique. Position one applique on either side of the center front; count stitches so the ovals are about 8-10 stitches apart across the vertical center line depending on desired spacing. Use the long tail to mattress stitch down the appliques, anchoring at several points around the perimeter for a smooth finish.
— Nose Teardrops (Make 2) :
Round 1 :
4 sc in magic ring using Black (4)
Round 3 :
2 sc, inc, 1 sc (5) — shape into a tiny teardrop, fasten off leaving tail for sewing
Info :
Sew the two small teardrops just beneath and between the eyes with their rounded sides facing up to mimic the stylized nostrils seen on the skull. You can embroider a thin satin stitch with the tail if you prefer to use embroidery instead of appliques.
— Mouth Embroidery :
Info :
We will create the stitched smile using Black yarn and a yarn needle. The mouth is a horizontal line across the lower face with vertical short stitches for teeth. Mark a horizontal stitch line across the lower front corresponding roughly to Rounds 25-28 to match photos.
Step 1 :
Thread a length of Black yarn (about 50-70cm) onto your yarn needle. Starting at the left side of the mouth line, run a running stitch (small back-and-forth) through the pot fabric to create the baseline of the smile. Keep stitches small and even.
Step 2 :
For teeth, insert the needle from the underside of the baseline then out on the baseline. Make vertical stitches approx 3-5 mm long extending above the baseline into the white area and back down through the baseline to the inside. Space teeth at regular intervals; in the sample there are about 7-9 teeth visible across the front. Secure ends inside and weave in.
Info :
Do not pull embroidery too tight; test tension on a scrap to get even lines. If you prefer a raised look, use a second pass of embroidery knots for each tooth.
— Soil Disk (Inner Support) :
Round 1 :
6 sc in magic ring using Dark Charcoal or Black (6)
Round 3 :
(1 sc, 1 inc) x 6 (18)
Round 4 :
(2 sc, 1 inc) x 6 (24)
Round 5-6 :
1 sc in each st (24)
Info :
This disk will be lightly stuffed and sewn or placed inside the pot opening to provide a secure anchor for the succulent leaf bases. Stuff lightly so it sits flush under the rim and does not bulge the pot sides.
Round 7 :
Start decreasing if you want a slight domed disk: (2 sc, 1 dec) x 6 (18)
Round 8 :
1 sc in each st (18) — Fasten off leaving a long tail for sewing into the pot
Info :
Sew disk into the interior of the pot around the top rim (Dark Charcoal rounds) so the succulent stems can be sewn to the disk and remain stable.
— Succulent Leaves (Make 5; Center leaf is slightly larger) :
Info :
Each leaf is crocheted as an elongated cone, worked in continuous rounds, lightly stuffed, and sewn into the soil disk. Use Leaf Green. Make 4 identical side leaves and 1 taller center leaf (center leaf uses 4 extra even rounds before decreasing).
Leaf (Side) - Round 1 :
6 sc in magic ring using Leaf Green (6)
Round 3 :
(1 sc, 1 inc) x 6 (18)
Round 4 :
(2 sc, 1 inc) x 6 (24)
Round 5 :
(3 sc, 1 inc) x 6 (30)
Round 6 :
(4 sc, 1 inc) x 6 (36)
Round 7 :
(5 sc, 1 inc) x 6 (42)
Round 8 :
(6 sc, 1 inc) x 6 (48)
Round 9-16 :
1 sc in each st (48) — work 8 even rounds to build length
Info :
Lightly stuff the leaf as you go once you have about 6-8 even rounds completed so the leaf keeps its shape but is still flexible. If you want a stiffer leaf, insert a short piece of florist wire to the center before stuffing: leave ends folded into the base.
Round 17 :
(6 sc, 1 dec) x 6 (42)
Round 18 :
1 sc in each st (42)
Round 19 :
(5 sc, 1 dec) x 6 (36)
Round 20 :
1 sc in each st (36)
Round 21 :
(4 sc, 1 dec) x 6 (30)
Round 22 :
1 sc in each st (30)
Round 23 :
(3 sc, 1 dec) x 6 (24)
Round 24 :
1 sc in each st (24)
Round 25 :
(2 sc, 1 dec) x 6 (18)
Round 26 :
1 sc in each st (18)
Round 27 :
(1 sc, 1 dec) x 6 (12)
Round 28 :
1 sc in each st (12)
Round 29 :
6 dec (6) — fasten off leaving long tail for sewing; finish stuffing tip firmly
Info :
Sew the leaf base flat and tight to the soil disk; shape the leaf by slightly flattening the base and curving the tip. Make 4 of these side leaves.
Center Leaf - Round 1 :
6 sc in magic ring using Leaf Green (6)
Round 3 :
(1 sc, 1 inc) x 6 (18)
Round 4 :
(2 sc, 1 inc) x 6 (24)
Round 5 :
(3 sc, 1 inc) x 6 (30)
Round 6 :
(4 sc, 1 inc) x 6 (36)
Round 7 :
(5 sc, 1 inc) x 6 (42)
Round 8 :
(6 sc, 1 inc) x 6 (48)
Round 9-20 :
1 sc in each st (48) — work 12 even rounds for a taller center leaf
Info :
The center leaf is taller; stuff as you go. If you like a more tapered look, begin decreases one round earlier. Insert wire if you want the leaf to stand perfectly upright, wrapping the wire end and covering it with stuffing before closing the tip.
Round 21 :
(6 sc, 1 dec) x 6 (42)
Round 22 :
1 sc in each st (42)
Round 23 :
(5 sc, 1 dec) x 6 (36)
Round 24 :
1 sc in each st (36)
Round 25 :
(4 sc, 1 dec) x 6 (30)
Round 26 :
1 sc in each st (30)
Round 27 :
(3 sc, 1 dec) x 6 (24)
Round 28 :
1 sc in each st (24)
Round 29 :
(2 sc, 1 dec) x 6 (18)
Round 30 :
1 sc in each st (18)
Round 31 :
(1 sc, 1 dec) x 6 (12)
Round 32 :
1 sc in each st (12)
Round 33 :
6 dec (6) — fasten off leaving long tail to sew; finish stuffing tip firmly
Info :
Make 1 center leaf and 4 side leaves. The leaves should be lightly stuffed and shaped so they curve outward slightly. If you used wire, be sure the wire ends are folded into the base and not poking out before sewing into the soil disk.
— Assembly & Joining :
Info :
Before final sewing, layout the leaves around the soil disk to determine the optimal arrangement. The center leaf sits in back-center or middle; the four side leaves are placed evenly around it to create the crown shape visible in the photos.
Step 1 :
Sew the soil disk into the pot under the Dark Charcoal rim. Use the long tail from the disk and secure with small whipstitches to the inside of the pot around the rim so it sits level and stable.
Step 2 :
Using the long tails from each leaf, sew each leaf base to the soil disk at the placement points you chose. Use dense stitches around the base to ensure they do not wobble; reinforce with extra stitches where needed.
Step 3 :
Sew the eye appliques to the front of the pot centered around the vertical midline. Measuring: with 60-48-... counts earlier, place appliques so the widest points align roughly between Rounds 13-18 of the pot. Leave enough space so the nose teardrops sit just beneath the inner edges.
Step 4 :
Sew the small nose teardrops just under the eyes, then complete the mouth embroidery as described. Hide ends inside the pot and weave them securely.
Info :
After assembly, adjust leaf angles and add a few invisible stitches at critical points to lock the shape. If any seams are visible outside, run a thread of matching yarn through nearby stitches and cinch gently for a cleaner finish.
This adorable skull succulent planter brings personality and charm to any desk or shelf. Each stitch builds a tiny world — the bold face details and sculptural leaves make it a delightful handmade accent. I hope you enjoyed the process as much as the finished piece — it's a small project that packs a big personality! 🧶🌿 Share your version and get creative with colors. Happy crocheting! 🎨