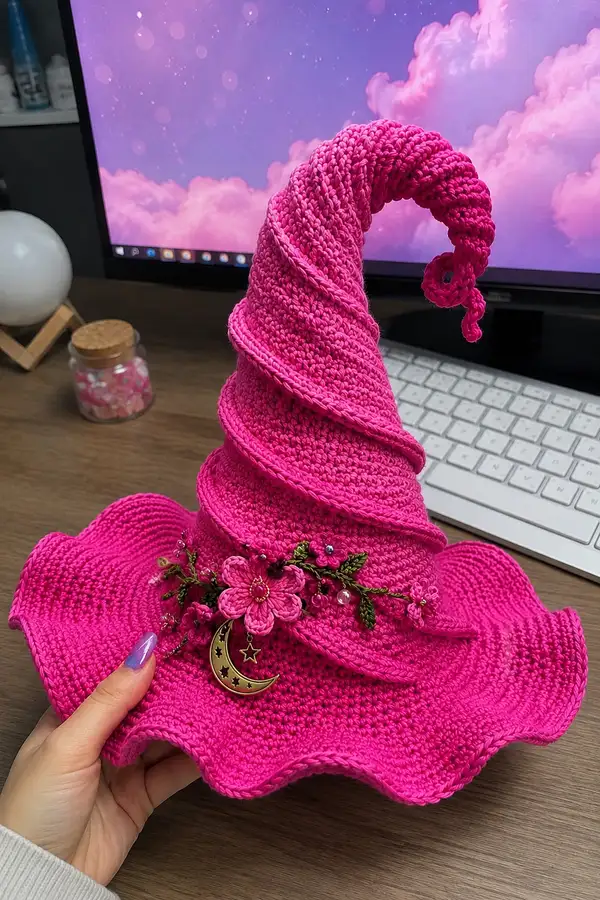
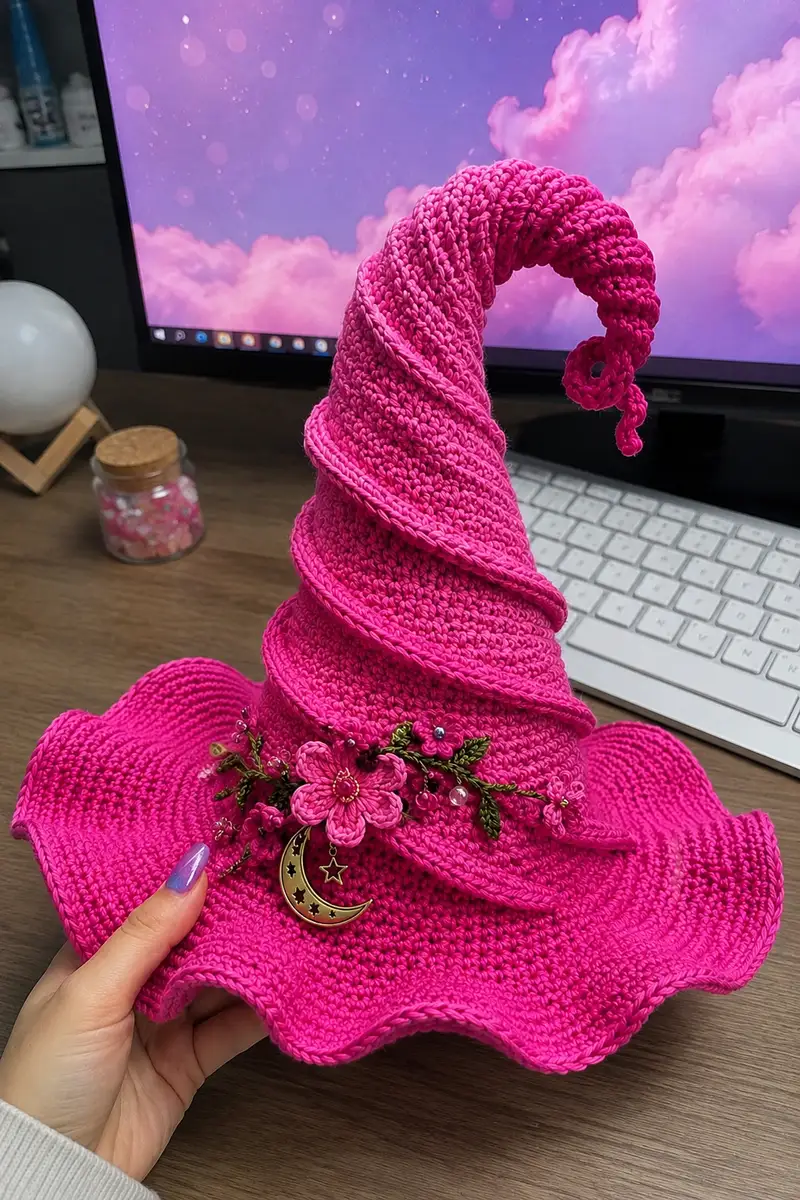
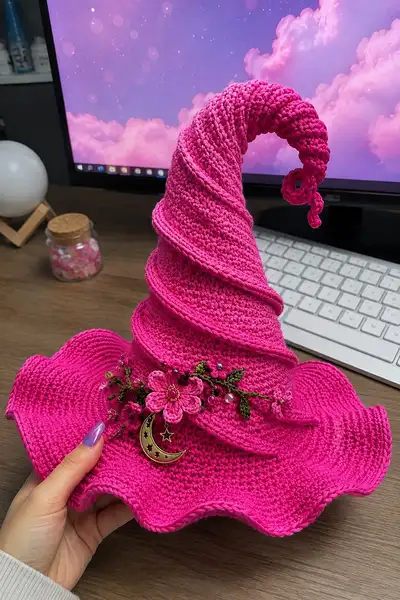
Make a whimsical, tall spiral witch hat in a bright hot-pink yarn — an eye-catching accessory perfect for Halloween, cosplay, or desktop decor. This pattern recreates the dramatic wavy brim, corkscrew top and decorative floral band shown in the photos. Detailed stitch-by-stitch rounds and helpful tips guide you through shaping the crown, building the wide ruffled brim and making the spiral topper and flower embellishments.
Progress Tracker
0% Complete
— Crown (base to cone) :
Round 1 :
6 sc in magic ring (6)
Round 3 :
(1 sc, inc) x 6 (18)
Round 4 :
(2 sc, inc) x 6 (24)
Round 5 :
(3 sc, inc) x 6 (30)
Round 6 :
(4 sc, inc) x 6 (36)
Info :
Use a stitch marker at the first stitch of every round and work in continuous rounds (do not join) to keep the crown seamless. These early rounds set the diameter of the hat crown; if you want a slightly larger head opening, add one more increase round before moving to even rounds.
Round 7 :
(5 sc, inc) x 6 (42)
Round 8 :
(6 sc, inc) x 6 (48)
Round 9 :
(7 sc, inc) x 6 (54)
Round 10 :
(8 sc, inc) x 6 (60)
Round 11 :
(9 sc, inc) x 6 (66)
Round 12 :
(10 sc, inc) x 6 (72)
Info :
At this point your crown diameter should be roughly 6.5-7.5 inches depending on tension and yarn. Try the hat opening on a head or a bowl to check the fit; if you need smaller or larger, adjust by adding or skipping the last increase round.
Round 13-18 :
1 sc in each st (72)
Info :
These even rounds build the straight portion of the crown. Work 6 rounds or more depending on how tall you want the lower crown before the spiral begins. Keep tension even; if your fabric is too floppy, switch to a slightly smaller hook.
Round 19 :
(10 sc, dec) x 6 (66)
Round 20 :
(9 sc, dec) x 6 (60)
Round 21 :
(8 sc, dec) x 6 (54)
Info :
Begin shaping the crown into a gentle taper by decreasing 6 stitches per round. These decreases start the cone shape and prepare for the spiral overlay that will be added later.
Round 22 :
(7 sc, dec) x 6 (48)
Round 23 :
(6 sc, dec) x 6 (42)
Round 24 :
(5 sc, dec) x 6 (36)
Info :
Stop and measure: the crown is now clearly tapered. You want a shape that will accept the spiral overlay. If your decreases create a too-small opening for additional layers, reduce the speed of decrease: repeat the previous even round once.
Round 25 :
(4 sc, dec) x 6 (30)
Round 26 :
(3 sc, dec) x 6 (24)
Round 27 :
(2 sc, dec) x 6 (18)
Round 28 :
(1 sc, dec) x 6 (12)
Info :
If you plan a long, curled spiral tip, leave the top slightly open and do not close to a tiny hole; this opening can be stuffed around a wire later. Fasten off leaving a long tail if you plan to pull the spiral tip inward to curl and stitch.
Round 30 :
Fasten off leaving a 20-30 cm tail for sewing and finishing. We will add the spiral overlay and the brim next.
— Spiral Overlay (make 1 long spiral strip) :
Info :
The spiral overlay is worked as a long narrow strip that will be wrapped around the cone. You can crochet it flat in rows and then stitch it spirally; this gives the same raised corkscrew effect shown. Make the strip long enough to wrap from base to tip with overlap — roughly 180-260 rows depending on your crown height. Work tightly to keep a strong ridge.
Round 1 (strip row 1) :
Ch 3 (counts as 1 sc here and next sc), 1 sc in 2nd ch from hook, 1 sc in next ch (2) — this is the beginning edge; you will work rows back and forth
Round 2 (row 2) :
Ch 1, turn, 2 sc in BLO across (2)
Round 3-6 (rows 3-6) :
Ch 1, turn, 2 sc (working into each st) (2)
Info :
We are creating a two-stitch-wide rope-like strip. For a chunkier spiral increase to 3 sc width by starting with ch4 and working 3 sc in the foundation chain. Keep tension even and use BLO on the turning chain to create a neat ridge edge if desired.
Round 7-120 (rows 7-120) :
Continue working 2 sc in each row (2) until strip length is sufficient to spiral around the crown from base to tip. For a 10" tall crown you will likely need 160-220 rows; for shorter hats, 100-140 rows. Stop when you can comfortably wrap the strip over the crown with each turn overlapping approximately 8-10 stitches to form visible ridges.
Info :
To create a raised ridge edge like in the photo, once the strip is the correct length, work an edging along one long side with 1 sc in each st then a row of sl st return to give a corded border. This makes the spiral sit prominently on the crown.
Round 121 :
Fasten off leaving a long tail for sewing. If you want a twisted spiral like the photo, gently block the strip and wrap it around the crown overlapping each wrap by 8-12 sts, pin in place, and sew through both layers with the tail. Secure both ends at base and near tip.
— Crown & Spiral Assembly :
Info :
With the crown finished and spiral strip ready, wrap the strip around the crown starting at the base and working up to the tip. Allow the spiral to tilt slightly so each coil sits offset and forms the diagonal corkscrew seen in the photo. Use pins to adjust spacing before sewing.
Round 1 :
Position the spiral so the inner edge nests near the crown surface; using the long tail from the spiral, sew the strip to the crown with whip stitch, catching both the strip and the crown in every 6-8 stitches to hold the ridge firmly (no change in st count on crown)
Info :
When you reach the cone tip, shape the final rows of spiral into a tight curl. Insert a short length of pipe cleaner or floral wire into the center of the curl for support before finishing. Fold the remaining strip into a small circle and sew it closed to create the decorative coil at the tip.
— Brim (wide, wavy) :
Round 1 :
With the crown still open at the base, rejoin hot-pink yarn to any base stitch around the crown where you want the brim to begin. Ch 1, 1 sc in same st and 1 sc in each st around the base (count equals the last round count of crown, for example 72). Work in continuous rounds. (72)
Round 2-4 :
1 sc in each st (72) — these rounds create a sturdy connection and slightly flare the base
Info :
These three rounds form the brim-neck transition. Add more even rounds here if you want a deeper crown-to-brim slope. Keep checking the brim diameter by laying the hat flat.
Round 5 :
(6 sc, inc) x 9 (81)
Round 6 :
(8 sc, inc) x 9 (90)
Round 7 :
(9 sc, inc) x 10 (100)
Info :
We begin increasing to create the brim area. The number of increases per round controls how ruffled the brim becomes. The example increases above will create a broad ruffle similar to the sample. Adjust the numbers proportionally if your crown stitch count differs.
Round 8 :
1 sc in each st (100)
Round 9 :
(4 sc, inc) x 20 (120)
Round 10 :
1 sc in each st (120)
Round 11 :
(5 sc, inc) x 20 (140)
Round 12 :
1 sc in each st (140)
Info :
By alternating a round of increases with rounds of even sc, the brim gains width while developing a smooth wave. You can stop increasing when the brim reaches your desired diameter — the sample brim is approximately 12-14 inches across when laid flat.
Round 13 :
(6 sc, inc) x 20 (160)
Round 14 :
1 sc in each st (160)
Round 15 :
(7 sc, inc) x 20 (180)
Info :
To create the pronounced wavy edge in the photo, we will do a ruffled edge sequence next. The ruffle uses a large number of increases concentrated in the final round to form deep waves.
Round 16 :
(1 sc, ch 2, 3 dc, ch 2, sl st) in next st, skip 2 st, 1 sc in next st — repeat around to make spaced shell ruffles (this is decorative; see alternate simpler method below)
Info :
Alternate simpler method for a smooth wave (used in the pictured hat): Work 1 sc in next 2 sts, (inc in next st) x 3, repeat across. This creates shallow undulating ruffles. The photographed hat shows deep scallops; use the shell method or multiple increases per shell to match that depth.
Round 17 (ruffle round option A - shell) :
*sl st in next st, ch 1, 1 sc in same st, ch 2, 3 dc in same st, ch 2, 1 sc in same st, sl st in next 4 sts* repeat around. Finish and fasten off. (Scalloped shells spaced evenly)
Round 17 (ruffle round option B - increase) :
(2 sc, inc, inc, inc) repeat around for deep waves. Count varies depending on starting stitch count; keep shell centers evenly spaced. Fasten off.
Info :
The hat pictured has deep, flowing scallops which were achieved by working a firm stitch base and then a final scallop round with wide shells. If your waves curl too much upward, block the brim flat and steam lightly while shaping.
— Brim Edge Finishing :
Round 1 :
Reattach yarn at the outer edge and work 1 round of sc in FLO (or BLO depending on preferred curl direction) to give a clean, twisted edge: 1 sc in each st (use a 3.0mm hook for a neat tighter edge) (variable count: follow rim)
Info :
Working in the front or back loop only pulls the edge slightly and creates the neat twisted ridge visible in the photos. Use smaller hook for this finishing round to accent the wave edge.
— Decorative Band & Flowers (flower cluster as shown) :
Band Round 1 :
Ch 60 (or long enough to encircle the crown base with some overlap), join with sl st to form a chain ring. Work 1 sc in each ch around to create a narrow band (60)
Band Round 2-3 :
1 sc in each st around (60). Fasten off leaving long tail to sew band to hat. Pin band around base so it sits evenly over the spiral seam and stitch in place through the band and crown base every 6-8 sts.
Flower Center (make 1) :
mr, 6 sc in mr (6). Pull tight and sl st to first sc. Fasten off leaving long tail for sewing.
Flower Petal (make 5) :
Join at center, ch 6, turn into 2nd ch from hook 1 sc, 1 hdc, 2 dc, 1 hdc, 1 sc in last ch, sl st to center. Repeat around 5 times to create 5 petals. Fasten off leaving long tails for placement and sewing.
Info :
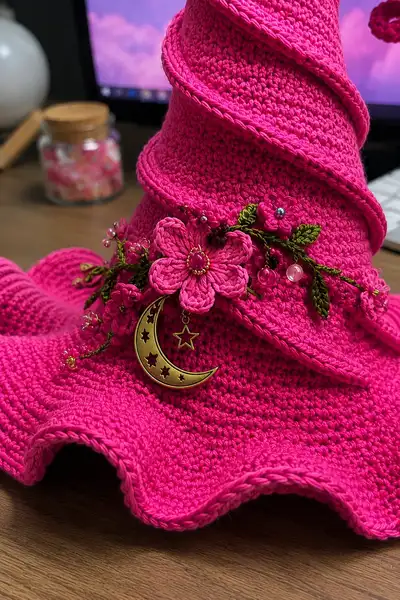
Sew petals to the flower center overlapping slightly so the flower looks full like in the reference. You can add a small embroidered bead or french knot in the center using contrasting thread to mimic the decorative gem shown in the photo.
Small Berry Cluster (make 3-4) :
Ch 4, join to make ring, 6 sc in ring, fasten off leaving tail. For clusters, sew 3-5 berries together on short stems.
Leaves (make 6-8) :
Ch 6, work in row: sc in 2nd ch from hook, hdc in next ch, dc in next ch, hdc in next ch, sc in next ch, turn, sl st along opposite side to make thin leaf. Fasten off. Using olive/leaf green yarn, embroider central veins with a few gold running stitches if desired.
Info :
Arrange the flower in the center front of the band and add two clusters of berries and 3-4 leaves arranged symmetrically. The sample hat uses extra small glass beads sewn onto the berry clusters to add shine. Use a gold crescent charm hung from the flower with a short chain or thread to match the pictured look.
— Small Tendrils and Beaded Strings :
Tendril Round 1 :
For each tendril: ch 20-30 (length varies), sl st back along chain to create a twisted cord effect, fasten off leaving ends. Attach small beads by threading them on before you secure the tendril to the band, or sew them on after.
Info :
To make the delicate beaded strands in the photo, use a fine thread and small seed beads. Stitch beads intermittently along a thin embroidered chain or along the ch-strings before attaching to the band.
— Flower & Band Assembly :
Info :
Pin the flower to the band about 3-4 sts above the brim seam, then arrange leaves and berry clusters to either side. Sew each piece securely using a yarn needle; bury tails inside the band and knot inside the brim for neatness. Attach the crescent charm with a small jump ring or thread loop through the flower center so it dangles as in the image.
Round 1 :
Sew the decorative band to the crown base using mattress or whip stitch; make small stitches so the band looks like an applied trim rather than a separate piece. Secure all embellishments firmly and weave in tails cleanly.
— Tip Curl Support & Final Shaping :
Info :
If you want the pointed tip to stay upright and curl like the sample, insert a short length of 12-18 gauge floral wire or a pipe cleaner inside the spiral tip before you close the crown top. Bend the wire into a small spiral to follow the crocheted coil and secure by wrapping the yarn tail around the inside and stitching closed.
Round 1 :
Use the tail from the crown or spiral to sew the top closed, shaping the tip into the desired tight curl. After closing, shape the brim with your hands and lightly steam-block if necessary to exaggerate scallops and flatten the crown base.
Info :
Light blocking with steam and pins helps the brim hold its wavy shape. Do not over-wet or press; a brief steam and careful shaping will set the brim. Allow to cool and dry fully before removing pins.
— Optional Decorative Variations :
Info :
For a contrasting band, work a wider band in another color with a decorative picot edge before attaching. You can also embroider stars on the crown using gold thread or add tiny felt mushrooms to the brim for a more whimsical look.
Final Touch :
Weave in all ends, trim any loose fibers, and check charm security. If the charm or beads are heavy, add an extra stitch or two to reinforce their attachment point on the band.
Info :
Enjoy your finished hat! It looks great as a decorative desk piece or as part of a costume. If you plan to wear it, add a soft lining (single-crochet in a contrasting cotton color worked inside the crown) for comfort against the skin.
This big pink swirl witch hat pattern pulls together whimsical shaping and intricate trim to make a stunning statement piece. From the dramatic wavy brim to the corkscrew tip and floral band, every detail adds personality and charm. It's a joyful project to crochet and assemble, and the finished hat is a perfect accent for costumes, seasonal displays, or whimsical decor. 🧶✨🌙