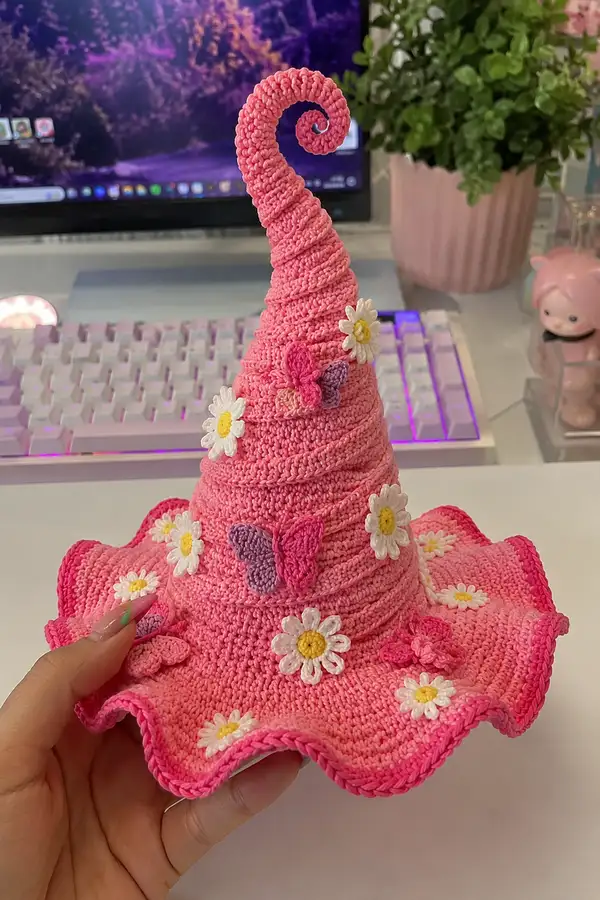
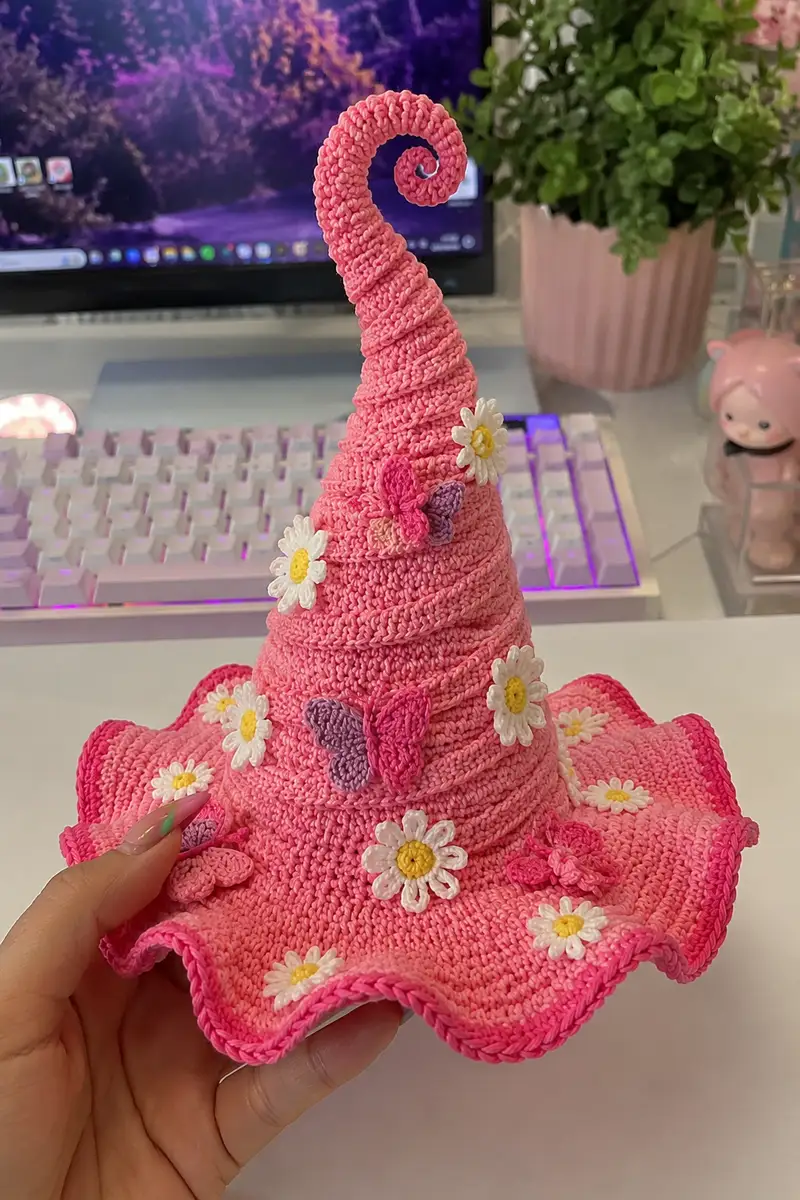
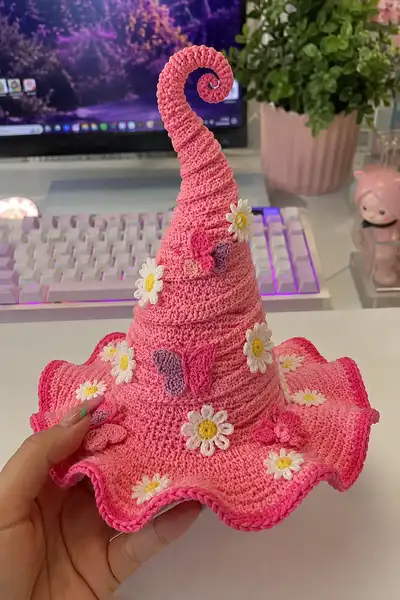
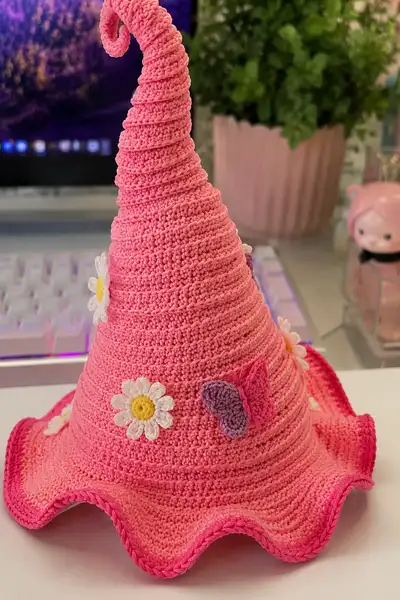
A whimsical tall spiral witch hat crocheted in bubblegum pink with a playful ruffled brim, edged in bright pink and embellished with white daisy appliques and tiny pastel butterflies. The hat features spiral ridges up the cone, a curled tip, and a wide, wavy brim that holds its shape. This pattern includes step-by-step rounds for the cone, brim ruffle, and all appliques so you can recreate the charming finished piece shown in the photos.
Progress Tracker
0% Complete
— Cone (Top & Spiral) :
Round 1 :
6 sc in magic ring (6)
Round 3 :
(1 sc, inc) x 6 (18)
Round 4 :
(2 sc, inc) x 6 (24)
Round 5 :
(3 sc, inc) x 6 (30)
Round 6 :
(4 sc, inc) x 6 (36)
Round 7 :
(5 sc, inc) x 6 (42)
Round 8 :
(6 sc, inc) x 6 (48)
Round 9 :
(7 sc, inc) x 6 (54)
Round 10 :
(8 sc, inc) x 6 (60)
Info :
We have reached 60 sts. This will become the main cone circumference for the tall cone section. From now on work tightly in continuous rounds (do not join) and use a stitch marker at round start. Using continuous rounds keeps ridges subtle and avoids laddering.
Round 11-14 :
1 sc in each st (60)
Info :
To create the faint spiral ridges visible in the photo, we'll begin alternating BLO rounds with regular rounds. On BLO rounds work single crochet in back loops only to create a subtle ridge that will read as a wrapped spiral on the cone.
Round 15 :
1 sc in each st BLO (60)
Round 16 :
1 sc in each st (60)
Round 17 :
1 sc in each st BLO (60)
Round 18 :
1 sc in each st (60)
Info :
Check cone height by holding it as you go; the photo shows a tall cone built by many even rounds with texture. Maintain consistent tension — if your fabric becomes too tight swap to the next larger hook for several rounds only and then return to the primary hook if needed.
Round 19-24 :
1 sc in each st, alternating BLO on every second round to maintain spiral texture (60)
Info :
We are now going to open the cone toward the brim. Over the next five increase rounds we'll increase gradually to flare the cone base outward. Count stitches before each increase round to be sure increases are spaced evenly.
Round 25 :
(4 sc, inc) x 12 (72)
Round 26 :
1 sc in each st BLO (72)
Round 27 :
(5 sc, inc) x 12 (84)
Round 28 :
1 sc in each st (84)
Round 29 :
(6 sc, inc) x 12 (96)
Round 30 :
1 sc in each st BLO (96)
Round 31 :
(7 sc, inc) x 12 (108)
Round 32 :
1 sc in each st (108)
Round 33 :
(8 sc, inc) x 12 (120)
Info :
Your cone base is now 120 stitches. This will form the join area to the brim. If your hat will sit on a head or bowl, check circumference now and adjust with +/- rounds of even stitches to get desired size.
Round 34-36 :
1 sc in each st (120)
Info :
To keep the cone tall and slightly flexible for later curling, you may work the next several rounds in the same hook. If you prefer an extra-firm cone for a cold season display, insert a thin, flexible wire through the last few rounds of the cone and secure ends inside.
Round 37 :
1 sc in each st BLO (120)
Round 38 :
1 sc in each st (120)
Round 39 :
1 sc in each st BLO (120)
Round 40 :
1 sc in each st (120)
Info :
We will now form the spiral curl at the very top. You can either continue working the cone into a narrow spiral or create a tubular spiral separately and sew it to the cone tip. The photos show a continuation that tightens into a spiral tube. We'll continue from the cone, decreasing gradually while adding BLO texture to emphasize the spiral ridges and then curl the finished tube.
Round 41 :
(8 sc, dec) x 12 (108)
Round 42 :
1 sc in each st BLO (108)
Round 43 :
(7 sc, dec) x 12 (96)
Round 44 :
1 sc in each st (96)
Round 45 :
(6 sc, dec) x 12 (84)
Round 46 :
1 sc in each st BLO (84)
Round 47 :
(5 sc, dec) x 12 (72)
Round 48 :
1 sc in each st (72)
Round 49 :
(4 sc, dec) x 12 (60)
Round 50 :
1 sc in each st BLO (60)
Info :
Continue decreasing a bit more to form a narrow spiral tube - you will stop decreases when the tube is narrow enough to curl neatly by hand. If you want a hollow curled tip, do not stuff; if you want a slightly rigid curl, insert a small amount of fiberfill and/or a flexible wire before closing.
Round 51 :
(3 sc, dec) x 12 (48)
Round 52 :
1 sc in each st (48)
Round 53 :
(2 sc, dec) x 12 (36)
Round 54 :
1 sc in each st BLO (36)
Round 55 :
(1 sc, dec) x 12 (24)
Round 56 :
1 sc in each st (24)
Info :
Fasten off leaving a 20 cm (8 in) tail if you plan to hand-sew the tip to the cone and curl it. Stuff a tiny amount if you prefer a plumper curled tip. To curl, coil the finished tube tightly in your hand and whip stitch the edge of the tube into itself in a spiral so that it forms a neat curled tip like the photo. You can insert a thin wire or a narrow rolled cardboard core and stitch around to make a spiral that holds its shape.
— Brim & Flared Ruffle :
Info :
Return to the round where your cone had 120 stitches (Round 33). From here we worked even rounds to build a short skirt; now we'll flare outward and create the wide, wavy ruffled brim. The hat in the photo has a generous ruffle created with two sequential increase rounds that expand the circumference substantially and then shell-like shaping to create waves. Work in continuous rounds and count carefully.
Round 58 :
Join at cone base if needed and place marker (120)
Round 59 :
(1 sc, inc) x 60 (180)
Round 60 :
1 sc in each st (180)
Round 61 :
(2 sc, inc) x 60 (240)
Info :
We are at 240 stitches. This broad number gives us enough fabric for the large wavy brim. The photo shows roughly 8 large waves around the brim; to create 8 waves you will work scallop sections of 30 stitches each (240 / 8 = 30). If you prefer more or fewer waves adjust the number of stitches per scallop accordingly.
Round 62 :
1 sc in each st (240)
Round 63 :
1 sc in each st BLO (240)
Info :
To create the wavy edge mimic in the photo, we'll work shell-shaped scallops across the next few rounds. Each scallop spans 30 stitches; within each scallop you'll work increases and shells to make a pronounced wave. Keep your stitch marker handy to mark the start of the scallop group.
Round 64 :
(*Shell across next 7 sts: (1 sc, 1 hdc, 3 dc, 1 hdc, 1 sc) over 7 sts, 23 sc across the next 23 sts* ) x 8 (240)
Info :
Explanation: The star pattern above creates 8 scallops. Each scallop uses a shell across 7 stitches to create a raised wave and then 23 single crochets to flatten the valley. Adjust counts if your shell consumes a different number of base stitches; the total per scallop should be 30 base stitches.
Round 65 :
1 sc in each st (240)
Round 66 :
Work a ruffle round: (1 sc, inc) x 120 (360)
Info :
This ruffle round doubles the flare so the brim turns out very wavy as in the photo. If your brim is too dramatic, reduce increases to (2 sc, inc) x 120 to reach 300 instead of 360 stitches. The sample hat shows a pronounced wave so we are increasing by 120.
Round 67 :
1 sc in each st (360)
Round 68 :
1 sc in each st BLO (360)
Round 69 :
Scallop shaping round: Work shells across groups to enhance waves. Repeat across 12 large scallops (360 / 12 = 30 per scallop). For each scallop: (1 sc, 1 hdc, 3 dc, 1 hdc, 1 sc) over first 7 sts, 23 sc across next 23 sts. Repeat x12 (360)
Info :
Check the brim shape frequently. You can block the brim flat with pins on a round form for a more even wavy look. If you plan to add wire or light interfacing, insert now before completing the last rounds.
Round 70 :
Change to bright pink for edge contrast. Carry yarn inside or fasten off and rejoin (360)
Round 71 :
1 sc in each st BLO using bright pink (360)
Round 72 :
Finish edge with reverse single crochet (crab stitch) around to give the crisp rolled edge seen in the photo. Work 1 reverse sc in each st (360)
Info :
Fasten off and weave in ends securely. If you added wire, now secure ends and cover with a short length of yarn stitched over the wire ends.
— Daisy Appliques (Make 7-9) :
Info :
The photo shows many flat daisies with a yellow center and white petals. We'll make small layered daisies: a yellow center disc, then white petals crocheted around the edge. Each daisy uses about 6-8 rounds of small work. Make 7-9 daisies of various sizes.
Make Daisy - Center Round 1 :
With yellow yarn: mr, 6 sc in mr (6). Pull ring tight. (6)
Daisy Center Round 2 :
(6 inc) x 6?
Correction :
Round 2: (1 sc, inc) x 3 around to make slightly larger center if preferred, or keep center as single round for small daisies. We'll keep center as 6 sts for a tidy small disc. (6)
Daisy Petals Round 3 :
Join white yarn to any stitch. *(ch 6, sl st into next stitch) repeat around to make 6 loops for petals; you will have 6 loops. Fasten off white leaving long tail for sewing.* (6 loops)
Info :
Alternative petal method: For a more defined petal, ch4, (1 sc, 1 hdc, 1 dc) into same stitch, sl st into next base, repeat x6. The loop method creates flatter petals like those in the photo. Make petals slightly overlapped for full look.
Finishing Daisy :
Use the long tail to sew the daisy to the hat. Center daisies on the cone and brim, spacing at least 6-8 rounds apart. Sew securely with a few passes and hide ends inside the hat or weave to the underside.
Info :
For medium daisies, you can make centers slightly larger by doing round 1 as 8 sc in mr and create 8 petals by repeating ch6 method 8 times. Make a mix of sizes for a natural cluster look.
— Butterfly Appliques (Make 3-4) :
Info :
Butterflies are worked flat and sewn on. Each butterfly is two small wing pieces joined by a central body. Use pink and lavender for wings to match the photo. Make 3-4 butterflies and place them clustered with daisies.
Butterfly Wing (Make 4 wings per butterfly) Round 1 :
With wing color A (pink): ch 6, in 2nd ch from hook sc, hdc, 3 dc across next 3 chs, hdc, sc in last ch. Sl st to first sc to form small wing. Fasten off. (flat small wing)
Butterfly Wing 2 :
Repeat wing in color B (lavender) for contrast or make two wings same color. Make 4 wings (2 left, 2 right) per butterfly.
Butterfly Body :
With scrap dark pink, ch 6, sc in 2nd ch from hook across (5 sc). Fold and stitch through the center to make a narrow body tube. Use long tail to sew wings to body: front two wings slightly lower, back two wings slightly higher to create stacked look. Sew securely to cone using several stitches through body and center of wings.
Info :
Place butterflies so wings read as three-dimensional — sew only along the center body so wing tips lift slightly like the sample. Use small, neat stitches and weave ends under the applique.
— Small Decorative Flowers (Optional filler) :
Round 1 :
mr, 6 sc in mr (6)
Round 2 :
*(ch 4, sl st into next st)* x 6 to create 6 small loops as petals. Fasten off and sew into gaps around daisies and butterflies.
Info :
Use these tiny flowers as fillers when your placement feels sparse. They are quick to make and help tie clusters together visually.
— Finishing & Assembly :
Info :
Block the hat gently with pins on a flat surface for several hours to even out stitches and shape the brim waves. For a more structured brim, insert a thin flexible wire into the last bright-pink edge round before finishing the edge; stitch over the wire ends to secure.
Step 1 :
Arrange daisies and butterflies on the cone and brim matching positions in photo or to your taste. Pin in place and view from all sides to ensure balance before sewing.
Step 2 :
Sew appliques using a matching yarn and needle. Sew through the base of petals and butterfly bodies only for a lifted look, avoiding sewing through the wing tips unless you want them flat.
Step 3 :
Weave in tails with yarn needle, passing through several rounds inside the hat to secure. Trim close to work.
Step 4 :
Lightly steam-block, or wet-block, if working with cotton to tighten fabric and set waves. Do not over-stretch petals or appliques when blocking.
Info :
Optional: If you want the hat to be wearable and stable, consider adding a narrow headband inside (stitched to the cone's inside rounds) to help it sit on the head without slipping.
— Tips, Variations and Troubleshooting :
Info :
Use the alternating BLO rounds on the cone to make subtle spiral ribs. If you want stronger spiral lines, alternate every single round. For a softer spiral, alternate every third round. Keep a consistent marking system to know which rounds are BLO and which are full.
Info :
If your brim gathers or buckles, reduce the number of increases in the ruffle rounds; if it lies too flat, add an extra increase round. You can also add an extra shell round to accentuate waves.
Info :
To scale the hat up or down: adjust final cone circumference before starting brim (increase or decrease number of increase rounds). To make a petite topper for doll use fewer rounds overall and lighter yarn; for a display piece use stiffer yarn or add interfacing.
This bubblegum-pink spiral witch hat is a joy to make and display — its tall curled tip and ruffled brim are playful and elegant all at once. Each daisy and butterfly is a small moment of delight that brings the hat to life. Whether you keep it as a whimsical desk accent or gift it to a friend, this pattern offers hours of creative stitching and a beautiful finished piece to treasure. 🧶🌼✨