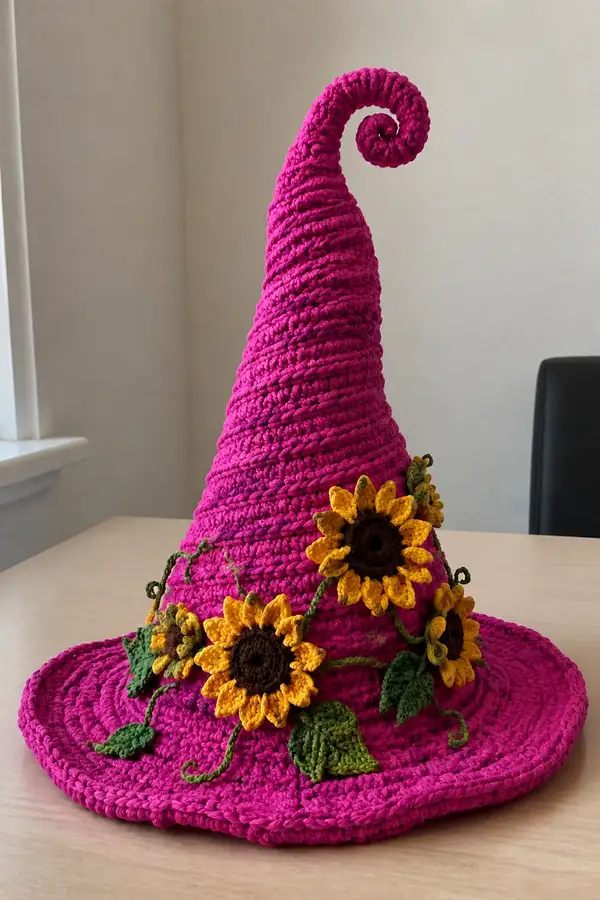
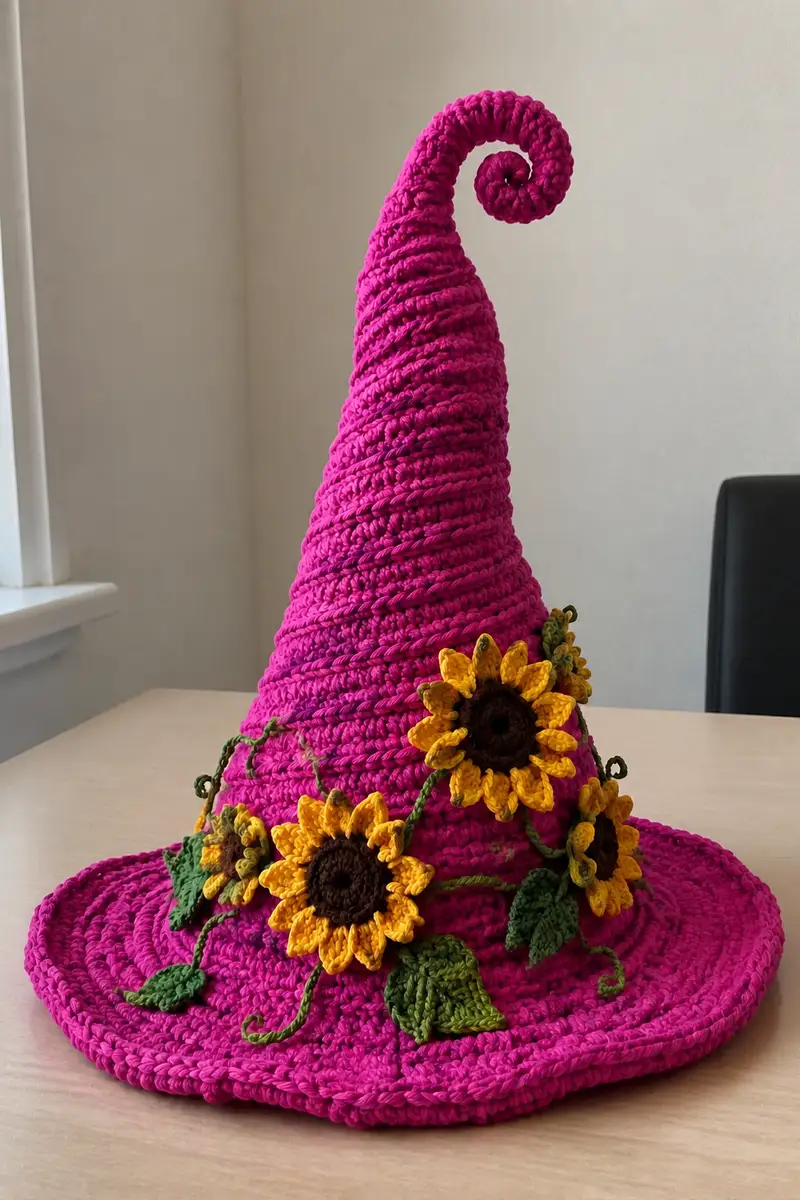
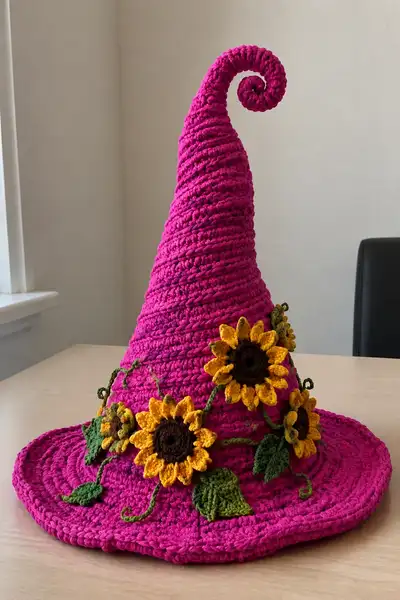
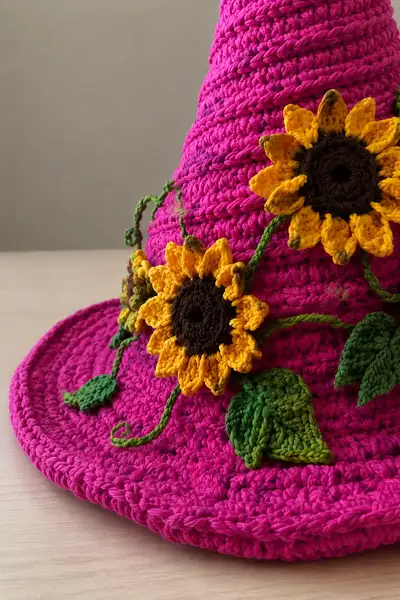
A tall, whimsical spiral witch hat crocheted in a vivid fuchsia with a wide brim and dramatic curled tip. Hand-sewn sunflower appliques, twisted green vines and layered leaves wrap around the crown for a cheerful, botanical accent. The pattern uses a bulky cotton-style yarn to create sturdy shaping and crisp stitch definition, perfect for costume wear or display. Detailed instructions guide you from cone formation through brim shaping and floral embellishments.
Progress Tracker
0% Complete
— Notes and Gauge :
Info :
Gauge is not critical for fit since this is a decorative costume hat, but with bulky yarn and 6.5mm hook the brim diameter will be approximately 15-17 inches (38-43 cm). Work tightly enough that stuffing (if used) does not show through. This pattern is worked in continuous rounds unless stated otherwise to create a smooth spiral effect. Use stitch markers for round starts.
— Cone / Crown (Main Spiral) :
Round 1 :
6 sc in magic ring (6)
Round 3 :
(1 sc, inc) x 6 (18)
Round 4 :
(2 sc, inc) x 6 (24)
Round 5 :
(3 sc, inc) x 6 (30)
Round 6 :
(4 sc, inc) x 6 (36)
Round 7 :
(5 sc, inc) x 6 (42)
Round 8 :
(6 sc, inc) x 6 (48)
Round 9 :
(7 sc, inc) x 6 (54)
Round 10 :
(8 sc, inc) x 6 (60)
Round 11 :
(9 sc, inc) x 6 (66)
Round 12 :
(10 sc, inc) x 6 (72)
Info :
From Round 1 to 12 we are establishing the crown circumference. Work tightly and close the magic ring well if using a mr. After Round 12 you will have 72 sts. Place a stitch marker at the first stitch of Round 13 and move it each round to track the spiral beginning.
Round 13-24 :
1 sc in each st (72) — work 12 rounds even to build height (72)
Info :
Work in continuous spiral without joining to create smooth lines. To create the ribbed texture seen in the photo, work every 3rd round in BLO — this will form gentle horizontal ridges. Example: Rounds 13 and 14 regular sc, Round 15 sc BLO, then repeat the rhythm every 3 rounds.
Round 25-36 :
1 sc in each st (72) — continue even to desired crown height (72)
Info :
At the end of Round 36 the crown is tall enough to begin shaping toward the tip for the spiral curl. If you want a shorter hat reduce the number of even rounds. Keep the fabric firm to hold shape.
Round 37 :
1 sc BLO in each st (72)
Round 38-44 :
1 sc in each st (72) — 7 rounds even (72)
Info :
These rounds add extra length and an emphasized rib. If you prefer a subtler rib, work fewer BLO rounds. Use a stitch marker and count carefully; continuous rounds can be deceptively long.
Round 45 :
(10 sc, dec) x 6 (66)
Round 46-49 :
1 sc in each st (66) — 4 rounds even (66)
Info :
Begin gentle decreases to narrow the cone without losing too much height. Each decrease round reduces the total by 6 stitches because we use patterns in 6 repeats. This keeps shaping symmetrical.
Round 50 :
(9 sc, dec) x 6 (60)
Round 51-54 :
1 sc in each st (60) — 4 rounds even (60)
Round 55 :
(8 sc, dec) x 6 (54)
Round 56-58 :
1 sc in each st (54) — 3 rounds even (54)
Round 59 :
(7 sc, dec) x 6 (48)
Round 60-62 :
1 sc in each st (48) — 3 rounds even (48)
Info :
Check the crown circumference periodically against a head or a display form. Adjust the number of even rounds between decreases to get the proportion you like — fewer evens for a steeper cone, more evens for a gradual cone.
Round 63 :
(6 sc, dec) x 6 (42)
Round 64-66 :
1 sc in each st (42) — 3 rounds even (42)
Round 67 :
(5 sc, dec) x 6 (36)
Round 68-70 :
1 sc in each st (36) — 3 rounds even (36)
Round 71 :
(4 sc, dec) x 6 (30)
Round 72-74 :
1 sc in each st (30) — 3 rounds even (30)
Info :
At around 30 stitches circumference the cone is narrowing nicely and is ready to form the long tapered tip. From here we will finish decreasing to a small tube that becomes the curled tip; keep stitches even and try not to twist the spiral when you later shape the curl.
Round 75 :
(3 sc, dec) x 6 (24)
Round 76-77 :
1 sc in each st (24) — 2 rounds even (24)
Round 78 :
(2 sc, dec) x 6 (18)
Round 79 :
(1 sc, dec) x 6 (12)
Round 80-92 :
1 sc in each st (12) — work 13 rounds even to elongate tip (12)
Info :
These narrow rounds form the long tapered tip. The photo shows a tall, slender tip before the curl; add or remove rounds 80-92 to adjust length. Keep tension consistent; these rounds are what you will coil to form the spiral curl.
Round 93 :
1 sc BLO in each st (12) — creates a defined ridge for the curl base (12)
Round 94-100 :
1 sc in each st (12) — 7 rounds even (12)
Info :
To form the characteristic curled tip seen in the picture you will now convert this narrow tube into a coil. You can do this by either: (A) working a narrow strip (12 sc x 6-10 rounds), then coiling and whipstitching the strip into a spiral; or (B) stuffing lightly and bending while sewing through rounds to form a spiral. Option A gives a crisp coil; Option B gives a softer, stuffed curl. If you prefer a poseable curl insert thin covered wire into the last 6-10 rounds before coiling.
Round 101-108 :
Work 8 more rounds of 1 sc in each st (12) to create a long strip for coiling (12)
Info :
Fasten off leaving a long tail (approx 30-40 cm) for seaming the coil. If you are coiling the strip, flatten it slightly, then start coiling from the tip toward the base, sewing the edges together as you go with mattress or blanket stitch to make a neat spiral. If stuffing, add light stuffing as you go, then sew the sides together to hold shape.
— Brim :
Info :
We pick up around the crown base (where you want the brim to begin). For clarity, we will treat the brim as a separate round sequence starting with a foundation round attached to the crown base. If you prefer, cut yarn and rejoin at base seam.
Round 1 (Brim) :
Join yarn at base where crown meets head. Ch 1, sc evenly around picking up 72 sts from crown base — aim for 72 sts (72)
Round 2 :
1 sc in each st (72)
Round 3 :
(5 sc, inc) x 12 (84)
Info :
Round 3 increases the brim so it begins to flatten outward. Work increases evenly across the round; if your stitch count differs, increase approximately 12 stitches total to keep a gentle flare.
Round 4 :
1 sc in each st (84)
Round 5 :
(6 sc, inc) x 12 (96)
Round 6-8 :
1 sc in each st (96) — 3 rounds even (96)
Info :
We alternate increase rounds with even rounds to create a smoothly fanned brim. If you want a wider brim continue increasing similarly; to keep brim smaller skip next increase round.
Round 9 :
(7 sc, inc) x 12 (108)
Round 10-12 :
1 sc in each st (108) — 3 rounds even (108)
Round 13 :
(8 sc, inc) x 12 (120)
Round 14-16 :
1 sc in each st (120) — 3 rounds even (120)
Info :
At 120 stitches the brim is wide. If you want the brim to sit flat, work Round 17 in BLO to introduce a firm ridge then add a few rounds of hdc for thickness.
Round 17 :
1 sc BLO in each st (120)
Round 18 :
1 hdc in each st (120)
Round 19 :
1 hdc in each st (120)
Info :
These hdc rounds give the brim body and help it hold a firm, slightly rounded edge like in the photos. For an even stiffer brim, you can repeat an additional hdc round or use a second strand of yarn held together for these rounds.
Round 20 :
(10 hdc, dec) x 10 (110)
Round 21 :
1 hdc in each st (110)
Round 22 :
(9 hdc, dec) x 10 (100)
Round 23 :
1 hdc in each st (100)
Round 24 (Edge Leveling) :
1 sc in each st (100) — work 1 round to tidy edge and reduce bulk (100)
Round 25 (Final Brim Edge) :
1 sc BLO in each st (100) — provides a neat, slightly rolled edge (100)
Info :
Fasten off and weave in ends. Block the brim to flatten and create a crisp outer edge: wet-block the brim on a flat surface and pin it into shape until dry, or use a steam iron held above the fabric (do not touch) to relax the yarn then pin flat.
— Sunflower Center (Make 4 medium centers) :
Round 1 :
Using Chocolate Brown, 6 sc in magic ring (6)
Round 3 :
(1 sc, inc) x 6 (18)
Round 4 :
1 sc in each st (18)
Round 5 :
1 sc BLO in each st (18) — creates slight ridge for petal mounting
Info :
Fasten off and leave a long tail for sewing the center to the petals and to the hat. Make four centers for the main decorative band or more for extra clustering.
— Sunflower Petal (Make approx 10 petals per flower) :
Round 1 (Petal Base) :
Join Sunflower Yellow to center. Ch 12, sl st to first stitch on center to form loop (acts as petal base) — repeat for each petal placement around center until you have 10 loops spaced evenly
Round 2 (Petal Shaping) :
Working into first ch-12 loop: sc in first 2 ch, hdc in next 2 ch, dc in next 3 ch, tr in next 2 ch, dc in last ch, sl st to base (1 full petal)
Round 3 :
Repeat Round 2 for each petal loop (10 petals total). After last petal fasten off and weave tail through center to stabilize (petal count = 10)
Info :
For the fuller sunflower look in the photo, make a second row of petals: join yarn behind first row and place petals offset between previous petals. Use slightly shorter petals (ch 10 loop) to create layered depth. Stagger petals for a natural look.
— Small Sunflower Variation (Make 2-3 small flowers) :
Round 1 :
Chocolate Brown mr: 6 sc (6)
Round 3 :
Switch to yellow. Ch 8 loops around center and form 8 petals using: sc, hdc, dc, hdc, sc into each loop. Fasten off and weave ends.
Info :
Small flowers are great for filling gaps and creating a cascading cluster around larger flowers like in the picture.
— Leaf (Make 6-8 leaves) :
Round 1 :
Using green, ch 12. Row 1: sc in 2nd ch from hook, hdc next, dc next 3, hdc next, sc next, sl st in last ch. (Work along the opposite side of foundation chain) sc, hdc, dc3, hdc, sc to form symmetrical leaf. Fasten off leaving tail for sewing (leaf length approx 6-7 cm)
Round 2 :
Optional: Using darker green, embroider central vein with yarn needle by sewing a running stitch down the center of the leaf; this gives the leaf definition seen in the photo.
Info :
To make textured leaves like the image, use two shades of green: lighter green for the main leaf and a darker green for tip accents and veins. Slightly block leaves to shape them.
— Vines and Tendrils (Make 4-6 long cords) :
Method A (Twisted Chain Cord) :
Ch desired length for vine (approx 60-90 ch depending on placement). Sl st into each ch back toward starting point to form a rounded cord. Twist lightly and tack in several places along hat to create loops and coils.
Method B (I-cord Style with sc) :
Ch 40, sc in 2nd ch from hook and each ch across (39 sc). Fasten off leaving a long tail; roll slightly and block into a gentle spiral. For a vine effect make two or three together and braid lightly before tacking in place.
Info :
For curly tendrils, chain 20-30 then work 3-4 sc into each chain stitch along the chain — this will cause the chain to curl naturally into spring-like tendrils. Use floral wire inside thicker cords for poseable vines.
— Assembly and Placement :
Info :
Lay out the main crown of the hat on a flat surface with the brim pinned. Arrange centers, petals, leaves, and vines until you are happy with composition. The photographed hat has three large sunflowers and two small ones clustered on one side of the crown and vines wrapping around the front and left side. Pin pieces in place before sewing to confirm balance and symmetry.
Step 1 :
Sew sunflower centers to crown first, using long tails and closely spaced whipstitches through the brown center round and into the crown fabric. Knot securely and weave ends into the inside of the crown.
Step 2 :
Sew petal rows next, stitching them to the center and to the crown to prevent petals from flaring; tack the base of each petal to the crown at 2-3 points for a secure attachment.
Step 3 :
Position leaves to peek from behind petals and sew leaves using small stitches at the base only so the tips remain slightly free and dimensional.
Step 4 :
Attach vines by tacking lightly along the crown where they cross fabric; leave tendril ends free or sew small loops to keep them in place. Use matching green thread for invisible tacking.
Info :
Use a yarn needle and long tails for sewing; weave all tails at least 6-8 cm into the hat interior and back through a few stitches for security. If you prefer stronger attachment, use a small amount of fabric glue under the base of heavy flowers in addition to sewing.
— Optional Finishing: Internal Support and Blocking :
Info :
If you want the curl to be poseable, insert a thin strand of covered floral wire into the last 6-10 rounds before coiling. Bend wire ends to avoid sharp points. For a very flat brim, cut a piece of lightweight plastic canvas to fit and slip it between brim layers before closing the final edge. Block the entire hat to smooth and set shape.
Finishing :
Weave in all ends securely. Lightly steam the hat with a distance to avoid flattening the ridges, then pin in place to dry. Trim any stray fibers and do a final once-over for symmetry.
This big fuchsia spiral witch hat is a joyful mix of structure and whimsy, combining sculpted shape with sunny floral accents. Each stitched row and embroidered petal adds personality and charm, making it a perfect statement piece for costumes or display. The step-by-step assembly yields sturdy construction with room for playful customization. 🎃🌻 Let your creativity bloom as you stitch and shape this magical hat! ✨