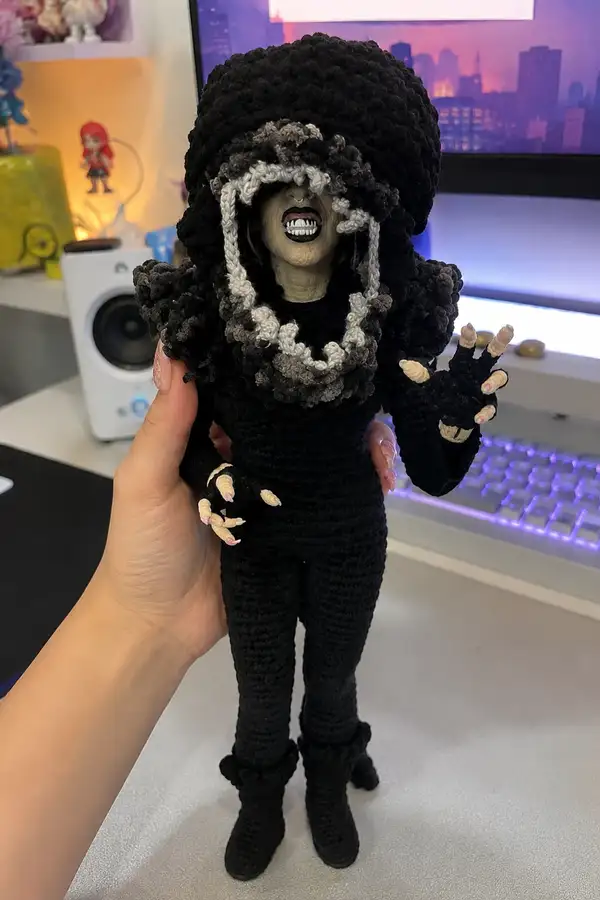
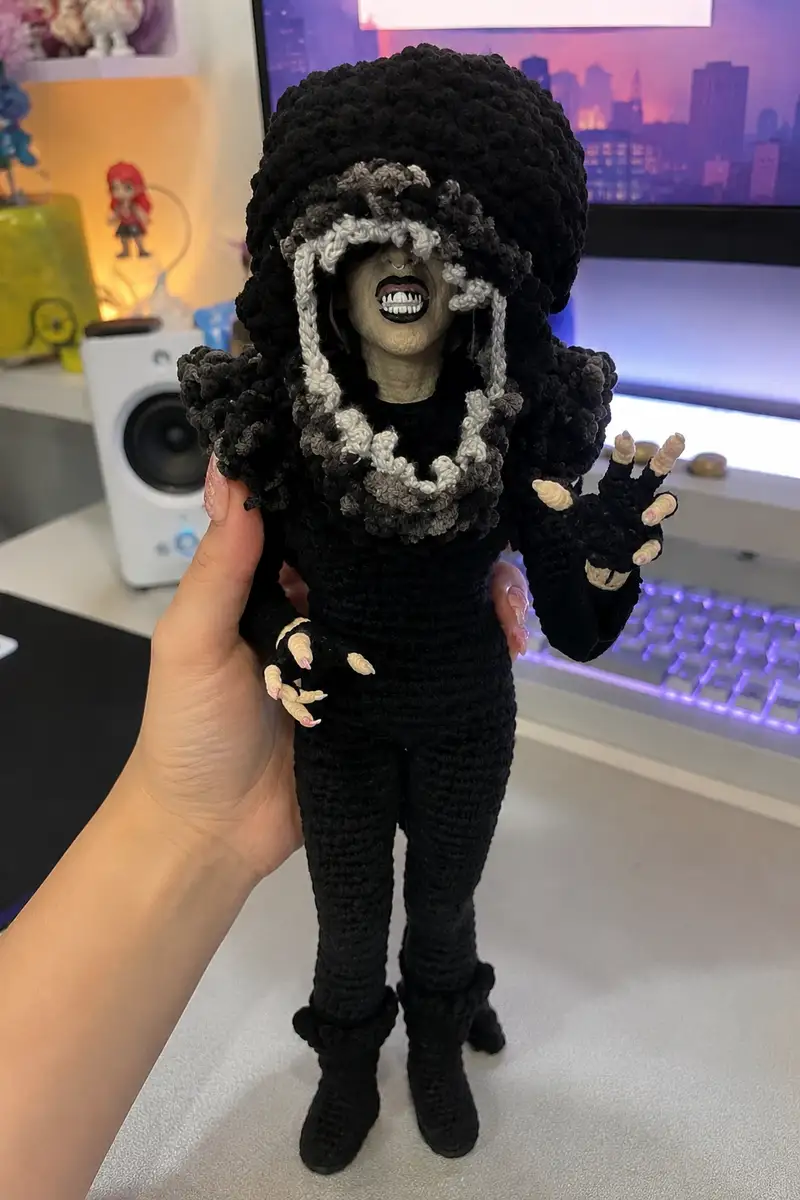
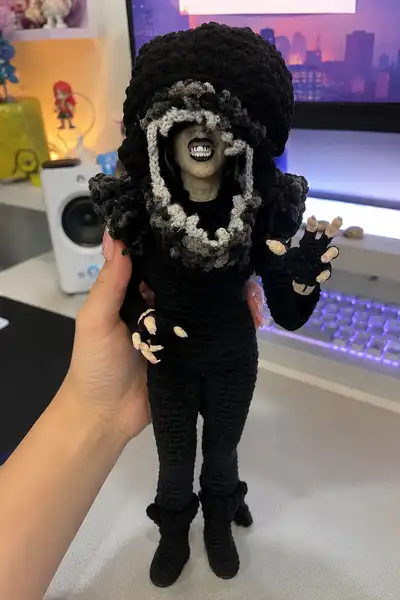
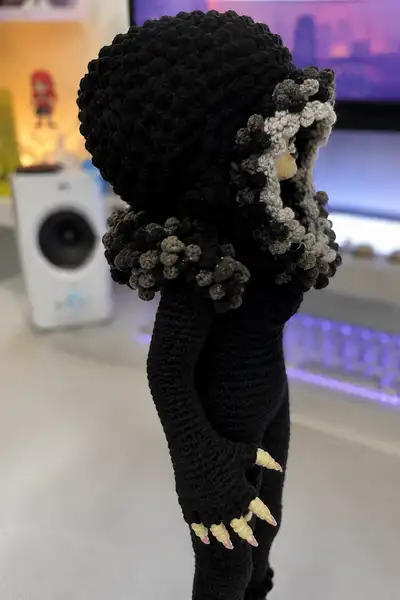
Create a hauntingly beautiful xenomorph-inspired amigurumi with a dramatic textured hood, layered gray ruffle trim, slender black body suit and clawed hands. This detailed pattern recreates the tall, elegant silhouette and the bulky hood collar seen in the photos. Perfect for a spooky shelf display or as a unique Halloween handmade gift. Advanced shaping and textured bobble work give this character its iconic, otherworldly presence.
Progress Tracker
0% Complete
— Head :
Round 1 :
6 sc in magic ring (6)
Round 3 :
(1 sc, inc) x 6 (18)
Round 4 :
(2 sc, inc) x 6 (24)
Round 5 :
(3 sc, inc) x 6 (30)
Round 6 :
(4 sc, inc) x 6 (36)
Round 7 :
(5 sc, inc) x 6 (42)
Round 8 :
(6 sc, inc) x 6 (48)
Round 9-16 :
1 sc in each st (48)
Info :
Place safety eyes or mark eye placement now if using them. For a stylized face, place them between rounds 13-14, approximately 10-12 sts apart. If you are inserting a sculpted faceplate later, leave these positions clear. Keep one stitch marker at the beginning of each round to maintain count.
Round 17 :
(6 sc, dec) x 6 (42)
Round 18 :
(5 sc, dec) x 6 (36)
Info :
Begin lightly stuffing the head now with polyester fill. Work into the creases to avoid lumps and add progressively more stuffing as you continue decreasing. If you are planning to inset a separate faceplate (crochet or sculpted), stuff only lightly so you can insert and sew the faceplate snugly later.
Round 19 :
(4 sc, dec) x 6 (30)
Round 20 :
(3 sc, dec) x 6 (24)
Round 21 :
(2 sc, dec) x 6 (18)
Round 22 :
(1 sc, dec) x 6 (12)
Info :
Fasten off leaving a long tail for sewing to the neck. If you are crocheting a faceplate, do not fasten off here: instead, leave the opening slightly larger and stitch the faceplate into the opening before closing completely. Secure stuffing so the face area remains firm.
Round 24 :
For neck formation, with right side facing, rejoin black yarn at 'back' of head and 1 sc in each st around for 3 rounds (6 sc -> stretched to join; if you need to expand, 1 sc in each stitch around - keep shape)
Info :
Work neck stitches more loosely than head to allow the body to attach seamlessly. Measure neck height against body opening before final decrease; adjust with extra even rounds if needed for proportion.
— Faceplate (Optional sculpted or crocheted) :
Round 1 :
Using skin tone yarn: 6 sc in magic ring (6)
Round 3 :
(1 sc, inc) x 6 (18)
Round 4 :
(2 sc, inc) x 6 (24)
Round 5 :
(3 sc, inc) x 6 (30)
Rounds 6-7 :
1 sc in each st (30)
Info :
Work two or three even rounds to create an oval faceplate. Embroider mouth and teeth now or leave the faceplate plain for attaching a sculpted nose and mouth later. If using polymer clay for hyper-realistic face, create a template from this faceplate to size the clay piece and sew it into the opening.
Round 8 :
Begin shaping chin area: (3 sc, dec) x 6 (24)
Round 9 :
(2 sc, dec) x 6 (18)
Round 10 :
(1 sc, dec) x 6 (12)
Info :
Fasten off leaving long tail for sewing. Center the faceplate in the head opening and stitch in place using whip stitch or ladder stitch for invisible join. Add embroidered teeth with white yarn and a contrasting dark mouth line with black yarn.
— Hood Dome :
Round 1 :
6 sc in magic ring (6)
Round 3 :
(1 sc, inc) x 6 (18)
Round 4 :
(2 sc, inc) x 6 (24)
Round 5 :
(3 sc, inc) x 6 (30)
Round 6 :
(4 sc, inc) x 6 (36)
Round 7 :
(5 sc, inc) x 6 (42)
Round 8 :
(6 sc, inc) x 6 (48)
Round 9 :
(7 sc, inc) x 6 (54)
Round 10 :
(8 sc, inc) x 6 (60)
Round 11 :
(9 sc, inc) x 6 (66)
Info :
The hood dome must be significantly larger than the head to sit like the chunky helmet in the photo. Increase to 66 sts which will give volume. If you want an even larger hood, work one or two more increase rounds keeping the pattern (10 sc, inc) x 6 = 72. Keep your fabric dense and slightly rigid by using a tighter hook or a slightly thicker yarn for this piece if you want more body.
Round 12-18 :
1 sc in each st (66)
Info :
These even rounds establish height for the hood dome. Try on the head for scale by holding the dome over the crocheted head; add or remove rounds to match desired overhang. Keep stitch markers at the start of each round for alignment.
Round 19 :
1 sc BLO in each st (66)
Round 20 :
1 sc in each st (66)
Round 21 :
1 sc in each st (66)
Info :
Work one or two rounds in BLO to create a subtle ridge inside the hood that will help it sit and define the facial opening. This ridge can also be used as an anchor point when sewing the hood to the collar or head.
— Hood Bobble Overlay (work in black first, then variegated gray trims) :
Info :
We will form a bobble surface using puff clusters over the hood dome. For stable texture, work a round of single crochet as a base, then work puff stitches grouped in clusters evenly across the surface. If you prefer a popcorn stitch, substitute 5-dc popcorns where puff is indicated.
Round 22 :
Attach black yarn at front edge (where face will be). *sc 2, puff in next st* repeat around to create scattered bumpy texture (66 -> still 66)
Round 23 :
1 sc in each st (66)
Round 24 :
*sc 3, puff in next st* repeat around (66)
Round 25 :
1 sc in each st (66)
Round 26 :
*puff, sc 4* repeat around (66)
Round 27 :
1 sc around (66)
Info :
Continue alternating texturing rounds and even single crochet rounds to build mass. Puff stitch instructions: yarn over, insert hook, yarn over and pull up loop 4 times (5 loops on hook), yarn over and pull through all loops, ch1 to close puff. Keep tension on puff loops consistent and do not tighten too fast.
Round 28 :
*sc 2, puff, sc 3* repeat around (66)
Round 29 :
1 sc around (66)
Round 30 :
*puff in every 3rd st* repeat around (66)
Round 31 :
1 sc around (66)
Info :
At this point your hood dome has texture but still needs a distinct facial opening. We will work a scalloped ruffle around the face edge using variegated grays to recreate the layered frill visible in the images. Decide where the front center is and use a stitch marker so you can mirror left and right symmetrically when adding the ruffle layers.
Round 32 :
Change to dark variegated gray yarn. Working at chosen front edge stitch, 1 sc in next 6 sts, then work a 5-dc shell (shell = 5 dc in same stitch) in the next st. *sc 6, shell in next* repeat around front 30 stitches only to form a scalloped edge (work only along the lower 30 sts that will surround the face). This will create about 5-6 shells depending on your count. Fasten off variegated gray.
Info :
We isolate the face-facing edge and work shells into these stitches to form a pronounced ruffle that frames the face. Adjust number of shells to taste. The shells should overhang the face opening to create the layered look. Keep the rest of the hood plain black so the ruffle pops.
Round 33 :
Rejoin light gray yarn at base of shells. Into each shell, work: ch2, (puff, sl st) into shell space to create a smaller contrasting ruffle on top of the darker shell. Work this into each shell across the same face edge (do not work across entire hood) and fasten off. This forms the light inner ruffle visible nearest the face.
Info :
Short tails from the variegated yarn should be woven in toward the inside; leave enough length where needed for neat sewing when attaching hood to collar and neck. Trim or block the shell ruffles slightly if they are too long.
— Hood Collar (Chunky bobble collar sits on shoulders) :
Round 1 :
Make a separate collar ring by 10 sc in magic ring (10)
Round 3 :
(1 sc, inc) x 10 (30)
Round 4 :
(2 sc, inc) x 10 (40)
Round 5 :
1 sc in each st (40)
Round 6 :
Work puff clusters all around: *sc 1, puff in next st* repeat around (40)
Round 7 :
1 sc around (40)
Round 8 :
Change to variegated gray and work *sc 2, puff* around to create layered bulbs (40)
Round 9 :
1 sc around (40)
Round 10 :
Fasten off leaving long tail for sewing. Flatten and sew collar to base of hood dome joining the inner edge of hood (use mattress stitch for even invisible join). The collar should sit on the shoulders and be slightly loose to drape as seen in the picture.
Info :
Make two smaller bobble clusters to sew to the outer shoulders to mimic the sculpted bulk in the photo. Use variegated gray mixed with black to create depth. You can stuff inside bobbles slightly to maintain round volume.
— Body :
Round 1 :
6 sc in magic ring (6)
Round 3 :
(1 sc, inc) x 6 (18)
Round 4 :
(2 sc, inc) x 6 (24)
Round 5 :
(3 sc, inc) x 6 (30)
Round 6 :
(4 sc, inc) x 6 (36)
Round 7-18 :
1 sc in each st (36)
Info :
These rounds form the torso. Work in continuous rounds for smooth fabric. The tall slender silhouette is achieved by working many even rounds (here rounds 7-18). Aim for a length of about 10-12 inches/25-30 cm from the top of the torso to the hip area but stop and compare to the head and legs as you work to achieve desired proportion.
Round 19 :
(4 sc, dec) x 6 (30)
Round 20 :
1 sc in each st (30)
Round 21 :
(3 sc, dec) x 6 (24)
Round 22 :
1 sc in each st (24)
Round 23-26 :
1 sc in each st (24) - work until torso length matches photos (about 4-6 more rounds if needed)
Info :
Leave top of torso open for head insertion if attaching from top, or leave a narrower neck opening if you will sew the head into place from the bottom. Mark placement for arm openings at rounds 12-14 approximately: measure about 8-10 stitches down from the top and leave a gap of 6-8 stitches for each arm depending on desired arm thickness.
Round 27 :
Begin lower body shaping: (2 sc, inc) x 6 (30)
Round 28 :
(3 sc, inc) x 6 (36)
Round 29-32 :
1 sc in each st (36)
Info :
Stuff body lightly from the bottom up after attaching and stuffing legs. Keep the torso just firm enough to keep shape without making the body too rigid. If you plan to insert wire for poseable spine, now is the time to prepare the center channel before closing top for head attachment.
Round 33 :
Work decrease for neck attachment: (4 sc, dec) x 6 (30)
Round 34 :
(3 sc, dec) x 6 (24)
Round 35 :
1 sc in each st (24) - leave this opening for head seam
Info :
Fasten off leaving a long tail for sewing. Test fit head on torso neck opening. If the head neck is slightly larger than the body opening, increase by a few sc rounds on the body neck or decrease the head neck rounds until fit is snug. Sew head securely with ladder stitch for an invisible seam.
— Arm (Make 2) :
Round 1 :
6 sc in magic ring (6)
Round 3 :
(1 sc, inc) x 6 (18)
Round 4 :
(2 sc, inc) x 6 (24)
Round 5-6 :
1 sc in each st (24)
Info :
Rounds 1-6 form the hand opening. Decide if you want a glove opening to reveal claws by leaving a gap or closing into a mitten-style hand. To create a glove with finger cutout, we will flatten the hand later and work openings by skipping stitches and ch loops. Keep the hand slightly wider than the wrist so claws look natural.
Round 7 :
Work 1 sc in next 12 sts; break yarn and leave remaining 12 sts unworked for now to form an opening for thumb placement later. Rejoin at remaining 12 sts and work 1 sc in each st. (24)
Round 8-12 :
1 sc in each st (24)
Info :
These rounds build the lower arm. For extra length to mimic the long elegant arms in the picture, work additional even rounds until arm length is about 6-7 inches/15-18 cm from the hand to shoulder when stretched out. Use stitch markers at the base where you will sew the arm into the torso.
Round 13 :
(4 sc, dec) x 4, 2 sc in next 8 sts (20) - slight taper to forearm
Round 14-18 :
1 sc in each st (20)
Round 19 :
(2 sc, dec) x 4, 1 sc in next 4 sts (16)
Round 20 :
1 sc in each st (16) - leave a long tail for sewing to body
Info :
Stuff hands and lower arms lightly, leaving the top of the arm unstuffed until after sewing into the torso to ensure a smooth join. If adding wire for poseability, insert wire here and continue stuffing around it. Pin arm into torso opening and adjust angle before sewing permanently.
— Hand & Finger Openings :
Round 1 :
With flat hand area (after closing row 6 by slip stitching around 12 sts on palm), join yarn and sc 12 across to form palm (12)
Round 2 :
1 sc in each st (12)
Round 3 :
Create thumb gusset: ch2, join with sl st to next st, continue 1 sc around hand (12 + 2 ch)
Round 4 :
1 sc around including ch2 as small opening for thumb; close and fasten leaving long tail (12)
Info :
Keep the hand narrow and leave thumb gap roughly 3-4 stitches wide. Adjust opening for claw placement. If you plan to glue polymer claws, leave a larger thumb opening for gluing and stitching the claw base securely.
— Claw (Make 10 for two hands) :
Round 1 :
With cream/skin yarn, 4 sc in magic ring (4)
Round 2 :
(1 sc, inc) x 2 (6)
Round 3 :
1 sc in each st (6)
Round 4 :
(2 sc, inc) x 2 (8)
Round 5 :
1 sc in each st (8)
Round 6 :
(2 sc, dec) x 2 (6)
Round 7 :
Dec across to 3 sts, then fasten off leaving long tail to sew to finger base (3)
Info :
Stuff claws very lightly or not at all so they form a tapered cone. Optionally shape with a small bit of thread or glue for a stiff tip. If you prefer more realistic claws, sculpt them from polymer clay, bake and paint, then sew or glue the base to the finger opening.
Round 8 :
Sew claw bases into finger openings of hand. Space five claws evenly across the palm edge and sew the thumb claw on the small gusset created earlier. For stability, whip stitch through hand, claw base and a small dab of glue inside.
— Leg (Make 2) :
Round 1 :
6 sc in magic ring (6)
Round 3 :
(1 sc, inc) x 6 (18)
Round 4 :
(2 sc, inc) x 6 (24)
Round 5 :
(3 sc, inc) x 6 (30)
Round 6-10 :
Work foot shape: 1 sc in each st around for 5 rounds (30)
Round 11 :
Start toe shaping: 1 sc in next 12 sts, turn work and sc across 12 sts, join with sl st to continue in rounds - create oval foot top structure (30)
Round 12 :
1 sc around (30)
Round 13 :
(4 sc, dec) x 5 + sc 2 (26)
Round 14-20 :
1 sc in each st (26) - work up leg length until desired height (approx 9-10 inches/23-25 cm)
Info :
Stuff foot firmly to create a stable base for standing. Keep leg stuffing moderate; legs in the photo are fairly slim and a bit firm. If making poseable legs, insert wire before closing top of leg. Attach legs to bottom of body in a small gap of 6-8 sts spaced evenly for balance.
Round 21 :
Decrease for hip: (3 sc, dec) x 6 (20)
Round 22 :
1 sc across (20) - leave long tail for sewing to body
— Boots (Make 2) :
Round 1 :
With black yarn, 6 sc in magic ring (6)
Round 3 :
(1 sc, inc) x 6 (18)
Round 4-7 :
1 sc in each st (18) - create boot shaft
Round 8 :
Change to BLO and 1 sc in each st for 1 round to create cuff ridge (18)
Round 9 :
Switch back to regular sc and work a ruffle: *sc 2, 5-dc shell in next st* repeat around cuff to create decorative ruffle seen at top of boots (approx 6 shells)
Round 10 :
Sew boots over the foot piece; use whip stitch around ankle and fasten off, weaving in ends. For extra sturdiness put a little glue inside the boot before pushing it over the crocheted foot.
Info :
If your boots fit snugly over the crocheted foot, sew a few invisible stitches around the toe and heel to anchor them. The ruffle on the boot can be left floppy or slightly starched with diluted glue for more pronounced rings.
— Finishing Details and Assembly :
Info :
We will now join all parts. Block pieces lightly if necessary, pin pieces into place before sewing, and use a backstitch or ladder stitch for invisible seams. Keep photos at hand to match proportions and angles.
Step 1 :
Attach legs to bottom of body at the base opening. Place legs evenly spaced (about 6-8 sts apart). Use mattress stitch and stuff legs as you sew to maintain foot shape. Secure with several passes to ensure stability for display.
Step 2 :
Sew each arm into side openings of the torso around rounds 12-14 of the body; position thumbs forward slightly. Use ladder stitch to reduce visible seam; leave a small gap for adjusting angle if you added wire for poseability.
Step 3 :
Sew head to top neck opening and ensure faceplate is centered in hood opening. If you made a separate sculpted face, glue and stitch into place first. Pull hood dome slightly forward and tack a few stitches through head and hood inner ridge to keep the hood in place.
Step 4 :
Sew the chunky collar piece to the base of the hood dome and to the body shoulders. Place large bobble clusters over the shoulder area and secure with hidden stitches so they read as shoulder sculpting rather than flat appliques.
Step 5 :
Attach claws to finger openings. If crocheted claws, sew bases into hand gussets with multiple secure passes. If using polymer claws, glue in place and reinforce with a few stitches through the base after the glue cures.
Step 6 :
Embroider mouth details (teeth, dark mouth interior) with white and black yarn. Use a small embroidery needle and couching stitches for teeth; place a small strip of black felt inside mouth for depth if desired.
Info :
Weave in all remaining tails into the nearest seam or inside the hood and collar so ends are hidden. Add a few securing dots of fabric glue to high-stress joins like claws and boots for extra durability if the doll will be handled frequently.
Round Count Note :
The full project including hood bobbles and claws totals well over 150 individual rounds across all components. Count carefully and refer back to the specific sections while assembling. Keep consistent tension and always verify stitch count after increases or decreases.
This dramatic xenomorph-inspired amigurumi blends sculptural bobble textures with sleek amigurumi shaping to create a striking seasonal piece. The large hood and layered gray ruffle give incredible presence while the slender body and detailed claws add character and realism. The step-by-step instructions will guide you through complex assembly and finishing for a polished result. 🧶👻 I hope you enjoy this atmospheric creation and share your spooky version with the community! 🎃