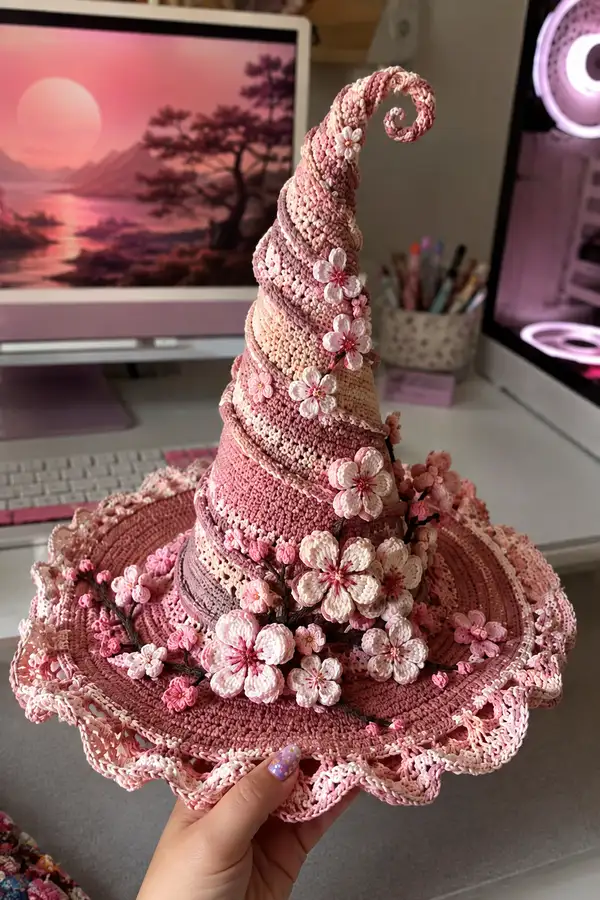
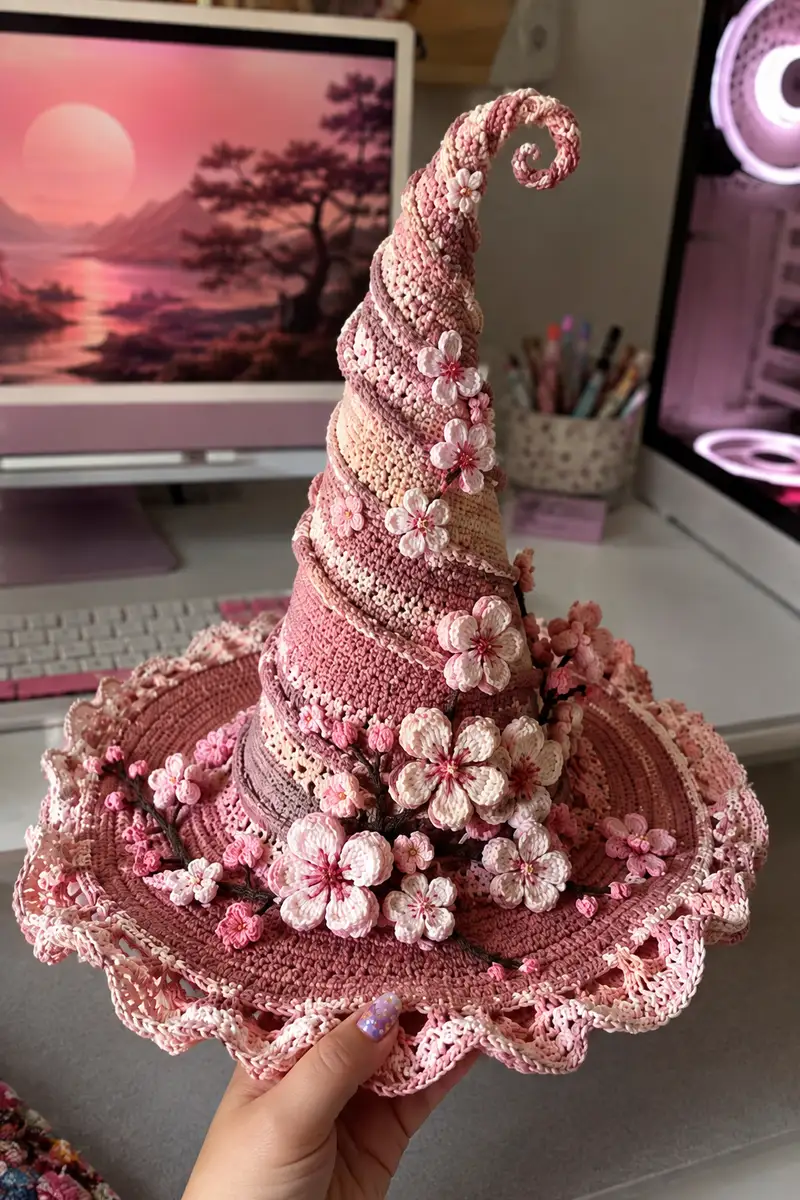
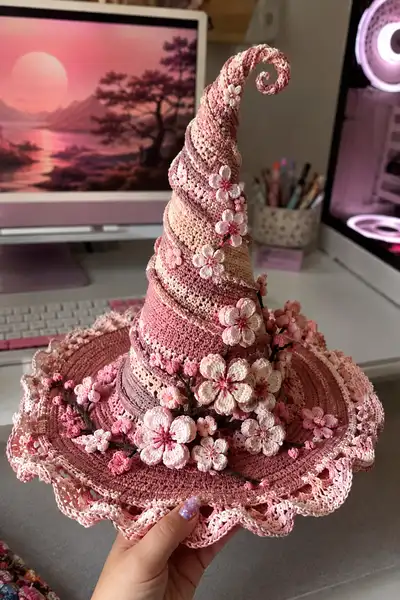
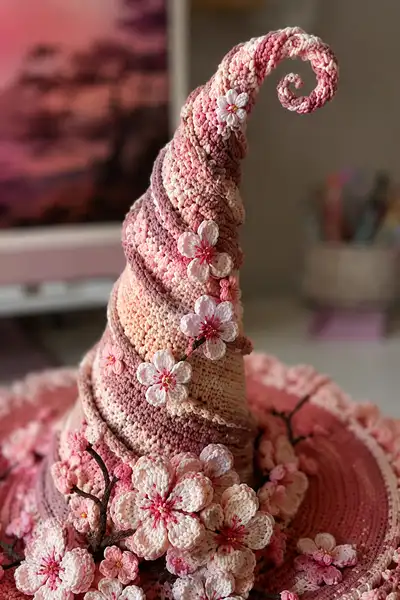
A dramatic tall witch hat crocheted in soft rose-gold variegated yarn with a pronounced spiral cone, generous ruffled brim and cascading cherry blossom appliques. This pattern builds the wide flat brim, sculpted cone and decorative spiral ridge, then adds layered blossoms and branches for a romantic, fairy-tale finish. Detailed shaping, texture rows and assembly notes help you recreate the exact look shown.
Progress Tracker
0% Complete
— Brim (Flat Base) :
Round 1 :
6 sc in magic ring (6)
Round 3 :
(1 sc, 1 inc) x 6 (18)
Round 4 :
(2 sc, 1 inc) x 6 (24)
Round 5 :
(3 sc, 1 inc) x 6 (30)
Round 6 :
(4 sc, 1 inc) x 6 (36)
Round 7 :
(5 sc, 1 inc) x 6 (42)
Round 8 :
(6 sc, 1 inc) x 6 (48)
Round 9 :
(7 sc, 1 inc) x 6 (54)
Round 10 :
(8 sc, 1 inc) x 6 (60)
Round 11 :
(9 sc, 1 inc) x 6 (66)
Round 12 :
(10 sc, 1 inc) x 6 (72)
Info :
Brim is worked flat in rounds. Use stitch markers to mark the first stitch of each round. If your brim is turning up, add a few increases in the next round; if cup-shaped reduce increases slightly. Aim for a finished brim diameter of approximately 14-16 inches (35-40 cm).
Round 13 :
(11 sc, 1 inc) x 6 (78)
Round 14 :
(12 sc, 1 inc) x 6 (84)
Round 15 :
(13 sc, 1 inc) x 6 (90)
Round 16 :
(14 sc, 1 inc) x 6 (96)
Round 17 :
(15 sc, 1 inc) x 6 (102)
Round 18 :
(16 sc, 1 inc) x 6 (108)
Round 19 :
(17 sc, 1 inc) x 6 (114)
Round 20 :
(18 sc, 1 inc) x 6 (120)
Info :
After round 20 you have a large flat circle of 120 stitches. If you prefer a slightly narrower brim, stop increases at round 18 (108 sts). From here we will build the brim depth by working even rounds and then shaping a ruffle/lace edge.
Round 21-24 :
1 sc in each st (120)
Round 25 :
1 sc in each st BLO (120)
Info :
Working the first of these rows in BLO creates a subtle ridge where the hat body will begin. This ridge helps anchor the crown later and gives a neat finish at the join.
Round 26 :
*1 sc in next 4 sts, 2 sc in next st* rep around (144) — (increase every 5th stitch)
Round 27 :
1 sc in each st (144)
Round 28 :
*1 sc in next 5 sts, 2 sc in next st* rep around (168)
Info :
Rounds 26 and 28 create the first ruffle flare. If you want a more dramatic ruffle, repeat an additional increase round (for example, *1 sc in next 6 sts, 2 sc* to reach larger diameter). Maintain even tension to avoid puckering.
Round 29 :
1 sc in each st (168)
Round 30 :
*1 sc in next 2 sts, 1 hdc in next 1 st, 1 sc in next 2 sts, 2 sc in next st* rep around (202)
Round 31 :
1 sc in each st (202)
Info :
Round 30 begins to shape a scalloped base for the lace trim. Adjust the number of rows in the ruffle depending on how wide you want the brim to be. The brim should lay flat when blocked.
Round 32 :
*ch 3, skip 2 sts, sl st into next st* rep around forming picot-like loops (202 loops)
Round 33 :
1 sc in each st (202)
Round 34 :
Switch to lighter blush/cream yarn. 1 sc in each st (202)
Info :
Color change: change to pale blush for lace edge highlight. Carry unused yarn inside if you plan to continue with the main variegated color for the cone; otherwise fasten off and weave ends neatly. Using a smaller hook (3.25mm) for the lace rounds will produce a neater, more delicate edge.
Round 35 :
(1 sc, ch 3, 3 dc in next ch-loop, ch 3, 1 sc in next 3 sts) rep around to create decorative scallops — work into loop and stitches evenly (202 scallops)
Round 36 :
Edging: *sl st in next st, ch 4, picot (ch 3, sl st in 3rd ch), sl st in next 2 sts* rep around to create delicate ruffle (202)
Info :
Fasten off and weave in ends. Block the brim flat with pins while slightly stretching the scallops to set shape. Allow to dry completely before attaching the cone.
— Crown Base (Attach Cone Start) :
Info :
Work the crown base as a shallow funnel to transition from brim center to cone tube. The crown base will be attached at the brim's center — count 60-72 stitches around the inner circle you will use as the base. Use the flat center created at round 20 of brim as your starting point.
Round 1 :
Join variegated yarn at center of brim circle (center hole). Ch 1, 1 sc in same st and in each of next 32 sts (32) — adjust to align with brim center circumference
Round 2 :
(1 sc, 1 inc) x 16 (48)
Round 3 :
(2 sc, 1 inc) x 16 (64)
Info :
These increases shape the funnel that rises from the brim. Make sure your stitch count at the join is even and that the join seam sits evenly — if needed add or skip stitches to match the brim's center stitches.
Round 4-6 :
1 sc in each st (64)
Round 7 :
(6 sc, 1 dec) x 8 (56)
Round 8 :
(5 sc, 1 dec) x 8 (48)
Info :
Decrease gently to form a slight inward curve before the cone begins. Stuffing is not used here — the crown base should remain supple because it flows directly into the cone which is largely hollow or lightly supported for shape.
Round 9-12 :
1 sc in each st (48)
Info :
Stop after round 12 and check circumference: this ring of 48 sts should align with the cone's starting circle. Use a stitch marker to mark the stitch where the cone's shaping sequence will begin.
— Cone / Spiral Body (Tall Sculpted Cone) :
Info :
The cone is worked in continuous rounds to create a tall, tapered spiral. We'll first build a short cylinder, then use an alternating increase/decrease scheme to create the spiral taper, and finally sculpt the curl at the tip. Work with a stitch marker and keep rounds continuous (do not join) so the spiral effect reads smoothly.
Round 1 :
Join variegated yarn at marked stitch. 1 sc in each of 48 sts (48)
Round 2 :
1 sc in each st (48)
Round 3 :
1 sc in each st BLO (48)
Round 4 :
*(3 sc, 1 inc)* rep around (60)
Info :
Round 4 adds a gentle outward curve close to the base of the cone. Working a row in BLO earlier (round 3) made a subtle ridge from the brim join that helps disguise the seam.
Round 5 :
1 sc in each st (60)
Round 6 :
*1 sc in next 6 sts, 1 inc* rep around (68)
Round 7 :
1 sc in each st (68)
Round 8 :
*1 sc in next 7 sts, 1 inc* rep around (76)
Round 9 :
1 sc in each st (76)
Round 10 :
*(5 sc, 1 inc, 1 sc, 1 dec)* rep around (76) — note: decreases positioned next to increases to begin the spiral wave
Info :
Round 10 begins shaping the spiral ridges by pairing increases and decreases so certain vertical columns grow while adjacent columns stay shorter, creating a diagonal wave. Keep your marker moving each round and note the location of the paired inc/dec.
Round 11 :
1 sc in each st (76)
Round 12 :
*1 sc in next 9 sts, 1 inc* rep around (84)
Round 13 :
1 sc in each st (84)
Round 14 :
*1 sc in next 4 sts, 1 dec, 1 sc in next 4 sts, 1 inc* rep around (84) — alternate dec/inc bands to create diagonal shaping
Round 15 :
1 sc in each st (84)
Info :
From round 10 onward we will repeat shaping cycles every 6-8 rounds: one round with increases concentrated in a band, then even rounds, then a round with paired dec/inc to force a slant. This gives the tall cone its spiral diagonal pattern.
Round 16 :
*1 sc in next 10 sts, 1 inc* rep around (92)
Round 17 :
1 sc in each st (92)
Round 18 :
*1 sc in next 5 sts, 1 dec, 1 sc in next 5 sts, 1 inc* rep around (92)
Round 19 :
1 sc in each st (92)
Round 20 :
*1 sc in next 11 sts, 1 inc* rep around (100)
Round 21 :
1 sc in each st (100)
Round 22 :
*1 sc in next 6 sts, 1 dec, 1 sc in next 6 sts, 1 inc* rep around (100)
Info :
Check the cone for even shaping every 6-8 rounds. The spiral is achieved by offsetting rows of incs and decs gradually around the round so the tall cone leans and forms an elegant curl at the top. If at any point the cone becomes too wide, add a row with slightly more decs to tighten the profile.
Round 23 :
1 sc in each st (100)
Round 24 :
*1 sc in next 12 sts, 1 inc* rep around (108)
Round 25 :
1 sc in each st (108)
Round 26 :
*1 sc in next 6 sts, 1 dec, 1 sc in next 6 sts, 1 inc* rep around (108)
Round 27 :
1 sc in each st (108)
Round 28 :
*1 sc in next 13 sts, 1 inc* rep around (116)
Round 29 :
1 sc in each st (116)
Round 30 :
*1 sc in next 7 sts, 1 dec, 1 sc in next 7 sts, 1 inc* rep around (116)
Round 31 :
1 sc in each st (116)
Info :
We're building height and gentle increases to give the cone its sculpted vertical lines. Continue this method until you reach the desired cone height; the pattern below outlines a full tall cone using this approach and adds a final curling section for the whisked tip.
Round 32 :
*1 sc in next 14 sts, 1 inc* rep around (124)
Round 33 :
1 sc in each st (124)
Round 34 :
*1 sc in next 7 sts, 1 dec, 1 sc in next 7 sts, 1 inc* rep around (124)
Round 35 :
1 sc in each st (124)
Round 36 :
*1 sc in next 15 sts, 1 inc* rep around (132)
Round 37 :
1 sc in each st (132)
Round 38 :
*1 sc in next 8 sts, 1 dec, 1 sc in next 8 sts, 1 inc* rep around (132)
Round 39 :
1 sc in each st (132)
Round 40 :
*1 sc in next 16 sts, 1 inc* rep around (140)
Round 41 :
1 sc in each st (140)
Info :
At around round 40 the cone is becoming tall and slightly wider than the crown base, forming the slouching spiral profile. If you want a slimmer profile, reduce increases in rounds 36-40 by working one fewer inc per repeat.
Round 42 :
*1 sc in next 8 sts, 1 dec, 1 sc in next 8 sts, 1 inc* rep around (140)
Round 43 :
1 sc in each st (140)
Round 44 :
*1 sc in next 17 sts, 1 inc* rep around (148)
Round 45 :
1 sc in each st (148)
Round 46 :
*1 sc in next 9 sts, 1 dec, 1 sc in next 9 sts, 1 inc* rep around (148)
Round 47 :
1 sc in each st (148)
Round 48 :
*1 sc in next 18 sts, 1 inc* rep around (156)
Round 49 :
1 sc in each st (156)
Round 50 :
*1 sc in next 9 sts, 1 dec, 1 sc in next 9 sts, 1 inc* rep around (156)
Info :
From round 50 onward we will alternate three rounds: one with concentrated increases to create a bulge (inc band), one even round to smooth, and one with paired dec/inc to tilt the fabric and produce the spiral. Repeat cycles until cone reaches about 12-14 inches (30-35 cm) in height measured from crown base — adjust length for your preference.
Round 51 :
1 sc in each st (156)
Round 52 :
*1 sc in next 19 sts, 1 inc* rep around (164)
Round 53 :
1 sc in each st (164)
Round 54 :
*1 sc in next 9 sts, 1 dec, 1 sc in next 9 sts, 1 inc* rep around (164)
Round 55 :
1 sc in each st (164)
Info :
At this stage optional textured rows can be added for ridges: work a row of hdc or puff stitches every 6 rounds to create a raised spiral effect. The sample hat alternates a single round of hdc every 8 rounds to produce soft ridges that catch light.
Round 56 :
1 hdc in each st (164)
Round 57 :
1 sc in each st (164)
Round 58 :
*1 sc in next 20 sts, 1 inc* rep around (172)
Round 59 :
1 sc in each st (172)
Round 60 :
*1 sc in next 10 sts, 1 dec, 1 sc in next 10 sts, 1 inc* rep around (172)
Round 61 :
1 sc in each st (172)
Info :
Continue building height with cycles of inc-band, even-rounds, and paired dec/inc rounds. Count your rounds to maintain consistent pattern repeat and create a recognizable spiral band visually wrapping the cone. Plan to work about 50-80 more rounds depending on desired height — sample hat comprises roughly 90 rounds total in the cone section including all cycles.
Round 62-76 :
Repeat cycles: (Round A: *1 sc in next N sts, 1 inc*), (Round B: 1 sc each), (Round C: *1 sc in next M sts, 1 dec, 1 sc in next M sts, 1 inc*), (Round D: 1 sc each) — increasing N and M gradually as shown previously. Maintain math so each cycle returns you to the same stitch count for that cycle group. Average stitch counts progress roughly 172 > 180 > 188 as you repeat increases slowly.
Round 77 :
1 sc in each st (approx 188) — check your actual stitch count and write it down
Info :
Begin planning tip curl: over the next 8-12 rounds you'll decrease progressively to a smaller circumference to form a tight tip which is then shaped into a spiral by crocheting short rounds and using a bit of wire if desired.
Round 78 :
(7 sc, 1 dec) rep around (approx 168) — calculate exact count based on your current stitch total to reduce evenly by 10%
Round 79 :
1 sc in each st (approx 168)
Round 80 :
(6 sc, 1 dec) rep around (approx 144)
Round 81 :
1 sc in each st (approx 144)
Round 82 :
(5 sc, 1 dec) rep around (approx 120)
Round 83 :
1 sc in each st (approx 120)
Round 84 :
(4 sc, 1 dec) rep around (approx 96)
Round 85 :
1 sc in each st (96)
Round 86 :
(3 sc, 1 dec) rep around (approx 76)
Round 87 :
1 sc in each st (76)
Round 88 :
(2 sc, 1 dec) rep around (approx 57)
Round 89 :
1 sc in each st (57)
Round 90 :
(1 sc, 1 dec) rep around (38)
Round 91 :
1 sc in each st (38)
Round 92 :
6 dec (6) — gather if creating fully closed tip, otherwise leave opening for wire insertion and shaping
Info :
For the curled tip: if you want a permanent spiral curl like the sample, insert a short length of thin floral wire down the center before final tightening and close just enough to hold the wire in place. Do not leave excess stuffing in tip. With the wire you can shape the tip to form the tight spiral turn.
Round 93 :
Fasten off leaving long tail. If using wire, wrap remaining yarn tail around wire base and sew few stitches to secure. Weave in ends securely.
— Spiral Ridge & Decorative Cord :
Info :
Create the raised spiral ridge that wraps the cone by making a long crocheted cord (i-cord style) and sewing it along the cone in a spiral. This cord is made with smaller hook for firmness and will be worked in a contrasting dusty rose to read as the darker spiral in the photo.
Round 1 :
Using dusty rose yarn and 3.25mm hook, ch 4, join with sl st to form ring, work 12 rounds of 12 sc around (12) — work in the round to make a thick tubular cord about 12 inches long. (Repeat or join yarn to get required length to wrap cone)
Info :
Alternatively use a crochet braid technique: ch as long as required then sc back along chains using BLO to create a rope. Aim for a cord length slightly longer than the cone height so you can overlap and make a decorative tail at the tip.
Round 2 :
Finish cord and leave long tails for sewing. Spiral cord around cone from base upward, spacing about 12-20 stitches between wraps depending on desired spiral density. Hand stitch cord with yarn needle using matching yarn and small stitches—secure at intervals to maintain shape.
Info :
To add textural raised ridges in the cone while crocheting the cone body instead of attaching a cord, you can work alternating rounds in front loops only (FLO) to create subtle horizontal ridges; the cord method provides a more dramatic spiral.
— Cherry Blossom Appliques (Make many) :
Info :
Make several sizes of cherry blossom flowers. Petals are slightly cupped by working hdc/dc clusters and pulling the base tight. Use pale blush for outer petals, add bright pink centers and tiny yellow bead centre if desired. Make clusters of small buds and larger 5-petal blossoms for a cascading effect.
Large Blossom - Petal (Make 5 petals per flower) :
Round 1 : With pale blush, ch 3, sl st to form ring, ch 1, 6 sc in ring (6)
Petal Round 2 :
*ch 2, 2 dc in next st, ch 2, sl st in same st* rep around to make 6 petal loops
Petal Round 3 :
Working into each petal loop: (sc, hdc, 3 dc, hdc, sc) — fasten off and leave long tail for sewing (creates five full petals)
Info :
Sew five petals together at center. Puff slightly in the center by adding a few small stitches and pull to gather — this will give the flower dimension. Add a few stitches of bright pink yarn to the center and sew on small yellow beads as stamens.
Medium Blossom (Make multiple) :
Round 1 : mr, 6 sc (6)
Round 2 :
*ch 2, 3 dc in same st, ch 2, sl st next st* rep x 6 to form petals
Round 3 :
Sew petals closed and add center embroidery of bright pink radial bars; knot and secure on back
Small Bud (Make many) :
Round 1 : mr, 6 sc (6)
Round 2 :
1 sc in each st (6) — fasten off leaving tail for sewing. Optionally add a tiny bright pink center with a few surface stitches to simulate a bud.
Info :
Blossoms shown are layered with two-tone petals: work the base petals in pale blush, then stitch a secondary smaller petal formed in a slightly darker rose on top for depth. Add French knot-style stitches for stamens using bright pink and a tiny bead of yellow at the center.
— Branches and Bud Clusters :
Round 1 :
Using chocolate brown yarn, ch 30-60 to create a branch length. Sl st back along chain to thicken, then twist and shape into a branch form. Make multiple lengths of varying sizes to cluster behind the blossoms.
Round 2 :
Sew small buds and miniature blossoms to branches by stitching through the chain and between sl st ridges. Secure each bloom with several stitches and knot on backside.
Info :
Wrap the branches with a thin spiral of dusty rose yarn to mimic bark highlights and to help them coordinate with the hat colors. Arrange branches along brim back-left and around base of cone as in photo for balanced clusters.
— Lace & Edge Embellishments :
Round 1 :
With pale blush and 3.25mm hook, pick up loops along brim scallops. Work decorative picot edging: *sc, ch 3, picot, sl st* around scallops to refine the ruffle (work into each loop created earlier) — aim for neat evenly spaced picots.
Round 2 :
Work a second row of lace: *ch 5, tr in next sc, ch 5, sl st* to create lacy arches between scallops. Fasten off and weave ends.
Info :
Blocking the lace now is important to set the scallops. Use steam or wet-block and pin the scallops slightly outward for that finished frilly look.
— Assembly & Decoration :
Info :
Plan your composition: lay cone on brim and try different placements of branches and blossoms before sewing. The sample hat places the largest clusters to the front-left of the crown and smaller blossoms spiraling up the cone alongside the dusty-rose cord.
Step 1 :
Position cone on brim: place the base of the cone into the brim center opening and pin in place. Sew through crown base rounds into brim with long tail and yarn needle using whip stitch. Use ladder stitch for invisible seam if desired.
Step 2 :
Sew spiral cord: starting at brim base, hand-stitch the prepared cord in a spiral up the cone with 6-10 evenly spaced sewing points per wrap. Tuck ends neatly and secure with a few securing stitches at tip.
Step 3 :
Attach large blossom clusters: pin clusters and sew flowers to cone and brim using matching yarn tails. Secure each blossom with 6-8 stitches through the center and base; add a bead for a center and secure with thread or thin yarn.
Step 4 :
Sew branches: place branches beneath blossom clusters to peek out naturally. Use small hidden stitches to secure branch bases to the brim; reinforce with extra stitches where clusters will bear weight.
Step 5 :
Final touches: add tiny bud clusters along the spiral cord by sewing small bud motifs in place. Use a needle and bright pink thread to create French knot stamens in center of some flowers for added realism.
Info :
Once all pieces are secured, weave all tails through a few rows of stitches, trim close and use fabric glue sparingly on knots if extra reinforcement is needed. Re-block lightly if any areas need reshaping.
This rose-gold spiral witch hat is pure magic to create — every round brings it closer to a fairy-tale finish. The combination of sculpted cone, raised spiral ridge and cascading cherry blossoms is endlessly photographed and adored. Enjoy the process of shaping, layering, and embellishing; the final piece is a gorgeous wearable or display object you'll be proud to give or keep. 🧶🌸✨