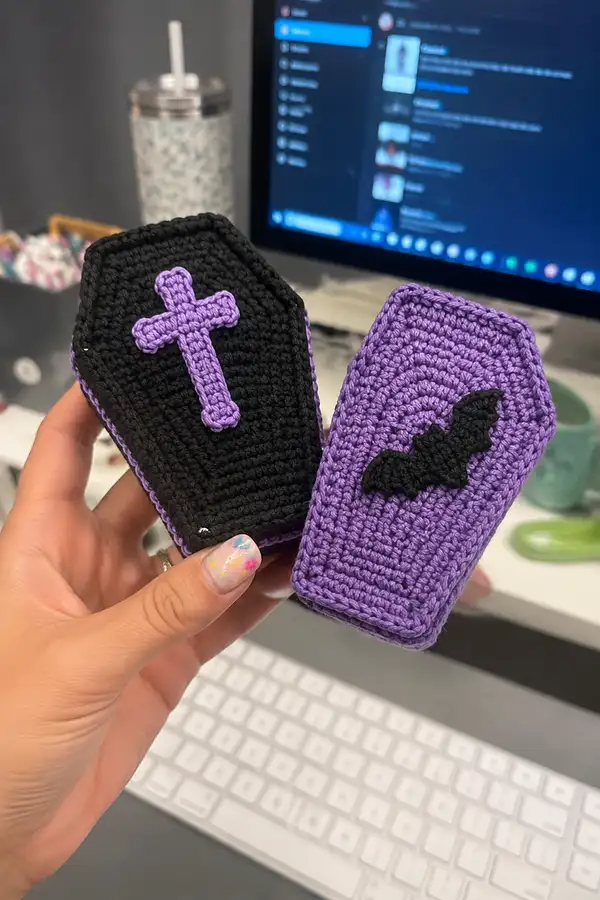
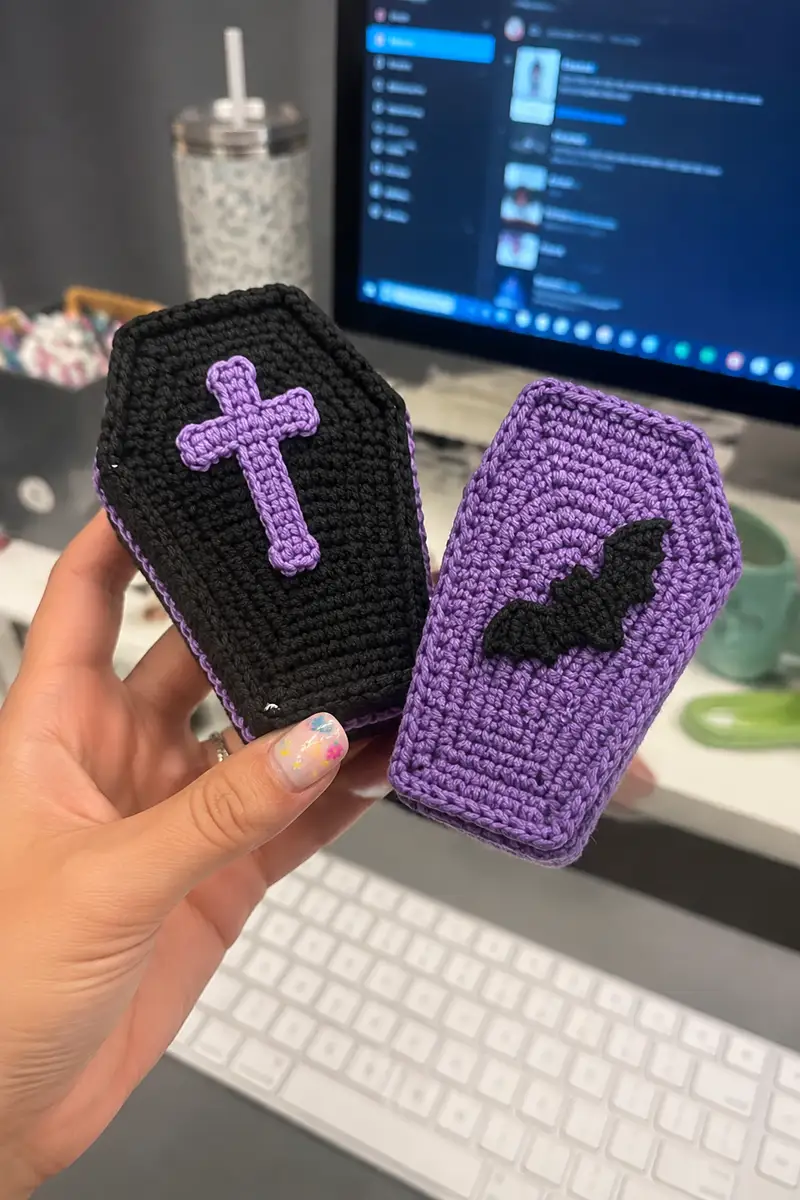
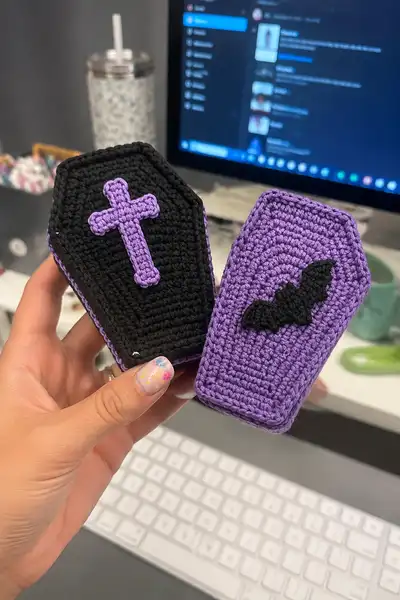
Make spooky-cute mini crochet coffins with bold contrast and decorative appliques. These palm-sized coffins feature a flat, beveled lid shape with a neat braided piping edge and appliqued bat or cross in contrasting yarn. Perfect for Halloween decor, keychain gifts, or desk accents — worked in single crochet with simple shaping and sewn assembly for a neat finished look.
Progress Tracker
0% Complete
— Notes :
Info :
This pattern creates a two-panel coffin (front and back) and a long side-band that is seamed to make a shallow 3D coffin. Work tightly so stuffing does not show through. I use worsted weight yarn with a 3.5mm hook for a dense fabric. Adjust hook for your yarn and tension.
— Front Panel (Make 1) :
Round 1 :
6 sc in magic ring (6)
Round 3 :
(1 sc, 1 inc) x 6 (18)
Round 4 :
(2 sc, 1 inc) x 6 (24)
Round 5 :
(3 sc, 1 inc) x 6 (30)
Round 6 :
(4 sc, 1 inc) x 6 (36)
Round 7 :
(5 sc, 1 inc) x 6 (42)
Round 8 :
(6 sc, 1 inc) x 6 (48)
Info :
Rounds 1-8 build a flat circular base. To begin shaping the coffin silhouette we will make small directional increases at two opposite points to elongate the shape vertically. Use a removable marker to mark one of the increase points (this will become the top of the coffin).
Round 9 :
1 sc in each st (48)
Round 10 :
1 sc in each st (48)
Info :
To elongate, we will increase twice per round at the marked top and the point directly opposite (bottom). This keeps the circumference nearly even while pulling the shape into an oval – this is subtle shaping that produces the coffin's elongated look.
Round 11 :
Inc at top marker, 24 sc across to opposite marker, inc, continue 22 sc (50)
Round 12 :
1 sc in each st (50)
Round 13 :
Inc at top marker, 25 sc, inc at bottom (52)
Round 14 :
1 sc in each st (52)
Info :
If at any time the increases shift, move your marker to the most pronounced point on the edge that reads like the coffin 'top' and keep increases opposite each other. The goal here is a long oval, not a perfect circle.
Round 15 :
Inc at top marker, 26 sc, inc at bottom (54)
Round 16 :
1 sc in each st (54)
Round 17-20 :
1 sc in each st (54) - work 4 rounds even to build panel height (54)
Info :
At this point you have a fairly large flat oval. To move toward a coffin with flattened top and tapered sides we will selectively reduce at four side points to form the straight edges. Visualize the coffin as having 6 sides: a top-shoulder, two tapered sides, a bottom-shoulder, and two small angled corners. We'll create four slight decreases spaced evenly to flatten the short sides.
Round 21 :
Work 12 sc, dec, 14 sc, dec, 12 sc, dec, 14 sc, dec (50)
Round 22 :
1 sc in each st (50)
Round 23 :
Work 11 sc, dec, 13 sc, dec, 11 sc, dec, 13 sc, dec (46)
Round 24 :
1 sc in each st (46)
Info :
Check the overall silhouette: you should now see a flatter top and bottom with slightly angled sides. If your panel looks too round, repeat a single round of the previous decrease pattern (spread decreases evenly) until the shape reads as more coffin-like. Keep stitch counts balanced on both sides.
Round 25 :
Work 10 sc, dec, 11 sc, dec, 10 sc, dec, 11 sc, dec (42)
Round 26 :
1 sc in each st (42)
Round 27 :
1 sc in each st BLO (42) - work this round in back loops only to create a subtle ridge around the panel edge that helps the panel sit against the side band
Info :
Work additional even rounds if you want a taller panel before joining (this raises the lip of the coffin lid). Ensure the back panel matches this height precisely for easy assembly.
Round 28-36 :
1 sc in each st (42) - work 9 rounds even to build final panel height (42)
Round 37 :
Sl st into next stitch and fasten off, leaving a long tail for sewing (do not close into a circle). Block flat if desired.
— Back Panel (Make 1) :
Info :
Work the back panel identical to the front so they match. If you want a reverse-color back (purple instead of black), change yarn now and work the same series of rounds. Follow rounds 1-37 exactly as the front panel so the side band lines up squarely.
Round 1-37 :
Repeat Front Panel Rounds 1-37 exactly (make sure stitch counts match: final circumference 42 sts and height equal to front panel)
— Side Band (Make 1 long band to fit circumference) :
Info :
The side band is worked in rows around the panel edge to create the depth of the coffin. Measure the circumference of your previously completed panel (should be about 42 sts around). We will join a long strip in the round and then seam to the front and back panels. The number of stitches in the band should equal the final stitch count around the panels (42). If yours differs, adjust the band width to match your measured panel circumference.
Round 1 :
Join yarn to an edge stitch of a panel or start with a chain to make a foundation row. Ch 42, sl st to join into a ring taking care not to twist (42)
Round 2 :
1 sc in each st around (42)
Round 3 :
1 sc in each st BLO (42) - work in back loops to make the inner edge sit flatter to the panel
Round 4-8 :
1 sc in each st (42) - work 5 rounds even to create thickness (42)
Info :
At this stage you have a narrow tube. Keep this band the same height as the panels' height count so that when you join them together the top and bottom edges line up flush. If you want a deeper coffin, add more even rounds now.
Round 9-20 :
1 sc in each st (42) - continue even rounds for a total band height of 20 rounds or until band height equals panel height. This example uses 20 rounds to pair with the panel height.
Info :
Optional color stripe: To mimic the pictured central braid color, switch to the accent color for 2-3 rounds in the middle of the band (change color at end of round with a sl st or by pulling through the new color). Carry the unused color on the inside to keep the exterior clean.
Round 21 :
1 sc in each st (42) - final round even, fasten off leaving a long tail for seaming to panels
— Decorative Braid / Piping (Make 1 or 3 cords) :
Info :
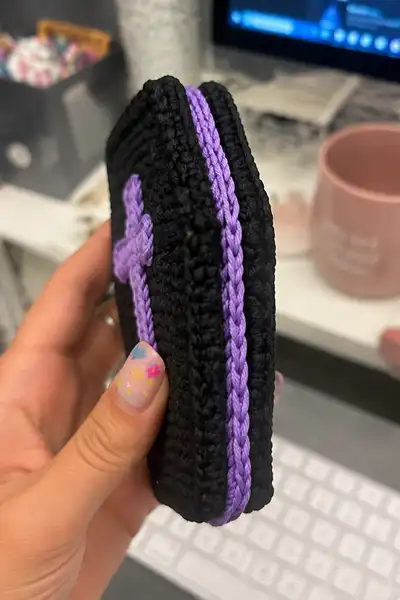
The photo shows a slim braided piping in contrasting purple applied down the center seam of the side band. You can either single-crochet a chain cord or make three short chains and braid them to create the look. Below are two options: crocheted chain cord or simple three-strand yarn braid.
Round 1 - Option A (Chain Cord) :
Using accent color, ch 70 (or length equal to side band circumference), sc in 2nd ch from hook and each ch across to create a thin cord, fasten off leaving long tail for sewing
Round 1 - Option B (Three-Strand Braid) :
Cut three strands each about 2.5x the side band circumference. Tie together and braid tightly. Knot ends and trim. Use yarn needle to tack braid to side seam.
Info :
For the pictured bright purple braid, I made three 3mm chain cords and braided them together. The crocheted chain cord is slightly bulkier and has a tidy texture. Whichever option you choose, test the fit around the side band and trim to length before sewing.
— Applique: Cross (Front of Black Coffin) :
Info :
The cross applique is worked small and flat in contrasting purple and then sewn centered on the front panel. The cross is basically a short vertical bar with a shorter horizontal bar attached.
Round 1 :
Using accent color, ch 6, sc in 2nd ch from hook and across (5 sc), turn (5)
Round 2 :
Ch1, sc in each st across (5)
Round 3 :
Ch1, sc across (5) - work 6 rows total to create a vertical bar 6 rows tall (5)
Info :
Make a small horizontal bar by working ch 4, sc across for 2 rows, then sew centered across the vertical bar at about row 3. Secure tightly and weave ends. Position on panel keeping the vertical bar centered top-to-bottom of the coffin face.
Round 4 :
Make horizontal bar: ch 4, sc in 2nd ch and across (3), ch1, turn, sc 3 (3). Fasten off leaving tail for sewing.
Info :
Sew horizontal bar to vertical bar at the center row using small whip stitch or mattress stitch to hide joins. Use a small dab of fabric glue if you prefer extra hold before sewing.
— Applique: Bat (Front of Purple Coffin) :
Info :
The bat is slightly larger and created from a simple silhouette crocheted in black in a small flat motif. Break the bat into three parts: left wing, right wing, and head/body joined together, or work as one small oval and cut/trim for wings shape. Below is a compact single-piece bat motif approach.
Round 1 :
Using black yarn, ch 8, sc in 2nd ch from hook and across (7)
Round 2 :
Ch1, sc across (7)
Round 3 :
Ch1, 2 sc in first st, sc 3, 2 sc in last st (9)
Round 4 :
Ch1, sc across (9) - fold the little rectangle and use small embroidery scissors to trim wing points into a bat silhouette, or work two angled increases on either side to create points
Info :
Because the motif is small, slight trimming with scissors to shape wings is acceptable. Alternatively, stitch two small triangular wing tips separately and sew to the sides of a central head/body oval for a cleaner silhouette.
Round 5 :
Fasten off leaving long tail for sewing. Position bat centered on the front panel and stitch around edges with small slip stitches or catch-stitches to secure.
— Edging and Final Joining :
Info :
Before joining, pin front and back panels on either side of the side band so the edges align. If the panels are slightly larger than the band, you can ease them by stitching every other stitch and then adding a round of sc around the assembled seam to tidy the edge.
Round 1 :
With panels pinned, align right sides facing out. Using the long tail from the side band, whip stitch the band to the front panel: insert needle under both loops of one edge stitch on the panel and through the corresponding stitch on the band. Work around the panel evenly (stitch count should match 42 stitches) until front panel is attached.
Round 2 :
Sew back panel to remaining edge of band the same way. Stuff the coffin lightly before finishing the seam so it has a subtle cushion but is not overstuffed. Use small amounts of fiberfill pushed toward the edges for a clean profile.
Info :
If you used the chain cord piping, now sew the braid into the center seam of the band where the two band edges meet (this hides the seam). For a more pronounced braid, sew to the outer face of the seam so it reads as a decorative ridge.
Round 3 :
Weave in all ends and reinforce any corners with a few extra small stitches. If using a keychain, sew a small loop at the top center before final seam closure and attach a key ring.
— Finishing Touches :
Info :
Use a yarn needle to tidy the applique edges and tack them down with very small stitches. You may embroider small highlights or outline the cross or bat for definition. Press lightly with steam from a safe distance to flatten any bumps; avoid direct heat on acrylic yarns.
Info :
Optional: Use a contrasting slip stitch around the outer edge of the panel after assembly to create a decorative ridge. Work sc into the outside edge around the seam, making sure to keep stitches evenly spaced.
This mini gothic coffin is a fun, fast project that mixes single crochet shaping with simple applique and braiding to create a polished little decor piece. The bold contrast between black and purple makes the silhouette pop, and the braided piping gives it tactile character. Make a set for Halloween displays, give one as a quirky gift, or attach a keyring for a spooky accessory. 🕯️🖤✨