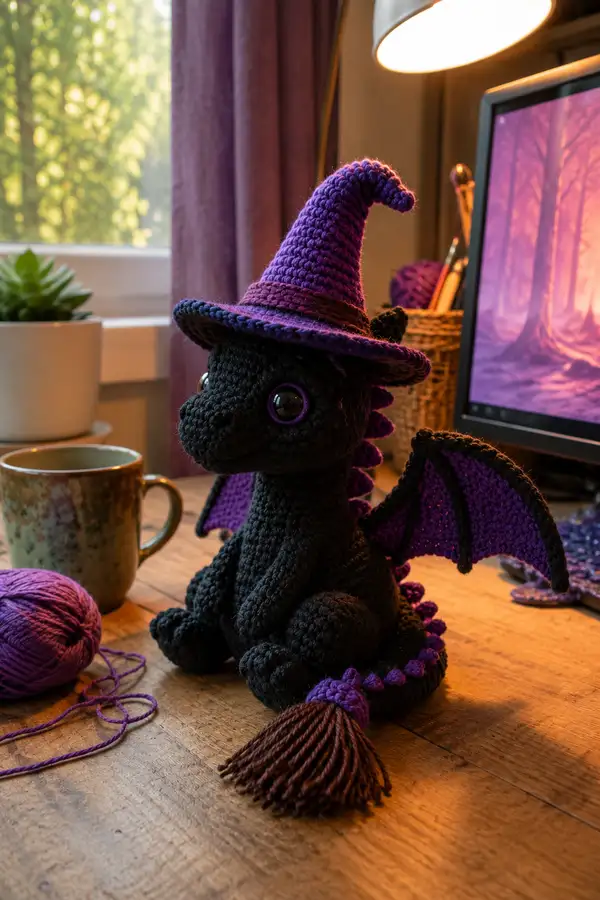
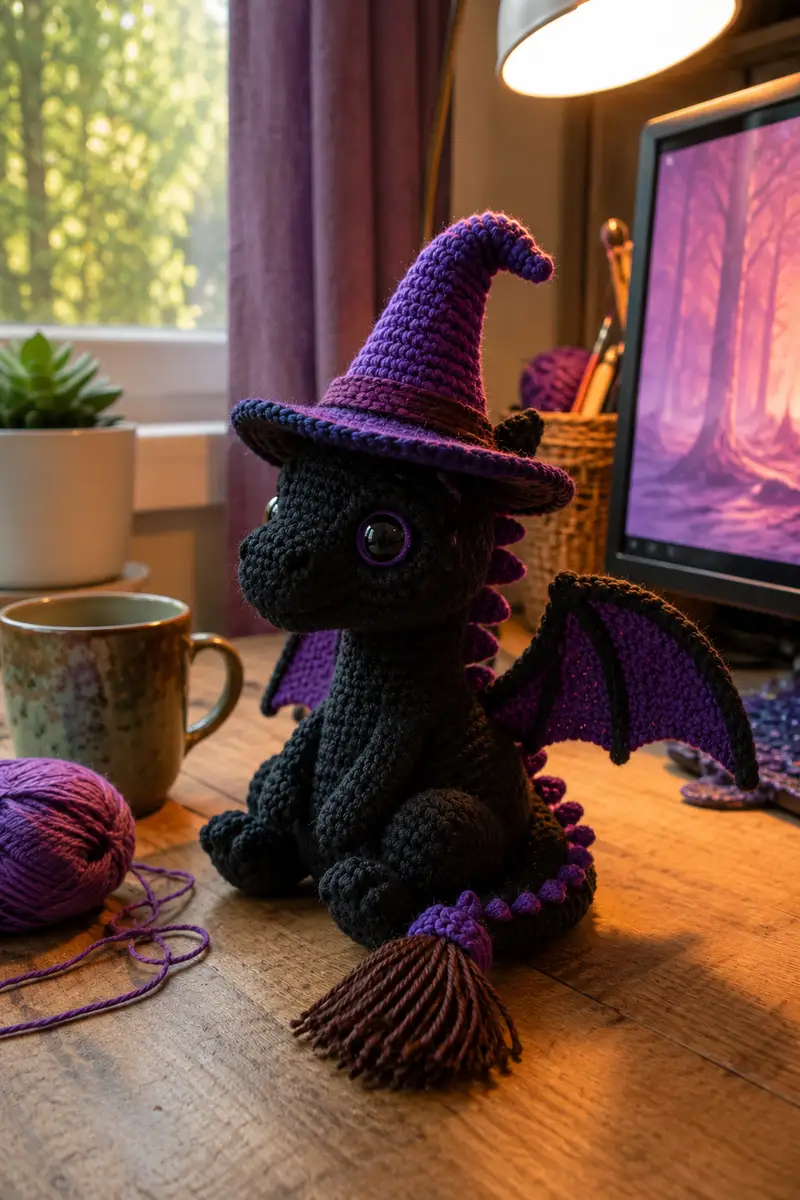
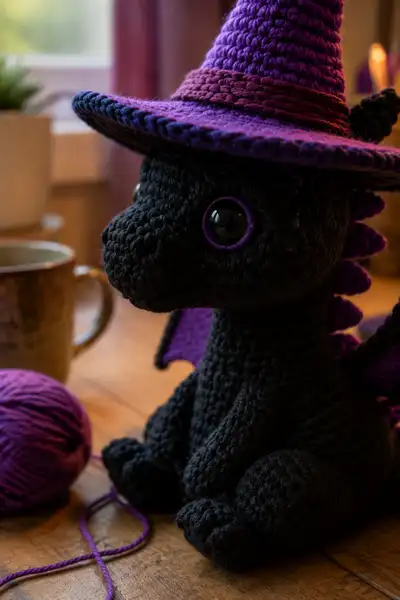
Create a charming witch-themed dragon amigurumi with a floppy purple witch hat, contrasting purple wing membranes and dorsal spikes, and a broomstick-style braided tail tassel. This pattern uses worsted-weight yarn and produces a plush, poseable sitting dragon perfect for seasonal decor or a cuddly companion. Detailed round-by-round instructions, assembly tips, and finishing notes included for a polished, professional result.
Progress Tracker
0% Complete
— Gauge & Tips :
Info :
Gauge is not critical for amigurumi but tight stitches help prevent stuffing from showing. With worsted yarn and 3.5mm hook, 10 sc x 10 rows measures roughly 4" x 4". Use a smaller hook for tighter fabric if needed. Keep a consistent stitch marker at the start of each round.
— Head :
Round 1 :
6 sc in magic ring (6)
Round 3 :
(1 sc, inc) x 6 (18)
Round 4 :
(2 sc, inc) x 6 (24)
Round 5 :
(3 sc, inc) x 6 (30)
Round 6 :
(4 sc, inc) x 6 (36)
Round 7 :
(5 sc, inc) x 6 (42)
Round 8 :
(6 sc, inc) x 6 (48)
Round 9-12 :
1 sc in each st (48)
Info :
Place safety eyes between rounds 13-14, approximately 10-12 sts apart measured across the round (this gives the wide, expressive look). Mark where the eyes will go before continuing. If using 18mm eyes, position holes so the rims sit flush with stitches.
Round 13-16 :
1 sc in each st (48)
Round 17 :
(6 sc, inc) x 6 (54)
Round 18 :
1 sc in each st (54)
Info :
These rounds widen the upper muzzle and brow — this makes room for the separate muzzle piece to sit naturally when attached. If you prefer an integrated muzzle, reduce these increases and follow the muzzle shaping section directly onto the head body.
Round 19 :
(7 sc, inc) x 6 (60)
Round 20-22 :
1 sc in each st (60)
Info :
Begin gentle stuffing at round 22-23 to fill the top of the head lightly. Stuff later more firmly as you shape the jaw. Use small amounts of fiberfill to avoid lumps.
Round 23 :
(7 sc, dec) x 6 (54)
Round 24 :
(6 sc, dec) x 6 (48)
Round 25 :
(5 sc, dec) x 6 (42)
Round 26 :
(4 sc, dec) x 6 (36)
Round 27 :
(3 sc, dec) x 6 (30)
Info :
Increase stuffing density here so the head keeps a round shape. Check eye spacing again and make sure the eyes are level. If you need deeper cheek definition, add a few stitches of extra stuffing behind the eyes.
Round 28 :
(2 sc, dec) x 6 (24)
Round 29 :
(1 sc, dec) x 6 (18)
Round 30 :
6 dec (6) - leave long tail and fasten off; finish stuffing and close with needle
Info :
Fasten off leaving a long tail for sewing. We finished the top of the head; next attach the separate muzzle for the distinctive snout shape visible in the photos.
— Muzzle / Snout (Make 1) :
Round 1 :
6 sc in magic ring (6)
Round 3 :
(1 sc, inc) x 6 (18)
Round 4 :
(2 sc, inc) x 6 (24)
Round 5-6 :
1 sc in each st (24)
Round 7 :
(2 sc, dec) x 6 (18)
Round 8 :
(1 sc, dec) x 6 (12)
Round 9 :
6 dec (6) - leave long tail for sewing; lightly stuff the muzzle so it keeps a soft rounded front
Info :
Sew muzzle onto lower front of head: align its center under the eyes, pin in place and baste with long tail. Use mattress stitch or whip stitch to join seamlessly. Add a tiny amount of stuffing behind the outer nose to maintain shape before final closure.
— Neck & Upper Body Join :
Info :
We will attach the head to the body after the body is worked up to the neck opening. Position the head so that the front feet will sit under the chin and the neck lines up with the top 8-10 rounds of the body. Do not permanently sew until both pieces are stuffed and pinned in position.
— Body :
Round 1 :
6 sc in magic ring (6)
Round 3 :
(1 sc, inc) x 6 (18)
Round 4 :
(2 sc, inc) x 6 (24)
Round 5 :
(3 sc, inc) x 6 (30)
Round 6 :
(4 sc, inc) x 6 (36)
Round 7 :
(5 sc, inc) x 6 (42)
Round 8-11 :
1 sc in each st (42)
Info :
If adding the hat as sewn-on accessory later, keep the top rounds even to create a stable neck opening. Mark the front center of the body with a pin to align head and legs.
Round 12 :
(5 sc, inc) x 6 (48)
Round 13-17 :
1 sc in each st (48)
Info :
Start stuffing the lower body around round 15; add even amounts of stuffing as you proceed. The body sits upright so the belly should be firm but not rock-hard.
Round 18 :
(4 sc, dec) x 8 (40)
Round 19 :
(3 sc, dec) x 8 (32)
Round 20 :
(2 sc, dec) x 8 (24)
Round 21 :
(1 sc, dec) x 8 (16)
Info :
Leave a long tail for joining to the lower torso if you prefer to close and then create a base disc for stability. Alternatively, stop decreases earlier and sew legs onto a wider base for a sturdy sitting posture. We will create separate legs and attach to the belly for a natural seated look.
— Legs (Make 2) :
Round 1 :
6 sc in magic ring (6)
Round 3 :
(1 sc, inc) x 6 (18)
Round 4 :
(2 sc, inc) x 6 (24)
Round 5-7 :
1 sc in each st (24)
Round 8 :
(3 sc, dec) x 6 (18)
Round 9-12 :
1 sc in each st (18)
Info :
Stuff foot section firmly through round 9-10 to create a plump rounded foot. Add a small disc of felt if you want extra stability in the sole (optional).
Round 13 :
(2 sc, dec) x 6 (12)
Round 14-18 :
1 sc in each st (12) - continue stuffing lightly for lower leg
Round 19 :
(1 sc, dec) x 4 (8)
Round 20 :
4 dec (4) - leave a long tail for sewing to body; do not close completely if you want to insert a small dowel or pipe cleaner for extra stability
Info :
Sew legs to bottom of body at the base rounds where you left the belly slightly wider (body rounds 12-14 are a good match). Place legs evenly spaced from the center front; test the seated posture before final sewing.
— Arms (Make 2) :
Round 1 :
6 sc in magic ring (6)
Round 3-5 :
1 sc in each st (12)
Round 6 :
(2 sc, dec) x 3 (9)
Round 7-11 :
1 sc in each st (9) - lightly stuff hand area
Info :
Arm length is short for the sitting posture; stuff palms firmly and arms lightly. If you want poseable arms, insert a thin pipe cleaner before closing and secure the ends by bending them back into a small loop covered with yarn.
Round 12 :
(1 sc, dec) x 3 (6)
Round 13-16 :
1 sc in each st (6) - leave long tail for sewing
Info :
Sew arms to sides of body around body rounds 14-17 so the hands rest slightly on the belly. Use a ladder stitch to create a smooth seam and secure strongly with several passes through the body and arm bases.
— Ears / Small Horns (Make 2) :
Round 1 :
4 sc in magic ring (4)
Round 2 :
(1 sc, inc) x 2 (6)
Round 3-4 :
1 sc in each st (6)
Round 5 :
(1 sc, dec) x 2 (4)
Round 6 :
4 sc (4) - fasten off leaving tail for sewing
Info :
Sew these ear shapes to the top sides of the head between rounds 10-12, slightly angled back. The image shows small curled horns; if preferred, twist the piece slightly while sewing for that curled look.
— Dorsal Spikes (Make 11) :
Round 1 :
5 sc in magic ring (5)
Round 3 :
1 sc in each st (10)
Round 4 :
(2 sc, dec) x 2, 2 sc (8)
Round 5 :
1 sc in each st (8) - fasten off leaving tail for sewing
Info :
Sew spikes down the center of the back from head base to near the tail base. The photo shows bright purple scalloped spikes; use accent color for these. Space them evenly (about every 4-6 stitches along the vertebrae depending on spacing).
— Tail Core :
Round 1 :
6 sc in magic ring (6)
Round 3 :
(1 sc, inc) x 6 (18)
Round 4-8 :
1 sc in each st (18) - work even to create tail length
Round 9 :
(2 sc, dec) x 4 (14)
Round 10-12 :
1 sc in each st (14)
Round 13 :
(1 sc, dec) x 4 (10)
Round 14-18 :
1 sc in each st (10) - leave a long tail at the base for sewing to the body; do not stuff fully if you will braid or wrap thicker yarn around the end
Info :
The visible tail has a braided/broom style tassel at the tip. Work the tail core to the desired length (approx 12-16 rounds before taper depending on your scale) and ensure the end is long enough to loop through the braid for secure assembly.
— Tail Braid & Broom Tassel :
Info :
Make a 60-80 chain using accent purple yarn doubled or tripled depending on thickness. Braid three strands together including or wrapping around the tail core. Secure with several embroidery stitches and wrap a contrasting brown yarn around the tip to create a broom tassel base. Finish with long brown strands knotted under the wrap to create a thick tassel.
Round 1 (Broom Knot) :
Chain 40 with triple strands then fold and braid to desired length; finish by wrapping brown yarn tightly 6-8 times and tie off (no numeric stitch count)
Info :
Trim tassel ends evenly and glue or sew the wrapped section onto the tail core. Add a small purple cap at the end of the braid where it meets the wrapped brown yarn to replicate the photo's purple knot.
— Wing Membrane (Make 2) :
Round 1 :
Ch 12, sc in 2nd ch from hook and across (11)
Round 2 :
Ch 1, turn, sc in each st across (11)
Round 3 :
Ch 1, sc in next 2 sts, inc, 1 sc in next 5, inc, sc in last 2 (13)
Round 4 :
Ch 1, sc across (13)
Round 5 :
Ch 1, sc in next 3, inc, sc in next 5, inc, sc in next 3 (15)
Round 6-8 :
1 sc in each st (15)
Round 9 :
Ch 1, across turning chain sc to create a slightly rounded outer edge - single crochet in each st and work 3 sc in last st to round the tip; continue along opposite edge (15 + 3 extra in tip)
Info :
These flat membranes will be edged with black for the webbing and then attached to a supporting armature (a strip crocheted or pipe-cleaner bones) to create the bat-like wing shape. Use purple for membrane and black for edges to match the photos.
Round 10 :
Switch to black yarn. Work 1 sc in each st around the entire membrane, placing 2 sc in each corner/tip to keep the shape flat. Fasten off leaving tail for sewing.
Info :
Sew a slim long tube (3-4 sc in magic ring, then 1 sc around for length) in black to form the leading edge / wing bone and stitch it along the membrane outer edge to give the wing structure and the raised black border seen in the image.
— Wing Bone / Armature (Make 2) :
Round 1 :
4 sc in magic ring (4)
Round 2-24 :
Slip stitch or sc around to create a thin tube of approx 18-22 cm depending on wing size; can be done in continuous rounds (4) and stuffed with a tiny amount of fiberfill or wire for stability
Info :
Sew the limb tube to the inner edge of the membrane; shape the wing with a few hand-tacks so it flares like the photo. Position wing assembly to body at the upper back slightly behind the arms so the wings rest naturally.
— Hat Cone :
Round 1 :
6 sc in magic ring with purple yarn (6)
Round 3 :
(1 sc, inc) x 6 (18)
Round 4 :
(2 sc, inc) x 6 (24)
Round 5 :
(3 sc, inc) x 6 (30)
Round 6 :
(4 sc, inc) x 6 (36)
Round 7-12 :
1 sc in each st (36)
Info :
These rounds create the main cone body. After round 12, stop increasing to make straight sides. The hat in the photo has a tall, slightly tapered cone with intentional flop to the tip — allow the top to remain more flexible by stuffing minimally or even leaving hollow if you prefer a floppy look.
Round 13-20 :
1 sc in each st (36) - work in spiral to avoid visible seams; stuff lightly or not depending on desired flop
Round 21 :
(4 sc, dec) x 6 (30)
Round 22 :
(3 sc, dec) x 6 (24)
Round 23 :
(2 sc, dec) x 6 (18)
Round 24 :
(1 sc, dec) x 6 (12)
Round 25 :
6 dec (6) - do not close completely if you want to stuff the tip slightly; fasten off and leave long tail
Info :
For a floppy tip similar to the photo, reduce stuffing and optionally stitch tip to the hat base at an angle. Add a hat-band by crocheting a flat chain band with a contrast color and sewing it around the cone near the brim.
— Hat Brim :
Round 1 :
With larger hook (3.5mm or 4.0mm), ch 48 and join to form circle (48)
Round 2 :
Ch 1, sc in each ch around (48)
Round 3 :
(2 sc, inc) x 12 (60)
Round 4 :
1 sc in each st (60)
Round 5 :
(3 sc, inc) x 12 (72)
Round 6-7 :
1 sc in each st (72)
Round 8 :
Switch to dark plum yarn. Work 1 sc BLO around to create a firm brim edge and subtle ridge (72)
Info :
Sew the brim to the base of the cone by matching the inner circumference and stitching firmly. Use a contrasting band (made with hdc rounds) to decorate the hat as in the photo. If you want the brim to be floppy, block lightly; to make it stiff, slip a piece of thin felt inside the brim before sewing shut.
— Wing Finishing & Attachment :
Info :
Sew the wing tube (armature) along the inner curve of the membrane. Reinforce the seam with small stitches and shape the outer edge to have the black raised border. Attach wings to body between body rounds 10-14 slightly behind the arms. Ensure both wings match in height and angle.
— Eye Rims & Face Details :
Round 1 :
With bright purple yarn, ch 8 and join to form a small rim; sc around for 2 rounds to create a rim that fits around the safety eye (approx 8-10 sts)
Info :
Sew rim to head around the eyes after inserting safety eyes; this creates the dramatic purple eye borders in the pictures. Embroider small nostrils with black or deep purple and embroider a small smiling mouth with a few backstitches for the friendly expression.
— Final Assembly :
Info :
Pin and sew the head to the body opening. Match front center points and use mattress stitch to create a smooth seam. Attach arms and legs symmetrically and sew dorsal spikes along the back, spacing them evenly. Attach tail to center back bottom using secure stitches. Place hat on head and either stitch in a few hidden points or leave removable.
Info :
Weave in all ends securely. Add optional blush with fabric paint or powdered eyeshadow on cheeks for a softer look. Check all joins for safety and secure loose bits of yarn or tassel wrap well for durability.
This witch dragon is such a rewarding make — the contrast of deep black and bright purple gives it personality, and the floppy hat with broom tassel is just delightful. Each step comes together into a companion full of character and charm that works beautifully as seasonal decor or a cuddly gift. Enjoy blocking the brim, stitching the spikes, and adding personal touches to make it uniquely yours. 🧶✨🕯️