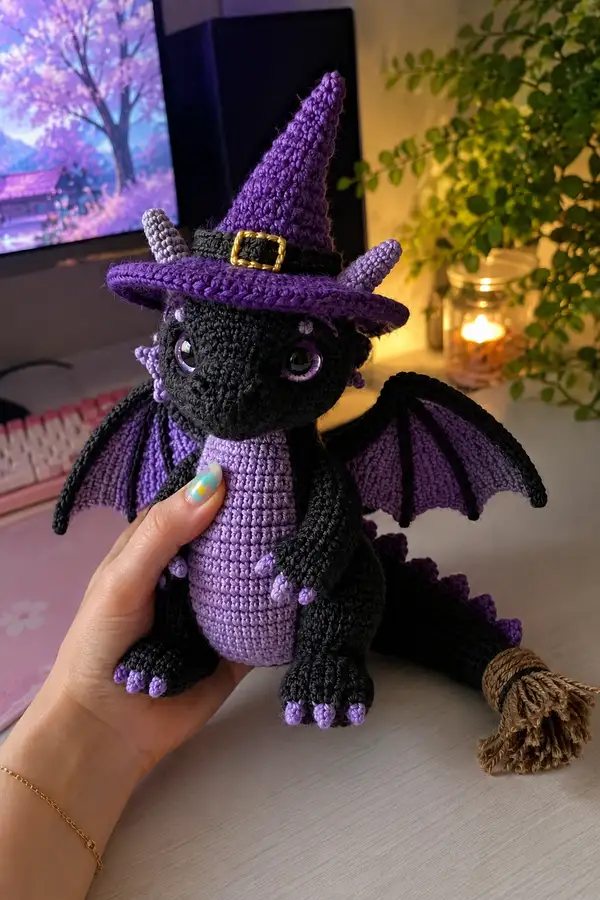
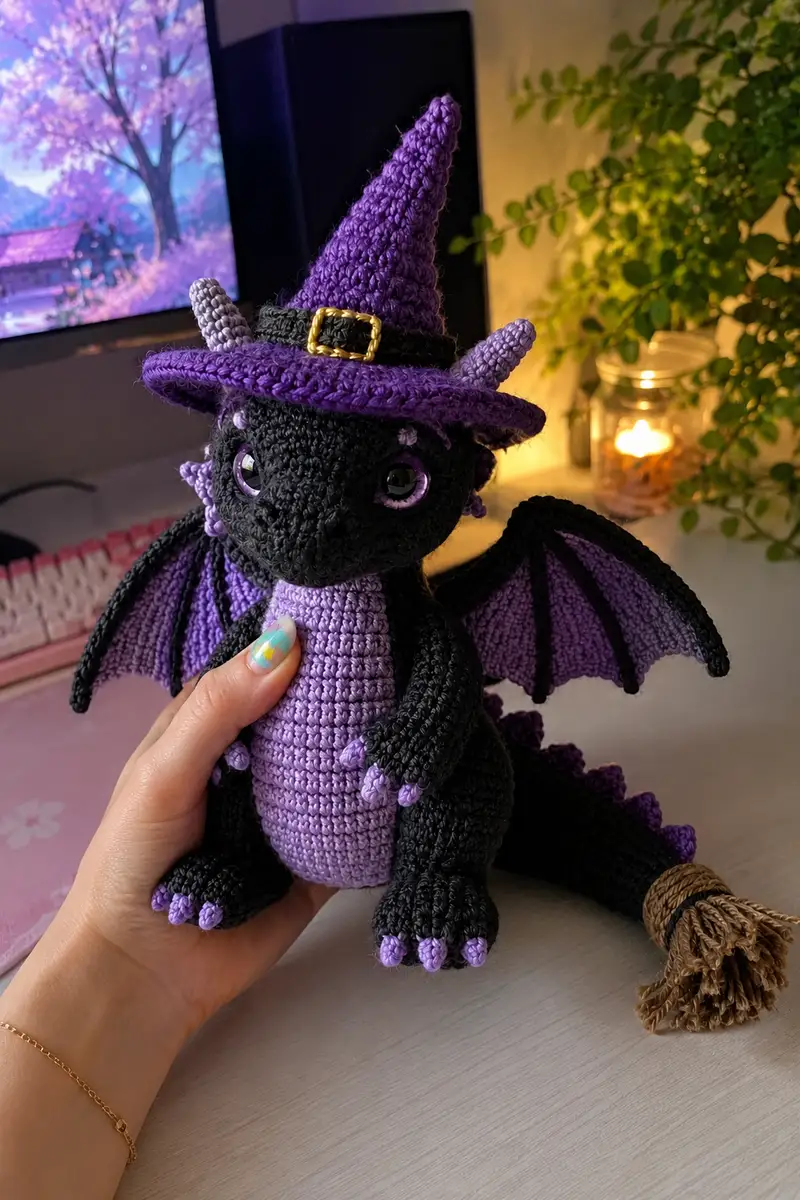
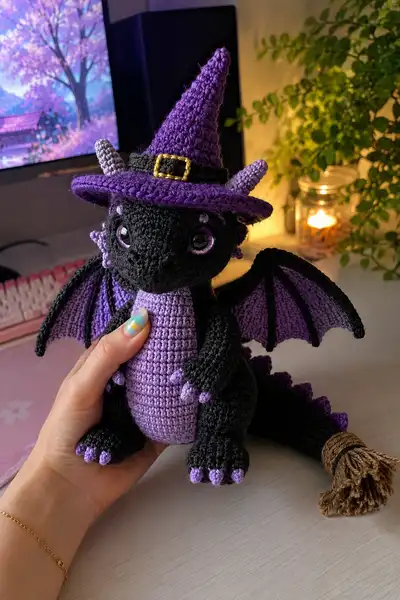
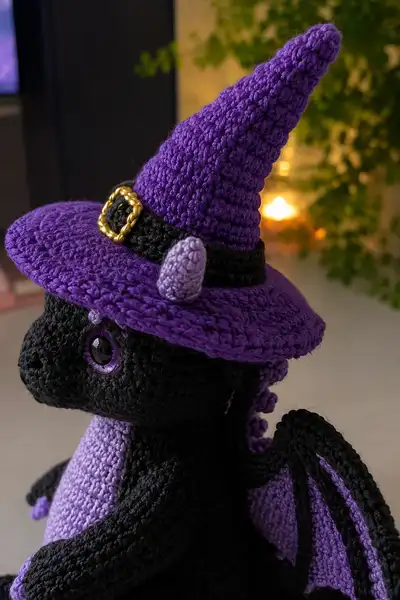
Create a charming witchy dragon amigurumi with a floppy purple witch hat, lilac belly and claws, articulated wings, tiny horns and a broomstick-style tail. This pattern recreates the black-and-purple dragon seen in the photos, featuring layered scales along the spine, purple wing membranes and a decorative hat with a gold buckle. Detailed round-by-round instructions, tips and assembly notes make this a fun intermediate project for seasoned crocheters.
Progress Tracker
0% Complete
— Head :
Round 1 :
6 sc in magic ring (6)
Round 3 :
(1 sc, 1 inc) x 6 (18)
Round 4 :
(2 sc, 1 inc) x 6 (24)
Round 5 :
(3 sc, 1 inc) x 6 (30)
Round 6 :
(4 sc, 1 inc) x 6 (36)
Round 7 :
(5 sc, 1 inc) x 6 (42)
Round 8 :
(6 sc, 1 inc) x 6 (48)
Round 9-12 :
1 sc in each st (48)
Info :
Place safety eyes between rounds 13-15 later, approximately 10-12 stitches apart for a sweet expression. Keep a stitch marker at round start to help align features. Work with Black yarn for head rounds.
Round 13-16 :
1 sc in each st (48)
Round 17 :
(6 sc, 1 inc) x 6 (54)
Round 18-20 :
1 sc in each st (54)
Info :
Lightly stuff the head later after attaching snout piece; for now leave head mostly unstuffed so you can shape the snout and eyes. Mark the front center stitch where you want the snout to attach.
Round 21 :
(6 sc, 1 dec) x 6 (48)
Round 22 :
(5 sc, 1 dec) x 6 (42)
Round 23 :
(4 sc, 1 dec) x 6 (36)
Round 24 :
(3 sc, 1 dec) x 6 (30)
Info :
Begin stuffing head moderately now. Make sure to push fiber toward the front to give shape for the snout. You will finish stuffing after snout attachment and final decreases.
Round 25 :
(2 sc, 1 dec) x 6 (24)
Round 26 :
(1 sc, 1 dec) x 6 (18)
Info :
Fasten off leaving long tail for sewing if you plan to close the top here. However, in this construction we will join the snout and then add neck rounds to connect to the body. Do NOT close completely yet — leave opening large enough to insert the snout and finish shaping.
— Snout / Muzzle (Make 1) :
Round 1 :
6 sc in magic ring with Black (6)
Round 3 :
(1 sc, 1 inc) x 6 (18)
Round 4 :
1 sc in each st (18)
Round 5 :
(2 sc, 1 inc) x 6 (24)
Round 6-8 :
1 sc in each st (24)
Info :
This snout will be slightly oval. Stuff lightly, just enough to fill without distorting stitches. Position the snout on the front center of the head and sew in place with a whip stitch. When sewn, the snout will create the forward muzzle shape seen in the photo.
Round 9 :
(2 sc, 1 dec) x 6 (18)
Round 10 :
(1 sc, 1 dec) x 6 (12)
Info :
Fasten off leaving long tail for sewing. Sew snout to head centered on the front. After snout is secure, continue closing any remaining head opening and adjust stuffing to shape the cheeks and forehead as seen in the photo.
— Eye Ring / Eye Surrounds (Make 2) :
Round 1 :
6 sc in magic ring with Light Purple (6)
Round 3 :
(1 sc, 1 inc) x 6 (18)
Round 4 :
1 sc in each st (18)
Info :
Sew the eye rings around the safety eyes on the head. Place eyes between rounds 13-15 of the head, about 10-12 stitches apart (count from front center). Ensure rings sit flush and centered around eyes to mimic the purple ring around the dragon's eyes in the image.
— Neck Connector (optional extra rounds on head to create neck tube) :
Round 1 :
Working from the head opening: pick up stitches evenly around opening, 24 sc to form neck tube (24)
Round 2-4 :
1 sc in each st (24)
Info :
These rounds help create a neat seam when joining head to the body. Stuff lightly and ensure neck length aligns with body opening before sewing.
— Body :
Round 1 :
6 sc in magic ring with Black (6)
Round 3 :
(1 sc, 1 inc) x 6 (18)
Round 4 :
(2 sc, 1 inc) x 6 (24)
Round 5 :
(3 sc, 1 inc) x 6 (30)
Round 6 :
(4 sc, 1 inc) x 6 (36)
Round 7-9 :
1 sc in each st (36)
Info :
Change to Light Purple to crochet the belly panel now or later (see Belly Panel section). If doing a color change here, carry the unused yarn inside or fasten off and sew later. The body remains wider at the top and tapers to the base where legs attach.
Round 10 :
(4 sc, 1 dec) x 6 (30)
Round 11-14 :
1 sc in each st (30)
Round 15 :
(3 sc, 1 dec) x 6 (24)
Round 16-18 :
1 sc in each st (24)
Info :
Begin stuffing body at round 16-18. Stuff firmly around the lower abdomen but leave upper body somewhat open to attach the head and arms. Keep the shape rounded and not completely firm so the toy remains squishy and poseable.
Round 19 :
(2 sc, 1 dec) x 6 (18)
Round 20 :
(1 sc, 1 dec) x 6 (12)
Round 21 :
Fasten off leaving long tail for sewing. Do not close completely — this opening will be used to sew the head, and you may finish closing after the head is securely attached.
— Belly Panel (Light Purple) :
Round 1 :
6 sc in magic ring with Light Purple (6)
Round 3 :
(1 sc, 1 inc) x 6 (18)
Round 4 :
(2 sc, 1 inc) x 6 (24)
Round 5-8 :
1 sc in each st (24)
Info :
The belly panel is an oval disk you will sew to the front of the body between rounds 8-14. Pin in place first, then use mattress stitch or whip stitch to attach neatly. Make sure the color change line is hidden under the body stitches as shown in photos.
Round 9 :
(2 sc, 1 dec) x 6 (18)
Round 10 :
Fasten off leaving tail for sewing. Sew belly to the front center of the body aligning top edge approximately at body round 8.
— Arms (Make 2) :
Round 1 :
6 sc in magic ring with Black (6)
Round 3 :
(1 sc, 1 inc) x 6 (18)
Round 4-6 :
1 sc in each st (18)
Info :
Make three small claws for each hand in Light Purple. The claws are small cone shapes (see Claw section) and will be sewn on after stuffing. Stuff hand tips firmly so the claws sit up nicely.
Round 7 :
(2 sc, 1 dec) x 6 (15)
Round 8-12 :
1 sc in each st (15)
Info :
Stuff the lower arm and hand firmly; stuff the upper arm a little looser to allow sewing to the body. Leave the top opening large enough to sew securely to the body between rounds 10-12 of the torso.
Round 13 :
(1 sc, 1 dec) x 5 (10)
Round 14-16 :
1 sc in each st (10)
Round 17 :
Fasten off leaving long tail for sewing shoulder. Repeat for second arm.
— Claws (Make 6) :
Round 1 :
4 sc in magic ring with Light Purple (4)
Round 3 :
1 sc in each st (8)
Round 4 :
(1 sc, 1 dec) x 2 (6)
Round 5 :
Dec, sc, dec (4)
Round 6 :
Fasten off leaving tail to sew three claws to the tip of each hand. Arrange claws in a slight curve and sew through the bases so they are secure.
— Legs (Make 2) :
Round 1 :
6 sc in magic ring with Black (6)
Round 3 :
(1 sc, 1 inc) x 6 (18)
Round 4 :
(2 sc, 1 inc) x 6 (24)
Round 5-8 :
1 sc in each st (24)
Info :
For the foot shape, flatten the first several rounds to create a broad base. We will add claws similar to the arms — make four claws for each foot. Stuff the foot firmly so it supports the amigurumi when sitting.
Round 9 :
(3 sc, 1 dec) x 6 (18)
Round 10-14 :
1 sc in each st (18)
Round 15 :
(2 sc, 1 dec) x 6 (12)
Round 16-18 :
1 sc in each st (12)
Round 19 :
Fasten off leaving long tail for sewing hip into the bottom openings of the body. Sew legs spaced evenly on the body base so the dragon sits balanced.
— Tail (Tail Tube + Broomstick Finish) :
Tail Tube Round 1 :
6 sc in magic ring with Black (6)
Round 3 :
(1 sc, 1 inc) x 6 (18)
Round 4-20 :
1 sc in each st (18)
Info :
The tail tube is long and tapered. After round 20, begin decreases to create a tapered tip where the broom tassel will be attached. Optionally insert a thin wire to make the tail slightly poseable before stuffing.
Round 21 :
(2 sc, 1 dec) x 6 (12)
Round 22-24 :
1 sc in each st (12)
Round 25 :
(1 sc, 1 dec) x 4 (8)
Round 26 :
1 sc in each st (8)
Info :
Fasten off leaving long tail. Stuff tail moderately. At the tip attach broom tassel: take brown yarn or twine and fold many strands in half, tie securely with a short length of black yarn to create the broom look. Sew the tied end into the tail tip opening and cover the seam with a small wrap of Black yarn to mimic the binding on the broomstick.
— Tail Spikes (Make 8, small triangular spikes along spine) :
Round 1 :
6 sc in magic ring with Light Purple (6)
Round 2 :
(1 sc, 1 inc) x 2, 2 sc (8)
Round 3 :
(1 sc, 1 inc) x 4 (12)
Round 4 :
1 sc in each st (12)
Round 5 :
(1 sc, 1 dec) x 4 (8)
Round 6 :
Fasten off leaving tail for sewing. Flatten the base slightly and sew each spike along the top of the dragon's back from neck to tail spaced evenly (about every 6 stitches) to mimic the layered spines shown in the photos.
— Horns (Make 2) :
Round 1 :
6 sc in magic ring with Light Purple (6)
Round 3 :
1 sc in each st (12)
Round 4 :
(2 sc, 1 dec) x 3 (9)
Round 5 :
1 sc in each st (9)
Round 6 :
(1 sc, 1 dec) x 3 (6)
Round 7 :
Fasten off leaving tail for sewing. Stuff lightly and sculpt into small curved horns. Sew horns on top of head, slightly behind the eyes and angled outward, corresponding to the placement in the photos.
— Wings (Make 2 panels + ribs each) :
Wing Panel Round 1 :
With Dark Purple, ch 21, sc in 2nd ch from hook and across (20)
Round 2 :
Turn, ch1, 1 sc in each st across (20)
Round 3 :
Turn, ch1, (sc, inc) across to widen the membrane slightly by adding 4 increases evenly distributed (24)
Round 4-8 :
1 sc in each st (24)
Info :
This rectangle will be shaped into a wing by crocheting a curved edge and then adding a black edging to form the outer wing. Keep rows even and block lightly with steam or pinned shaping if desired.
Round 9 :
Start shaping curve: sc across first 18 sts, then dec at last 6 stitches to begin rounding the tip (18)
Round 10-12 :
1 sc in each st (18)
Round 13 :
Fold wing panel and sc through both layers along one long edge to form a slightly stiffened, thicker edge for the wing (18)
Round 14 :
With Black, sc around the outer edge of the wing in continuous rounds to create border (approx 44 sts - adjust to fit) (approx 44)
Round 15 :
1 sc in each st BLO on the outer edge to create a neat ridge for attaching ribs (44)
Info :
Create a second wing panel identical to the first. After both panels are made, add ribs by surface slip-stitching or single crocheting thin strips of Black yarn from base to tip to mimic the bat-like skeletal wing ribs visible in the photos.
Wing Rib Details :
With Black, attach yarn at base of wing and use sl st or surface sc to make 4-5 curved ribs across the purple membrane. Secure ends and weave in tails.
— Back Finishing (Attach wings and spikes) :
Info :
Sew wings to body at the upper sides, aligning the wing base with body rounds 10-12. Sew each wing securely around their base with hidden stitches. Attach the pre-made spikes from neck to tail along center back spaced evenly; sew each spike with several passes for durability.
— Hat: Witch Hat (Cone + Brim + Band + Buckle) :
Cone Round 1 :
6 sc in magic ring with Dark Purple (6)
Cone Round 3 :
(1 sc, 1 inc) x 6 (18)
Cone Round 4 :
(2 sc, 1 inc) x 6 (24)
Cone Round 5 :
(3 sc, 1 inc) x 6 (30)
Cone Round 6-14 :
1 sc in each st (30)
Info :
To achieve the tall, slightly twisted witch cone look, work the next rounds in continuous spiral without joining and use slightly tighter tension. Optionally create gentle decreases every few rounds to taper the cone into a point at the top.
Cone Round 15 :
(4 sc, 1 dec) x 5 (25)
Cone Round 16-20 :
1 sc in each st (25)
Cone Round 21 :
(3 sc, 1 dec) x 5 (20)
Cone Round 22-26 :
1 sc in each st (20)
Cone Round 27 :
(2 sc, 1 dec) x 5 (15)
Cone Round 28-30 :
1 sc in each st (15)
Info :
Stuff the cone lightly if you want it to hold shape; many makers work the cone unstuffed so it can flop slightly. Fasten off and leave long tail if sewing the cone to the brim directly.
Brim Round 1 :
With Dark Purple, ch 36, join to form a ring (36)
Brim Round 2 :
Ch1, sc in each ch around (36)
Brim Round 3 :
(1 sc, 1 inc) x 12 (48)
Brim Round 4-6 :
1 sc in each st (48)
Info :
Flatten the brim and add an extra round of loose single crochet or hdc to make the brim sit flat. Adjust number of stitches if needed to match cone base. Sew cone to center of brim, aligning the cone base to the brim center with hidden stitches.
Band & Buckle :
With Black, ch 30 and sc across to make a narrow band long enough to wrap around hat base. Sew band onto hat. For the buckle, use Gold yarn and ch a small rectangle: ch 8, sc across; ch1 and sc back for 3 rows to make a small square. Sew Gold square onto the Black band and stitch around with small stitches to imitate a buckle.
Info :
Sew the finished hat to the dragon's head (top center) or make it removable by creating a small button loop under the hat that attaches to a yarn loop sewn on the head. Position hat slightly tilted as in the photos for personality.
— Finishing Touches & Assembly :
Info :
Sew head to body: place head opening to body top opening and sew evenly using whip stitch or ladder stitch for an invisible join. Use the neck connector rounds to ease the join. Stuff the head and body to final firmness before closing seams completely.
Info :
Attach arms at body rounds 10-12 on either side; pin positions first to ensure symmetry. Sew through both arm opening and body body stitches around 6-8 times for a secure seam.
Info :
Attach legs to bottom of body centered and spaced to allow the dragon to sit. Sew through several rounds of body to make the legs stable. Add a few extra securing stitches through the foot base into the body if the toy will be frequently handled.
Info :
Sew wings to body at rounds 9-12 (upper sides). Add surface slip stitch ribs across the wings if not already added, and weave in ends. Sew spikes on top of head and down the tail; make sure they are evenly spaced.
Info :
Sew horns behind eye line at the top of the head and slightly outward. Add small embroidered nostrils or mouth with black or dark purple embroidery thread if desired. Weave in all tails and trim close.
Info :
Optional: for a more durable broom tassel, use small natural twine or raffia and bind with black yarn to create the trimmed look. Secure with a few hidden stitches to the tail tip.
Final Steps :
Check symmetry and reinforce any seams as necessary. Add a small amount of blush to cheeks with fabric-safe makeup for extra cuteness. Ensure all safety eyes and small elements are securely attached for safe gifting.
This adorable witch dragon is a celebration of whimsical details — a tall purple hat, tiny lilac claws and a broom tail that give it instant personality. Each carefully worked section snaps into place to create a plush friend you'll love to display. The pattern balances structured shaping with opportunities for creative customization, so you can make your dragon slightly different every time. Have fun stitching, stuffing and styling — and enjoy the cozy satisfaction of a handmade magical companion! 🧶🕯️