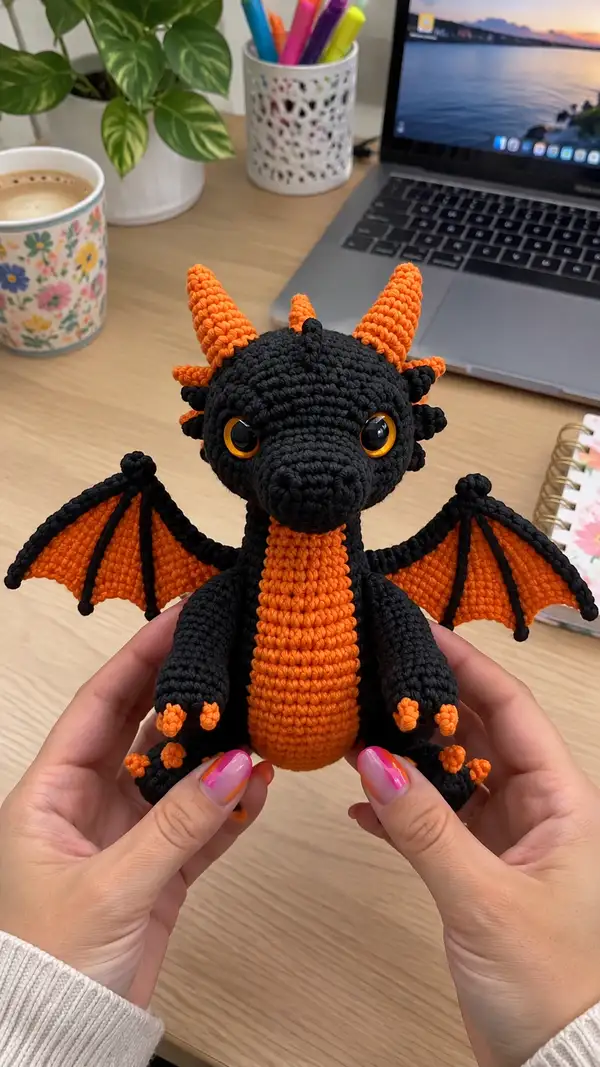
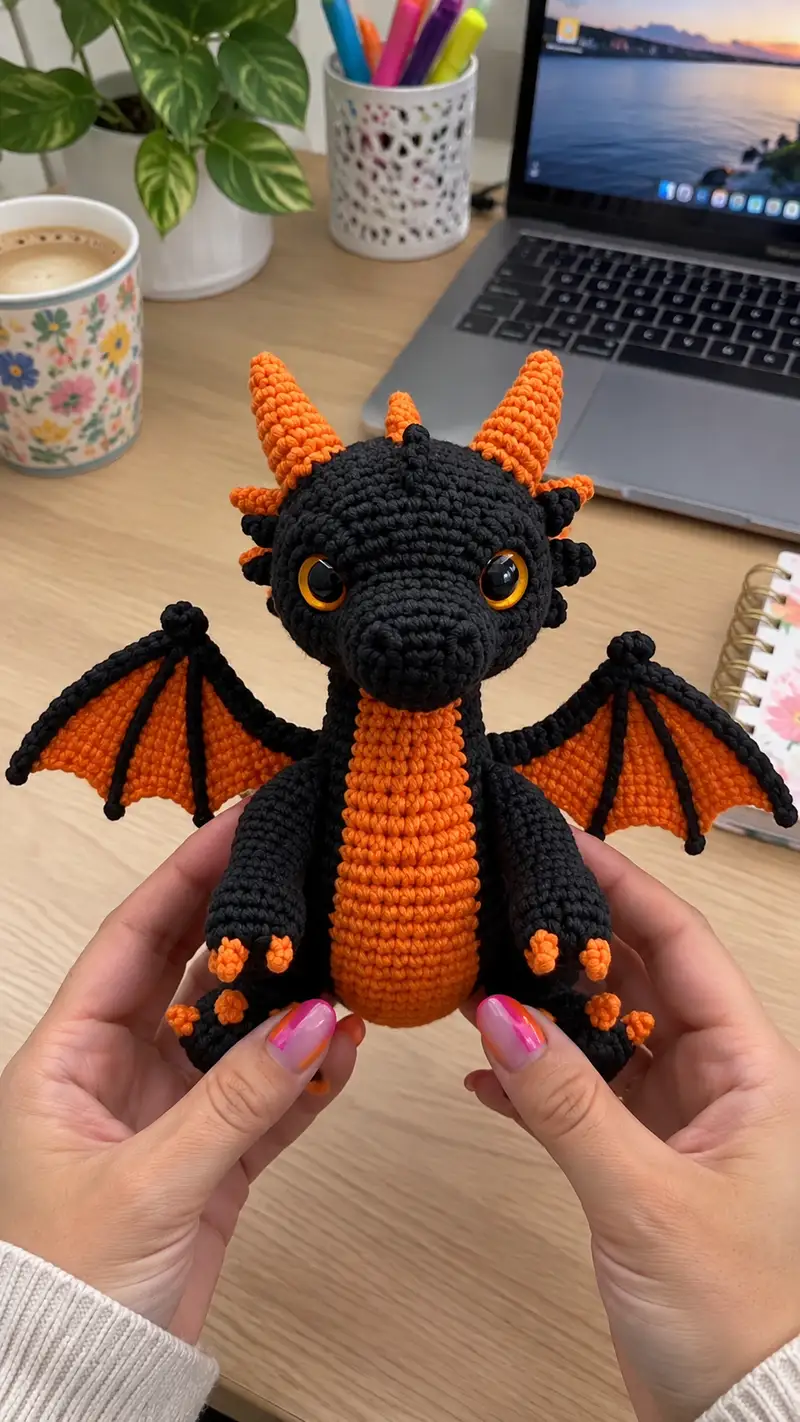
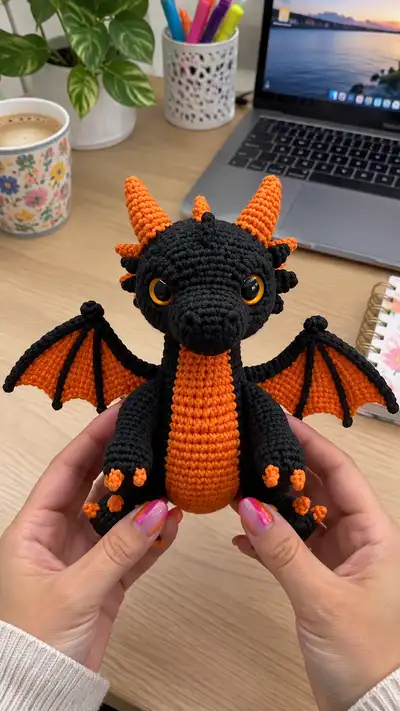
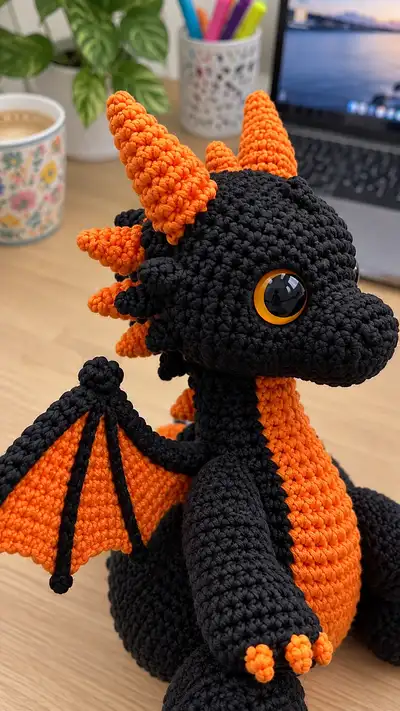
A charming hand-sized dragon amigurumi crocheted in striking black and orange. This pattern recreates the chunky body, elongated snout, expressive orange-ringed safety eyes, tapered horns, spiky crest down the neck, and membrane wings with black ribs. Clear step-by-step sections guide you through crocheting the head, snout, body, limbs, wings, horns, spikes and all finishing touches to make a cuddly, poseable character.
Progress Tracker
0% Complete
— Notes :
Info :
This pattern is written in continuous rounds unless noted. Use a stitch marker to mark the first stitch of each round. Work tightly so stuffing does not show. Numbers in parentheses are stitch counts for each round. Use black yarn for main body and orange for belly, horns, wing membranes and spikes unless otherwise stated.
— Head (main sphere) :
Round 3 :
(1 sc, 1 inc) x 6 (18)
Round 4 :
(2 sc, 1 inc) x 6 (24)
Round 5 :
(3 sc, 1 inc) x 6 (30)
Round 6 :
(4 sc, 1 inc) x 6 (36)
Round 7 :
(5 sc, 1 inc) x 6 (42)
Round 8 :
(6 sc, 1 inc) x 6 (48)
Round 9 :
(7 sc, 1 inc) x 6 (54)
Round 10 :
(8 sc, 1 inc) x 6 (60)
Round 11-14 :
1 sc in each st (60)
Info :
Place safety eyes between rounds 13 and 14 approximately 10-12 stitches apart (this yields the large, forward-facing look). Insert eyes now before continuing. Lock washers on the inside and ensure placement is even. If you prefer embroidered eyes, mark placement and move to embroidery after stuffing.
Round 15 :
(8 sc, 1 dec) x 6 (54)
Round 16 :
(7 sc, 1 dec) x 6 (48)
Round 17-20 :
1 sc in each st (48)
Info :
The head is slightly elongated on the pictured dragon, so we keep several even rounds to create height. Stuff the head lightly now to keep the shape while you add the snout; you will finish stuffing after joining the snout and closing.
Round 21 :
(6 sc, 1 dec) x 6 (42)
Round 22 :
(5 sc, 1 dec) x 6 (36)
Round 23 :
(4 sc, 1 dec) x 6 (30)
Round 24 :
(3 sc, 1 dec) x 6 (24)
Info :
Leave an opening at the front of the head for sewing the snout piece in place. Do not fasten off; instead leave long tail for sewing the snout. Continue shaping towards neck in the next section when body is ready to attach.
— Snout / Muzzle :
Info :
The muzzle is worked in black and sewn to the front of the head for a pronounced elongated nose. Stuff the snout firmly so it keeps shape and sits forward from the head sphere.
Round 3 :
(1 sc, 1 inc) x 6 (18)
Round 4 :
(2 sc, 1 inc) x 6 (24)
Round 5-7 :
1 sc in each st (24)
Info :
These rounds build the top and sides of the snout. Keep even to form a long tube. Stuff the snout firmly but leave tail for sewing.
Round 8 :
(2 sc, 1 dec) x 6 (18)
Round 9 :
(1 sc, 1 dec) x 6 (12)
Info :
Fasten off leaving a long tail. Stuff firmly and sew snout to front opening of head lining the center seam of the snout with the center line of the head. Adjust placement so the eyes sit just above the snout sides. Sew around opening using mattress or whip stitch, pulling slightly to hide seam.
— Neck join :
Info :
When head and body are both made, join head to body by sewing through the neck rounds. If you prefer to work the last rounds of the body and head together for a seamless neck, do so. Below we create a short neck extension to sew into the body opening.
Round 1 :
With black, 1 sc in each st around the opening on head (use the remaining 24 stitches if that is your opening). Fasten off leaving long tail for sewing (24)
— Body :
Round 3 :
(1 sc, 1 inc) x 6 (18)
Round 4 :
(2 sc, 1 inc) x 6 (24)
Round 5 :
(3 sc, 1 inc) x 6 (30)
Round 6 :
(4 sc, 1 inc) x 6 (36)
Round 7 :
(5 sc, 1 inc) x 6 (42)
Round 8 :
(6 sc, 1 inc) x 6 (48)
Round 9-11 :
1 sc in each st (48)
Info :
Change to orange yarn at the beginning of Round 12 to start the belly panel if you want a vertical orange belly panel. Carry the black yarn along the outside or cut and weave in tails as preferred. If you want a striped body, plan color changes now.
Round 12 :
Change to orange. 1 sc in each st (48)
Round 13-20 :
1 sc in each st (48)
Info :
Work belly panel by crocheting the front center rounds in orange only. To make a clean belly edge, you may work the two stitches at each side of the belly in black while crocheting the center 16-20 stitches in orange. The pictured dragon has a wide central orange belly; we will create a 16-stitch belly strip. Use BLO on the last black round before orange to form a ridge if desired.
Round 21 :
Change back to black for outer rounds. 1 sc in each st (48)
Round 22-24 :
1 sc in each st (48)
Info :
Begin stuffing the body firmly but not overstuffing. The body should be firm enough to sit upright but still slightly squishy for sewing on limbs. If you are joining the head by sewing, have head and body openings roughly equal in size to attach neatly.
Round 25 :
(6 sc, 1 dec) x 6 (42)
Round 26 :
(5 sc, 1 dec) x 6 (36)
Round 27 :
(4 sc, 1 dec) x 6 (30)
Round 28 :
(3 sc, 1 dec) x 6 (24)
Round 29 :
(2 sc, 1 dec) x 6 (18)
Round 30 :
(1 sc, 1 dec) x 6 (12)
Info :
Leave the opening large enough to insert the head neck tail or to allow sewing. Fasten off leaving a long tail. Finish stuffing firmly and close with 6 dec (6). Weave in the end securely.
— Arms (make 2) :
Info :
Arms are worked top-down as a long tube with a rounded paw. Work in black with orange claw tips by changing color for final rounds. Stuff fingers/hand tip firmly, arms slightly less so to maintain flexibility.
Round 3 :
(1 sc, 1 inc) x 6 (18)
Round 4-6 :
1 sc in each st (18)
Info :
Start shaping the wrist and forearm now. The pictured arms are chunky and slightly tapered toward the paw. Keep even rounds to create length.
Round 7 :
(2 sc, 1 dec) x 6 (12)
Round 8-11 :
1 sc in each st (12)
Round 12 :
Change to orange for claws. 1 sc in each st (12)
Round 13 :
1 sc in next 9 sts, place 3 small claw nubs as small cones: in next st make 3 sc in same st (inc cluster) then 1 sc in next st, repeat small-nub placement spaced evenly across front 6-8 sts (12)
Info :
For front claws create small cones: make 3 sc in single stitch then continue. Alternatively make separate tiny claws and sew to paw. In the pictured dragon, three small orange nubs are attached at the paw edge. After adding claw detail, fasten off leaving long tail for sewing.
Round 14 :
Fasten off leaving long tail for sewing. Stuff paw firmly and sew arm opening closed slightly to form shoulder. Repeat for second arm.
— Legs (Make 2) :
Info :
Legs are larger than arms and have a wide rounded foot. We work top-down to have a flat hip edge for sewing into body. Add three orange toe nubs similar to the arms. Feet should be stuffed very firmly for the dragon to sit upright.
Round 3 :
(1 sc, 1 inc) x 6 (18)
Round 4 :
(2 sc, 1 inc) x 6 (24)
Round 5-8 :
1 sc in each st (24)
Info :
These rounds create the toe and foot width. Add extra stuffing in the foot portion to help the dragon sit. Keep a firm fill in the foot and moderate in the leg shaft.
Round 9 :
(3 sc, 1 dec) x 6 (18)
Round 10-14 :
1 sc in each st (18)
Round 15 :
Change to orange. 1 sc in each st (18)
Round 16 :
Create toe nubs across front by making 3 small cones: *skip to front center: (in one stitch make 3 sc in same st) repeat three times spaced evenly across front* Continue 1 sc for remaining stitches (18)
Round 17 :
Switch back to black. 1 sc in each st (18)
Round 18 :
(2 sc, 1 dec) x 4, 2 sc (14)
Round 19 :
(1 sc, 1 dec) x 4, 2 sc (10)
Round 20 :
1 sc in each st (10)
Round 21 :
Fasten off leaving long tail for sewing. Stuff foot firmly and sew hip opening to body bottom with ladder or whip stitch. Make second leg the same.
— Tail :
Info :
The tail tapers and ends with a small spike. Work from base toward tip, stuffing lightly near base and firmer near tip if you want a weighted end for posing. Add 3-4 small spikes along the back close to the tail base.
Round 3 :
(1 sc, 1 inc) x 6 (18)
Round 4-8 :
1 sc in each st (18)
Round 9 :
(2 sc, 1 dec) x 4, 2 sc (14)
Round 10 :
(1 sc, 1 dec) x 4, 2 sc (10)
Round 11 :
1 sc in each st (10)
Round 12 :
(1 sc, 1 dec) x 3 + 1 sc (7)
Round 14 :
Fasten off leaving tail. Stuff and sew tail to back of body at lower rounds. Add a small orange spike cone at tail tip (see Spike cone pattern) and a couple of decorative spikes along the top near base.
— Wing (Make 2) :
Info :
Each wing has a black frame (outer edge and bone) and an orange membrane. We start with the orange membrane as a flat fan and then crochet the black tube edge around it. The ribs are added using surface slip stitches or narrow crocheted tubing sewn across the membrane. The pictured wings have three internal ribs and a rounded tip with a small knob.
Membrane Round 1 :
With orange, ch 8. Row 1: sc in 2nd ch from hook and across (7)
Membrane Round 2 :
Ch1 turn, 2 sc in first st, sc across, 2 sc in last st (9)
Membrane Round 3 :
Ch1 turn, 2 sc in first st, sc across to last st, 2 sc in last st (11)
Membrane Round 4 :
Repeat increases at edges to create a slight fan shape so total increases each end +2 each row until you have about 19-21 sts across (approx 6-8 rows)
Info :
Work flat rows shaping the membrane to a triangular fan approximately 12-14 cm wide when stretched. The pictured membrane is relatively small - aim for 9-12 rows total before finishing the fan edge. Fasten off orange leaving tail for sewing.
Frame Round 1 :
With black, work around the perimeter of the orange fan: sc evenly along edges making sure to place 2 sc at each fan tip to round corners. This rounds the triangle and creates an outer edge (total st count depends on fan size ~40-50)
Frame Round 2-3 :
1 sc in each st around to build a tube edge of 2-3 rounds (same count each round)
Rib construction :
Using black, crochet narrow tubes (ch 30, slip stitch back or sc in each ch) to make three ribs. Pin ribs across membrane from base to outer edge spaced evenly. Sew ribs in place along their length. You can also surface slip stitch lines from base outwards to mimic ribs if you prefer a flat, neat look.
Knob :
At the wing tip make a small knob by making 6 sc in mr then 6 inc (12), 1 round sc (12), fasten off and sew to tip. Repeat for second wing.
Info :
For stronger wings, insert a thin piece of floral wire along first rib before sewing and secure ends inside wing base. Hide wire ends in the wing seam.
— Horns (Make 2 large horns and 2 small horns) :
Info :
Large horns are tapered cones worked in orange. Work them separately and sew to top of head. Small horns and the crest spikes are made with the same cone pattern but smaller (fewer rounds). Make the horns slightly curved by offsetting a stitch on one side when sewing to the head.
Large horn Round 1 :
6 sc in mr (6)
Large horn Round 2 :
6 inc (12)
Large horn Round 3 :
(1 sc, 1 inc) x 6 (18)
Large horn Round 4 :
(2 sc, 1 inc) x 6 (24)
Large horn Round 5-8 :
1 sc in each st (24)
Large horn Round 9 :
(2 sc, 1 dec) x 6 (18)
Large horn Round 10 :
(1 sc, 1 dec) x 6 (12)
Large horn Round 11 :
6 dec (6)
Large horn Round 12 :
Fasten off leaving long tail for sewing. Lightly stuff so horn keeps shape but remain hollow enough to shape when sewn (6)
Small horn Round 1 :
6 sc in mr (6)
Small horn Round 2 :
6 inc (12)
Small horn Round 3 :
1 sc in each st (12)
Small horn Round 4 :
(1 sc, 1 dec) x 4 (8)
Small horn Round 5 :
4 dec (4)
Small horn Round 6 :
Fasten off leaving long tail. Lightly stuff and shape. Make several small horns for the crest (the pictured dragon uses pairs of alternating black and orange small cones along the neck).
— Crest spikes (make 8-10 alternating cones) :
Info :
The crest along the head and neck alternates small black and orange spikes. Use the small horn pattern but make many and slightly flatten the base for easier sewing. Arrange spikes with odd spacing so they follow a zig-zag line down the center and sides of the neck.
Spike Round 1 :
6 sc in mr (6)
Spike Round 2 :
6 inc (12)
Spike Round 3 :
1 sc in each st (12)
Spike Round 4 :
(1 sc, 1 dec) x 4 (8)
Spike Round 6 :
Fasten off leaving long tail. Slightly stuff if desired and flatten base for sewing (4)
— Claws & small details :
Info :
Make small orange claw nubs for toes and hands. You can make these as small cones or create clustered incs on the paw edge. The small claw cone pattern below works well for consistent results.
Claw Round 1 :
4 sc in mr (4)
Claw Round 3 :
(1 sc, 1 dec) x 2 (6)
Claw Round 4 :
Fasten off leaving tail for sewing. Make 6 claws for feet and 6 for hands (total 12). Sew into position on paw edges.
— Assembly & Finishing :
Info :
Before final sewing, pin all pieces into position. Use photos as a guide: head centered on top of body, eyes above snout, horns on top of head spaced about 6-8 stitches apart, crest spikes alternating along the centerline and sides of neck, wings sewn to upper back just below the neck seam, legs at bottom front for sitting pose, arms midway down sides.
Step 1 :
Attach head to body by sewing through the last rounds of the body and the neck tail of the head. Use ladder stitch or whip stitch for a neat join. Pull slightly to create a curved neck if desired.
Step 2 :
Sew horns to top of head using long tails. For a slight curve, sew one side of horn base tighter than the other and shape while sewing. Reinforce with extra stitches so horns do not come loose.
Step 3 :
Sew crest spikes in alternating colors down the neck; place small black spikes between larger orange ones to replicate the photo. Space them evenly about 6-8 stitches apart depending on neck length.
Step 4 :
Sew arms to the body at approximately round 16-18 of the body (or about upper-mid section), slightly tilted forward for a friendly posture. Sew legs to the base of the body and position so the dragon sits balanced.
Step 5 :
Attach wings to the upper back just below the neck seam. Sew along the wing base securely; add a few stitches through the body stuffing to anchor them firmly. If using wire, hide and secure wire ends inside the body.
Step 6 :
Sew claws onto paw edges and toes. Embroider nostrils on snout with two small French knots or tiny sc stitches in black yarn. Check symmetry and weave in ends neatly.
Info :
Optionally add a small bit of blush to cheeks with soft pastel or a tiny bit of fabric paint for character. Secure any small parts and double-check knots are hidden inside before gifting to a child.
This friendly black-and-orange dragon is a delightful mix of classic amigurumi shapes and bold colorblocking—perfect as a seasonal gift or shelf companion. The sculpted horns, armored crest, and framed wings give it big personality in a compact form. Follow the detailed rounds and Info tips to assemble each part neatly and enjoy watching this character come to life stitch by stitch. 🧶 Bring out your yarn and make a little dragon friend to treasure! 🔥