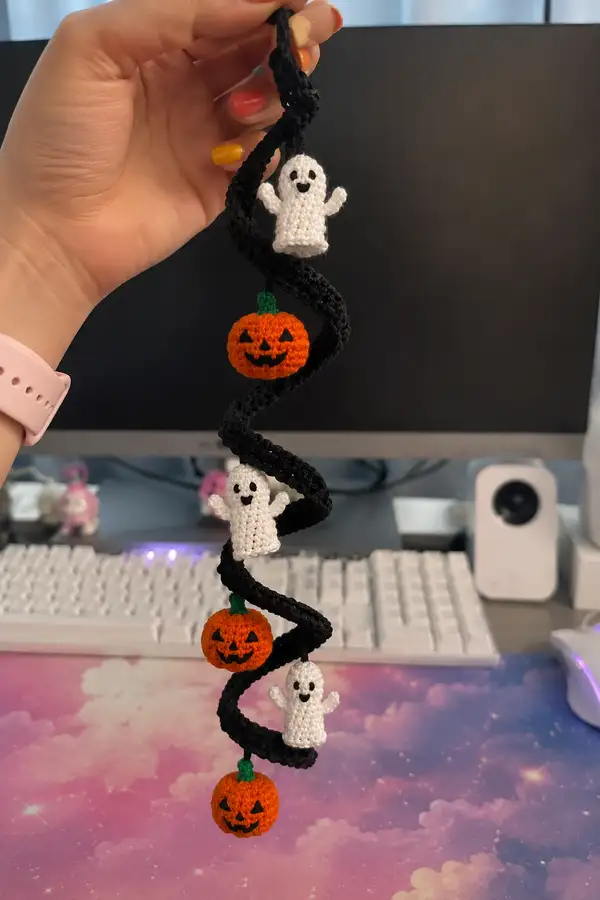
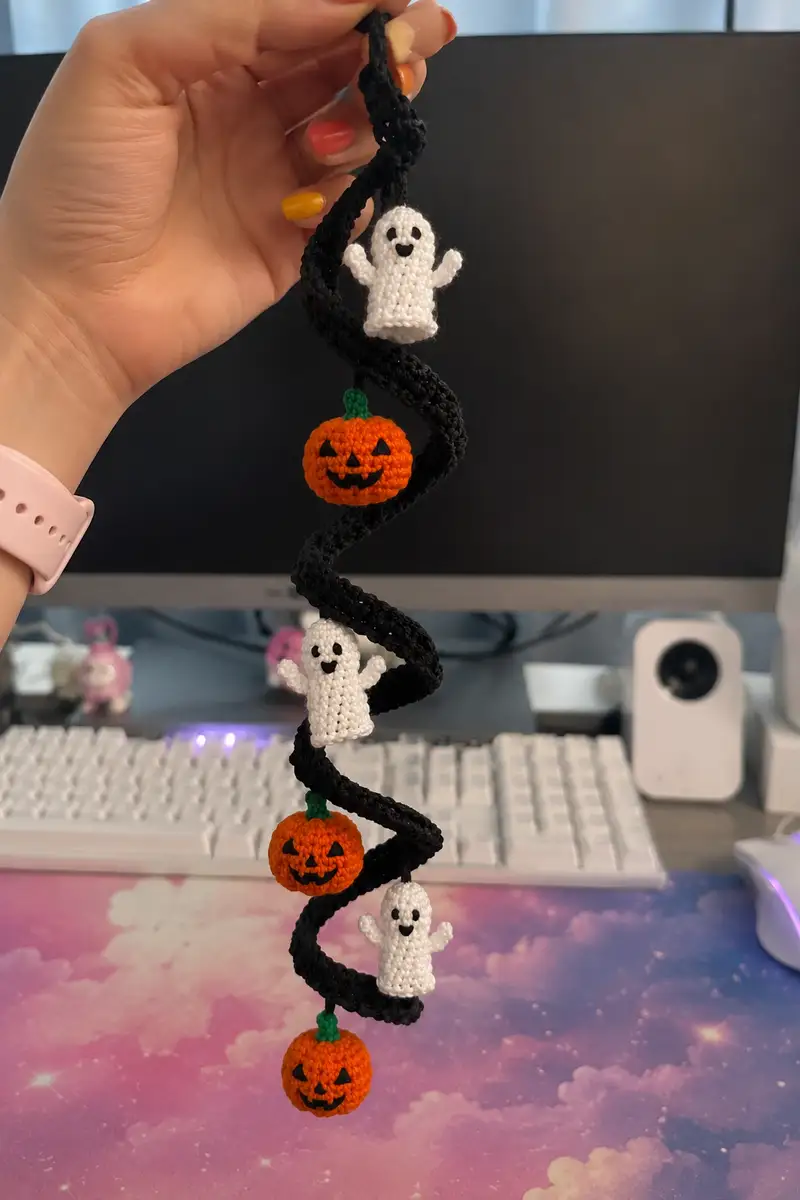
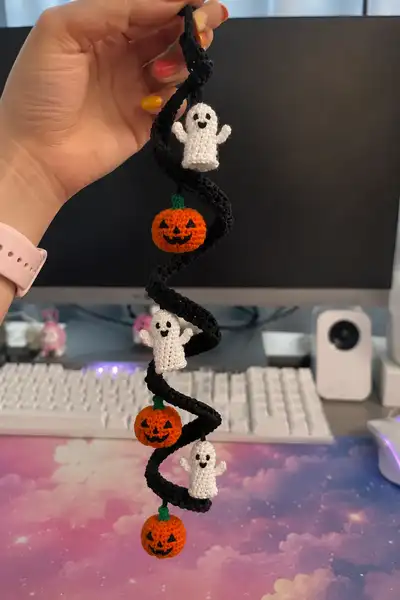
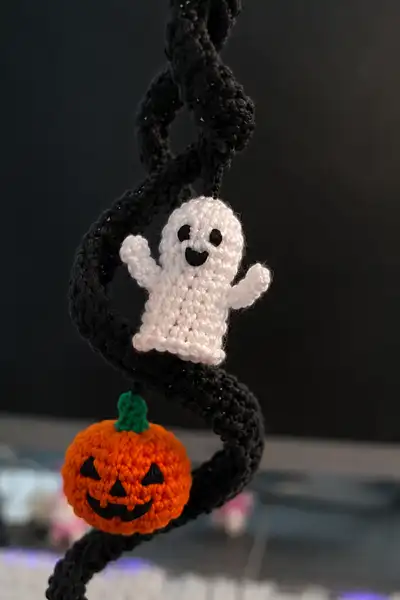
A whimsical Halloween garland featuring a long black spiral cord with three tiny floating ghosts and three jack-o-lanterns suspended along its curves. The design uses small amigurumi pumpkins with embroidered faces and bell-shaped friendly ghosts with tiny arms. Hang it on a door, window, or mantle for a playful, spooky accent—great for holiday decorating or gifting.
Progress Tracker
0% Complete
— Overview and Construction Notes :
Info :
This pattern is written in US terms. Work in continuous rounds where no join is indicated (use a stitch marker at the first stitch each round). Tension should be firm so stuffing does not show through the stitches. Each ghost and pumpkin is worked separately, lightly stuffed, and sewn onto the spiral cord. The spiral cord is a long crocheted tube worked in the round and then shaped into a helix—pin into shape and sew anchor points to secure ornaments.
Info :
Gauge is not critical for this decorative garland, but finished proportions will change if you swap yarn weight significantly. For a similar finished scale, use DK/Light Worsted yarn and a 3.0mm hook.
— Spiral Cord (Make 1 long tube, then shape) :
Round 1 :
6 sc in magic ring (6)
Round 3 :
(1 sc, inc) x 6 (18)
Round 4 :
(2 sc, inc) x 6 (24)
Round 5 :
(3 sc, inc) x 6 (30)
Round 6 :
(4 sc, inc) x 6 (36)
Round 7-16 :
1 sc in each st (36)
Info :
Begin keeping this tube unstuffed or very lightly stuffed for the first 16 rounds. This will make shaping and pinning easier. If you want the spiral to be stiff, insert a single length of thin floral wire along the inside before closing the final rounds—fold the wire ends back to avoid sharp tips.
Round 17-26 :
1 sc in each st (36)
Info :
Work in continuous rounds. For a long garland like the sample, you will continue this even round many times to create length. The sample spiral measured about 60-80 cm of tube before shaping; you can make yours longer or shorter to preference.
Round 27-36 :
1 sc in each st (36)
Round 37-46 :
1 sc in each st (36)
Info :
If you would like the spiral to have slightly flattened edges (a ribbon-like look), use your finger to press the tube flat every 20 rounds while blocking lightly with steam (test yarn first). Otherwise keep it round for a tubular look.
Round 47-56 :
1 sc in each st (36)
Round 57-66 :
1 sc in each st (36)
Round 67-76 :
1 sc in each st (36)
Info :
At this point measure your tube against the desired length. The sample spiral used roughly 120-160 rounds of 36 stitches (about 12-16 cm of vertical height per 40 rounds, depending on yarn and tension). Continue until you reach the length you like—I worked an additional 80-100 rounds to achieve a long, dramatic spiral.
Round 77-86 :
1 sc in each st (36)
Round 87-96 :
1 sc in each st (36)
Round 97-106 :
1 sc in each st (36)
Info :
If stuffing the tube for body/drape, stuff very lightly in short bursts so the spiral remains flexible. Overstuffing makes shaping difficult. If you opted to insert floral wire, make sure the wire runs centrally along the tube and is covered by fibers or yarn so it won't poke out.
Round 107-116 :
1 sc in each st (36)
Round 117-126 :
1 sc in each st (36)
Round 127-136 :
1 sc in each st (36)
Info :
When your tube is the desired length, fasten off leaving a long tail for hanging and for sewing attachments. Create a small loop at the top by chaining 12-20 (depending on desired hanging length) and slip stitching back to the top stitch; fasten off and weave in ends securely.
Round 137-160 :
1 sc in each st (36) — continue until desired length (sample used up to round 160 for a long helix)
Info :
After finishing the tube, block it lightly if desired. To shape into a spiral helix, wrap the tube around a cylindrical object (like a bottle) or use pins on a cork board to form evenly spaced loops. Pin carefully and tack the tube in place at anchor points where ornaments will be attached—use matching black yarn and small invisible stitches that go through the back of the tube to secure.
— Ghost (Make 3 identical ghosts) :
Round 1 :
6 sc in magic ring (6)
Round 3 :
(1 sc, inc) x 6 (18)
Round 4 :
(2 sc, inc) x 6 (24)
Round 5 :
(3 sc, inc) x 6 (30)
Round 6 :
(4 sc, inc) x 6 (36)
Round 7-12 :
1 sc in each st (36)
Info :
Place eyes between rounds 8-9 (or after round 9) roughly 6-8 stitches apart depending on desired expression. You can embroider black eyes with embroidery yarn or sew tiny black safety eyes if preferred (use safety eyes no larger than 6mm for scale). When using safety eyes, insert and secure before much stuffing.
Round 13 :
(4 sc, dec) x 6 (30)
Round 14 :
(3 sc, dec) x 6 (24)
Info :
Begin stuffing gently and evenly from round 13 onward; push fiberfill into the head until the ghost is plump but still flexible. The ghosts are small, so use tiny bits of stuffing and shape with your fingers.
Round 15 :
(2 sc, dec) x 6 (18)
Round 16 :
(1 sc, dec) x 6 (12)
Round 17 :
1 sc in each st (12)
Round 18 :
(1 sc, inc) x 6 (18)
Round 19 :
(2 sc, inc) x 6 (24)
Round 20 :
(3 sc, inc) x 6 (30)
Info :
These increases create the small bell-shaped skirt. Work evenly and keep stitches tidy. If you prefer a more flared skirt, add one extra increasing round: (4 sc, inc) x 6 (36).
Round 21 :
1 sc in each st (30)
Round 22 :
1 sc in each st (30)
Round 23 :
1 sc in each st (30)
Info :
To create a ruffled edge similar to the sample, work one round of alternating increases: (1 sc, inc) x 15 which will create little waves at the hem. Alternatively, you can add a picot or shell round for a more pronounced frill.
Round 24 :
(1 sc, inc) x 15 (45) — optional ruffle round
Round 25 :
1 sc in each st (45) — tidy edge after ruffle
Round 26 :
sl st around in back loops only to create a slightly scalloped hem. Then fasten off leaving a long tail for sewing (or tuck tail inside if finishing invisibly).
Info :
Arms: Make two per ghost if desired. Small tubular arms use MR 6 -> 6 sc, inc to 12 then 3-4 rounds sc, fasten off leaving tail to sew. Sew arms to body at round positions 10-12 for raised arm placement. Embroider mouth and eyes now if using yarn embroidery.
— Ghost Arm (Make 6 total: 2 per ghost) :
Round 1 :
6 sc in magic ring (6)
Round 3-5 :
1 sc in each st (12)
Info :
Stuff arms very lightly or not at all — a slightly limp arm looks natural on the small ghosts. Flatten the base of the arm and sl st through two loops to close slightly, leaving a long tail for sewing. Position arms on either side of the ghost body at approx rounds 9-11 and sew securely.
— Pumpkin Body (Make 3 pumpkins) :
Round 1 :
6 sc in magic ring (6)
Round 3 :
(1 sc, inc) x 6 (18)
Round 4 :
(2 sc, inc) x 6 (24)
Round 5 :
(3 sc, inc) x 6 (30)
Round 6 :
(4 sc, inc) x 6 (36)
Round 7 :
(5 sc, inc) x 6 (42)
Round 8-14 :
1 sc in each st (42)
Info :
These rounds build the girth of the pumpkin. Work tightly and keep consistent tension so later embroidery sits flat on the surface. After round 10, decide which side will be the front for the jack-o-lantern face and mark it with a removable marker or scrap of yarn.
Round 15 :
(5 sc, dec) x 6 (36)
Round 16 :
(4 sc, dec) x 6 (30)
Round 17 :
(3 sc, dec) x 6 (24)
Info :
Begin stuffing at round 16-17. Pumpkins should be stuffed more firmly than ghosts to hold a round shape. Add small amounts of fiberfill and shape with your fingers to create a rounded silhouette.
Round 18 :
(2 sc, dec) x 6 (18)
Round 19 :
(1 sc, dec) x 6 (12)
Round 20 :
6 dec (6) — leave a small hole for attaching the stem, or close completely and create a surface stem (see Info)
Info :
To create the distinct pumpkin ribs, you can: (A) use a tapestry needle and pull yarn from top to bottom in 6-8 evenly spaced channels to create dents, or (B) embroider raised 'ridges' with surface slip stitch or chain lines. Option A gives classic segmentation.
Round 21 :
Fasten off leaving long tail for closing and for sewing the stem. If you left a small hole at round 20, use your tail to gather and anchor the stem later. If you closed completely, stitch a stem on top and sew securely.
— Pumpkin Stem and Leaf :
Round 1 :
4 sc in magic ring (4)
Round 3-4 :
1 sc in each st (8)
Round 5 :
1 sc in each st, sl st to finish, fasten off leaving a long tail to sew (8)
Info :
Small leaf: ch 4, sl st in 2nd ch from hook, hdc in next ch, sc in last ch, sl st back into base to form a little leaf. Fasten off and leave a long tail to sew onto stem. Sew stem to the top center of the pumpkin using the long tail; anchor with a few stitches into the pumpkin body for security.
— Pumpkin Face Embroidery :
Info :
Use black embroidery yarn or thin black cotton to stitch facial features. Mark eye and mouth positions first. For eyes, small triangles or half-moons work well — embroider two small triangles equidistant from center. For the mouth, stitch a curved mouth with a small tooth or two by stitching across a few stitches and then backfilling. Secure all ends by weaving inside the pumpkin and knotting if necessary.
— Additional Decorative Details (Optional) :
Info :
You can create tiny jack-o-lantern teeth by weaving black yarn through the mouth or by sewing on tiny triangles cut from felt and glued with fabric glue. If you wish to add glittery thread to the spiral, carry a strand of sparkle yarn with your black main yarn for a shimmery effect.
— Assembly and Placement Planning :
Info :
Before stitching ornaments to the spiral, arrange them along the pinned helix to determine spacing. In the sample, ghost/pumpkin pairs alternate approximately every 20-25 rounds of spiral tube; leave a little extra tube between ornaments to show the spiral shape clearly. Mark positions with safety pins or removable markers on the spiral.
Info :
Sewing method: Use a yarn needle and the long tail left from each ornament. Insert the needle through the back of the ornament into the spiral tube at the marked spot, take a few anchoring stitches through the tube body, then sew into the ornament base several times to secure. Tie off and weave tail inside the spiral or ornament for a neat finish.
— Finishing Touches :
Info :
After sewing all ornaments in place and removing pins, check that the spiral hangs evenly. If adjustments are needed, tighten or add a few more anchor stitches at the back of the tube. Trim and weave in all tails. Optionally, add a clear bead or small stitch at key anchor points to prevent ornaments from shifting.
Info :
If you used floral wire, ensure the wire ends are tucked well inside the tube and that the wire does not protrude from any stitch. Use extra yarn wraps around the top loop for added hanging strength.
— Suggested Stitch Counts & Repeat Notes (Reference) :
Info :
Ghost main body circumference after increases: 30-36 stitches depending on chosen increasing rounds; Pumpkin max circumference around rounds 8-14: 42 stitches in the sample. Spiral tube circumference in sample: 36 stitches. Keep consistent counts per section for symmetry across the three repeats of each mini ornament.
Info :
To make multiple garlands, simply scale length of spiral tube and add more ornament repeats at regular intervals. You can also change colors: swap black for purple or add glitter yarn for a festive twist.
This playful Black Spiral Halloween Garland brings together tiny amigurumi ghosts and smiling jack-o-lanterns for a charming seasonal accent. The long spiral cord makes each mini ornament float and sparkle with personality, while the friendly faces add whimsical cheer to your Halloween decor. I hope each stitch brings you joy as you assemble the garland — hang it proudly or gift it to a friend who loves handmade holiday touches! 🎃👻🧶