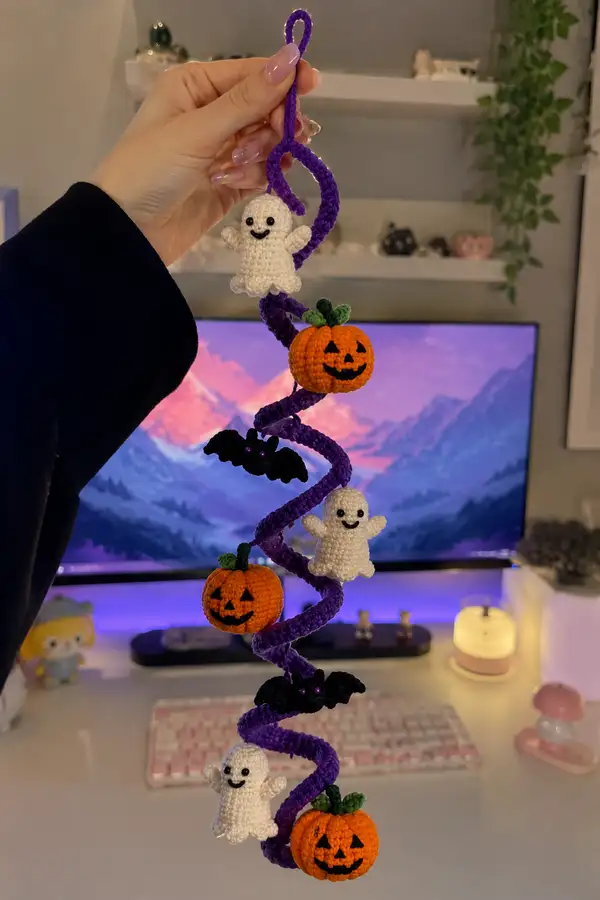
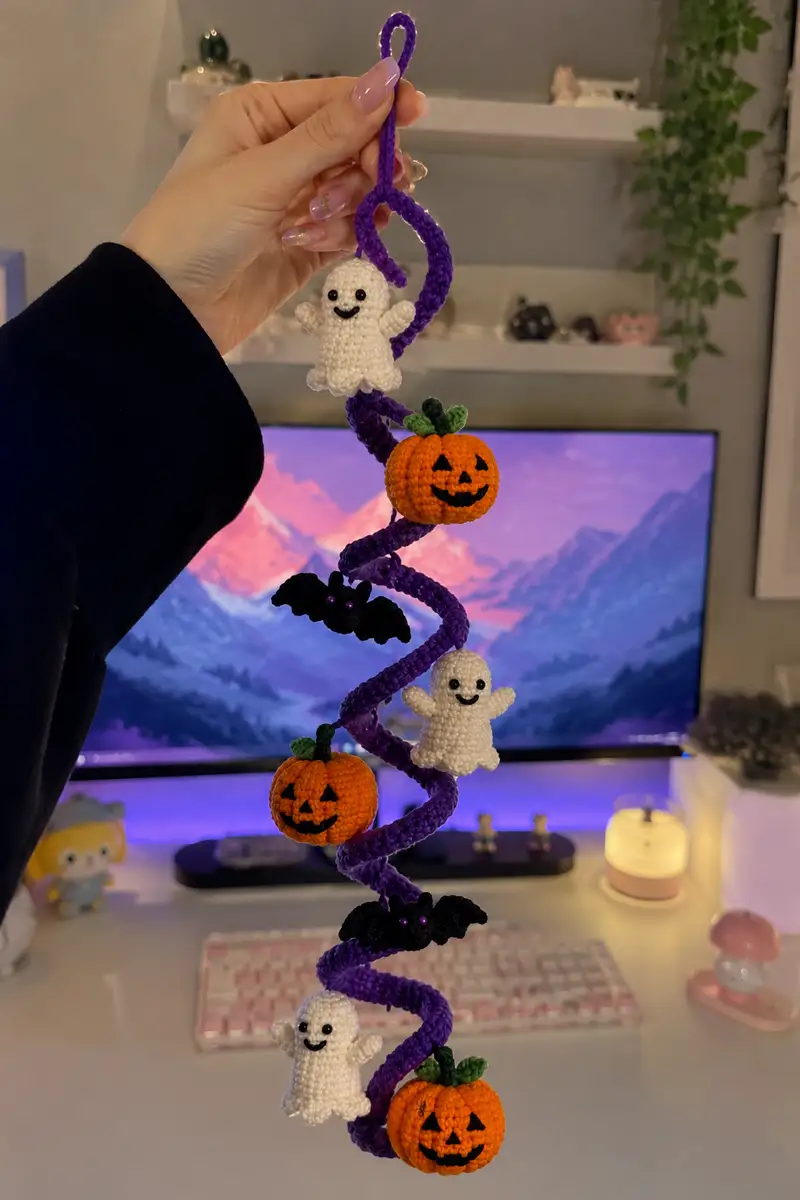
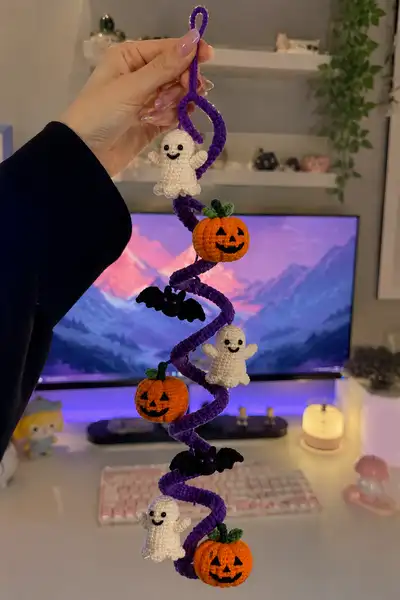
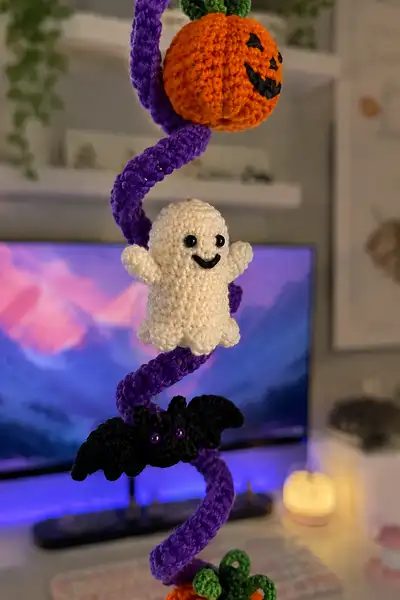
A whimsical hanging Halloween garland featuring a twisted purple spiral cord hung with smiling jack-o-lanterns, cheerful little ghosts, and sleepy bats. This pattern teaches you how to crochet a sturdy spiral tube, small amigurumi pumpkins with carved faces, tiny ghost buddies with scalloped hems, and flat bats with bead eyes. Perfect for seasonal decor, doorways, or hanging in windows — the finished garland is lightweight, portable, and full of charm. Includes step-by-step rounds, assembly tips, and finishing instructions for a polished look.
Progress Tracker
0% Complete
— Notes & Overview :
Info :
This pattern is written in US crochet terms and is worked in continuous rounds unless specified. Use a stitch marker to mark the first stitch of each round. Stuff ornaments lightly to moderately so they keep shape but remain lightweight. The spiral cord is a crocheted tube worked in the round and optionally reinforced with a thin craft wire threaded inside before closing. Make 3 pumpkins, 3 ghosts, and 2 bats, then arrange along the spiral and sew in place.
— Spiral Cord (make 1) :
Round 1 :
6 sc in magic ring (6)
Round 3 :
(1 sc, 1 inc) x 6 (18)
Round 4 :
(2 sc, 1 inc) x 6 (24)
Round 5 :
(3 sc, 1 inc) x 6 (30)
Round 6 :
(4 sc, 1 inc) x 6 (36)
Info :
The spiral tube will be worked to a long length in even rounds. 36 sts gives a sturdy tube about 1.6-2 cm (0.6-0.8 in) wide depending on yarn and hook. If you prefer a thinner tube, stop increasing at 24 or 30 sts. Insert wire later if you want the spiral to hold its twist permanently.
Rounds 7-16 :
1 sc in each st (36)
Info :
Work evenly for a stretch until your tube measures about 6-7 cm, then you may check placement for the first ornament. Use stitch markers to mark intervals where ornaments will attach: top loop, then three evenly spaced attachment points for pumpkins/ghosts and two for bats.
Rounds 17-26 :
1 sc in each st (36)
Info :
At this stage you can very gently pull a thin craft wire through the center if using one: feed the wire from the base to the working end. Wire tips should be folded back or capped to avoid poking and to anchor inside stuffing.
Rounds 27-36 :
1 sc in each st (36)
Info :
Continue working even rounds until the tube reaches desired garland length. For the sample shown, the tube is approximately 40-45cm (16-18 in) before final shaping and loop creation. Count rounds so you can mark positions for each ornament evenly: top loop (~3 rounds), then sections for first pumpkin, ghost, bat, lower pumpkin, ghost, bat, last pumpkin and ghost.
Rounds 37-56 :
1 sc in each st (36)
Info :
If you want a stronger spiral, every 10-12 rounds insert a few small stuffing pellets (2-3 g each) to help the tube hold shape; push the pellets into the tube before continuing. Keep the stuffing sparse so the tube remains flexible for twisting.
Rounds 57-62 :
1 sc in each st (36)
Round 63 :
(4 sc, 1 dec) x 6 (30)
Round 64 :
(3 sc, 1 dec) x 6 (24)
Info :
If you will create a hanging loop at the top, leave about 10-12 rounds unstuffed near one end so you can form a small loop: after finishing tube rounds, chain 8-12 and sl st back to the tube base to form a sturdy loop, then close tube around the loop base.
Round 65 :
(2 sc, 1 dec) x 6 (18)
Round 66 :
(1 sc, 1 dec) x 6 (12)
Info :
Fasten off leaving long tail if you plan to sew the end closed or attach to loop. If you inserted a wire, tuck the wire end into the stuffing and weave the tail through a few stitches to secure the end so wire doesn't slip out. Shape the completed tube by gently twisting it into a spiral and pinning if needed while final assembly is done.
— Ghost Body (Make 3) :
Round 1 :
6 sc in magic ring (6)
Round 3 :
(1 sc, 1 inc) x 6 (18)
Round 4 :
(2 sc, 1 inc) x 6 (24)
Round 5 :
(3 sc, 1 inc) x 6 (30)
Round 6 :
(4 sc, 1 inc) x 6 (36)
Info :
Ghosts are small bell-shaped bodies with scalloped hems and tiny rounded arms. Work tightly for a neat fabric. Position safety eyes between rounds 9-10 approximately 6 stitches apart (adjust to desired expression). If embroidering eyes, wait until after stuffing but before finishing the base.
Rounds 7-12 :
1 sc in each st (36)
Round 13 :
1 sc in each st BLO (36)
Info :
Working BLO here creates a subtle ridge across the chest and helps set the eye line. Insert safety eyes now and secure them. If you prefer embroidered eyes, use black embroidery thread and whip a small circle after stuffing.
Rounds 14-17 :
1 sc in each st (36)
Info :
Begin stuffing the ghost firmly but not overstuffed; the body should be slightly soft so the scalloped base can flatten neatly when sewn to the spiral.
Round 18 :
(4 sc, 1 dec) x 6 (30)
Round 19 :
(3 sc, 1 dec) x 6 (24)
Round 20 :
(2 sc, 1 dec) x 6 (18)
Info :
Add more stuffing now to fill the head and chest area. Press stuffing toward the top with your yarn needle to maintain roundness. Keep the bottom opening wide enough to create scallops rather than close completely.
Round 21 :
(1 sc, 1 dec) x 6 (12)
Info :
Do not fully close; instead fasten off leaving a long tail for attaching to the base scallop ring. We will form the scalloped hem separately by crocheting loops around the bottom edge so the ghost sits flat when sewn to the spiral.
Round 23 :
Join yarn at base opening and *sc in next st, ch 2, sl st in next st*; rep around to create a chain-looped scallop edge. (Approx 12 scallops)
Info :
Alternatively make small shell scallops by working *(2 dc, sl st) in same st, skip 1 st* around for a puffier edge. Keep scallops even; they create the cute wavy hem seen in the photos.
Round 24 :
If using sc-ch2 loops, return to front and sc into each ch-2 loop around to tidy the scallops (12 sc)
Round 25 :
Fasten off leaving long tail for sewing. Weave tail into body and hide inside stuffing when attaching to spiral.
Arms (Make 6 — 2 per ghost) :
See arms rounds below; attach arms to each side of the ghost at rounds corresponding to chest height (between Rounds 12-15 of the ghost body).
— Ghost Arm (Make 6 total, 2 per ghost) :
Round 1 :
6 sc in magic ring (6)
Round 3 :
1 sc in each st (12)
Round 4 :
1 sc in each st (12)
Round 5 :
(2 sc, dec) x 3 (9)
Round 6 :
1 sc in each st (9)
Info :
Stuff very lightly so the arm is soft and slightly squishy. Flatten top and sc across two stitches to close then leave a long tail for sewing to the ghost chest. Position arms symmetrically on each side between rounds 12-15 of the ghost body and sew through several stitches for a secure attachment.
Round 7 :
Fasten off leaving a long tail for sewing
— Pumpkin Body (Make 3) :
Round 1 :
6 sc in magic ring (6)
Round 3 :
(1 sc, 1 inc) x 6 (18)
Round 4 :
(2 sc, 1 inc) x 6 (24)
Round 5 :
(3 sc, 1 inc) x 6 (30)
Round 6 :
(4 sc, 1 inc) x 6 (36)
Info :
To create the pumpkin's vertical ribs later, mark 6 equally spaced stitches around the equator — these will be anchor points to stitch down and produce the classic grooved pumpkin look. You can also leave loops to pull with a yarn needle after stuffing to make strong ribs.
Rounds 7-12 :
1 sc in each st (36)
Info :
When the pumpkin reaches a nice round fullness, begin decreasing to shape the bottom. Stuff firmly but allow some give — pumpkins should be plump, not rock-hard.
Round 13 :
(4 sc, 1 dec) x 6 (30)
Round 14 :
(3 sc, 1 dec) x 6 (24)
Round 15 :
(2 sc, 1 dec) x 6 (18)
Round 16 :
(1 sc, 1 dec) x 6 (12)
Info :
Leave a long tail and do not fully close. Pull the top and bottom together with the tail to create a slight flattened shape, then secure. To form ribs: thread yarn through the marked anchor points and pull gently until grooves form. Knot and weave tail inside stuffing to secure. Repeat for all 6 ribs to achieve distinct pumpkin segments.
Round 18 :
Weave in tail and tidy. If you want a deeper rib look, embroider vertical lines along each division with back stitches using a single strand of yarn and pull lightly to deepen grooves.
Leaf (Make 3) :
Using green yarn: ch 6, sc in 2nd ch from hook, hdc, dc, hdc, sc in last ch; sl st back into base to secure. Fasten off leaving tail to sew to pumpkin top. Alternatively use rounds: 6 sc in magic ring, join, then shape leaf with FLO and shaping rows (tiny leaf approx 6-8 sts). Sew to pumpkin top between stem and rib anchors.
Stem (Make 3) :
Using green or brown: 4 sc in magic ring, work 4 rounds of 4 sc to form a short tube (4 sts per round), stuff lightly, fasten off leaving tail to sew to top center of pumpkin. Flatten the base and secure to pumpkin top with a few stitches.
— Pumpkin Face Embroidery :
Info :
Embroider jack-o-lantern faces using black yarn and surface stitch or backstitch. For a small carved face: two small triangles for eyes (approx 3-4 stitches each) and a curved smile of 6-8 stitches. Alternatively, use small safety eye beads and stitched mouth. Secure ends and hide tails inside stuffing.
— Bat Body & Wings (Make 2) :
Bat Body Round 1 :
6 sc in magic ring (6)
Round 3 :
(1 sc, 1 inc) x 6 (18)
Round 4 :
1 sc in each st (18)
Round 5 :
(1 sc, dec) x 6 (12)
Info :
Bat bodies are small and flatish. You can leave them slightly flat and attach wings directly, or close completely and sew wings on top. For the photo look, the bat body is compact with two small bead eyes sewn on and wings attached on either side.
Wings (Make 4 — 2 per bat) Round 1 :
Ch 6, sc in second ch from hook and across (5 sc), ch 1, turn
Wings Round 2 :
Sc across 5 sc. Ch 1, turn (5)
Wings Round 3 :
1 sc in first st, 3 sc in next st, 1 sc in last 3 sts (8)
Wings Round 4 :
Sc evenly around edge of wing to create a scalloped border; fasten off leaving long tail for sewing
Info :
Shape wings gently with fingers to create a wing curve. Sew wings to the sides of the bat body with a few secure stitches. Sew small purple beads or tiny safety eyes to the bat face, using embroidery thread to secure if necessary for safety.
— Top Hanging Loop (Make 1) :
Info :
Create a strong hanging loop by leaving 10-12 rounds unstuffed at the top end of the spiral. From the working end, ch 10-12 — adjust length for desired hanging loop size — then sl st into the base of the tube and work 1 round of sc around that seam to secure. Work a small edge of 6 sc into the loop and fasten off, weaving tail into the tube and securing to the inserted wire or stuffing.
— Finishing Details & Facial Embroidery :
Info :
For ghost faces: use black yarn and a yarn needle to embroider a small smiling mouth with satin stitch (about 5-7 stitches) and two tiny stitched eyes if you did not use safety eyes. For pumpkins: use black yarn to form triangle eyes and a toothy smile with backstitch; hide tails inside stuffing. Add a tiny dab of fabric glue if you wish to secure embroidery knots.
Info :
Use a water-soluble fabric pen to mark face placements before embroidering. Keep spacing consistent across ornaments so the garland looks balanced.
— Optional Variation: Weighted Base & Shape Fixing :
Info :
If you want the garland to hang straighter and hold spiral twists, insert a thin craft wire inside the purple tube or add small flat washers into the bottom-most pumpkin before closing to add a slight downward pull. For stiffness, soak the finished spiral lightly with a fabric stiffener and allow to dry while pinned into a spiral shape.
— Full Assembly :
Info :
Arrange ornaments along the spiral before sewing: alternate pumpkins and ghosts with bats interspersed. Pin each ornament in place, making sure the scalloped ghost hems sit flush against the tube. Use a tapestry needle and a length of purple yarn to sew ornaments through several tube rounds for secure attachment. Reinforce by sewing through 3-4 stitches at multiple points around the ornament base.
Info :
For a tidier finish, weave any tails into the interior of the tube if possible, and hide knots inside stuffing. Trim remaining short ends and use a small dab of glue for extra security if ornaments will be handled frequently.
This cheerful Halloween garland brings delightful seasonal character to any space — from doorways to classroom displays. Each tiny pumpkin, ghost, and bat is a compact study in adorable detail and hand-stitched charm. I love how the purple spiral gives the piece movement and whimsy while the small amigurumi ornaments add personality. 🧶 Hang it proudly and enjoy the smiles it brings to every corner of your home! 🎃👻