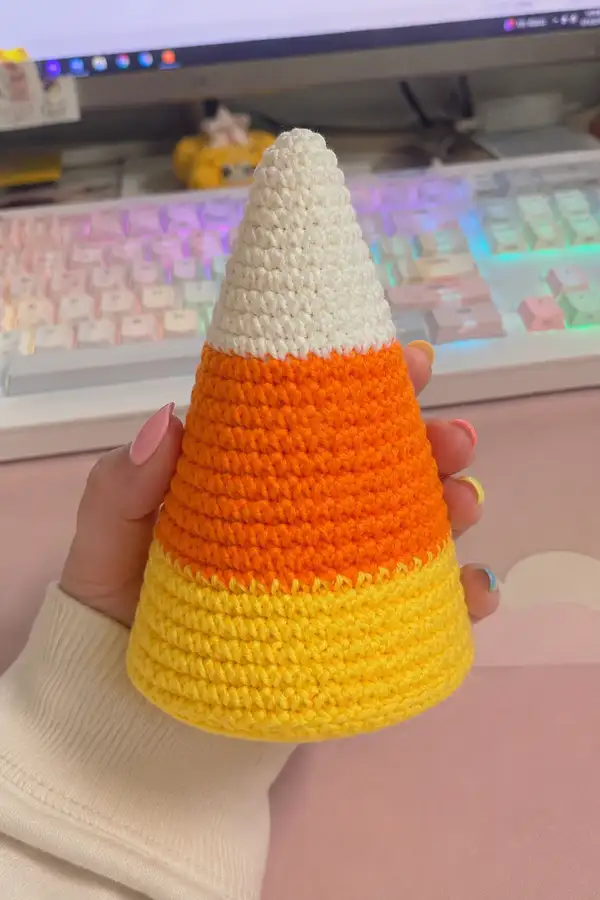
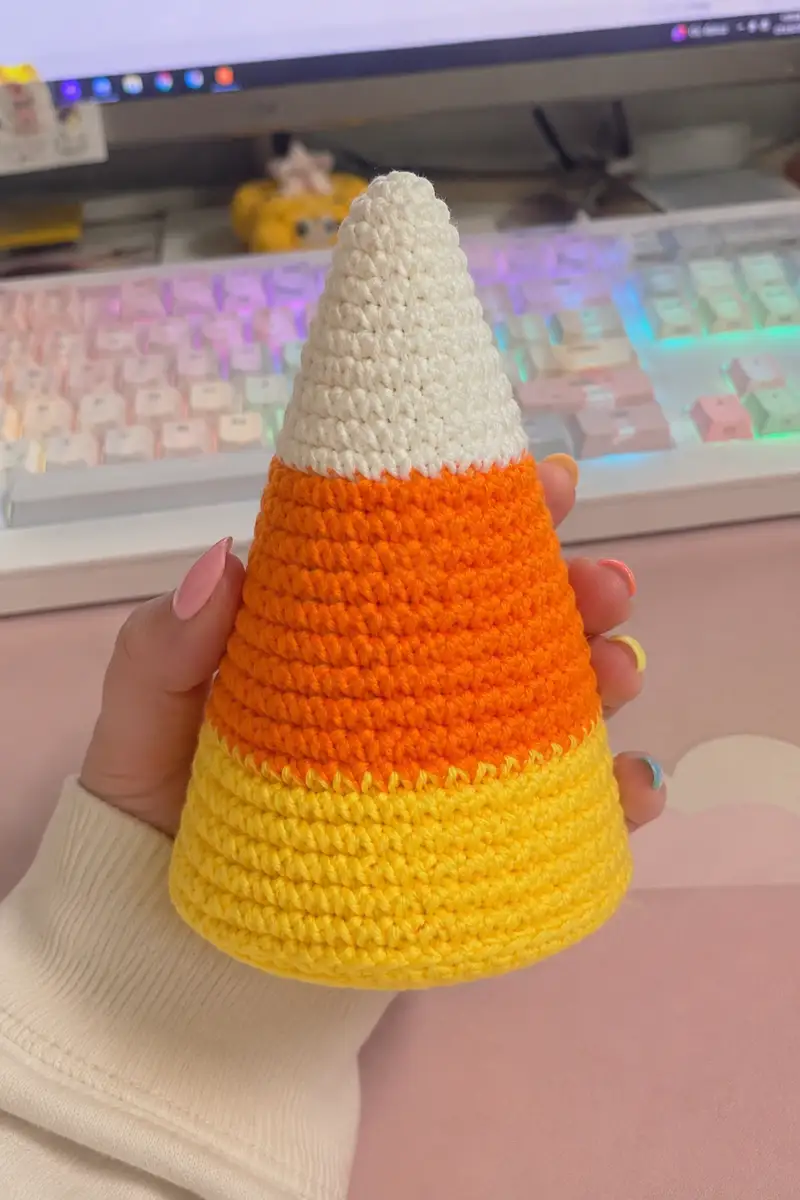
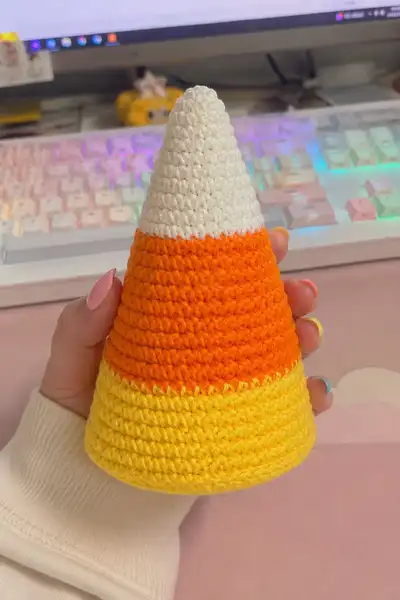
This cheerful candy corn cone is a playful, palm-sized amigurumi with smooth single-crochet rows and crisp color blocks of yellow, orange, and white. Worked top-down, the cone has a gently tapered shape and a soft matte finish perfect for seasonal decor, gifts, or a cute desk companion. The pattern uses continuous rounds for seamless stripes and clear instructions for even shaping and neat color changes.
Progress Tracker
0% Complete
— Head (White Tip) :
Round 1 :
6 sc in magic ring (6)
Round 3 :
(1 sc, 1 inc) x 6 (18)
Round 4 :
(2 sc, 1 inc) x 6 (24)
Round 5 :
(3 sc, 1 inc) x 6 (30)
Round 6 :
(4 sc, 1 inc) x 6 (36)
Round 7 :
(5 sc, 1 inc) x 6 (42)
Round 8 :
(6 sc, 1 inc) x 6 (48)
Round 9-25 :
1 sc in each st (48)
Info :
Work these rounds in continuous spiral without joining. Place stitch marker at the first stitch of Round 1 and move it up every round. The white tip is worked high to form a gentle taper; keep tension even. If you prefer a shorter tip, work fewer even rounds here before changing color.
Info :
Eye or face placement (optional): If you want to add a small embroidered face, plan it on the white section. Mark the desired position now using pins before stuffing. For safety eyes (not necessary for this design), place them between rounds 18-20 about 6-8 stitches apart. Remember safety eyes are not recommended for toys for very young children; embroidery is safest.
— Body (Orange Section and Transition) :
Info :
Change to Pumpkin Orange yarn at the end of the last white round. To create a clean color change, finish the last white stitch to the final yarn over, pull through with orange, and continue working in orange. Carry the unused white yarn inside if you like, or fasten off and weave in later.
Round 1 (Orange) :
1 sc in each st (48)
Round 2-10 :
1 sc in each st (48)
Info :
These even rounds build the orange band. Keep rounds snug but not overly tight—this yarn is slightly shinier in photos but a matte worsted yarn works beautifully. Check height visually as you go; you can add or reduce even rounds to make the stripe taller or shorter.
Round 11 :
(7 sc, 1 inc) x 6 (54)
Round 12-18 :
1 sc in each st (54)
Info :
We increased to gently widen the cone as it moves toward the yellow base. Make sure increases are evenly spaced (every 8th stitch in this round) and that you move your marker each round. If your gauge differs slightly, match increases so the cone remains symmetrical.
Round 19 :
(8 sc, 1 inc) x 6 (60)
Round 20-28 :
1 sc in each st (60)
Info :
Continue to monitor tension. Stuff the cone lightly now if you plan to finish the piece closed — it helps maintain shape when you later do the final decreases. Use small amounts of fiberfill and shape with your fingers so the cone remains tapered rather than lumpy.
Info :
If you prefer a more pronounced orange middle, add 2-4 additional even rounds here before the next increase. This will enlarge the orange band proportionally while maintaining overall shape.
— Transition to Yellow (Start of Base Band) :
Info :
Change to Lemon Yellow yarn at the end of the last orange round. To keep a neat stripe, finish the final orange stitch by pulling through with yellow. Carry the unused orange yarn along the inside or fasten off and weave later. The first yellow round will continue the same stitch count (60) so the stripe sits flush.
Round 1 (Yellow) :
1 sc in each st (60)
Round 2-9 :
1 sc in each st (60)
Info :
These rounds create the yellow band height. If you want the cone base to flare more, add an increase round after a few even rounds. The photo shows a slightly flared base; we will add gentle increases below to create that shape.
Round 10 :
(9 sc, 1 inc) x 6 (66)
Round 11-18 :
1 sc in each st (66)
Info :
These increases add subtle flare to the base while keeping the cone shape. When you begin stuffing more fully, do it gradually here so the widened section holds shape without bursting stitches.
Round 19 :
(10 sc, 1 inc) x 6 (72)
Round 20-34 :
1 sc in each st (72)
Info :
Work enough even rounds in yellow to match the desired base height — here we have given a large block of rounds to match the photographic reference where the yellow is the widest section. If you are aiming for a smaller candy corn, stop earlier or remove an increase round above.
Round 35 :
(10 sc, 1 dec) x 6 (66)
Round 36 :
1 sc in each st (66)
Info :
We begin the gentle closure to form the bottom end of the cone. This sequence of decreases is gradual so that the base remains rounded but can be closed neatly. Continue stuffing a little firmer than earlier — the base should be filled so the cone stands and keeps its shape.
Round 37 :
(9 sc, 1 dec) x 6 (60)
Round 38 :
1 sc in each st (60)
Round 39 :
(8 sc, 1 dec) x 6 (54)
Round 40 :
1 sc in each st (54)
Info :
Keep shaping symmetrical by ensuring the decreases are in the same relative places each round. If your cone seems to twist, check you did not accidentally skip or add a stitch — unravel back to the last correct round if necessary.
Round 41 :
(7 sc, 1 dec) x 6 (48)
Round 42 :
1 sc in each st (48)
Round 43 :
(6 sc, 1 dec) x 6 (42)
Round 44 :
1 sc in each st (42)
Round 45 :
(5 sc, 1 dec) x 6 (36)
Round 46 :
1 sc in each st (36)
Round 47 :
(4 sc, 1 dec) x 6 (30)
Info :
As you approach smaller stitch counts, start using smaller bits of fiberfill to avoid lumps. Use a pen or stuffing tool to press small tufts into the narrowing tip from the opening before final pulls and closure.
Round 48 :
1 sc in each st (30)
Round 49 :
(3 sc, 1 dec) x 6 (24)
Round 50 :
1 sc in each st (24)
Round 51 :
(2 sc, 1 dec) x 6 (18)
Round 52 :
1 sc in each st (18)
Round 53 :
(1 sc, 1 dec) x 6 (12)
Info :
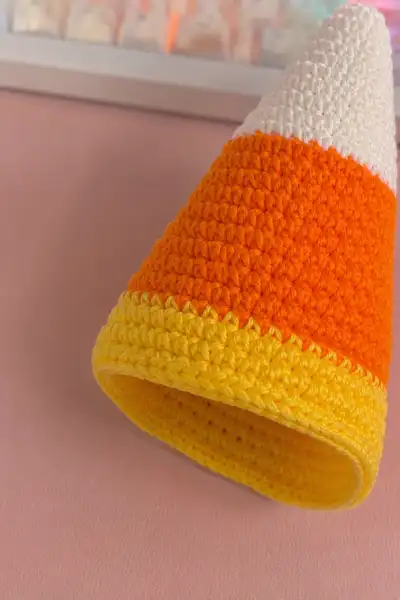
Fasten off leaving a long tail for sewing. Use your yarn needle to weave the tail through the remaining 6 sts and pull tight to close completely. Weave the tail through several stitches on the inside and trim. If you prefer a flat open base (a hollow cone), stop stuffing earlier and skip final decreases; instead finish with a neat round and finish off.
— Optional Base Insert (Rigid Base for Standing) :
Info :
If you want a firm flat base so the cone stands upright, cut a circle from thin cardboard or plastic to match the circumference and slip it into the base before final decreases. If you add an insert, close the last few rounds around it so it sits snugly and is concealed.
Round 1 (Base Insert Crochet Circle) :
Make a separate small circle to match base opening: 6 sc in magic ring (6)
Round 3 :
(1 sc, 1 inc) x 6 (18)
Round 4 :
(2 sc, 1 inc) x 6 (24)
Round 5 :
(3 sc, 1 inc) x 6 (30)
Round 6 :
1 sc in each st (30)
Info :
Slip the insert into the cone and continue a few rounds around the join if needed, then sew into place. The insert can be removed if you want to wash the cone later; consider covering hard edges with a felt disc glued on one side before insertion.
— Finishing :
Info :
Weave in all ends on the inside. Use a yarn needle to hide yarn tails through several stitches. If the color transition looks uneven, use a small whip stitch in matching yarn to tidy the seam. Lightly shape the cone with your hands and press it on a towel to remove loose fuzz from yarn.
Info :
Optional face: Embroider a small smile or two tiny eyes on the orange band using black embroidery floss or yarn. Use a removable marker to mark positions before stitching, and make small, tight stitches for durability.
This cute candy corn cone is the perfect quick project to brighten a shelf or gift bag. Each color band comes together with simple, rhythmic rounds that make the making relaxing and satisfying. You’ll enjoy how fast it works up and how charming it looks when finished — a sweet handmade accent for autumn decor or a playful desk friend. 🧶🎃 Keep a few on hand for festive displays or parcel toppers — they make instantly adorable gifts!