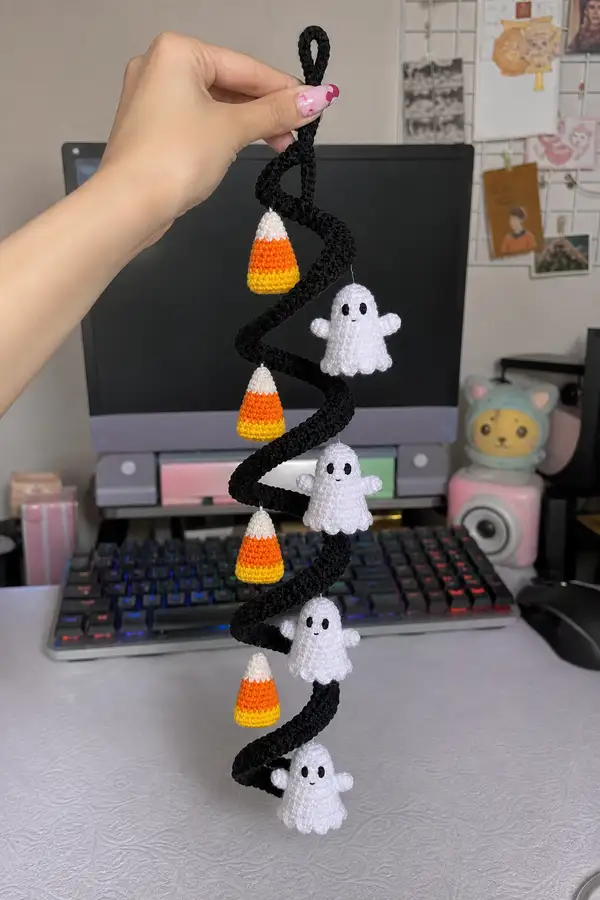
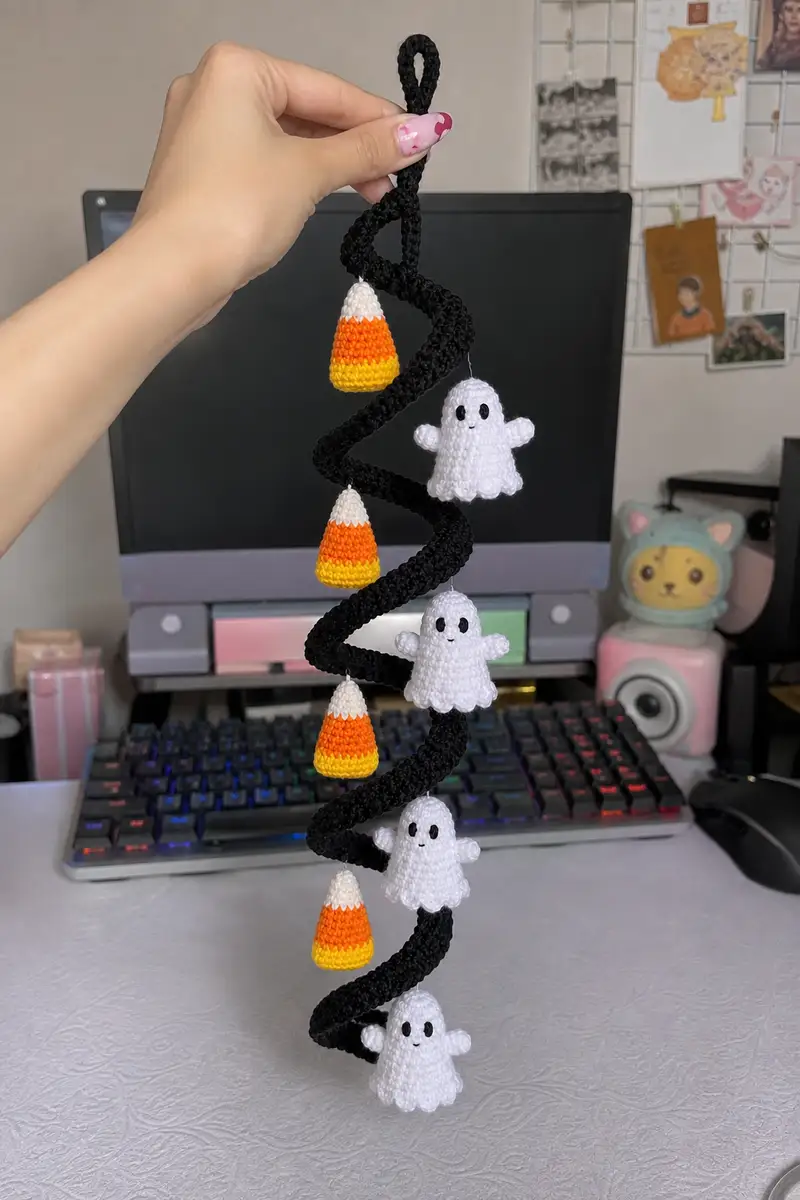
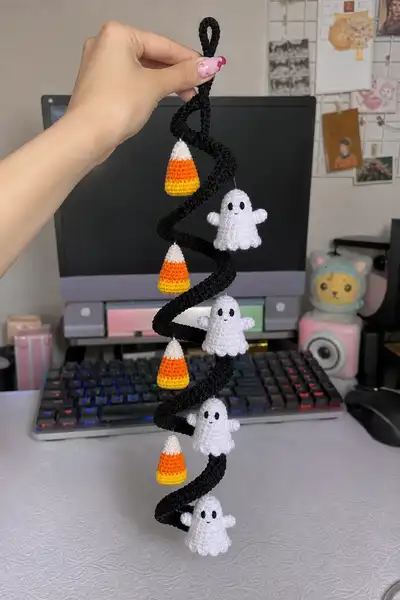
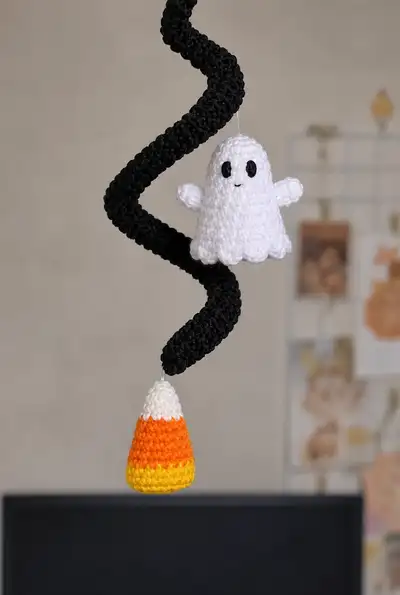
Create a spooky, spiral-hung Halloween garland featuring dangling white ghosts and bright candy-corn charms. This pattern builds a long black spiral tube that hides a flexible core and suspends multiple small amigurumi ghosts and candy corn pieces. Perfect for a doorway, mantel, or Halloween tree, the design uses simple amigurumi shapes, color changes, and clear assembly steps.
Progress Tracker
0% Complete
— Materials & Gauge :
Info :
Gauge is not critical for this decorative piece but consistent tension will produce a neat spiral. Using worsted weight yarn with a 3.5mm hook produces a spiral tube approximately 2cm in diameter and a finished hanging length near 30-35cm when coiled tightly. Adjust yarn weight and number of rounds to change length and thickness.
— Spiral Tube (core) :
Round 1 :
6 sc in magic ring (6)
Round 3 :
(1 sc, 1 inc) x 6 (18)
Round 4 :
(2 sc, 1 inc) x 6 (24)
Round 5 :
(3 sc, 1 inc) x 6 (30)
Info :
The tube circumference is set to 30 stitches. If you prefer a thicker spiral, increase to 36 or 42 stitches using further increase rounds. Work in continuous rounds (do not join) to create an even tube.
Round 6-15 :
1 sc in each st around (30)
Info :
Begin working many even rounds now to build the length of the tube. Each round adds approximately 2-3mm of length; plan roughly 110-130 even rounds for a 30-35cm coiled garland depending on desired spacing between charms.
Round 16-35 :
1 sc in each st around (30)
Info :
If you will insert a wire core, leave a long tail at the top opening so you can slide the wire in before final closing. Do not fasten off yet.
Round 36-65 :
1 sc in each st around (30)
Info :
Periodically hold the growing tube up and wrap it loosely around your hand to preview how the spiral will form. The snugness of the final coil depends on how closely you wrap the tube around the wire core.
Round 66-95 :
1 sc in each st around (30)
Info :
At approximately round 70-80, plan the placement of the first (top-most) charm by measuring down from the top loop area; mark the rounds where charms will attach. Typical spacing in the pictured example is roughly 18-22 rounds between charms.
Round 96-125 :
1 sc in each st around (30)
Info :
Continue until the tube reaches the desired full length. The pictured spiral contains approximately 120 even rounds after the increase section; adjust as necessary. Leave a gap of about 6-10 rounds at each end for forming the top hanging loop and finishing the bottom tip.
Round 126 :
(3 sc, 1 dec) x 6 (24)
Round 127 :
(2 sc, 1 dec) x 6 (18)
Info :
Begin tapering the bottom end of the spiral so it has a neat finish and won’t have a bulky bulge. Keep stuffing light; the tube is normally only lightly stuffed so it can flex around the wire.
Round 128 :
(1 sc, 1 dec) x 6 (12)
Info :
Do not finish off here. Leave a long tail and do not fully close if you plan to insert wire. Instead slip the wire core into the tube: use a thick needle or a safety pin attached to the wire to pull it through the tube interior from top to bottom. Position the wire so it extends slightly beyond the top for forming a hanging loop and trim excess at the bottom, folding and taping the end to avoid punctures.
Round 130 :
Close remaining opening with whip stitch after inserting wire and light stuffing. Fasten off and weave in ends invisibly.
Info :
Wrap the spiral by holding the wire core into a loose spiral shape and positioning the tube around the wire to follow the coil. You can temporarily secure the tube to the wire with a few loose stitches or thread to keep it in place while attaching charms.
— Hanging Loop (Top) :
Round 1 :
At the top tail of the spiral, fold the excess wire up and wrap yarn around the wire area to form a small tube for a loop. Ch 18 (or desired length) or make a small crocheted chain tube: 18 sc working in back loops to create a flat loop.
Round 2 :
Join ends of chain by slip stitching through both layers to form a small hanging tube, or fold and sew the crocheted chain back to the top of the spiral. Fasten off and weave in ends.
Info :
Cover the wire where it juts out with several wraps of yarn and stitch securely. This prevents the wire from poking through and creates a finished loop ready for hanging.
— Ghost (Make 4) :
Info :
Each ghost is worked as a small dome body with a scalloped skirt and two stubby arms. Work each ghost from the top down, using white worsted yarn. The example ghost uses a circumference of 36-42 stitches to produce a sweet, compact charm about 3.5-4.5cm tall. Below is a 30-round pattern producing a 3.5-4cm ghost; adjust rounds if you prefer larger or smaller ghosts.
Round 1 :
6 sc in magic ring (6)
Round 3 :
(1 sc, 1 inc) x 6 (18)
Round 4 :
(2 sc, 1 inc) x 6 (24)
Round 5 :
(3 sc, 1 inc) x 6 (30)
Round 6 :
(4 sc, 1 inc) x 6 (36)
Info :
At this point the ghost head/body circumference is 36 sts. For a slightly wider ghost increase one more round to 42 using (5 sc, 1 inc) x 6. Place stitch marker at the first stitch of each round and keep consistent tension.
Round 7-12 :
1 sc in each st around (36)
Info :
Rounds 7-12 build the dome. After Round 11 you can position safety eyes between rounds 9-11 about 6-8 stitches apart (or embroider eyes later). If using safety eyes, insert and fasten backs before stuffing.
Round 13 :
(4 sc, 1 dec) x 6 (30)
Round 14 :
(3 sc, 1 dec) x 6 (24)
Info :
Begin stuffing the ghost gently. Use small amounts of fiberfill and push into the dome evenly so the head keeps a round shape. Stuff to medium firmness—not too firm, to preserve a soft look.
Round 15 :
(2 sc, 1 dec) x 6 (18)
Round 16 :
(1 sc, 1 dec) x 6 (12)
Round 17 :
1 sc in each st around (12)
Info :
Rounds 17-18 form a short neck area before creating the scalloped skirt. Stuff a little more if necessary. These rounds also provide the anchor to sew in short arms.
Round 18 :
(1 sc, 1 inc) x 6 (18)
Round 19 :
1 sc in each st around (18)
Round 20 :
(2 sc, 1 inc) x 6 (24)
Info :
Now we will begin the skirt shaping. Scallops are created on the next round using small shells. Keep your last even round (round 19 or 20) as the foundation for shell placement; space shells evenly.
Round 21 (Skirt/First Scallop Row) :
*sc in next st, (ch 1, 3 dc, ch 1) in next st, sc in next st; rep from * around – work 6 small scallops (24)
Info :
If working shells is unfamiliar, think of each scallop as sc, shell, sc in a 3-st grouping. The total stitch count remains 24 because shells are worked into single base stitches; keep tension loose to allow scallops to sit nicely.
Round 22 :
1 sc in each st around, working into shells where needed to anchor (24)
Round 23 (Scallop Emphasis) :
*sc in next st, (ch 1, 3 dc, ch 1) in next st, sc in next st; rep from * around (24)
Info :
Repeat the scallop round again if you want a fuller ruffled hem like the sample. After Round 23 fasten off leaving a long tail for sewing if needed. Weave in tail once ghost is attached to spiral.
Round 24 (Arms - Make 2 for each ghost) :
Arms are worked separately: 6 sc in magic ring (6)
Round 26 :
1 sc in each st around (12)
Round 27 :
(1 sc, 1 dec) x 4 (8)
Round 28 :
1 sc in each st around (8)
Info :
Stuff arms very lightly and leave a yarn tail long enough to sew the arms onto the ghost sides at approximately the same height (usually around ghost rounds 14-16). Sew firmly and hide ends by weaving through the body casing.
Round 29 (Face Embroidery) :
Embroider eyes and mouth: Use black embroidery thread or black yarn to stitch two small oval eyes approximately 6 stitches apart within rounds 9-11 and a small curved smile beneath.
Round 30 (Finish) :
Make hanging loop: with white yarn sew an invisible loop at the top center of the ghost by pulling a short length of clear nylon thread through the top stitch and forming a loop above the head. Secure and knot inside then hide ends. Weave in any remaining tails and trim.
Info :
Repeat the ghost pattern to make 4 ghosts total. Slight variations in stuffing will make each ghost uniquely expressive; maintain similar sizes for balanced hanging.
— Candy Corn Charm (Make 4) :
Info :
Each candy corn is worked bottom-up in three color bands: yellow, orange, and white. Work each band as continuous rounds and fasten off between color changes, weaving in tails to keep the bands clean. The candy corn is a small cone about 2.5-3cm tall in the pictured example.
Round 1 :
6 sc in magic ring with yellow yarn (6)
Round 3 :
(1 sc, 1 inc) x 6 (18)
Round 4 :
(2 sc, 1 inc) x 6 (24)
Round 5 :
1 sc in each st around (24)
Info :
Complete the yellow bottom band with rounds 1-5. Fasten off and change to orange yarn at the end of Round 5. Secure and weave tails to the inside of the cone for a neat seam.
Round 6 (Orange band start) :
Join orange yarn and 1 sc in each st around (24)
Round 7 :
1 sc in each st around (24)
Round 8 :
1 sc in each st around (24)
Round 9 :
(3 sc, 1 dec) x 6 (18)
Info :
Transition to white yarn after Round 9 for the tip. Use a small tail and weave carefully to avoid lumps between colors. The decrease here begins the taper toward the candy-corn tip.
Round 10 (White band start) :
Join white yarn and 1 sc in each st around (18)
Round 11 :
(2 sc, 1 dec) x 6 (12)
Round 12 :
(1 sc, 1 dec) x 4 (8)
Round 14 :
Fasten off, leaving a long tail for sewing. Stuff lightly before final closes, using a tiny bit of fiberfill so the candy corn keeps a slightly plump cone shape (4)
Info :
Make 4 candy corns. Use bright shades of yellow and orange for high contrast and a crisp white tip. For a cleaner color transition, use the invisible join technique or fasten off and sew colors together on the inside.
— Additional Finishing Details :
Info :
For both ghosts and candy corn charms attach a small loop of clear nylon thread or a short length of yarn at the top of each piece for hanging. The loop should be long enough to feed through the spiral tube or tie around the tube exterior, typically 2-3cm per charm.
Info :
Alternatively, you can sew each charm directly onto the spiral tube using a yarn needle and matching yarn. Sew through a few interior stitches of the charm and through two or three stitches of the spiral tube so charms hang securely without wobbling.
Info :
When using a wire core for the spiral, position it so the charms hang in the swivel valleys of the coil—this balances the garland visually. Pin each charm in place before sewing and check overall balance and spacing.
— Assembly & Placement :
Info :
Typical spacing for the pictured garland: starting 3-4cm below the top loop, alternate candy corn and ghost at roughly 18-22 rounds (height units) apart. The example used 4 candy corns and 4 ghosts arranged alternatingly down the spiral.
Info :
Orientation: Candy corn cones point downward with tip up toward the spiral (so tip points upward into the coil valley) and ghosts face outward. Turn each charm slightly to create a dynamic look.
Info :
Secure charms tightly but invisibly by stitching inside the charm top and into the spiral tube. If you prefer removable charms for washing, use small jump rings or tie with removable nylon loops.
Info :
Final touches: Trim all ends, round off any rough wire bits and add a few scattered decorative stitches or glitter glue (optional) to candy corn for a shiny finish.
This playful spiral garland transforms simple amigurumi shapes into a festive hanging display—perfect for Halloween decorating! Each scalloped ghost and colorful candy corn adds handcrafted charm and personality. Follow the clear, step-by-step construction to assemble a balanced spiral that’s light, durable, and delightfully spooky. 🧶👻 Whether hung by a doorway, on a mantel, or as part of a seasonal wreath, this garland is sure to make you smile. Happy stitching and enjoy making each tiny character come to life! 🎃