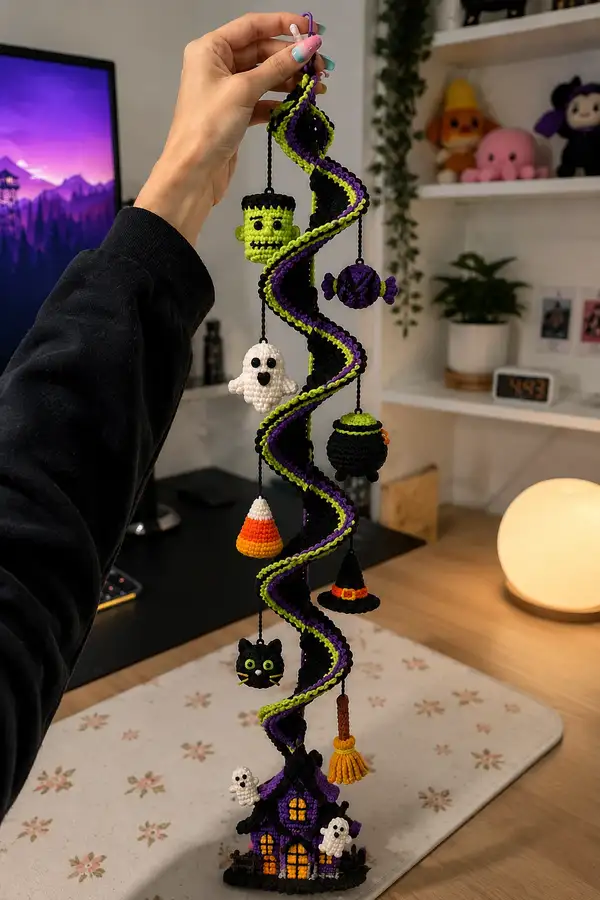
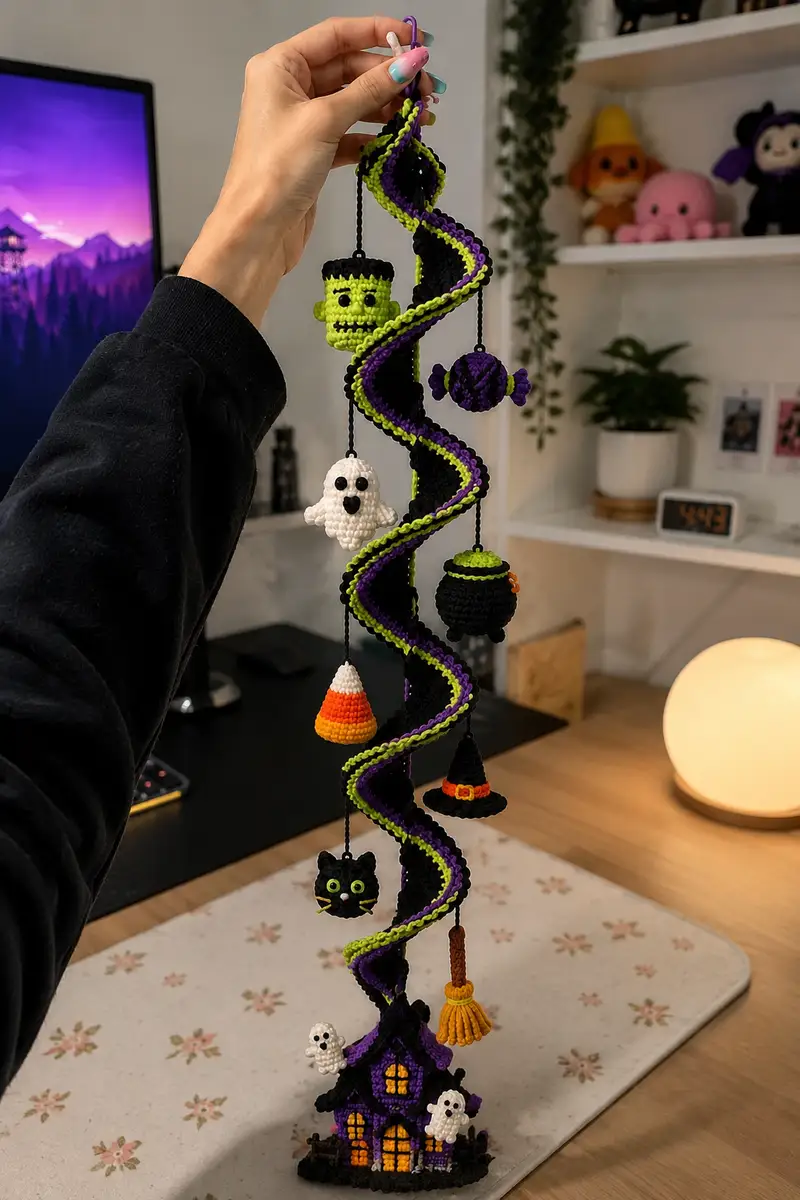
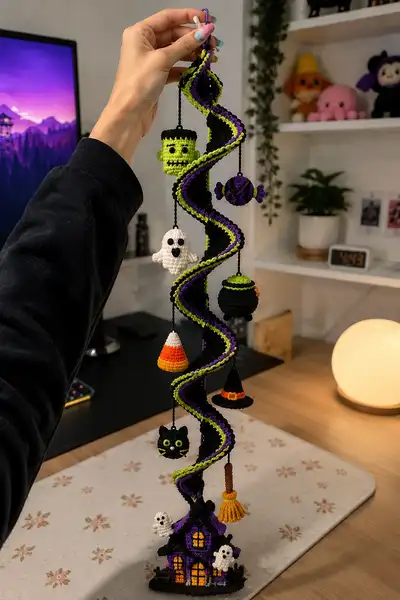
Create a whimsical, hanging Halloween spiral mobile featuring a twisted spiral column trimmed in lime and purple, a charming haunted house base and a string of tiny amigurumi charms — Frankenstein, ghosts, candy corn, witch hat, broom, black cat, cauldron and more. This pattern guides you through crocheting each detailed motif and the long spiral column, with clear shaping, stuffing and assembly tips. Perfect for decorating a doorway, window or as a spooky centerpiece.
Progress Tracker
0% Complete
— Spiral Column (Main structural piece) :
Info :
This long spiral is worked as a hollow tube in continuous rounds using black worsted yarn to form the body. We will create decorative ridges in chartreuse (lime) and purple along the edges. Insert a stiff wire or pipe cleaner along the inside after making the tube to shape the spiral. The tube should be approx 70-90 cm long before shaping depending on how tightly you twist it; you can adjust the length accordingly. Work tightly (3.5mm hook) so stuffing and wire are hidden.
Round 3 :
(1 sc, inc) x 6 (18)
Round 4 :
(2 sc, inc) x 6 (24)
Round 5 :
(3 sc, inc) x 6 (30)
Info :
These increases form a small tube that will become the spiral's core circumference. Continue in the round until reaching a stable circumference. If you prefer a wider spiral, increase to 36 sts by doing (4 sc, inc) x 6 on Round 6.
Round 6 :
1 sc in each st (30)
Round 7 :
1 sc in each st (30)
Round 8 :
1 sc in each st (30)
Round 9 :
1 sc in each st (30)
Round 10 :
1 sc in each st (30)
Info :
At this point the tube is established. Continue making even rounds to achieve length; we will add decorative ridges after the main tube is complete. Work in spiral to avoid visible seam if you prefer (do not join rounds, just place a stitch marker at start).
Round 11-70 :
1 sc in each st (30) — continue making even rounds until tube measures approximately 70-90 cm or desired length (this is usually 60 rounds depending on tension)
Info :
Stuff very lightly only near both ends if you want the spiral to hold an arched shape; the central length should remain empty to accept wire. Leave a 25-30 cm tail at one end of the tube to attach to the haunted house base. Fasten off leaving long tail for assembly.
Round 71 :
Fasten off and weave in ends temporarily; you will insert wire and then add decorative trim along the two edges of the tube to create the spiral's ruffled edge.
Info :
Edge decoration: We will add two narrow crocheted ridges that sit along one edge each side of the tube. Use purple and chartreuse for contrast. Use a hook 0.5 mm smaller to get crisp ridges. Attach yarn at one end of tube and sc evenly along the edge through both loops catching the side loops of the tube.
Edge Purple Round 1 :
Join purple yarn at tube edge, sc evenly around the edge placing 1 sc for every 2 tube sts to create a decorative trim (approx 15 sc for half the circumference edge). Join with sl st and FO (15)
Edge Purple Round 2 :
Join new color round: (1 sc, 1 inc) around to create a small ruffle (approx 22)
Edge Purple Round 3 :
1 sc in each st (22)
Info :
Repeat for the opposite edge using chartreuse: join yarn and work similar edging. This creates the dual-color decorative spiraling edge when the tube is twisted into its helical shape.
Edge Chartreuse Round 1 :
Join chartreuse at opposite edge, sc evenly around (approx 15) (15)
Edge Chartreuse Round 2 :
(1 sc, 1 inc) x around (approx 22)
Edge Chartreuse Round 3 :
1 sc in each st (22)
Info :
After adding both trims, insert a length of 18-22 gauge wire or pipe cleaner inside the tube. Center and secure the wire by stitching through the end rounds around as needed. Shape the tube into a spiral by twisting and bending the wire; anchor the bottom end inside the haunted house base later during assembly.
— Frankenstein Head (Make 1) :
Info :
Frankenstein head is worked as a small cylinder with a flat top and small ears. Use chartreuse or lime green yarn for face, black for hair and features. Position eyes between rounds 8-9.
Round 3 :
(1 sc, inc) x 6 (18)
Round 4 :
(2 sc, inc) x 6 (24)
Round 5 :
(3 sc, inc) x 6 (30)
Round 6 :
1 sc in each st (30)
Round 7 :
1 sc in each st (30)
Info :
Place two 6mm safety eyes between rounds 8 and 9 approx 6-8 sts apart. If embroidering eyes, mark positions with pins before adding stitches. Add small nose as an embroidered horizontal line of 3 sc-equivalent stitches around round 9 center.
Round 8 :
1 sc in each st (30)
Round 9 :
1 sc in each st (30)
Round 10 :
1 sc in each st (30)
Round 11 :
(4 sc, dec) x 5 (25)
Round 12 :
(3 sc, dec) x 5 (20)
Info :
Begin stuffing head firmly to hold shape before further decreases. Use small bits of stuffing pushed into forehead and cheeks for a plump look. Leave top open to add hair cap.
Round 13 :
(2 sc, dec) x 5 (15)
Round 14 :
(1 sc, dec) x 5 (10)
Info :
Fasten off leaving a long tail and close magic ring using yarn needle. Sew the top closed, weave in ends. Add small flat ear discs: use chartreuse, make a 6 sc magic ring, FO and sew to sides around rounds 7-9.
Hair Cap (Black) Round 1 :
Join black at top of head where hair should start. Work 6 sc in mr on top center (6)
Hair Cap Round 2 :
6 inc (12)
Hair Cap Round 3 :
(1 sc, inc) x 6 (18)
Hair Cap Round 4 :
1 sc in each st (18)
Info :
Create straight fringe by surface slip stitching short black stitches across the brow line or embroider a rectangular hairline in black using a backstitch for the Frankenstein look. Add two small bolt studs on each side using gray or metallic small beads and sew in place.
— Medium Ghost (Make 1) :
Info :
Classic round-tuft ghost with scalloped bottom. Use white yarn and place eyes on rounds 6-7. Stuff lightly and close.
Round 3 :
(1 sc, inc) x 6 (18)
Round 4 :
(2 sc, inc) x 6 (24)
Round 5 :
1 sc in each st (24)
Round 6 :
1 sc in each st (24)
Info :
Place two 5-6mm black safety eyes between rounds 5-6 approx 6 sts apart, or embroider eyes later. Begin very light stuffing at this stage to preserve hollow look.
Round 7 :
1 sc in each st (24)
Round 8 :
(3 sc, dec) x 6 (18)
Round 9 :
1 sc in each st (18)
Round 10 :
Now create scalloped edge using (sc, hdc, dc, hdc, sc) in each stitch around for ruffle (approx 18 scallops)
Info :
Fasten off leaving long tail for hanging cord. Sew through the top center and attach a short cord or jump ring for hanging. Add mouth or eyebrows with black embroidery if desired.
— Small Ghost (Make 2) :
Round 3 :
1 sc in each st (12)
Round 4 :
1 sc in each st (12)
Round 5 :
Scalloped edge around: (sc, hdc, dc, hdc, sc) x 4 (approx 20)
Info :
Fasten off, embroider eyes (two French knots or small stitches) and attach to house base as embellishments using short tails. These are tiny accents and should be stuffed minimally or not at all.
— Cauldron (Make 1) :
Info :
Cauldron is a round bulb with a flat top rim. Use black yarn and a small amount of lime/green for bubbling top. Work from bottom up.
Round 3 :
(1 sc, inc) x 6 (18)
Round 4 :
(2 sc, inc) x 6 (24)
Round 5-8 :
1 sc in each st (24)
Round 9 :
(2 sc, dec) x 6 (18)
Round 10 :
(1 sc, dec) x 6 (12)
Round 11 :
6 dec (6) - leave small opening for stuffing then re-open top area to create rim
Info :
Turn piece inside out (or leave as is) and stitch a round of black around the top to form rim: join at top and sc evenly around the top opening, then switch to chartreuse and make 2 rounds of (sc, inc) to create bubbling foam effect. Add embroidered sparkles or small pom-poms for bubbles.
Rim Round 1 :
Join black at top opening rim and sc evenly around to make flat rim (approx 18)
Rim Round 2 (Chartreuse) :
Join chartreuse: (1 sc, inc) x around to create bubbly rim (approx 27)
Info :
Attach a short cord to the top center for hanging. Sew cauldron to hold its shape and add small orange stitched 'glow' at the base if desired.
— Candy Ball (Wrapped Candy) (Make 1) :
Info :
Small wrapped candy motif with spherical center and 'twists' worked by crocheting short flaps to simulate wrapper ends. Use purple and black or any two contrasting colors.
Round 3 :
(1 sc, inc) x 6 (18)
Round 4 :
1 sc in each st (18)
Round 5 :
(1 sc, dec) x 6 (12)
Round 6 :
6 dec (6) - FO leaving tail for sewing; stuff lightly (6)
Wrapper Twists (Make 2) :
Ch 6, join to form ring, work 6 sc around, FO; gather ends and sew to opposite sides of candy sphere to simulate twisted ends. Attach hanging cord at top.
— Candy Corn (Make 1) :
Info :
Classic triangular candy corn worked in rounds with color changes. Work with white at top, orange middle, yellow base. Carry yarn inside carefully or weave ends later.
Round 1 :
6 sc in mr (6) - white section
Round 2 :
6 inc (12) - white
Round 3 :
1 sc in each st (12) - white
Info :
Switch to orange for the middle band. Change color by completing last stitch of white with orange to avoid gaps. Work in continuous rounds for a slightly conical shape.
Round 4 :
Change to orange. (1 sc, inc) x 4 (16) - orange
Round 5 :
1 sc in each st (16) - orange
Round 6 :
Change to yellow: (2 sc, inc) x 4 (20) - yellow
Round 7 :
1 sc in each st (20) - yellow
Round 8 :
(3 sc, dec) x 4 (16) - yellow
Round 9 :
(2 sc, dec) x 4 (12) - yellow
Round 10 :
6 dec (6) - FO, stuff lightly (6)
Info :
Weave in ends and attach hanger. Adjust color band widths to match desired candy corn proportions; the counts above give a slightly tapered candy corn approx 3-4 cm tall at worsted weight.
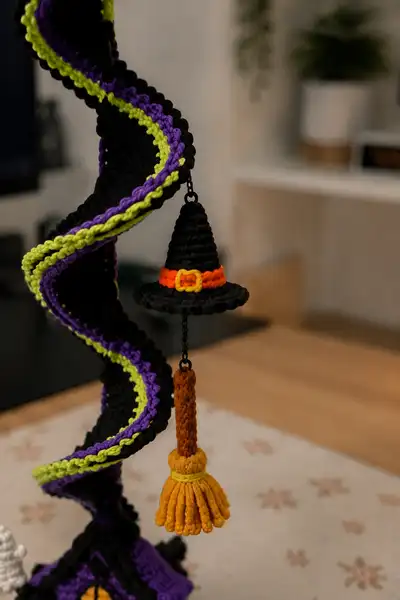
— Witch Hat (Make 1) :
Info :
Classic pointed hat with wide brim, black main color, orange band and small yellow buckle. Work top down and create brim by increasing; use BLO on the brim for a crisp edge if desired.
Hat Round 1 :
6 sc in mr (6)
Round 3 :
(1 sc, inc) x 6 (18)
Round 4 :
(2 sc, inc) x 6 (24)
Round 5-9 :
1 sc in each st (24) — work 5 rounds to form cone height
Info :
Now form brim: we will significantly increase to create a flat brim. Place marker where brim begins.
Brim Round 1 :
(3 sc, inc) x 6 (30)
Brim Round 2 :
(4 sc, inc) x 6 (36)
Brim Round 3 :
1 sc in each st BLO (36) - this gives a slight rolled-brim effect
Info :
Switch to orange for hat band: join and sc evenly around hat brim base (approx 24 sts across the crown join area). Embroider or make a tiny yellow buckle by crocheting a 6 ch loop and stitching it to the front.
Hat Band :
Join orange, sc around base of cone portion for one round (24), FO; create small buckle using yellow yarn: ch 6, join, sc 6, FO, sew to band.
Info :
Attach a short cord to the hat top for hanging. If you want brim stiffer, block with fabric stiffener or insert a thin cardboard disk inside brim before final sewing.
— Broom (Make 1) :
Info :
Broom is constructed from a brown handle and multiple yellow tassels looped into a ring for the broom head. The handle is a tight tube and tassels are long loops knotted into a ring.
Handle Round 1 :
6 sc in mr (6)
Handle Round 2-12 :
1 sc in each st (6) — work until handle is about 6-8 cm long depending on scale
Info :
For broom head: cut 12-18 strands of yellow yarn approx 6 cm long, fold each in half and attach to a small ring or directly into stitches to form tassels. Trim ends to even and secure bundle with a wrapped yarn band in orange or yellow.
Broom Assembly :
Fold tassels around base ring or sew into more than 6 stitches around bottom of handle, wrapping with yellow yarn to secure. Add a small orange tie detail crocheted as ch 8 and wrapped around to create the tie band.
— Black Cat Head (Make 1) :
Info :
Small cat head with little triangular ears and embroidered whiskers. Use black yarn; eyes are lime green small safety eyes or embroidered. Place eyes between rounds 7-8.
Round 3 :
(1 sc, inc) x 6 (18)
Round 4 :
(2 sc, inc) x 6 (24)
Round 5-8 :
1 sc in each st (24)
Info :
Place two small lime safety eyes between rounds 7-8 approx 5 sts apart. Embroider nose with small triangle of pink and whiskers with yellow or white thread using long stitches from muzzle.
Round 9 :
(3 sc, dec) x 6 (18)
Round 10 :
(2 sc, dec) x 6 (12)
Round 11 :
6 dec (6) - FO, stuff lightly (6)
Ear (Make 2) :
Ch 2, 3 sc in second ch from hook, FO (3). Fold ear flat and sew to head at rounds 3-4 spaced evenly. Create slight inner ear with a single stitch of light color if desired.
— Haunted House Base :
Info :
The haunted house is worked as a flat base rectangle that is built up into walls and roof. Work mostly in rounds; windows are created with surface slip stitch or color change panels. The base will anchor the spiral bottom and support the mobile. Use black as base, purple for roof, orange/yellow windows.
Base Round 1 :
Chain 30, join to work in rounds to make a flat oval foundation. You can also make a magic oval start: ch 12, work 14 sc back along chain, 6 sc in last chain, continue along other side with 14 sc, 6 sc in first chain to meet (total 40) - this creates a stable base shape (40)
Base Round 2 :
Sc evenly around increasing at both ends by 6 sts each round as necessary to maintain oval shape (approx 46)
Base Round 3-5 :
1 sc in each st (46)
Info :
Now build walls by crocheting up from the base. We will create 12-14 rounds of walls and then build roof elements separately. Work walls in black with small color panels for windows using surface slip stitch or intarsia-like attachment.
Wall Round 1 :
Join black yarn to foundation edge, 1 sc in each st working up (46)
Wall Round 2-12 :
1 sc in each st (46) — work 11 more rounds to create wall height (total walls 12 rounds high)
Info :
Create window panels: for each window, either change color to orange/yellow for 3-4 sts tall across two or three rounds to mimic glowing windows, or embroider yellow rectangles afterwards. Place windows spaced evenly across the front wall; typical window width is 6-8 sts depending on scale.
Window Panel (Example) :
On Wall Round 5-6, change to orange for a 3 sts by 2 rounds panel: sc in orange for 3 sts, change back to black. Repeat for each window. After walls are complete, embroider window panes with black to divide into 4 panes.
Info :
Roof construction: work two roof panels in purple, each as a triangle cap. Attach along top perimeter of walls and add scalloped edges to simulate shingles. Roof peak can be created by decreasing along a center line to produce triangular shape.
Roof Panel 1 Round 1 :
Make a flat triangle: ch 18, sc across decreasing 1 sc at the end of each row to shape triangle until 6 rows remain. Alternatively, make a curved roof by crocheting in the round with increases forming a cone then flattening.
Roof Panel 1 Round 2-12 :
Work shaping until roof peak is correct for house scale. Join panels along peak and sew to the top edge of the wall rounds. Add scalloped edging with black by crocheting (sc, hdc, dc, hdc, sc) along eaves for decorative finish.
Info :
Attach tiny ghosts (small ghosts made above) by sewing them to the walls and roof as shown in the photos; attach the spiral tube to the center of the roof or base by sewing the tube bottom tail through multiple stitches, anchoring to a small piece of cardboard inside the house for support if desired.
Door and Details :
Use orange and yellow to crochet a small doorway rectangle: ch 6, sc 5 rows, FO and sew to front. Embroider panes and window frames in black for contrast. Add small ground details like gravestones by crocheting small 6 sc oval shapes and sewing them to the base edge.
Final House Assembly :
Sew roof panels securely, add tiny ghost accents and leaves, and block house base lightly so it sits flat. Reinforce where the spiral tube attaches with extra sewing stitches and glue if necessary. If using wire core, ensure wire is fully enclosed to prevent poking through.
— Small Hanging Elements Summary (Assembly ready) :
Info :
Each motif made above should have a small loop or jump ring sewn into its top center for hanging. Use either jewelry chain, thin cord, or crocheted ch cords to suspend motifs at varying heights along the spiral. Suggested lengths: Frankenstein 7-9 cm, Ghost 9-12 cm, Cauldron 8-10 cm, Candy 7 cm, Candy Corn 7 cm, Hat 9 cm, Cat 9 cm, Broom 10 cm. Arrange them alternately to create visual balance.
Info :
Use pliers to open jump rings and attach small motifs to short lengths of chain or cord. Knot cords securely and hide knots inside the top of each amigurumi motif. Use a dab of fabric glue for extra security if the mobile will hang where children can reach it.
Finishing Touches :
Weave in all ends, trim stray fibers, and slightly shape each motif with fingers. Optionally add a touch of blush with pastel on the cheeks of ghosts or cat for character. Lightly steam block the spiral if needed to set shape, but be careful with synthetic yarns.
You've just made a show-stopping Halloween spiral mobile full of personality and charm! The twisting column, bright lime and purple trims, and the tiny amigurumi charms combine into a dramatic seasonal display that will delight everyone who sees it. I love how each small motif tells a story — from the spooky haunted house base to the playful black cat and candy corn. Hang it in a window or doorway and enjoy the whimsical movement and handcrafted detail. 🧶🎃👻