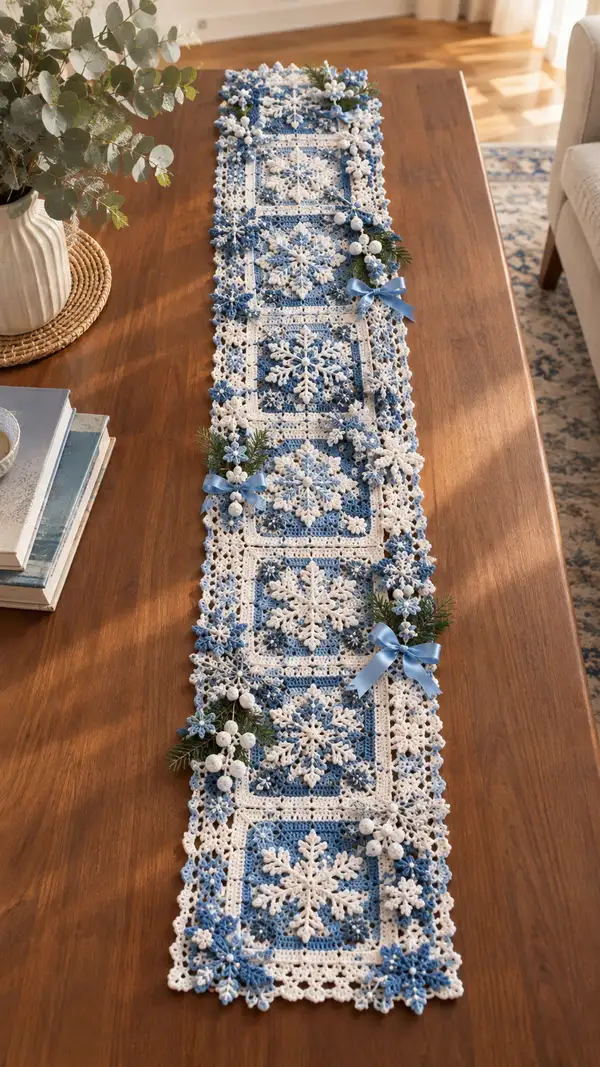
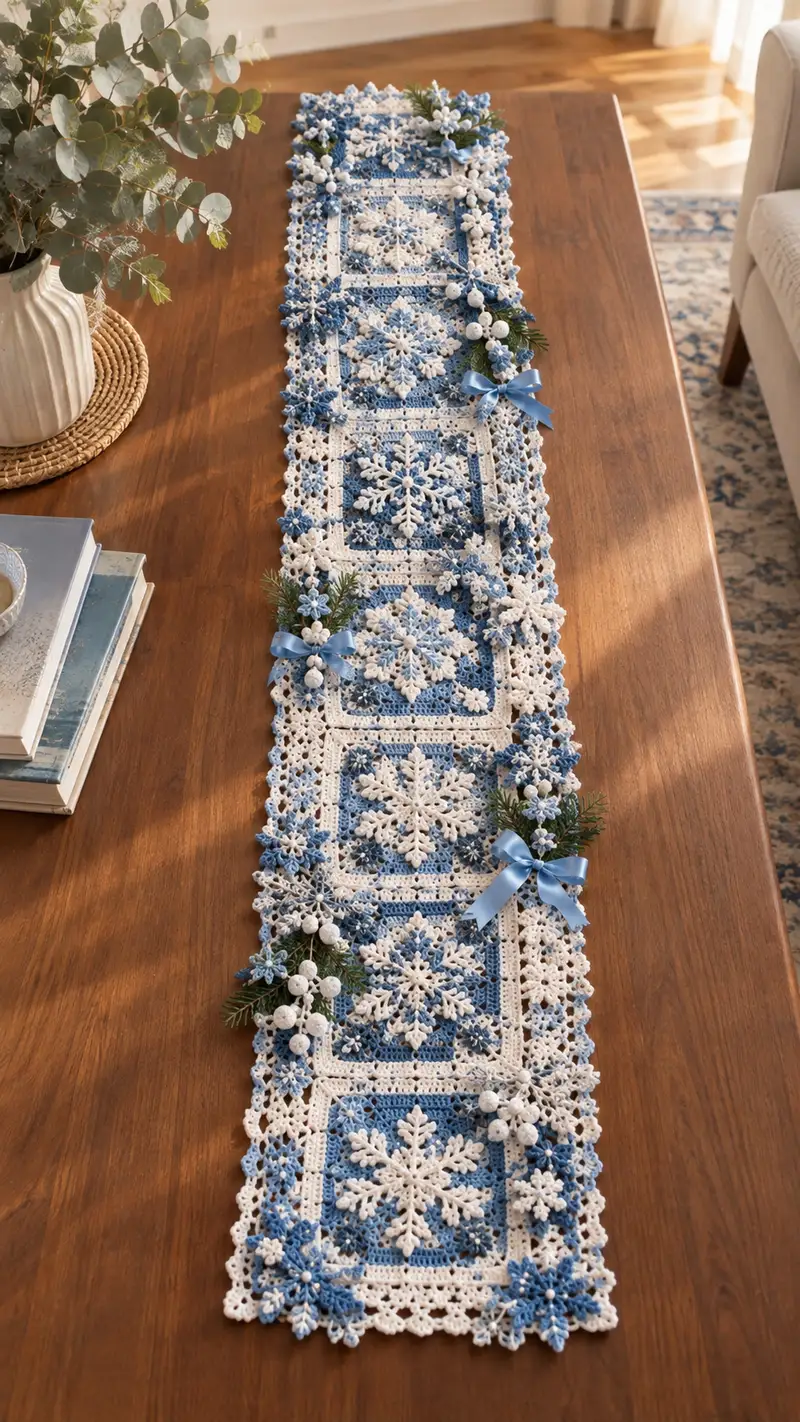
Create a delicate, winter-inspired table runner made from stacked lace squares with layered snowflake appliques and elegant scalloped edging. This pattern uses fine cotton thread in icy blue and crisp white to build detailed squares, corner blossoms, and tiny star accents. The finished runner is lightweight, delicate, and beautiful for holiday or winter decor. Includes instructions for motifs, join-as-you-go assembly, edging, and decorative bow/berry clusters.
Progress Tracker
0% Complete
— Main Square Motif (make multiple) :
Round 1 :
With color B (icy blue) make a loop and ch4, sl st to form ring. Ch3 (counts as dc), (2 dc, ch2, 3 dc) into ring to form first corner. Repeat (3 dc, ch2, 3 dc) into ring three more times. Join with sl st to top of ch3. (12 dc, 4 ch-2 corner sps)
Round 2 :
Sl st into next two dc and into corner ch-2 sp. Ch3, (2 dc, ch2, 3 dc) in same ch-2 sp, *ch1, skip next 3 dc, (3 dc, ch2, 3 dc) in next ch-2 sp* repeat from * 2 times, ch1, join with sl st to top ch3. (12 dc groups plus ch1 sps)
Round 3 :
Sl st into next two dc and into corner. Ch3, 2 dc in same corner, ch1, *(3 dc, ch1) in each ch1 sp on side* across (3 dc groups separated by ch1), in each corner work (3 dc, ch2, 3 dc). Join. (48 dc total; 4 corner ch-2 spaces)
Round 4 :
Ch1, sc in same stitch, *ch3, skip next ch1 sp, sc in next dc across side creating 3 ch loops across each side (12 ch-3 loops across). In corner sc, (ch3, sc) in corner ch2 space. Repeat around and join. (sc placement across 48 dc positions maintained)
Round 5 :
Info :
This round creates a lacy grid for the snowflake to sit on. Keep stitch tension slightly loose to allow applique placement.
Round 5 :
Change to color A (white) if you want a white inner square border now. Ch3, dc in each sc and in each ch3 loop around, working (dc, ch2, dc) in corner spaces. Join. (Approximately 56-64 dc depending on loops)
Round 6 :
Ch1, sc in each dc around working 3 sc in each corner (total sc approx 64). Join. (64)
Round 7 :
Info :
If you prefer a stronger contrast, switch back to color B for the next two rounds to create the blue field behind the snowflake applique. We recommend carrying the blue neatly or fastening off and joining again.
Round 7 :
Change to color B. Ch3, dc in each sc around, in corners work (dc, ch2, dc). Join. (64 dc spots)
Round 8 :
Ch1, sc in each dc around; work 3 sc in each corner ch-2. Join. (64)
Round 9 :
Ch3, *dc in next 7 sc, (2 dc, ch2, 2 dc) in corner* repeat across; join. (4 corner clusters and sides with 7 dc each; total dc ~72)
Round 10 :
Ch1, sc in each dc around. Join. (72)
Round 11 :
Info :
At this point check gauge against other squares. All completed squares should measure approximately the same (target ~6-7 inches square unblocked depending on thread). Block if needed before continuing.
Round 11 :
With color A, ch3, dc in each sc and dc around forming a crisp white inner border. In corners (dc, ch2, dc). Join. (72)
Round 12 :
Ch1, sc in each dc around; in corner work (sc, ch3, sc). Join. (72)
Round 13 :
Ch3, dc in next 3 sc, *(dc3 cluster separated by ch1 along sides to create mesh), in corner work (3 dc, ch2, 3 dc)*. This creates a denser field for sewing the applique. Join. (approx 80 dc spots)
Round 14 :
Ch1, sc in each dc around. Join. (80)
Round 15 :
Info :
Start working ornamental corner petals in this round if you want scalloped corners later. Otherwise continue straight for an even edge. Keep consistent counts so join points match.
Round 15 :
With color A, work a decorative round: *in side: (sc, ch3, sc) in every 6th stitch to create small loops; in corners work (sc, ch5, sc)*. Join. (loops approx 12 per side)
Round 16 :
Ch1, sc in each sc and in each ch loop around. Join. (maintain stitch count ~80)
Round 17 :
With color B, work a shell round for texture: *(skip 2 sc, 5 dc in next sc, skip 2 sc, sc) across sides; in corners work (sc, ch3, 5 dc, ch3, sc)*. Join. (shells across sides; count varies ~80-92 dc units)
Round 18 :
Ch1, sc over shells to anchor, making 3 sc in each corner shell for stability. Join. (approx 92)
Round 19 :
Info :
Measure square again. If you intend to add a layered border later, add one more even round in white to equalize all squares to same finished size before blocking and joining.
Round 19 :
Change to color A. Ch3, dc in each sc around, work (dc, ch2, dc) in corners. Join. (approx 92)
Round 20 :
Ch1, sc in each dc around. Join. (92)
Round 21 :
Work final even round to prepare for join-as-you-go: *sc in each st for one round in color A (white) to give a clean strip for joining*. Join and fasten off. (92)
Info :
Sew in ends or leave long tails for the join-as-you-go process. Block the square flat to exact desired dimensions. Repeat to make required number of squares (the sample runner uses 8 squares in a single column, but you can adjust number for table length).
— Snowflake Applique (make 1 per square) :
Round 1 :
With color A (white) start with mr, ch2 (counts as hdc), 11 hdc into ring. Join with sl st to first hdc. (12)
Round 2 :
Ch1, sc in same st, *ch4, skip next st, sc in next* repeat around to make 6 ch4 loops. Join. (6 ch-4 loops)
Round 3 :
Into each ch4 loop: (sc, hdc, 3 dc, hdc, sc) to form a petal. Join. (6 petals)
Round 4 :
Info :
This round builds the snowflake arms; keep petals symmetrical. Block lightly if needed to maintain petal shape before continuing to the next layered arms.
Round 4 :
Ch3, work a short picot arm out from tip of each petal: sl st to the middle dc of petal, ch5, sl st in 3rd ch to form a picot extension, sl st back to petal center. Repeat for each petal to form 6 small arms. (6 arms)
Round 5 :
Ch1, sc around base to anchor all arms; into spaces between petals ch6, sl st to form additional loops (12 ch-6 loops). Join. (sc count approx 36)
Round 6 :
Into each ch-6 loop: (sc, hdc, 5 dc, hdc, sc) forming secondary larger arms. Join. (12 larger arms)
Round 7 :
Ch3, picot in each larger arm tip: (ch4, sl st in 3rd ch) and anchor back into arm center. This creates defined snowflake spikes. (12 pico t tips)
Round 8 :
Info :
For the raised look seen in the photo, work the next layer in puff stitches and finish with small picot beads. Use a slightly smaller hook for the applique to keep edges crisp.
Round 8 :
Ch1, sc around base of arms. Then in alternating spaces create small puff clusters for texture: *(ch2, puff stitch made of 3 loops pulled and closed, ch2, sc) in next space* repeat around. (approx 24 puff clusters)
Round 9 :
Ch3, work a decorative looped round: *into each puff cluster ch5 loop, sl st and sc around to anchor* repeat to make a second-tier sparkle. Join. (details vary)
Round 10 :
With color A, create final rim: *working into the base of each large arm, make (sc, ch3, picot, ch3, sc)* to give small pointed decorative tips. Join and fasten off leaving long tail for sewing. (final petal count 12 tips)
Info :
Block each snowflake applique very flat so the arms are evenly spread and the center sits flat. Sew centered onto the prepared square using the long tail and small whip stitches through the inner base of the applique and into the dc mesh beneath.
— Corner Blossom Motif (make 4 per square corner) :
Round 1 :
With color B, ch6, sl st to form ring. Ch3 (counts as dc), 11 dc into ring, join. (12 dc)
Round 2 :
Ch1, sc in same st, *ch4, sc in next dc* repeat around to make 6 ch4 loops. Join. (6)
Round 3 :
Into each ch4 loop work (sc, 3 dc, sc) to create small petals. Join. (6 petals)
Round 4 :
Info :
Blossoms are small accents used between squares; they add a layered texture to joins and border. Make them slightly raised with small puff centers if desired.
Round 4 :
Ch1, sc around petals, then in each petal center make a small puff (3 loops) to form a textured center. Join and fasten off leaving long tail for sewing. (6 petals with puff centers)
— Little Star Accent (make many) :
Round 1 :
With color A, mr, ch3, 9 dc into ring. Join. (10 including ch3)
Round 2 :
Ch2, *tr, picot, sl st in next dc* repeat around to create small star points. Join and fasten off. (10 tiny points)
Info :
Make a handful of these tiny stars to scatter across joins and along the outer border. They can be sewn flat or slightly lifted with a few stitches at center for 3D effect.
— Join-As-You-Go Rows (assemble squares in column) :
Round 1 :
Place two blocked squares wrong side facing you and align edges. With color A, attach yarn at the corner sc of the first square's joining strip. Sc through both layers into first st, sc next st through both layers, continue sc across the side joining each sc to sc, making sure to work into equivalent stitches for an even seam. (sc count equals edge sc count, approx 92 per side)
Round 2 :
Info :
When joining squares use an even number of joining stitches; for mesh edge counts vary slightly—adjust by adding or skipping a sc evenly across the join to avoid puckers.
Round 2 :
Continue joining additional squares exactly as above, working in a single row (column) for a runner. When joining each square, add one corner blossom motif at each exposed outer corner by working a sc through both layers and sewing blossom center with remaining tail.
Round 3 :
Once all squares are joined in a column, check that joins lie flat. If needed, add an additional sc round across both seams in color A to smooth transitions. Fasten off and weave ends.
Info :
If making a wider runner, produce parallel columns and join columns using the same method—consider alternating square orientations for visual interest.
— Outer Border & Scalloped Edging :
Round 1 :
With assembled column laid flat, join color A at any corner. Ch3 (counts as dc), dc evenly along the long side into each sc, working 3 dc, ch2, 3 dc in each corner for continuity. Join at end. (dc count varies by total length; work evenly, approximately 8 dc per square side)
Round 2 :
Ch1, sc in each dc around, working 3 sc in each corner ch-2. Join. (even sc round)
Round 3 :
Info :
Begin scalloped shaping on this round. Use shells and picots to form the decorative outer edge pictured. Keep counts consistent along straight edges by spacing shells evenly.
Round 3 :
Change to color B. Working along long sides: *(skip 2 sc, 5 dc in next sc, skip 2 sc, sc in next sc)* repeat for scallops. In corners work (sc, ch5, sc) to create deep scallop. Join. (scaffolded shell counts)
Round 4 :
Ch1, sc over shells to anchor: sc in top of each 5-dc shell and into corner loops work (sc, ch3, sc). Join. (approx same stitch count maintained)
Round 5 :
With color A, add picot beadwork between scallops: *(ch3, picot, sc) in the center sc between shells* repeat. Join and fasten off. This creates the tiny white points between shells seen in the photo.
Round 6 :
Info :
For an extra ornate finish add a final round of small star motifs sewn along the edge every two scallops. This reproduces the clustered floral look in the picture.
Round 7 :
If adding stars, sew tiny star accents (from Little Star Accent) at even intervals along the scalloped edge using matching blue or white thread. Space them evenly—typically every 2 scallops for a balanced look.
— Decorative Clusters & Berries (optional embellishments) :
Round 1 :
Make small crochet berries to resemble the tiny white berries: With white thread, ch2, 6 sc in second ch from hook, work 2 more rounds of sc in spiral to create a little 3-row bead (final approximate diameter 6-8 mm). Stuff with tiny tuft of polyester if desired. Make 6-12 berries per cluster. (approx 18 sc total per berry)
Round 2 :
Make small crochet leaves in green thread if adding faux greenery: ch8, sc in second ch from hook and next 6 sc, turn; in next row work (sc, hdc, dc, hdc, sc) along chain to create a tapered leaf. Make 6-9 leaves per cluster.
Round 3 :
Info :
Attach berries and leaves in tasteful clusters along the runner at intervals (sample has clusters spaced over several squares). Use a lightweight hand-sewing thread or a dab of fabric glue behind the piece to secure faux pine sprigs or ribbon bows.
Round 4 :
Bow placement: make satin bows and sew at cluster base using small stitches through knot; cover bare stitches with small star motifs or blossoms if needed to conceal join threads. Keep clusters light so lace does not sag.
Round 5 :
Fasten all embellishments securely. Weave all tails into surrounding stitches and trim close. Block final assembled runner flat and allow to dry thoroughly before displaying.
Info :
Use rust-proof pins and a professional blocking board. Spray lightly with water and shape to even edges; measure corner-to-corner diagonal to ensure straightness while drying.
— Finishing Touches & Alternative Options :
Round 1 :
To create a narrower runner, omit alternate squares when joining; for a table centerpiece, assemble 3-5 squares in the column. To make a table cloth centerpiece, arrange a 2 x 4 grid and join with the same join-as-you-go method.
Round 2 :
If you want added shimmer, carry a very fine metallic thread through the last border round only, crocheting it together with the white outer round to give just a thread of sparkle without changing the main body color.
Info :
Store the runner flat or lightly folded in tissue to avoid creases. For washing: hand wash gently in cool water with mild detergent and lay flat to dry to preserve shape and color; do not tumble dry.
This lovely snowflake table runner transforms a simple wooden table into a winter wonderland with delicate crochet lace and layered snowflakes. The modular design means you can craft any length to fit your space; each square adds more charm and texture to your table. Whether you display it for the holidays or as a seasonal staple, the handmade detail is sure to delight. 🧶❄️💙