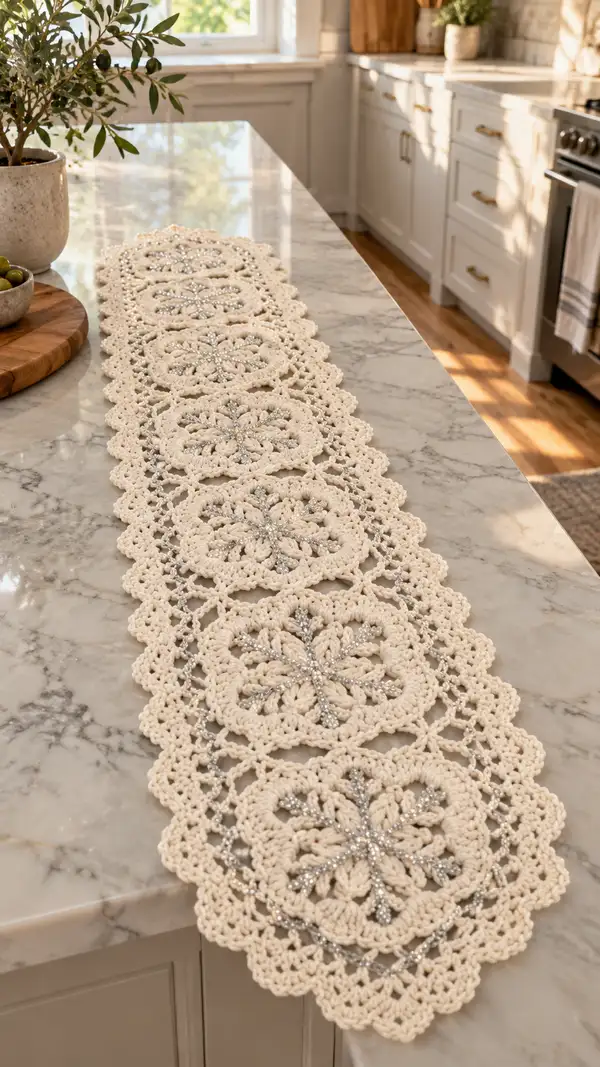
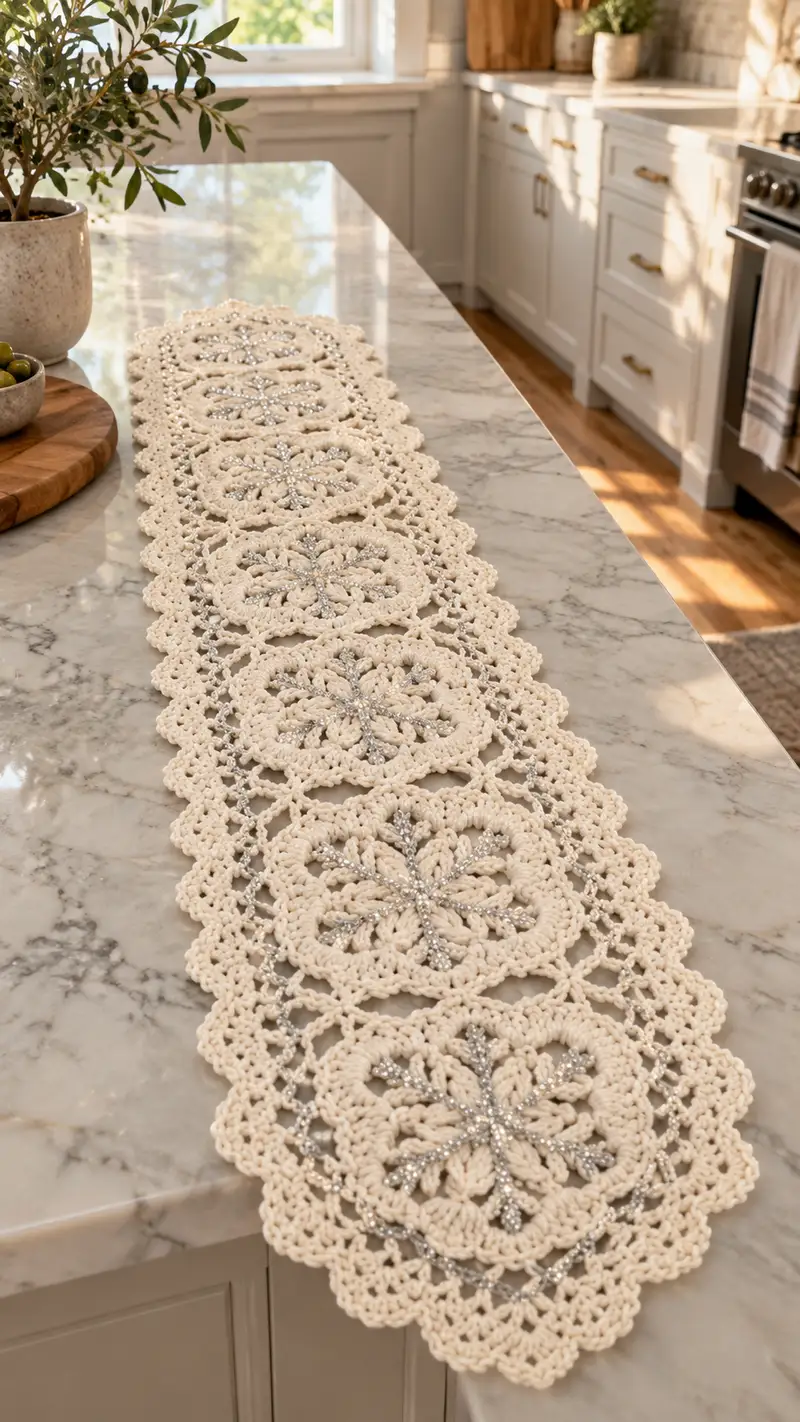
Create a refined, scalloped table runner made from linked snowflake-inspired square motifs with a delicate silver-thread accent. This neutral-cream runner features raised puff petals, open lace joins, and a scalloped border for a vintage-inspired look. Designed to lay flat on counters or dining tables, it combines textured stitches and airy chains for a lightweight yet substantial centerpiece. The pattern shows motif-by-motif construction, step-by-step joining and a polished finishing edge.
Progress Tracker
0% Complete
— Notes and Techniques :
Info :
This runner is worked modularly: make the decorative snowflake square motif (Make 7 motifs shown). Each motif is worked in rounds moving outward. Puffs and clusters create the raised petals. Use a 5.0 mm hook unless your gauge is loose; you want a firm fabric for clean joins.
Info :
Puff stitch: Yarn over, insert hook, pull up a loop (repeat 4 times = 5 loops on hook), yarn over and pull through all loops, ch1 to secure. Adjust the number of yarn-overs/pull-ups to match puff height in the sample.
— Motif (Make 7-9 depending on desired length) :
Round 1 :
Make a magic ring. Ch2 (does not count as stitch), work 8 dc into the ring; pull ring tight. Join with sl st to first dc. (8)
Round 2 :
Ch3 (counts as dc), dc in same st, 2 dc in each st around. Join with sl st to top of ch3. (16)
Round 3 :
Ch3, dc in same st, *dc in next st, 2 dc in next st; rep from * around. Join. (24)
Round 4 :
Ch2, dc in each st around to maintain a smooth round; join. (24)
Round 5 :
Ch3, *(puff) in next st (puff made over that st as described above), ch1, sc in next st, ch1; rep from * around to create 8 puff petals total. Join with sl st. (8 puffs, 8 sc between)
Info :
Place a stitch marker in the top of each puff to mark petal tops; these markers will help align the silver accent in later rounds.
Round 6 :
Ch3, dc in next st, *ch2, sc in ch1 space behind each puff (work into ch1 spaces created between puff and sc), ch2, 2 dc in next st (between petals); rep around. Join. (32 dc/chain spaces total distributed)
Round 7 :
Ch1, sc in same st, *ch3, sc in next ch2 space, ch3, sc in next dc (anchor in top of puff base), rep from * around to form 8 open arches. Join. (8 arches)
Round 8 :
Info :
Change to metallic silver thread carried together with main yarn for the next round if you want the raised silver star to be integrated. Carry the silver loosely and twist with the main yarn at the start of the round so it sits on top of the puff petals.
Round 8 :
With main yarn + silver carried together (or work silver separately by surface embroidery later), ch3, *(3 dc cluster anchored into top of each puff: yo, insert into top of puff, pull up loop; repeat thrice to have 4 loops; yo, pull through all loops) then ch1, sl st into center between petals to create connecting spoke; rep around. Join. (8 spokes)
Round 9 :
Remove silver if carried and continue in main color only. Ch3, 2 dc in same st, *dc in next 3 sts, 2 dc in next st; rep around. Join. (approx 40)
Round 10 :
Ch2, dc in each st around to smooth. Join. (40)
Round 11 :
Ch3, dc in next 4 sts, *(ch1, sc in next arch space, ch1), dc3 in next group; rep around. Join. (40 with 8 arch insertions)
Info :
Starting now we will begin squaring the motif. Corners are formed by working multiples of stitches separated by chain loops. Place markers where corner clusters will be worked (4 corners spaced evenly).
Round 12 :
Ch3, 2 dc in next 3 sts (corner start), *dc in next 6 sts, (2 dc, ch2, 2 dc) in next st as corner; rep from * around to create four corners. Join. (approx 56)
Round 13 :
Ch1, sc in same st, *ch3, sk 2 sts, (sc, ch1, sc) in ch2 corner, ch3, sc in next 8 sts; rep around. Join. (corner ch-spaces and sides created)
Round 14 :
Ch3, dc in each sc and ch1 along the edges, working (2 dc, ch2, 2 dc) in each ch2 corner to reinforce square shape; join. (approx 64)
Round 15 :
Ch1, sc in each st for 4 stitches, *(ch3, sc) across the next open arch spaces along sides, continue sc across side; maintain (sc, ch3, sc) at each corner to form a small lacy corner space for joining later; join. (approx 64)
Info :
At this stage each motif is square with interior puff-star center and four small chain-corners that will be used for joining. Block motifs flat before joining to open lace and set shape.
Round 16 :
Ch2, hdc in each st around working 3 hdc into each corner ch3 space to round the corner slightly. Join. (approx 68)
Round 17 :
Ch3, *dc in next 8 sts, (sk1, sc in next ch3 corner, sk1), dc in next 8 sts, (2 dc, ch2, 2 dc) in corner; rep around. Join. (approx 76)
Round 18 :
Ch1, sc in each st around for a tidy edge, placing 5 sc across each corner ch2 to create a small scalloped corner foundation. Join. (approx 76)
Round 19 :
Ch3, dc in next 3 sts, *(3 dc, ch2, 3 dc) in each corner to emphasize square, dc across sides evenly; join. (approx 84)
Round 20 :
Ch1, sc in next st, *ch5, sk 3 dc, sc in next st to create open lace window along sides; repeat around. Join. (8 windows plus corners)
Info :
If you did not carry silver earlier you can now use the metallic thread to surface-stitch the spokes: use a long tapestry needle and couch silver along the top of the puff spokes from the center out to the petal tips.
Round 21 :
Change to BLO for texture: ch2, 1 hdc BLO in each st around to create a defined ridge; join. (approx 84)
Round 22 :
Ch1, sc in same st, *(sc, ch3, sc) in each side window to create four arch loops per side, sc around corners to maintain shape; join. (approx 84)
Info :
Fasten off and weave in ends after blocking. Make the desired number of motifs (the sample shows 7 motifs for a narrow runner; make 9 for a longer dining table runner).
— Joining Motifs (Join-as-you-go or sew after blocking) :
Info :
You can join motifs using either a crocheted ladder-join while working the final round of a motif or by whipstitching motifs together after blocking. The following join rounds assume you block motifs and join by slip-stitch ladder in Round J1 and reinforce in J2.
Round J1 :
Lay two motifs with right sides up aligned. With main yarn and 5.0 mm hook, attach at corner on the right-hand side of the first motif. Sl st into corner of motif A, ch3, *insert hook into corresponding side chain loop of motif B and sl st to join, ch3, continue sl st through each open side loop across the adjoining edge to form ladder joins between motifs; join into motif A corner. (one side joined)
Round J2 :
Info :
Work a reinforcing row across the join on both front and back for stability: sc into each sl st join and into each adjacent stitch on both motifs to hide the ladder and stabilize the seam, working 3 sc in corner loops to maintain corner shape.
Round J2 :
Sc in each join and into adjacent sts on both motifs, working (3 sc) in corner ch3 spaces. Fasten off and weave ends. Repeat joining until all motifs are connected in a single strip. (counts vary depending on motif count and joins)
Info :
If you prefer an invisible seam, use mattress stitch with a yarn needle, sewing through the corresponding loops on either motif back-to-back and pulling snugly to flatten the seam.
Round J3 :
Once all motifs are joined in a strip, work along each joined internal seam on the front side: with hook and main yarn, ch1, sc in every back loop along the seam edge to flatten, working sc into side spaces to keep the join flat. This creates a decorative running column between motifs.
Round J4 :
Info :
Optionally add a narrow open lace column between motifs that mirrors the main sample: attach silver thread at center of each join and surface stitch small diagonal lines across the ladder to echo the runners' silver line.
Round J4 :
With main yarn, ch3 from seam, *(ch4, sk 2 sc, sc in next ch-space) along seam length to create a light decorative open column visible between motif blocks. Join and fasten off. (this is decorative and stitch counts vary)
Info :
At this point measure the runner length. You may add or remove motifs to reach desired length. Block the whole strip again after joining to ensure seams sit flat and lace windows align.
— Outer Border and Scalloped Edge (worked around entire connected strip) :
Round B1 :
With main yarn attached to any outer corner, ch1, work sc evenly along the entire outer edge of the connected motifs, placing (3 sc) into each corner ch3 to maintain shape. Join. (stitch count varies by runner length)
Round B2 :
Ch3 (counts as dc), *dc in next 3 sts, ch2, sk 2, dc2 in next 2 sts; repeat across sides, placing (3 dc, ch2, 3 dc) in corner to create larger corner scallops; join. (even out dc groups to create symmetrical pattern)
Round B3 :
Ch1, sc in same st, *ch5, sc in next group between dc clusters to create open picot-like arches; continue across. Join. (creates airy edging that echoes motif windows)
Info :
If you want a firmer edge for a table runner, work a second round of sc around after B3, working two sc into each ch5 arch to make a stable foundation for scalloped finishing.
Round B4 :
Ch2, hdc in each st and into each ch5 arch (work 5 hdc across arch) to turn arches into filled loops; join. (provides structure)
Round B5 :
Sc evenly around to tidy the row. Join. (foundation for scallops)
Round B6 :
Begin scalloped edging: *(5 dc, sl st in first dc) in same st to form a shell, sk 2, sc in next st; rep around. Join. (shell scallops around entire edge)
Round B7 :
Ch1, sc in same st, *(3 dc in shell, ch2, 3 dc) in same shell, sc in next sc between shells to form double scallops; rep around. Join. (gives double-layer scallop echo as in sample)
Info :
For the delicate rounded scallops shown in the photo, after B7 work a final cleanup round of sc in BLO to give a ridge behind the scallops that helps them sit upright on a table surface.
Round B8 :
Ch1, sc BLO in each st around including across shells; join. Fasten off and weave in ends. Block entire runner flat and shape scallops with pins while damp. This finishes the main cream border.
— Silver Thread Surface Decoration (Optional but recommended) :
Info :
The silver accent in the image forms a continuous thin line running from center of each motif outward along joins and across the runner. You can either carry the metallic thread with your yarn when working specific rounds (as noted earlier) or couch the metallic thread on the surface after all crocheting is completed.
Round S1 :
Using a long tapestry needle, thread the metallic silver and tack it down along the center spokes of each motif: insert needle at center back, bring to front at center, lay silver along top of puff spokes and make small couching stitches with main yarn at each petal tip to hold it in place. Repeat for each motif spoke (8 per motif).
Round S2 :
To form the thin connecting silver line between motifs, run the metallic thread across the ladder-join columns and couch with small stitches every 4-6 mm to keep it laying flat. Secure ends on the back by weaving through several plies and knotting lightly if necessary.
Info :
Be mindful of tension when couching metallic thread; too tight will pucker the motifs. Keep couching stitches small, frequent and secure. If using metallic thread during crochet rounds, twist it with the main yarn at the start of the round and carry it loosely behind your work.
— Finishing Touches and Blocking :
Info :
Soak the entire runner in lukewarm water with a tiny amount of gentle detergent. Gently squeeze out excess water (do not wring). Pin the runner onto a blocking board or towel, stretching lightly to even out motifs and shape scallops. Allow to dry completely. Use spray starch if crisper edge is desired.
Round F1 :
After blocking and final weaving, give the runner a final once-over: trim stray ends, check silver couching for security and add small reinforcing invisible stitches along joins if needed to stabilize movement on a tabletop.
Info :
Store runner flat or gently rolled to avoid creasing the scallops. Wash gently by hand to preserve metallic thread and shape.
— Pattern Variations and Sizing :
Info :
To make the runner longer or shorter, add or remove motifs. The sample shows 7 motifs for a counter runner roughly 36-40 inches long; each motif finished blocked measures approximately 5-6 inches square with border joins between motifs expanding total width slightly.
Info :
For a wider runner, make two or three parallel strips and join them using the same ladder-join and border approach, then work a continuous border around the entire large panel.
Info :
Alternative accents: use a thin colored cotton thread instead of silver to match seasonal decor, or omit metallic completely for a completely natural look.
This elegant snowflake table runner brings a timeless handcrafted feel to your home decor. Each motif is like a little piece of lace, and when linked together they form a sophisticated centerpiece that gleams subtly with metallic accents. The modular construction lets you customize length and style — perfect for gifting or seasonal decoration. 🧶✨ Blocking and finishing transform these crocheted squares into a beautifully draped runner you will be proud to display. Happy stitching and enjoy the sparkle! 🎄