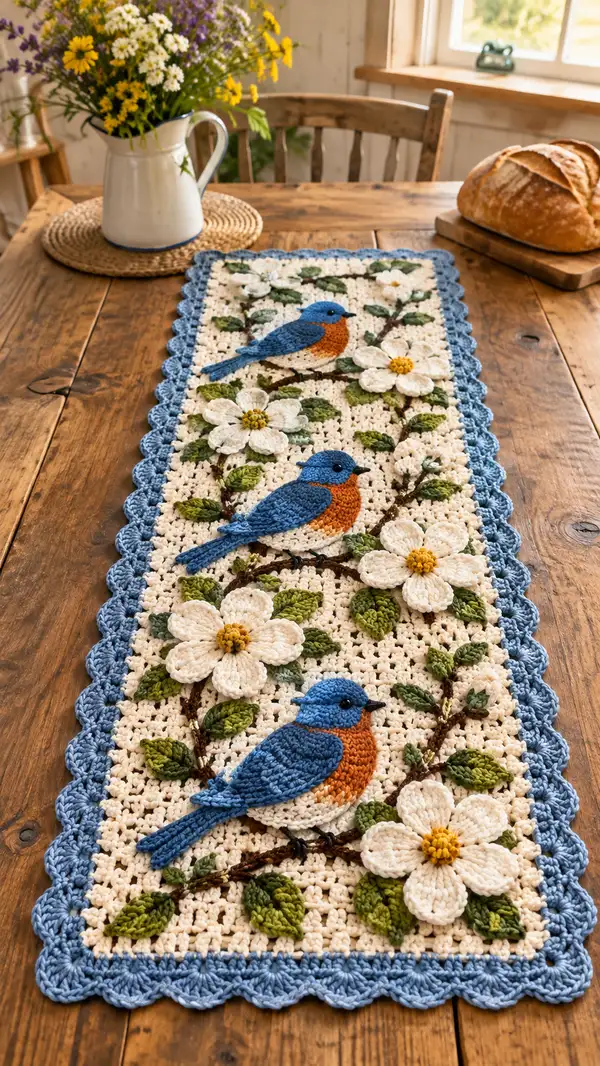
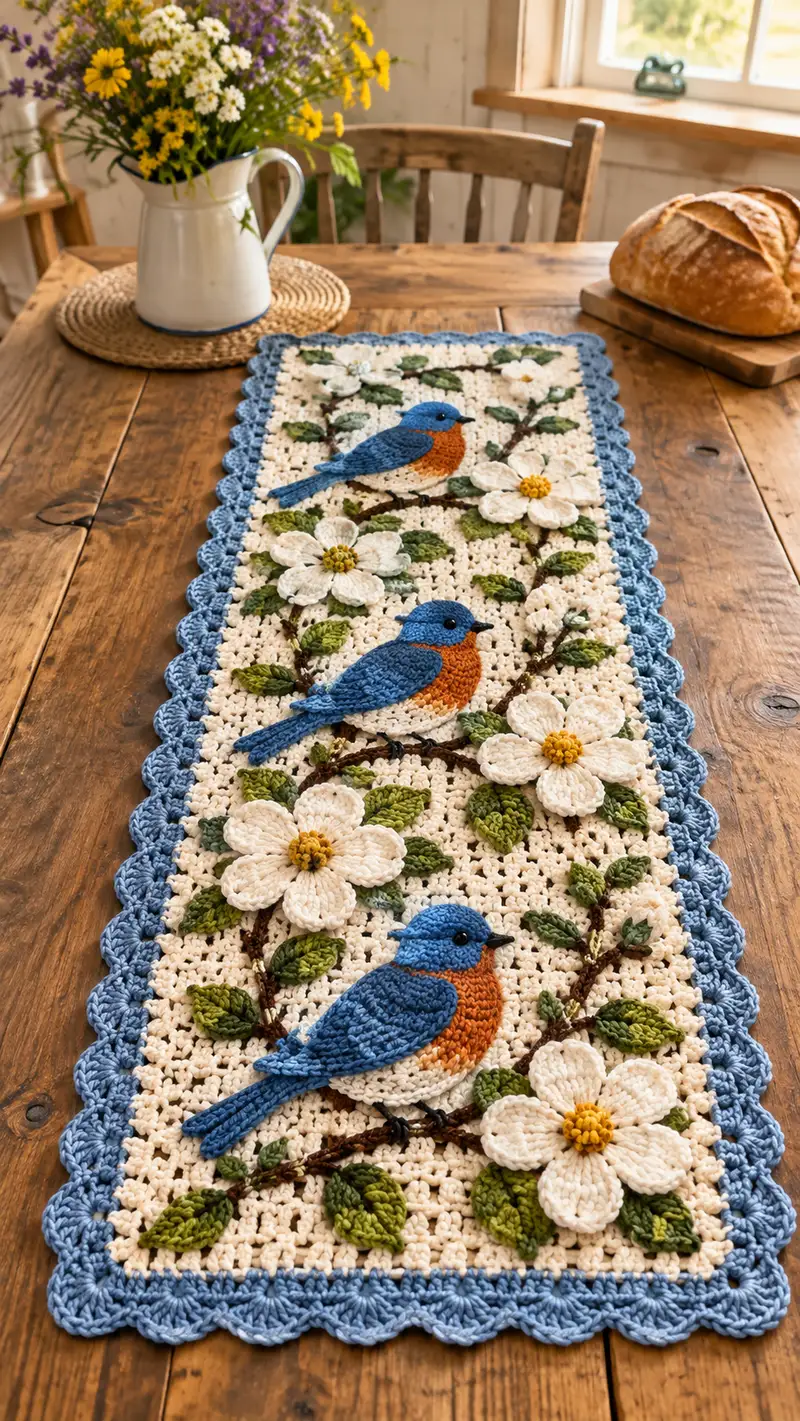
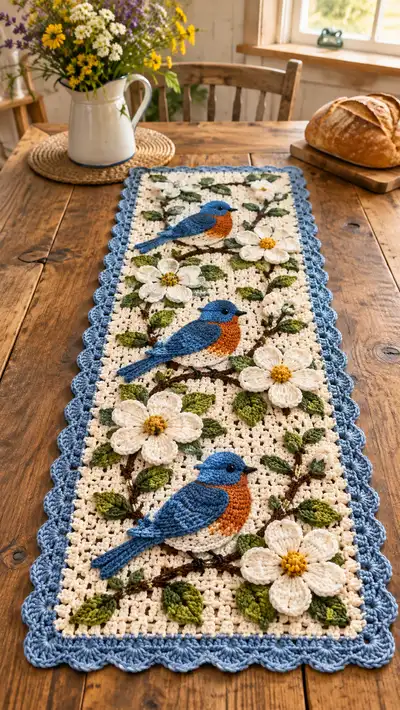
A charming, cottage-style table runner featuring three embroidered-style bluebird appliques perched among raised dogwood blossoms and textured leaves. Worked on a cream open mesh background with a soft blue scalloped border, this runner adds hand-crafted springtime charm to any table. The pattern uses textured stitches and applique9 assembly for a richly dimensional finish—perfect for gifting or decorating your home.
Progress Tracker
0% Complete
— Overview & Notes :
Info :
This runner is worked in three phases: 1) the cream mesh background panel, 2) the scalloped blue border, 3) applique9 elements (birds, flowers, leaves, branches) that are created separately and sewn or surface-crocheted onto the panel. Work in cotton worsted weight yarn and use a slightly smaller hook for tighter fabric on applique9 pieces. Block the background panel lightly before attaching applique9s.
Info :
Finished dimensions (approximate): 14" x 48" (35cm x 122cm) when using worsted cotton and a 3.5mm hook. Gauge will change final measurements—adjust the foundation chain length if you wish a longer or shorter runner.
— Background Mesh Panel :
Round 1 :
Foundation: Chain 64, join with sl st to first chain to work in joined rounds (64 ch). Note: This initial chain will set the internal grid width; adjust by multiples of 2 to change width.
Round 2 :
Ch2 (counts as dc), *ch1, sk next ch, dc in next ch*; rep from * to * around, join with sl st to top of ch2 (32 dc posts and 32 ch1 spaces overall). This forms a simple dc/ch1 mesh.
Round 3 :
Sl st into first ch1 space, ch2, dc into same ch1 space, *ch1, dc into next ch1 space; rep from * around, join (32 dc, 32 ch1).
Round 4-8 :
Repeat Round 3 for 5 rounds (32 dc, 32 ch1). Keep turning the panel lightly and check edge alignment often to prevent spiraling or slanting.
Info :
Place stitch markers at each corner if you decide to square off a rectangular mesh later; for this long runner, keep the joined-round approach but check row counts every 8 rounds for consistent width.
Round 9-16 :
Continue repeating Round 3 for 8 rounds (32 dc, 32 ch1 each round). After Round 12, begin visual placement notes for applique9s: mark approximate centers for three bird placements, leaving even spacing (approx 14"/3 = every 16 cm). Use temporary safety pins or contrasting yarn to mark rows that align to bird centers.
Info :
If you prefer a more lacy background like pictured, you may replace dc in each ch1 with (dc, ch1, dc) clustering to create more openwork. The instructions use a subtle mesh to provide structure for sewn applique9s.
Round 17-28 :
Work 12 more repeats of Round 3 (32 dc, 32 ch1 each round) until the panel measures approximately 44-46" long, leaving room for border. Block lightly if desired to square edges.
Info :
When the panel has reached desired length, fasten off leaving a 12" tail. Weave tail to the wrong side and trim. Press or steam-block to flatten and stabilize the mesh before attaching applique9s.
— Border: Scalloped Shell Edge :
Info :
Work border around the entire panel in joined rounds. Start at a corner and work evenly along edges; adjust spacing to keep shells approximately 1 shell per 1/2" (1.2cm).
Round 1 :
Join sky blue with sl st to any edge stitch. Ch1, evenly sc around the panel working 1 sc in each dc post and 1 sc in each ch1 space; work 3 sc in each corner to ease; join with sl st (panel edge stabilized).
Round 2 :
*Skip next 2 sc, in next sc work (5 dc, ch1, 5 dc) to form large shell; sk next 2 sc, sl st in next sc*; rep from * to * around, join with sl st. Adjust shells at corners by working shells into corner sc group.
Round 3 :
Ch1, work 1 sc in top of each shell and sl st into ch1 space of each shell to neaten; join and fasten off. Weave in ends.
Info :
The scallop gives a soft framed look similar to the photo. If your shells bunch, add extra sc spacing between shells; if shells are too wide, reduce to (4 dc, ch1, 4 dc).
— Bird Applique9 (Make 3) :
Info :
Make three identical birds. Work birds flat in joined rounds for a layered, slightly cupped shape. Use bright blue for upper body, sky blue for wing contrast and warm orange for breast. Work on RS with neat edges since birds are sewn on top of the mesh.
Round 1 :
With bright blue, make magic ring, 6 sc in MR (6). Do not join; we will work in joined rounds (sl st to join each round).
Round 2 :
Inc in each st around (12).
Round 3 :
(1 sc, inc) x6 (18).
Round 4 :
(2 sc, inc) x6 (24).
Round 5 :
(3 sc, inc) x6 (30).
Info :
These increases create the rounded belly of the bird. From here, we'll shape the body in slightly elongated rounds to form the back and breast pockets for the wing and orange breast.
Round 6 :
1 sc in each st around (30).
Round 7 :
1 sc in next 5 sts, dec, 1 sc in next 4 sts, dec, 1 sc in next 6 sts, dec, 1 sc in next 4 sts (27). Math check: three decs reduce 30->27.
Round 8 :
1 sc in each st around (27).
Round 9 :
1 sc in next 6 sts, dec, 1 sc in next 6 sts, dec, 1 sc in next 6 sts (25). (Two decs: 27-2=25.)
Info :
Round 9 begins the shoulder/neck shaping. At the end of Round 10 we will place the orange breast overlay and begin to form the wing area on rounds 12-18.
Round 10 :
1 sc in each st around (25).
Round 11 :
1 sc in next 4 sts, (dec, 1 sc) x3, 1 sc in remaining sts (22). Work evenly to slightly narrow the back neck area.
Round 12 :
1 sc in each st around (22).
Info :
Change to orange yarn for the breast overlay. We'll create the textured orange breast as a separate overlay worked into the front of the body shape. Carry blue up or fasten off and rejoin later for wings.
Round 13 :
Change to orange: Join with sl st to the lower-front position (visualize bottom third of body). Ch1, 1 sc in same st, (1 sc in next st) x6, (dec) x1, 1 sc in next 4 sts; join to create a semi-circular breast that will be layered. Count: makes 13-15 sts depending on placement; we will shape to 16 sts total.
Round 14 :
1 sc in each st around the orange semi-circle, adding incs at the sides where needed to reach 20 sts (adjust by inserting up to two incs evenly). This forms a slightly domed breast that sits on the bird's front.
Info :
Stitch the orange breast over the blue base with running stitch or whipstitch around the lower front to secure it into place; do not over-tighten — the breast should sit slightly raised.
Round 15 :
Rejoin bright blue to upper edge of body where the neck is. Work 1 sc in each st around 22 sts to re-establish the body circumference (22).
Round 16 :
Work next 3 rounds even in sc (Rounds 16-18) to build height of body and create an attachment area for the wing. R16: 1 sc in each st (22).
Round 17 :
1 sc in each st (22).
Round 18 :
1 sc in each st (22).
Info :
Begin wing placement mapping: mark the spot on Round 17 where the wing will sit — roughly over 8-12 stitches on the side of the bird. We will create a separate wing piece and overlay it, tucking its lower edge under the body edge to secure.
Round 19 :
Dec at the neck back once, 1 sc for next 8 sts, dec once on the opposite side leaving approx 18 sts total (18). This begins to form the rear taper of the body where the tail will attach.
Round 20 :
1 sc in each st around (18).
Round 21 :
(2 sc, dec) x6 (12). Shape toward the tail base.
Round 22 :
1 sc in each st around (12).
Round 23 :
Work (1 sc, dec) x4 (8). This tightens the rear base for tail attachment.
Round 24 :
1 sc in each st around (8).
Round 25 :
Fasten off leaving a long tail (approx 12") for sewing; this forms the base body. Do not close the rear completely—leave a small opening to attach tail and to anchor wing lower edge.
Info :
Stuff minimally with a tiny pinch of fiberfill if you want very subtle lift under the bird; otherwise leave flat for a sewn applique look. Birds in the photo are slightly cupped — use a light pinch of stuffing behind the breast if desired and stitch closed.
— Bird Wing (Make 3, 1 per bird) :
Round 1 :
With sky blue, ch 14, turn and sc in 2nd ch from hook and across to end (13 sc). This creates a wing that will be later shaped into a feathered form.
Round 2 :
Ch1, sc across (13). Do not join; turn each row to create a short flat wing over 5 rows total.
Round 3-5 :
Repeat Round 2 for a total of 5 rows (13 sts per row). At Row 5, begin shaping outer feather edge by working decreases on one side.
Round 6 :
On Row 6 (shaping row): ch1, sc2tog at outer edge, sc rest of row to last 2 sts, sc2tog into last 2 sts (11). Fasten off leaving tail for sewing.
Info :
For feather texture, work a light surface slip-stitch ridge using bright blue across top of wing to mimic feather barbs. Layer wing over body and baste in place before permanent assembly.
— Bird Tail (Make 3) :
Round 1 :
With bright blue, ch 18. Sl st back along chain to form a flat strap tail; join and ch1, sc across (17 sc).
Round 2 :
Ch1, sc across (17). Fasten off leaving long tail for attaching to the rear of the body. Optionally trim outer tail edge to a slight fork by cutting center stitches and bracing with secure stitches.
Info :
Sew tail to the back of the bird, tucking the tail end slightly under the final rounded rows for a smooth joint. Add a topstitched center line for visual tail feather separation with a row of sl st or thin embroidery.
— Bird Beak & Eye :
Round 1 :
Beak: With black, ch3, sc in 2nd ch from hook and next ch (2 sc). Fasten off leaving tail to sew to front of head as a tiny triangular beak. Secure firmly with small whipstitches.
Round 2 :
Eye: Use black embroidery floss or size-2 cotton to create a French knot or a very small bead. If using small beads, sew then stitch around to secure and hide thread ends. Place eye slightly above the line between Rounds 11-13 of the bird body, centered 2-3 stitches from the top of the orange breast area.
Info :
Be sure eyes are anchored and placed at consistent heights on all three birds. The photo shows slightly raised, shiny eyes — use small jet black beads or glossy embroidery thread and apply a tiny dab of glue on the back if needed for security.
— Dogwood Flower Center (Make 4 major centers + small buds) :
Round 1 :
With mustard yellow, make magic ring, 6 sc in MR (6).
Round 3 :
1 sc in each st around (12). Fasten off leaving tail for sewing to first petal layer. For a more raised center use a tiny amount of stuffing in the center before sewing.
Info :
Create 4 full centers for large blossoms and 3-4 smaller centers for buds. Slightly stuff large centers to give a clustered seed-pod effect as shown in the photo.
— Dogwood Petal (Make 20+ total: 5 petals per big flower x4) :
Round 1 :
With cream, ch8, sc in 2nd ch from hook and across to end (7 sc). Turn, ch1.
Round 2 :
Sc across (7). Turn. Do 3 rows total of single crochet to build petal base thickness (7 sc in each row).
Round 3 :
Row 3: sc across (7). At the last row, work along the long edge to form the petal curve: ch1, 2 sc in edge, hdc in next edge, dc in next edge, hdc next, 2 sc in last edge; finish by sl st to base to create a tapered petal tip. Fasten off leaving tail.
Info :
Sew five petals into a radial arrangement around a prepared yellow center. Slightly overlap petal bases and secure with a few stitches to create a unified flower. Press gently flat to shape petals outward as in the photo.
Round 4 :
For additional petal texture, work a small picot at the tip: ch3, sl st into same stitch to create a tiny point, then continue sewing. Repeat for each petal tip if desired.
— Leaf (Make many: assorted sizes) :
Round 1 :
With leaf green, ch8. Row1: sc in 2nd ch from hook and across (7 sc). Turn.
Round 2 :
Ch1, sc across (7). Turn.
Round 3 :
Shape leaf by working on long edge: ch1, 2 sc in next st, hdc in next, dc in next, hdc next, 2 sc in next st; mirror on opposite edge as you sl st to base if working in round. Fasten off leaving long tail.
Info :
Make leaves in varied greens, and vary size by changing initial chain length: ch6 for small, ch10 for larger. Add a flo or blo ridge down the center to simulate a leaf vein using a contrasting green if desired.
— Branch & Twigwork (Surface Crochet and Applique) :
Round 1 :
With brown yarn, create a long foundation chain roughly equal to the length of branches you need (approx 36-48 ch for a branch that spans across bird area). Lay the chain over the mesh in desired position and baste through with small stitches every 6-8 chains to anchor.
Round 2 :
Work surface slip stitch over the chain to create a raised cord: bring yarn up at the start, and with the cord on top of the mesh, insert hook through mesh stitch, pull yarn over cord and draw through in a surface sl st (this creates the look of a raised twig). Continue to the end, fasten off and weave ends.
Info :
Use two shades of brown twisted together for a variegated twig look. Add small offshoots by sewing or chaining short pieces and securing at angles, tacking them down with small stitches. Branches should be anchored before attaching bird applique9s to prevent shifting.
— Small Buds and Vine Leaves :
Round 1 :
Bud: With cream, make small 4-ch loops and sc into first ch to create tiny knobbly buds; secure with yellow tiny French knot in center for a bud effect.
Round 2 :
Vine Leaves: ch6, sc2tog midline to form small pointed leaves, fasten off and arrange along branch as filler between larger leaves and flowers.
Info :
Make multiple small leaves and buds to provide natural clusters around the large dogwood blossoms like in the photo. Use olive and moss greens for variety and shade the edges slightly by adding a slip-stitch in a darker green on the edge.
— Assembly & Sewing Applique9s :
Info :
Before sewing, block the background panel flat and place the panel on a table. Lay out branches first using pins to mark final positions. The birds sit on or near branches with flowers tucked around the legs and tail. Use a photo reference to align elements and ensure even spacing of the three birds.
Step 1 :
Pin branches onto the mesh and sew through the chain and mesh with a yarn needle using matching brown to secure every 6-8 stitches. Use tiny overhand stitches to keep the branch flat and avoid pulling the mesh into ripples.
Step 2 :
Position each bird over the branch; baste temporarily with a contrasting thread if needed. Sew the bird body down using the long tail left from shaping: use a ladder stitch or whipstitch around the lower edge and the back to anchor. Sew through branch and mesh as well to attach the bird in a layered manner (bird over branch).
Step 3 :
Attach wings: place wing over body shaping ( overlapping lower edge into body seam ) and sew around the wing base with small invisible stitches, then add a row of surface sl st to emphasize feather ridges. Sew tail securely into rear opening and anchor with a few stitches to the mesh.
Step 4 :
Sew flowers: position five-petal dogwood blooms along branches, overlapping petals slightly. Sew centers first, then stitch through petal bases to anchor to mesh and branch. Add small leaves and buds around flowers using the long tails to weave under the stitches so the attachment is secure and flat.
Step 5 :
Use small embroidery stitches in dark brown to create subtle twig texture on branches near birds' perch points. Add tiny black French knots for bird eyes or sew small black beads (ensure they are large enough to be secure and well-stitched) then lock them with knots and glue if needed for safety.
Info :
Weave in all ends on the WS and trim close. Block the entire runner once more after assembly to flatten any seams and set the shape. Use steam or a warm iron over a damp cloth for cotton yarns.
— Finishing Touches :
Step 1 :
If desired, embroider a few feather lines on the birds' wings and tails using a contrasting blue. Use simple long running stitches or a surface chain stitch to simulate feather shafts.
Step 2 :
Add subtle shading to petal edges using a washed pencil or fabric-safe watercolors to deepen the center edge and mimic gentle blossom curl (test on scrap yarn first).
Info :
For a country cottage look like the photo, choose muted, slightly vintage colors and avoid ultra-bright neons. The texture and layering are what make this runner sing—be gentle with shaping and blocking for best results.
This Bluebird and Dogwood Blossom Table Runner is a joyful blend of texture, color and cottage charm — every stitch builds a little scene you can display with pride. The layered applique9s and scalloped edge make it a thoughtful gift or a centerpiece for seasonal decorating. Enjoy the meditative rhythm of the mesh foundation and the creative satisfaction of arranging petals, leaves and birds into a cohesive, hand-crafted tableau. 🧶🌸✨