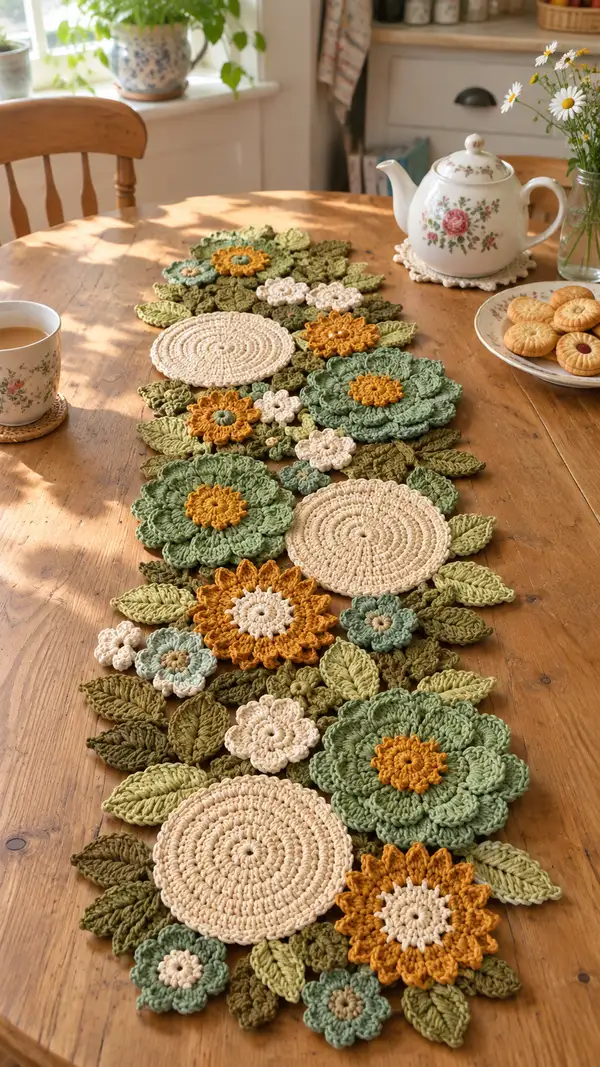
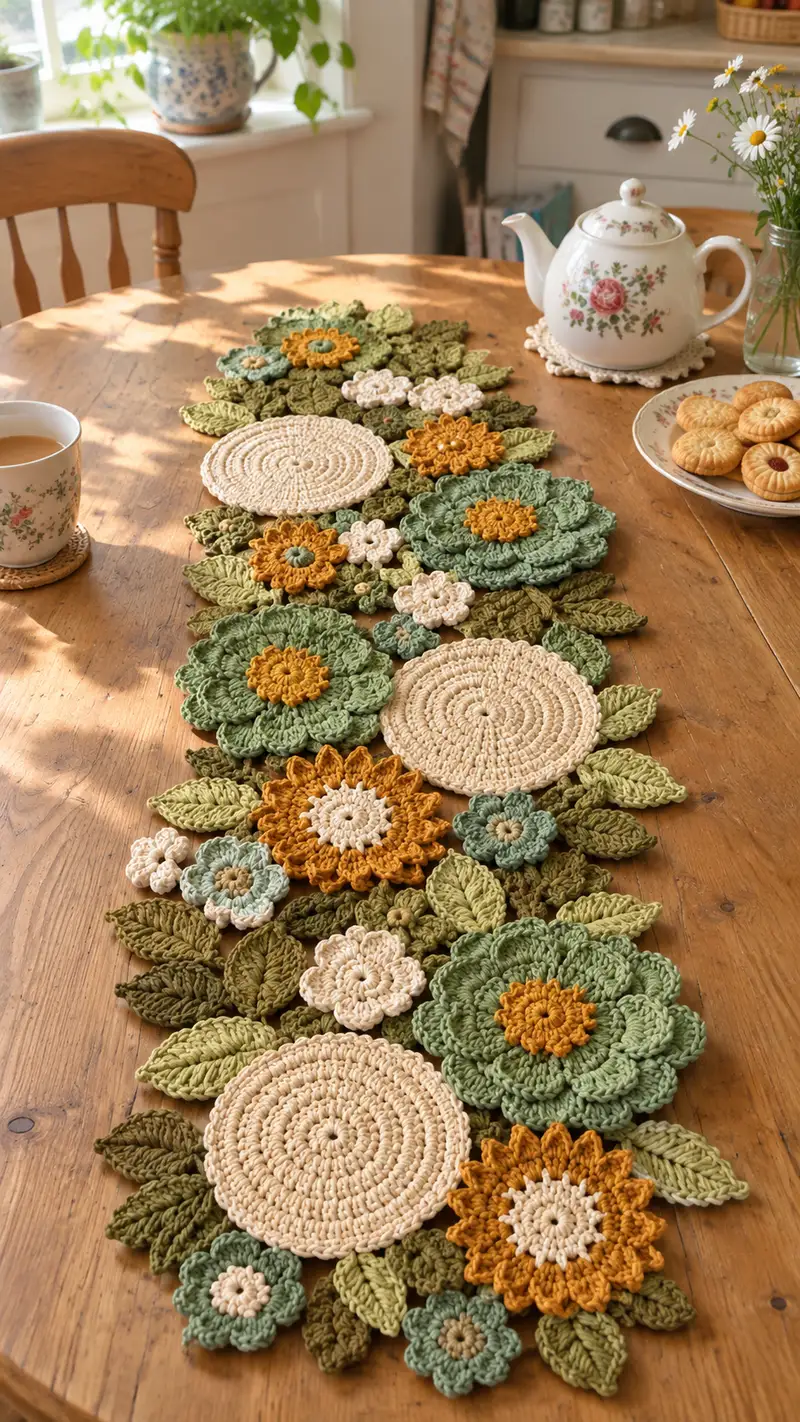
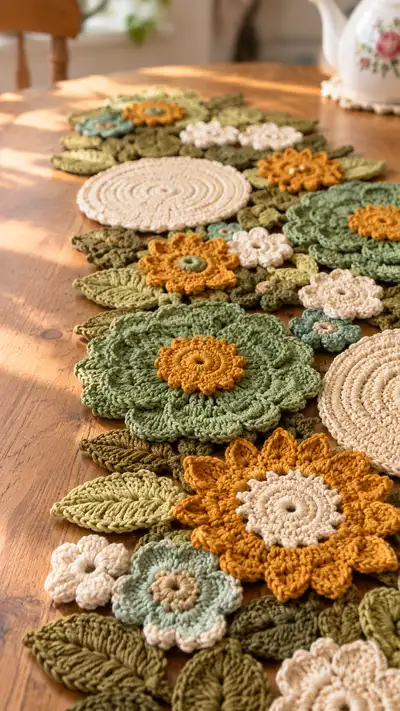
Bring a touch of cottage garden charm to your dining table with this botanical crochet table runner pattern. Composed of layered floral motifs, circular coasters and textured leaves in soft greens, mustard and cream, this runner assembles into a flowing organic shape. The pattern includes multiple motif sizes, joining techniques and finishing tips so you can create a stunning, tactile centerpiece. Perfect for seasonal decorating or a handmade gift.
Progress Tracker
0% Complete
— Overview & Gauge :
Info :
This pattern creates an organic, assembled table runner made from discrete motifs. Gauge is not critical but affects final size: 16 sc x 10 rows = 10 cm in worsted cotton with 4.0mm hook. Measure your discs if you need a specific runner width.
Info :
Suggested finished runner length shown in photos: approximately 100-120 cm (39-47 inches) using quantities listed. You can add or subtract motifs to suit your table.
— Materials Notes :
Info :
Work motifs flat in rounds. Use 4.0mm hook for a slightly open texture that blocks well; 3.5mm will give a tighter, denser motif and slightly smaller dimensions. I recommend cotton for structure and washability.
— Large Round Disc (Make 3) :
Round 3 :
(1 sc, inc) x 6 (18)
Round 4 :
(2 sc, inc) x 6 (24)
Round 5 :
(3 sc, inc) x 6 (30)
Round 6 :
(4 sc, inc) x 6 (36)
Round 7 :
(5 sc, inc) x 6 (42)
Round 8 :
(6 sc, inc) x 6 (48)
Round 9 :
1 sc in each st (48)
Round 10 :
1 sc in each st (48)
Round 11 :
1 sc in each st (48)
Info :
Check that disc is laying flat. If it ruffles, use a larger hook or one fewer increase in the earlier rounds. If cupping, add another even round or block firmly.
Round 12 :
1 sc in each st BLO to create a subtle ridge (48)
Round 13 :
sl st to finish and fasten off, weave in ends. Block flat to final shape.
— Large Layered Flower (Make 3 sage green with mustard center) :
Round 3 :
(1 sc, inc) x 6 (18)
Round 4 :
Change to mustard for center. (2 sc, inc) x 6 (24)
Round 5 :
Switch back to green. 1 sc in each st (24)
Round 6 :
Working in BLO: (3 sc, inc) x 6 (30)
Round 7 :
1 sc in each st BLO (30)
Round 8 :
Petal foundation: *ch 3, skip 1 st, sc in next st* around to create 15 ch-3 loops (15 loops)
Round 9 :
Into each ch-3 loop: (sc, hdc, 3 dc, hdc, sc) forming tall petals. Join with sl st (15 petals)
Info :
Petals will be slightly tall; block with steam or wet-blocking to shape and flatten petal edges for consistent layering.
Round 10 :
Join behind petals into unworked base sts: 1 sc in each st around (30)
Round 11 :
Second petal layer base: *(2 sc, ch 2, 2 sc) in next st, skip 1* repeat around to make 10 larger loops (10 loops)
Round 12 :
Into each loop: (sc, 2 hdc, 5 dc, 2 hdc, sc) - larger outer petals (10 petals)
Round 13 :
Slip stitch around back of outer petals to neaten and fasten off. Weave in ends and block petals outward for a full layered look.
Info :
To create a raised center, work an extra round with mustard: join mustard in center and work 1 round of puff stitches (see puff technique note) to pop out the center before switching to green for petals.
— Medium Layered Flower (Make 4 pale green with mustard centers) :
Round 3 :
(1 sc, inc) x 6 (18)
Round 4 :
Switch to mustard for small center: 1 sc in each st (18)
Round 5 :
Switch to green. Create petal base: *(ch 2, skip 1, sc) x around to make 9 small loops (9 loops)
Round 6 :
Into each loop: (sc, hdc, 3 dc, hdc, sc) (9 petals)
Round 7 :
Round of sc around backing to stabilize petals (18)
Round 8 :
Finish with a decorative edge: *(sl st, ch1) around petals for scallop. Fasten off and block (18)
Info :
For neat color joins, carry the unused color behind your work for a few stitches and cut when switching central accents; weave ends afterwards.
— Sunflower / Spiky Flower (Make 4 mustard with cream centers) :
Round 3 :
(1 sc, inc) x 6 (18)
Round 4 :
Switch to cream for center ring: 1 sc in each st (18)
Round 5 :
Switch to mustard. Petal base: *ch 4, sl st in next st* around to make 9 long loops (9 loops)
Round 6 :
Into each loop: (sc, 2 dc, tr, 2 dc, sc) to create pointed petals (9 petals)
Round 7 :
1 sc around between petals to secure (18)
Round 8 :
Decorative picot edge: *(sc, ch3, sl st in top of ch3) around each petal tip (9 picots)
Info :
These petals have a strong pointy character—block with steam while pulling petal tips slightly outward to hold shape.
— Small Flower (Make 8 cream and mint mix) :
Round 2 :
Join color A: ch1, (inc) x 6 (12)
Round 3 :
(1 sc, inc) x 6 (18)
Round 4 :
Create 6 petals: *(ch2, sc in next st) repeat around to make 6 loops (6 loops)
Round 5 :
Into each loop: (sc, hdc, 3 dc, hdc, sc) (6 small petals). Fasten off and weave ends.
Info :
These tiny flowers are excellent for filling gaps. You can also layer two small flowers offset for more depth.
— Tiny Bud (Make 6) :
Round 2 :
1 sc in each st (5)
Round 3 :
Form a tiny puff: *yo, insert, yo, pull through 1 loop* repeat 5 times to make a 5-loop puff, close with sl st and fasten off (5)
Info :
These buds add texture and look great clustered near leaf veins or between larger flowers.
— Large Leaf (Make 14) :
Round 1 :
ch 11, sc into 2nd ch from hook, sc across to last 2 chs (10 sc)
Round 2 :
Turn and work along other side of chain: sc 10 back, sl st to join at base (20 total sc around)
Round 3 :
Working along one side for shaping: ch1, sc in next 3, hdc in next 3, dc in next 3, (tr in next 1 middle) then mirror on opposite side: dc 3, hdc 3, sc last 3. Fasten off (20)
Round 4 :
Rejoin in center base and work central ribbing: ch1, sc in center, *ch2, sl st back into same st* repeat to make a raised rib, fasten off
Info :
For sharper leaf veins, work BLO on the side rows or use surface slip stitches to add contrast ridges after blocking.
— Medium Leaf (Make 12) :
Round 1 :
ch 9, sc into 2nd ch from hook and across (8 sc)
Round 2 :
sc back along chain, sl st to join (16 around)
Round 3 :
Shape with increases: sc 3, hdc 2, dc 2, hdc 2, sc 3. Fasten off and block (16)
Info :
Varying leaf sizes and shades in placement gives a natural, layered look. Mix darker greens under larger flowers and paler greens at edges.
— Small Leaf (Make 20) :
Round 1 :
ch 7, sc 6 across (6)
Round 2 :
sc back along chain, sl st to join (12 around)
Round 3 :
Add rib: ch1, sc in each st, then surface sl st down center for vein. Fasten off and block (12)
Info :
Small leaves are excellent to tuck under petals and fill negative space when assembling the runner.
— Textured Leaf Variation (Make 8) :
Round 1 :
ch 12, sc into 2nd ch from hook across (11)
Round 2 :
sc back along chain, sl st to join (22 around)
Round 3 :
Working in FLO for texture: 1 sc in next 3 FLO, hdc in next 4 FLO, dc in next 6 FLO, hdc in next 4 FLO, sc in last 3. Fasten off (22)
Round 4 :
Surface embroider a central vein with contrasting thread for detail (Info: use long running stitch). Fasten off.
Info :
FLO/BLO usage creates ridges; use these leaf variations to catch light and add dimensional interest to the runner.
— Joining & Base Fill (Background Fill Motifs) :
Info :
Decide your runner layout on a flat surface before joining. The photos show a staggered repeat: large disc, layered flower, sunflower, cluster of small flowers and leaves, repeating along the runner axis. Pin each motif and photograph your layout before sewing.
Round 1 :
Pick two motifs to join: place them right sides up touching at intended seam point. Using yarn and tapestry needle, whip stitch through outer round post and into outer round of second motif with small, even stitches. Work around join area, spacing stitches 2-3 mm apart for stability.
Round 2 :
For join-as-you-go: work last round of a motif using sl st or sc into adjacent motif sts to lock them together. Example: when finishing the final sc round on a disc, instead of finishing the round, sl st into free loops of neighboring petals to join then continue sc to complete round. Fasten off and weave ends.
Info :
Alternate join methods: visible whip-stitch for rustic look or invisible ladder stitch for seamless joins. Use small stitches to avoid gaps and keep runner durable for table use.
— Assembly Sequence (Suggested) :
Round 1 :
Lay out central spine: arrange large discs and large layered flowers alternating to form runner center spine. Space them so petals overlap about 8-12 mm for visual continuity.
Round 2 :
Attach medium flowers and sunflowers to the side of spine using join-as-you-go or whip stitch, filling gaps with small flowers and buds.
Round 3 :
Tuck leaves under petals and overlap edges; secure leaves at three points with small whip-stitches: tip, middle, base to prevent flipping up.
Round 4 :
After the main assembly, reinforce high-traffic seams with an additional row of edge sc using matching yarn to secure joins and create a unified surface.
Info :
Always pin and check symmetry as you go; rotate the runner to view from all angles and adjust placement before final sewing to avoid unintended gaps.
— Decorative Edge Option (Optional Lace Border) :
Round 1 :
With yarn matching majority color, sc evenly around entire assembled runner edge, placing 1 sc for every 4 mm of edge. Join ends with sl st. Count stitches for reference.
Round 2 :
Sc around again working *(ch4, sl st in 2nd ch from hook) to create loops,* place a sl st into every 6th base sc to form a small scallop. Fasten off and weave in ends.
Info :
Alternatively, create a tiny picot edge for a more finished look: *(sc, ch3, sl st in 3rd ch) every 5 sc* around. Test edge on a scrap to ensure the border sits flat and does not curl.
— Puff Stitch Center Technique :
Round 1 :
To make puff stitch centers like the large flower mid-round: yarn over, insert hook into st, yarn over and pull up a loop — repeat 4 times into the same stitch so you have 9 loops on hook, yarn over and pull through all loops, ch1 to close puff. Anchor with sl st in next st.
Info :
Use puff stitches in clusters for textured centers. Keep loops even in tension; if puff is flat, add one more yo-loop; if too tall, reduce loops by one. Secure centers with 1 round of sc afterwards if needed.
— Blocking & Finishing :
Info :
Wet-block each motif flat before final joining. Pin petals and leaves to desired shape and allow to dry fully. This step is crucial to achieve the flat, crafted look shown in photos and to make joins sit neatly.
Round 1 :
After assembly, press with steam from 10-12 inches above work—do not press iron directly. Re-pin any petals if they moved during sewing then allow to cool before removing pins.
Round 2 :
Weave in all ends into neighboring motifs, trimming close but not too close—leave 1-2 mm of tail inside stitches. For extra security, add a small dab of fabric glue to hidden knots (optional).
Info :
Final runner will drape more naturally after a gentle wash and reshaping. Store flat or rolled to avoid creasing of petals and leaves.
— Pattern Summary & Motif Counts (Photos Layout) :
Info :
Suggested motif counts to create a runner approximately 110 cm long: 3 large discs, 3 large layered flowers, 4 medium layered flowers, 4 sunflowers, 8 small flowers, 6 tiny buds, 14 large leaves, 12 medium leaves, 20 small leaves, and 8 textured leaf variations. Adjust counts to desired length and fullness.
Round 1 :
Plan your layout by placing the largest motifs first, then fill gaps with medium and small elements. Sew as you go for a secure, organic join and to maintain motif shapes without heavy flattening.
Info :
If you prefer symmetry, mirror the layout across the runner center; for a more natural look, stagger motif placement slightly as shown in the images.
This floral table runner pattern combines classic crochet motifs with layered, textured details to create a beautiful handmade centerpiece. Each motif is an opportunity to play with color and shape and the join-as-you-go assembly makes the process satisfying and surprisingly quick. The finished runner brings garden charm indoors and makes a thoughtful, handcrafted gift. 🧶🌼 Lay it out, pin, join, and enjoy a personalized touch to your table decor. Happy stitching! 🌿