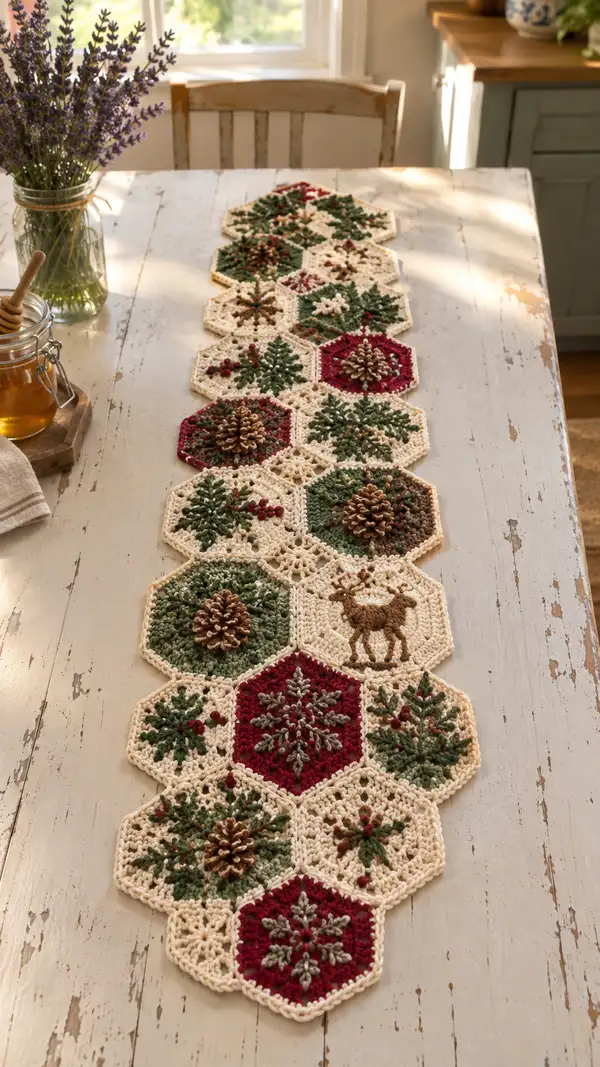
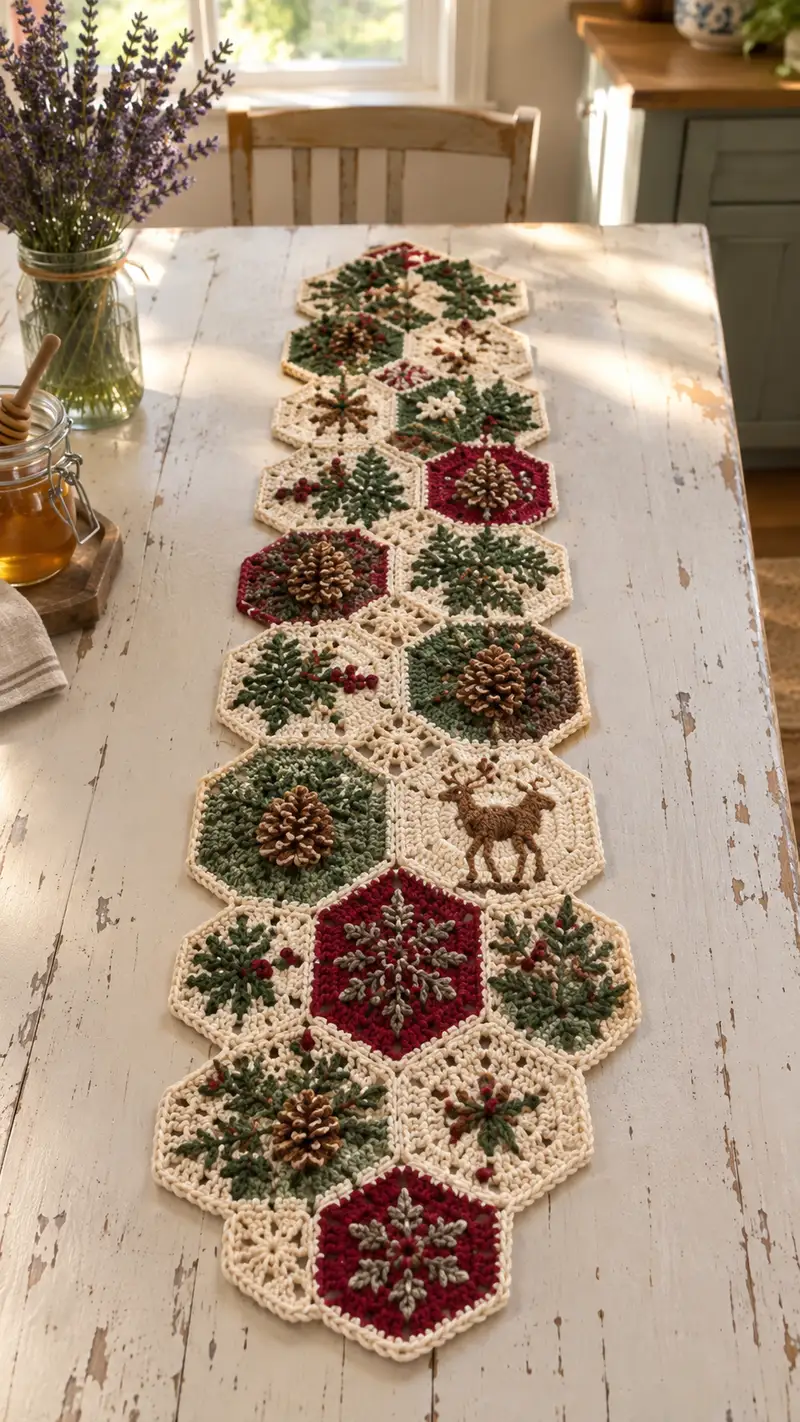
Create a warm, rustic table runner made from linked hexagon motifs in cream, burgundy and forest green. Each hexagon features seasonal details — embroidered pine sprigs, bobble berries, snowflake stars, a charming deer silhouette, and a textured 3D pinecone. The motifs are joined with a delicate cream lace join and finished with a scalloped border for a handmade heirloom look.
Progress Tracker
0% Complete
— Overview :
Info :
This runner is made of 18 hexagon motifs arranged end-to-end in two offset columns giving a long runner effect. Each hexagon is worked from the center out in worsted weight yarn with a cream joining round. Motifs include variation templates: Pinecone Hex, Pine Sprig Hex, Berry Cluster Hex, Snowflake Hex, Deer Silhouette Hex, and Plain Textured Hex for balance. You can substitute real mini pinecones or crochet your own using the Pinecone Applique section. Work tidy color changes and block motifs flat before joining.
— Hexagon Base (make 18) :
Round 1 :
6 sc in magic ring (6)
Round 3 :
(1 sc, inc) x 6 (18)
Round 4 :
(2 sc, inc) x 6 (24)
Round 5 :
(3 sc, inc) x 6 (30)
Round 6 :
(4 sc, inc) x 6 (36)
Round 7 :
(5 sc, inc) x 6 (42)
Round 8 :
(6 sc, inc) x 6 (48)
Info :
Rounds 1-8 create a stable hexagon base; place your increases evenly at six corner points to form the hexagon shape. Use stitch markers at the start of each round to keep track. Change color where noted by carrying yarn or fastening off and rejoining - see motif variations below.
Round 9 :
1 sc in each st (48)
Round 10 :
1 sc in each st (48)
Round 11 :
1 sc in each st (48)
Info :
These even rounds build the hexagon to the final size. Work rounds 9-11 in the background cream for most hexes, or substitute the accent color for colored centers (burgundy or green). Block motifs flat after finishing these rounds before adding surface detail to ease embroidery and joining later.
Round 12 :
Work 1 sc in each st BLO to create a subtle ridge if you want a defined inner edge (48)
Round 13 :
1 sc in each st (48)
Info :
If your motif will be heavily embroidered (deer or snowflake), work round 12 in the accent color to help the detail pop. Add a spare length of yarn to use for surface slip stitch embroidery later - you can leave a long tail to stitch over the finished motif if preferred.
— Snowflake Hex (make 3) :
Info :
Work hexagon base in burgundy for rounds 1-11 (use burgundy for rounds 1-11 in the Hexagon Base). After round 11, attach a contrasting light gray or moss for the snowflake. The snowflake uses post and treble combinations to form a star on the surface.
Round 14 :
Join light contrast yarn in the center top of hexagon; ch1, sc in same st, (ch4, sc in next corner point) x6 to create 6 small loops around the edge for reference (6 loops)
Round 15 :
Working from the center area, sl st to the central area between two corner increases, ch3 (counts as dc), 2 dc in same sp, ch2, 3 dc in next reference sp; rep across to make 6 spokes (6 spokes total)
Round 16 :
At the tip of each spoke, ch3, tr in same st, ch2, tr in same st to create a small forked tip; sl st back to base of spoke. Repeat at each spoke (6 tips)
Info :
Work these snowflake rounds with a smaller hook (3.5 mm) if you want the star to sit more compressed and defined. Use even tension and block flat. If you prefer a flat embroidered snowflake, you may use surface slip stitch instructions instead of post stitches.
Round 17 :
Surface crochet: Using light contrast, surface sl st around each dc cluster to define, then add small 3-loop picot chains at each arm tip: (ch3, sl st in 1st ch) to mimic delicate points (6 picot points)
Round 18 :
Embellish: Using a darker accent, embroider a small center dot and tiny satellite chains between arms. Add tiny French knot-style bobbles (see Berry/Bobble section) at 3 alternate arm junctions for sparkle (3 bobbles)
Info :
Snowflake motifs benefit from careful blocking. Pin into shape with arms evenly spaced. If using metallic thread as highlights, couch it with tiny stitches rather than pulling it through the fabric to avoid shine loss.
— Pine Sprig Hex (make 6) :
Info :
Work hexagon base in cream for rounds 1-11 then change to forest green for round 12-13 to create a colored central octagon where sprig detail will sit. The sprig is worked with surface slip stitch and short trebles for needle texture, plus small bobbles for berries.
Round 12 :
Change to forest green yarn. 1 sc in each st (48)
Round 13 :
1 sc in each st (48)
Info :
Decide sprig placement: typically center of hexagon. Use a removable stitch marker at the center of the hexagon for reference (go through the center of the initial magic ring area). The sprig will consist of 3-5 angled branches fanning from a short trunk.
Round 14 :
Surface slip stitch trunk: using forest green, bring yarn to surface at center, sl st 3-4 sts forward to form trunk (approx 4-6mm in length). Fasten off and rejoin for branches as needed
Round 15 :
Branch 1: join at base of trunk, ch1, (sc in next st, ch2, tr in next st, ch2, sc) to create a branch with two needle clusters; secure with sl st to motif. Repeat for 2-4 more branches angled symmetrically (3-5 branches total)
Round 16 :
Needle detail: In each branch, work small sets of 3 short treble clusters along branch stem by making 3 tr worked into successive surface points (pick up bars with hook and pull loops through to make tr). This gives a pine-needle texture.
Round 17 :
Berries: Using burgundy, embroider tiny french-knot-style bobbles: bring yarn up, wrap yarn around needle 2 times and insert back near original point, pull through to form a tight bobble; secure with a sl st on the inside. Make 2-4 berries near the base of branches (2-4 bobbles)
Info :
Alternative bobble: work a 3-loop bobble directly into the fabric: (yarn over, pull through twice) x3, yarn over and pull through all loops, ch1 to secure. Keep bobbles small so they read as berries rather than lumps.
— Berry Cluster Hex (make 4) :
Info :
These hexagons are cream with a scattered cluster of embroidered berry bobbles and small short-row leaves. Work hexagon base in cream and add clusters of 3-6 bobbles and leaves placed off-center for visual interest.
Round 14 :
Using moss or olive, make tiny fly-stitch leaves: bring yarn through, sl st, ch3, sl st back into base to anchor leaf; repeat in small arcs to form a leaf spray (6-8 leaf stitches)
Round 15 :
Add bobbles in burgundy: work 3 small bobbles in a triangle cluster. Space clusters across three points of the hex for balanced look (3 clusters)
Info :
Use a blunt tapestry needle for fly-stitch leaves if you prefer embroidered leaves rather than surface slip stitches. Keep the leaves flat to avoid too much bulk when joining motifs.
— Pinecone Hex with 3D Cone (make 3) :
Info :
These are the standout textured hexes. Options: attach small store-bought mini pinecones with glue or tie, or crochet your own layered pinecone applique and sew it to the center. Below provides a crocheted pinecone worked in rounds and then sewn to the hex center.
Pinecone Applique Round 1 :
With tan yarn, ch2, 6 sc in 2nd ch from hook; join with sl st (6)
Pinecone Applique Round 2 :
(ch3, 2 dc in same st, sl st in next st) x3 to make 3 petal clusters around base. Turn petals slightly to overlap. Fasten off short tail for sewing (18 loops worked)
Pinecone Applique Round 3 :
Rejoin tan in between petals, sl st, ch4, 3 tr in same sp, sl st in next gap; repeat around to create staggered scale layer (6 scale clusters)
Pinecone Applique Round 4 :
Repeat Round 3 but stagger scales to sit between previous scales, using shorter clusters (ch3, 3 dc) to compress the layer for a tapered cone shape. Repeat 2-3 times until you have built a cone of 3-4 layered rounds. Fasten off and stuff lightly in the center if you prefer a fuller cone.
Info :
Work the pinecone scales slightly offset as you build up layers; trim yarn ends and block lightly with steam to set rounded scales. Sew the finished cone to the hexagon center using a strong brown yarn and whip stitch through base rounds. If using real pinecones, secure with craft glue and a few reinforcing stitches around base.
Pinecone Final Detail :
Optionally dry-brush tips of cone with cream or white acrylic paint for a frosted look. Allow to dry completely before attaching.
— Deer Silhouette Hex (make 1) :
Info :
Work hexagon base in cream with a textured center (rounds 1-13). The deer silhouette is embroidered using surface slip stitch and short loop stitches to outline and fill. Transfer a simplified deer outline by marking placement with pins and basting with a contrast thread.
Round 14 :
Surface outline: Using brown yarn and yarn needle, bring yarn up at the deer head top. Work surface slip stitch tracing the head, antlers, neck and body. Keep stitches close (about every 2 mm) to form a smooth outline.
Round 15 :
Antlers: Use a combination of split-stitch and tiny single crochet floats to create branching antlers. Work small tines off main antler stalk using short chain loops anchored back to the stalk with a sl st.
Round 16 :
Body fill: Using brown, use satin-stitch style surface slip stitches closely packed to fill the body and legs. Alternate direction to follow the contour for a natural look, and leave small gaps for definition at joints (legs, throat). Fill legs with vertical rows of tight surface sl st.
Info :
Practice the surface technique on a scrap before working on the final hex. Use a fine tapestry needle to pull stitches through neatly. Secure ends on the wrong side and weave in thoroughly to avoid loose threads.
— Plain Textured Hex (make 3) :
Round 14 :
After completing hexagon base rounds 1-13 in cream, work a textured round: *(ch1, sc in next 3 sts, fpdc around next st)* repeat around to create subtle texture (48)
Info :
These act as neutral spacers between heavily decorated hexes to give the eye rest. Texture adds interest without competing with applied motifs.
— Joining (Join-As-You-Go) :
Info :
Arrange hexagons in the desired layout (photo shows a long vertical runner with offset columns). Join-as-you-go method links edge stitches of adjacent motifs while working the final round. Ensure motifs are blocked and flat before joining for clean seams.
Joining Round A (for a hex about to be joined) :
Working in cream, begin final decorative round: ch1, sc in first 3 sts, *ch2, sc in corner st, ch2, sc in next 3 sts*, when you reach a side that touches an already-completed neighbor: instead of sc in the next st, sl st into corresponding st on neighbor to join, then continue sc in next st of working hex. Continue around and join at each touching side (48 including joins)
Info :
Pin the two motifs together aligning the stitch spacing of the sides. Typically sides that touch will have 7-9 stitches depending on your gauge; find equivalent distance on neighbor and sl st through both layers to create a neat join. Maintain even tension during sl st joins to avoid puckering.
Joining Round B :
After motifs are connected in primary runs, work a lace connector round to build small circular joins at three corner points where three motifs meet: ch3, join with sl st to create small loop, sc around previous sl st joins to lock into place. Repeat at triple junctions for decorative strength (6-9 small loops per runner)
Info :
Alternative joining: sew motifs together by mattress stitch from the wrong side for an invisible seam if you prefer no surface sl st. However, join-as-you-go gives a continuous look and saves finishing sewing time.
— Final Border & Scallop Edge :
Round 1 (Border) :
With cream, work 1 sc evenly around entire assembled runner edge, placing 3 sc in each corner point to maintain smooth border. Keep counts consistent across the length to ensure scallop spacing stays even.
Round 2 (Scallop) :
*Skip 2 sts, 5 dc in next st, skip 2 sts, sl st in next st* repeat around to form shell scallops. Adjust skips slightly at corners so scallops end evenly.
Round 3 (Finishing) :
Work a tidy pick-up round in BLO: 1 sc in each st BLO to refine edge and create a crisp finish (approx 180-240 sc depending on runner length)
Info :
Block the entire runner after the border is complete. Use steam or wet-blocking to shape scallops evenly. If your border has varying shell counts at ends, add or remove small shells to keep visual balance.
— Alternative: Attach Real Mini Pinecones :
Info :
If you choose to attach real pinecones for a rustic look, use small lightweight ones (approx 1-2 cm). Secure by running a length of strong thread or thin wire through the base and stitching through the center of the hexagon base, or glue with fabric/hot glue to the crocheted pinecone round. Reinforce with a few whip stitches to ensure they stay in place during handling.
— Finishing Touches & Care :
Info :
Weave in all tails on the wrong side thoroughly. For embroidered elements, secure ends by weaving them several rows into the wrong side of motif. Hand wash gently in cool water with mild detergent and lay flat to dry. If you used real pinecones, remove before washing or spot-clean around them carefully.
Info :
Optional: Stiffen motifs lightly using diluted fabric stiffener for a table runner that lays flatter and will support heavier embellishments. Test on a scrap first to ensure finish matches desired feel.
This hexagon table runner brings a touch of handmade seasonal magic to your table. Each motif — from embroidered pine sprigs to three-dimensional cone centers and a singled-out deer silhouette — adds personality and texture for a cozy, collected look. The join-as-you-go construction and scalloped edge make finishing straightforward and satisfying. 🧶 Bring this runner to life with your favorite color variations, and enjoy a centerpiece that will become part of family traditions. 🎄