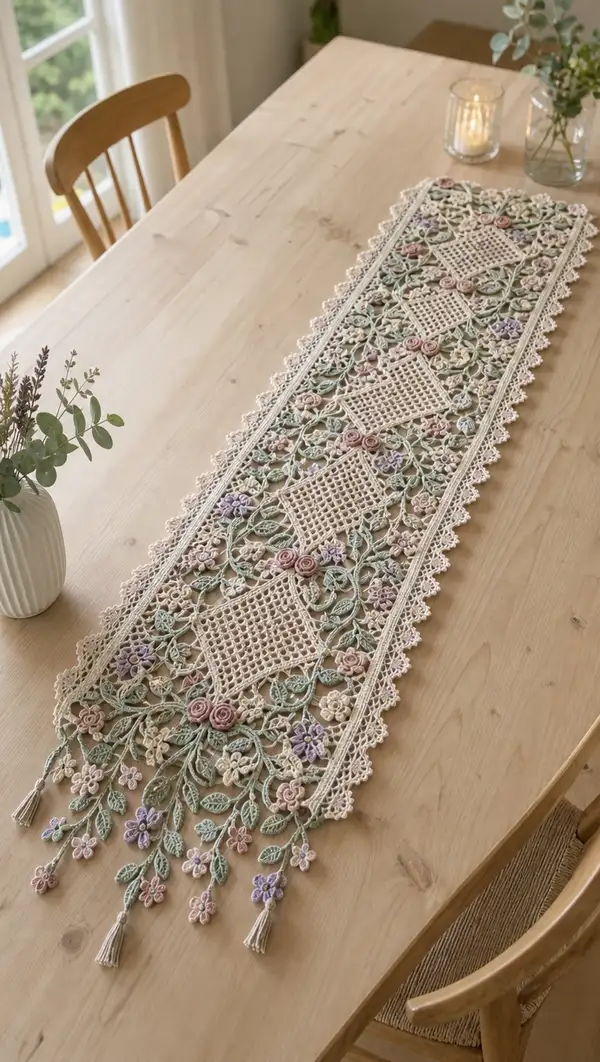
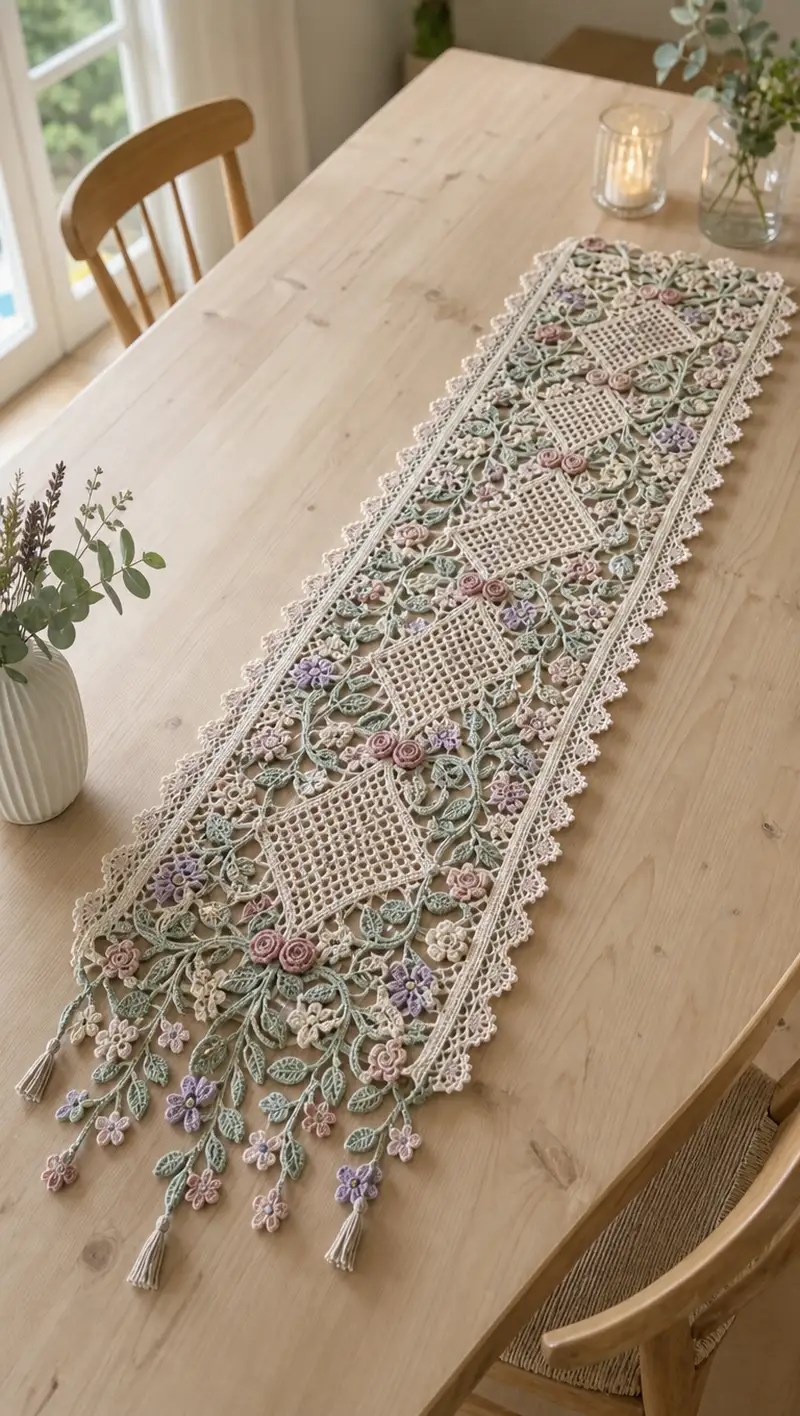
Create a long, romantic lace table runner featuring four central openwork squares framed by flowing vines, tiny roses, pastel blossoms and tassel fringe. This pattern recreates the delicate Irish-crochet-inspired look in soft cream, sage, dusty pink and lavender. Detailed motif instructions and step-by-step joining make it possible to assemble the runner piece by piece for a heirloom-quality table accent.
Progress Tracker
0% Complete
— Materials & Gauge :
Info :
Use light fingering or sport weight cotton. Gauge is not critical for lace look but affects finished runner length. With 2.5mm hook and main color, 10cm square of mesh (dc with chains) should be approximately 18-22 mesh spaces across. Keep tension consistent across motifs.
— Center Lattice Square Motif (Make 4) :
Round 1 :
Ch 8, join with sl st to form a ring (8 ch). This will act as base ring for first round of dc clusters.
Round 2 :
Ch 3 (counts as dc), (2 dc, ch 2, 3 dc) in ring to form first corner. *Ch 1, (3 dc, ch 2, 3 dc) in ring; rep from * 3 times. Join with sl st to top of starting ch 3. (4 corner groups)
Round 3 :
Sl st into ch-2 corner sp, ch 3, (2 dc, ch 2, 3 dc) in same ch-2 sp (corner made). *Ch 3, sc in center of next side (between corner groups) to form lattice anchor, ch 3, (3 dc, ch 2, 3 dc) in next ch-2 corner sp; rep from * around. Join. (4 corners, 4 side anchor spaces)
Round 4 :
Work in rounds building lattice: sl st into first side anchor ch-3 sp, ch 3, dc in same sp, ch 1, dc in next ch-3 sp (repeat across side), at corner make (3 dc, ch2, 3 dc) in corner ch-2 sp. Join. This round forms the first mesh row on each side. Count across each side: 1 corner cluster, 5 dc mesh stitches, 1 corner cluster (approx 9 dc equivalent).
Info :
From this round onward we will create a regular openwork mesh using chains and dc pairs so the square grows evenly. Keep corners consistent: always work (3 dc, ch2, 3 dc) in corner ch-2 space.
Round 5 :
Sl st to first side sp, *(dc, ch2, dc) in each side sp across to corner ch-2 sp; at corner (3 dc, ch2, 3 dc); rep from * around. Join. This creates a regular mesh grid. Count: each side will contain 6-8 mesh spaces depending on tension (approx 24-32 dc across whole round).
Round 6-8 :
Repeat Round 5 to expand square evenly. Maintain corners as (3 dc, ch2, 3 dc). After Round 8 the square should be approximately 9cm across depending on tension. (st count approximates; maintain consistent pattern)
Info :
Check measurements. If you prefer a larger center square, add 1-2 more mesh rounds by repeating Round 5. Block each finished square flat before joining to prevent distortion.
Round 9 :
Optional decorative insertion: In each side sp, instead of dc pairs, work (dc, ch3, dc) to create slightly larger mesh, giving diamond openings in center. Join and fasten off. Weave in ends. (Finish motif)
— Small Cluster Rose Motif (Make 12) :
Round 1 :
Make tight spiral rose center: mr, ch 1, 6 sc into ring (6). Pull ring closed. (6)
Info :
This rose is worked as a spiral strip of petal rounds that will be rolled and sewn into a rose. Each petal row increases a small amount to give a tapered, coiling rose look.
Round 2 :
Ch 3 (counts as sc for strip), turn, in each st of Round 1 work: (sc, hdc, dc, hdc, sc) across all 6 sts to create a petal ridge; do not join; continue in a continuous spiral for next petal row. End after completing petals to create a strip approximately 3-4cm long. Fasten off leaving long tail for coiling and sewing.
Info :
Alternatively work petals in rows by turning and join with sl st at end if you prefer a defined edging. For two-color roses, use a lighter center and darker outer petal color, joining yarn at beginning of petal round.
Round 3 :
Coil strip tightly from one end, sew base securely using long tail and yarn needle to form rose. Reserve small nub of stuffing in center if you want a plumper center. Make 12 roses (six slightly smaller for cluster depth).
— Tiny 5-Petal Flower (Make 28) :
Round 1 :
mr, ch 1, 5 sc in ring, pull tight, join with sl st to first sc (5)
Round 2 :
*Ch 4, sl st in next st to form loop petal; rep from * around to make 5 loops. Fasten off leaving tail. (5 loops)
Info :
To define petals, work front-loop picot edge: join yarn in each loop, (sc, ch3, sl st in loop top) to create tiny picot. These small flowers will be sewn to vines and used as dangling blossoms in fringe.
Round 3 :
Work small picot or sc edging around each petal if desired. Make 28-36 small flowers in mixed pastel colors.
— Raised Spiral Rose (Layered) (Make 8) :
Round 1 :
mr, ch1, 8 sc into ring (8)
Round 2 :
Ch 3, *in next st work (dc, tr, dc), sl st in next st; rep from * around to create petal arcs. Adjust petal count so you have 8 arcs. Fasten off and leave long tail.
Round 3 :
Wind spiral center into a rose and sew in place beneath petal arcs to give dimensional roses. Make 8 roses and combine with small roses for clusters between squares.
— Leaf Motif (Make 40-48) :
Round 1 :
Ch 8, sc in 2nd ch from hook, hdc in next, dc in next 2 ch, hdc in next, sc in last ch, ch 1, sl st into opposite side of foundation ch to work along opposite edge: sc, hdc, dc, dc, hdc, sc. Fasten off. (Leaf length approx 3-4cm)
Info :
Make leaves in sage green. For open veining, you can work a central line of slip stitches or surface crochet later. Leaves can be made slightly larger by using ch10 foundation.
Round 2 :
Optional BLO ridge: rejoin yarn along leaf center, work 1 sc in each st BLO to create a raised ridge down the center. Fasten off. Make 40-48 leaves to arrange around squares and within vine runs.
— Curved Vine Link (Make 20 long + 16 short) :
Round 1 :
Ch 30 (long vine) or ch 18 (short vine) to create draping vine segment. Join with sl st to desired attachment point or leave as free strand for fringe. Vines will be embellished with leaves and small flowers along their length.
Round 2 :
Along chain: sc in 2nd ch from hook, *ch 3, skip 2 ch, sc in next ch; rep across to create series of loops for attaching leaves and flowers. Fasten off. Prepare 20 long and 16 short segments.
Info :
Spacing of ch-3 loops determines how many leaves and flowers you can attach. Plan placement by pinning motifs to a blocking board and placing vine segments to achieve desired drape.
— Small Clustered Blossom (Make 18) :
Round 1 :
mr, ch1, 6 sc in ring, pull tight, do not join; ch 1, turn and work around the 6 sc as a continuous round.
Round 2 :
Work 6 petals: in each st work (ch 3, 2 dc, ch 3, sl st in same st) to form a lace petal; rep around. Fasten off. Make 18 small blossoms in pale cream or soft blush.
Info :
These blossoms will be used to fill negative space between squares and vines. Make a few extra for assembly corrections.
— Joining Rosettes and Leaves into Clusters :
Info :
To create the look in the photo, assemble clusters of one larger rose, one medium spiral rose, and 2-3 leaves plus 2-3 tiny flowers. Stack with largest rose centered over mesh square corners and secure with yarn tail using whip stitch.
Round 1 :
Lay base mesh square flat. Place rose cluster at each corner and at centers of long sides; pin in place. Use main cream yarn and mattress stitch to attach by sewing through mesh intersections and rose base, pulling gently but not flattening roses. Repeat for all four center squares.
— Decorative Picot Scallop Border Strip (Make 2 long strips) :
Round 1 :
Ch length to match runner length plus 2 cm (measure across assembled center sections). Turn, sc in 2nd ch from hook and across, keep even tension. Fasten off. (This creates a narrow band to frame both sides of central panel)
Round 2 :
Rejoin at one end, ch 1, sc in each st across, at end ch 3 and work picot edge along outer side: *sk 2 sts, (sc, ch3, sl st in sc) to make picot; rep along edge. Fasten off. Repeat for second strip.
Info :
Make these two strips in the main cream color and attach along both long sides of the assembled motif area to create a neat frame that the scalloped outer edging will sit on.
— Outer Lace Edge (Scalloped) :
Info :
The outer scalloped edge is worked after the central motifs are joined and the side strips are sewn in place. It uses repeated shell and picot clusters to give the delicate scalloped trim seen in the photo.
Round 1 :
With runner assembled and side strips secured, attach main color yarn at one corner. Ch1, sc evenly along side strip attaching to runner every 3-4 mesh sts. At each picot point along side strip, work (5 dc shell, ch3, sl st in 3rd ch for picot) in same space to create larger scallop. Skip 2 sc, sc, then next shell; rep along entire length. Turn corner with 2 shells to maintain symmetry.
Round 2 :
Work a decorative chain loop between scallops: in the ch3 sp of each shell work (ch5, sl st in next shell's ch3 sp) forming a delicate connecting arch. Fasten off. Block scalloped edge to open shells and set shape.
— Fringe Tassel & Dangling Flowers (Make 6 tassel groups) :
Round 1 :
Prepare tassel core by winding main cream yarn around a 3cm template approximately 24-30 times. Slide off and tie top loop with a doubled strand of yarn. Trim bottom loops to create tassel fringe and wrap a small piece of yarn around 6-8mm down to form the tassel neck. Repeat for 6 tassels.
Round 2 :
Attach tassel groups to ends of runner by sewing the tied top into the last row of vines, using several secure passes through the neck to create sturdy attachment. Leave enough length for tassels to hang approximately 5-6cm below runner edge.
Round 3 :
Attach 3-5 small 5-petal flowers along short vine tails to form dangling floral clusters. Sew each flower to vines using tiny whip stitches through the flower base. Space evenly and ensure balanced drape.
— Joining Motifs: Step-by-Step Assembly :
Info :
Layout all motifs on a blocking board before joining. Arrange the four center lattice squares in a straight line with even spacing approx 2-3 mesh units between each square. Place two long decorative strips along both long sides of the line of squares. Position rose clusters and leaf groups at square corners and between squares as shown in the photo.
Round 2 :
Sew the first long strip to the outermost points of the first row of square motifs using mattress stitch through corner mesh loops and strip sc foundation. Secure every 1 cm with a small stitch. Repeat for opposite strip.
Round 3 :
Attach vine segments between squares: working with sage yarn, pick up yarn at corner ch-3 loop adjacent to a rose cluster and crochet a curving vine by joining ch-30 vine to that point with a sl st, then sew or single crochet the vine into place along the intended path to the next cluster; secure at intervals through mesh by whip stitch. Repeat until all vine paths are attached.
Info :
Attach leaves and flowers to vine loops before or after sewing vines in place depending on preference. For a three-dimensional look, sew in place after vines are secured; for a flatter portrait, attach to vine as you go.
Round 5 :
Sew rose clusters at pre-planned positions: stitch through rose base and mesh intersection beneath, anchoring tightly but allowing petals to preserve volume. Add extra small blossoms around clusters to fill negative space and create visual balance.
— Final Blocking & Finishing :
Info :
Thorough blocking is essential. Pin runner to flat blocking board or foam with edges and tassel positions equalized. Use rust-proof pins and a light mist of water or steam (per yarn care) to set shape. Leave to dry fully before removing pins.
Round 2 :
Weave in all ends securely, trimming tails short. For security, weave ends through multiple stitches and knot where necessary at points of tension such as tassel tops and vine connection junctions.
Round 3 :
Lightly press with a warm iron through a damp cloth if your yarn care allows, shaping scallops and smoothing mesh. Final trim tassel lengths uniformly and comb lightly for a clean finish.
Info :
Label and note motif counts for future repeats: 4 lattice squares, 12 small spiral roses, 8 layered roses, 28 tiny flowers, 40-48 leaves, 20 long vines, 16 short vines, 2 side strips, 1 outer scalloped edging and 6 tasseled fringe groups.
This lace runner pattern brings a touch of vintage charm to any table—full of tiny blooms, delicate leaves, and pretty tassel fringe. The modular approach makes it satisfying to make piece by piece, and the final blocking and joining are so rewarding. Enjoy the process of arranging and assembling each little motif into a flowing garland—every stitch adds character and warmth to your home. 🧶🌸✨