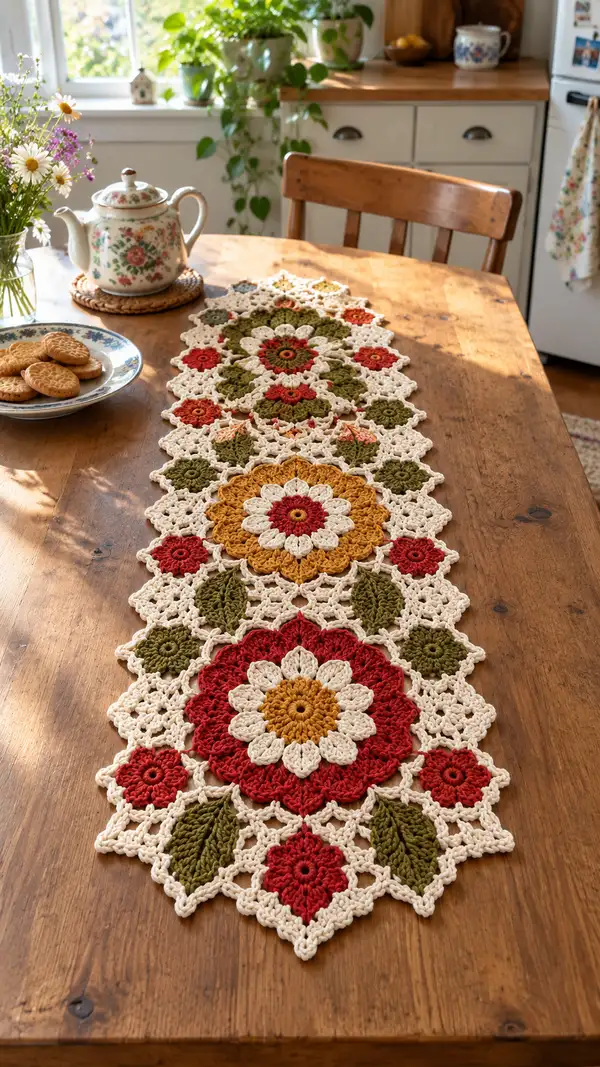
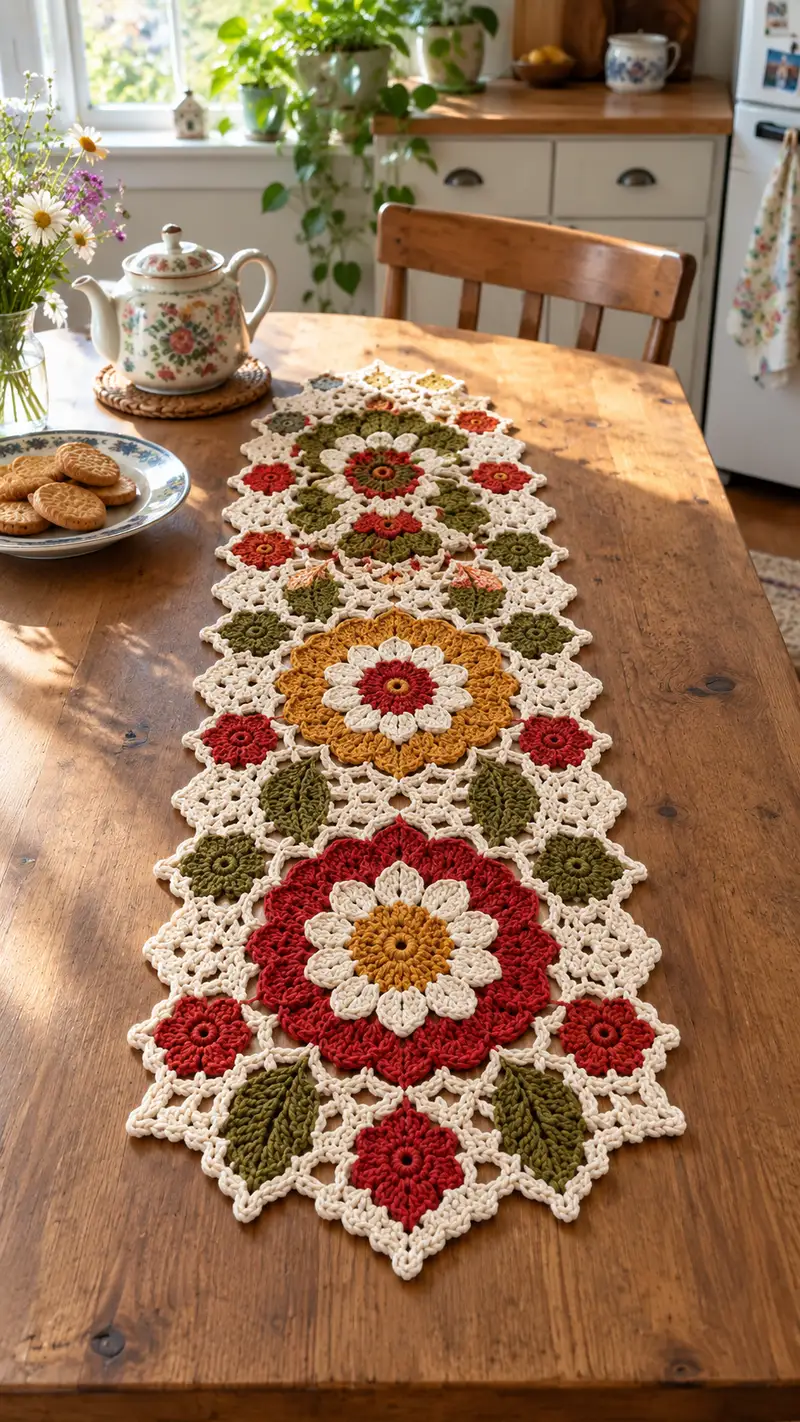
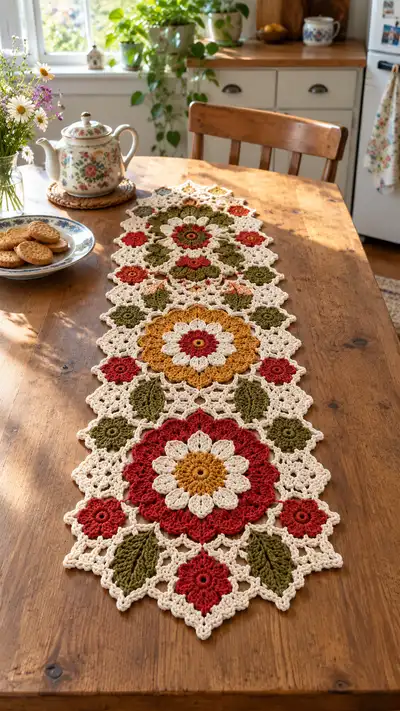
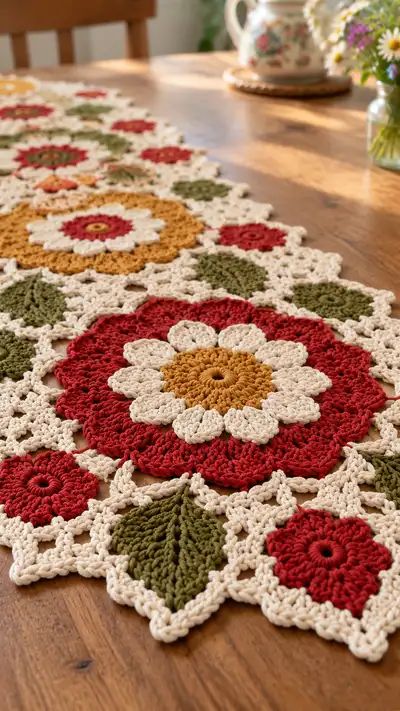
A warm, vintage-inspired floral table runner composed of interlocking floral and leaf motifs in cream, deep red, mustard and olive. This runner features layered flower centers, raised petals and openwork lattice joins for a delicate, handmade look. The pattern uses join-as-you-go assembly for a seamless finish and includes clear color-change tips and finishing instructions. Perfect for autumn tablescapes or year-round cottage decor.
Progress Tracker
0% Complete
— Large Floral Medallion (make 3) :
Round 1 :
Using mustard (Color A). 6 sc in mr (6)
Round 2 :
Inc around: 6 inc (12)
Round 3 :
(1 sc, inc) x6 (18)
Round 4 :
(2 sc, inc) x6 (24)
Round 5 :
1 sc in each st (24)
Info :
Change to deep red (Color B) for the first petal round. Fasten off Color A and join Color B in back loop of any stitch to give a subtle ridge between center and petals
Round 6 :
Join Color B. [ch3 (counts as dc), dc in same st, ch2, *2 dc in next st, ch2] around, join with sl st to top of starting ch3. You will make 24 dc clusters separated by ch2 (24 clusters)
Round 7 :
Into each ch2 space: [ch1, (3 dc, ch2, 3 dc)] working shell petals. This produces 24 petal spaces; join with sl st (24 shells)
Round 8 :
Working behind the petal row: sl st to next shell, ch1, 1 sc in center of shell, ch3, skip to next shell center, 1 sc; repeat to create ledger chain around (24 ch-3 loops)
Info :
Switch to cream (Color C) for the layered petal round to create contrast. Carry Color B ends to weave in later or fasten off and rejoin Color C.
Round 9 :
Join Color C in ch-3 loop: [ch2 (counts as hdc), (2 dc, ch1, 2 dc) in same loop] forming a raised petal; sl st to next loop. Repeat around (24 petals)
Round 10 :
Slip to base between petals, ch1, 1 sc in each stitch across the top of petals and across spaces, approx 96 sc (approx 96) — count as you go and adjust to maintain even tension
Round 11 :
Working BLO to create a defined edge: 1 sc in each st BLO (96)
Round 12 :
Begin large scallop: *ch3, skip 2 sc, sc in next, repeat from * around forming a lacy scallop edge (approx 32 small scallops)
Info :
Change back to Color B or a second accent (mustard) for outer petal contrast if desired before next round. Pin motif flat to check round shape before continuing.
Round 13 :
Join Color A (mustard) for outer petal: in each scallop, work [ch1, (5 dc) in scallop, ch1, sl st in next sc] creating pronounced outer petals (32 petals)
Round 14 :
Ch1, 1 sc in each st around to tidy edge (approx 192 sc) adjust as needed to keep flat
Round 15 :
Star point shaping: *sl st 2, ch4, sl st in sc to create connecting points; repeat to make 16 points around. This prepares join points for lattice connection (16 join points)
Round 16 :
Fasten off leaving tail for blocking and weaving. Weave ends through edge stitches and block motif to 12-13cm diameter.
— Medium Floral Motif (make 4) :
Round 1 :
Using deep red (Color B). 6 sc in mr (6)
Round 3 :
(1 sc, inc) x6 (18)
Round 4 :
Change to cream (Color C). (2 sc, inc) x6 (24)
Round 5 :
Into each st: [ch3, (2 dc, ch2, 2 dc)] to make raised petal bases; join with sl st (24 petals)
Round 6 :
In each ch2 space: ch1, 5 dc, ch1 to form full petals (24 petals)
Info :
These medium motifs are slightly smaller; block to approx 9-10cm so they fit neatly between large motifs. Use tapestry needle to hide starting tail in center for a smooth finish.
Round 7 :
Switch to olive (Color D) for a decorative ring: ch1, 1 sc in each stitch around across petal tops to anchor petals (approx 96 sc)
Round 8 :
Work a small openwork border: *ch3, skip 2, sc; repeat around (approx 32 ch-3 loops)
Round 9 :
In each ch-3 loop: sl st, ch1, (3 dc, ch1, sl st) to make tiny clusters (32 tiny clusters)
Round 10 :
Sc around to tidy edge (approx 128 sc)
Round 11 :
Optional: BLO round for contrast ridge: 1 sc in each st BLO (128)
Round 12 :
Fasten off and weave in ends. Pin flat and steam-block to shape.
— Small Blossom Motif (make 6) :
Round 1 :
Using deep red (Color B). 6 sc in mr (6)
Round 3 :
Switch to cream (Color C). (1 sc, inc) x6 (18)
Round 4 :
Into each st: ch2, (2 dc, ch2, 2 dc) in every 3rd st to form 6 petals (6 petals)
Round 5 :
Sl st to base, ch1, 1 sc around petals to form a small disk (approx 36 sc)
Round 6 :
Edge: *ch3, sc in next stitch; repeat around to create tiny loops (12 loops)
Round 7 :
Fasten off leaving tail for join-as-you-go. Weave tail neatly into center ring to hide.
Info :
Small blossoms act as filler motifs between larger medallions. Because they are compact, distribute them evenly to maintain the runner’s balanced shape.
— Leaf Motif (make 8) :
Round 1 :
Using olive (Color D). Ch6, sl st to form a ring (6 ch loop)
Round 2 :
Ch1, work 10 sc into ring evenly, join (10)
Round 3 :
Start shaping leaf: ch3 (counts as dc), 1 dc in same st, 2 dc in next, 2 dc in next, 1 dc, ch1, turn working along the opposite side of the starting chain: 2 dc, 2 dc, 1 dc, sl st to base (total approx 12-14 dc forming a pointed leaf)
Round 4 :
FLO: 1 sc in each st FLO to create ribbed vein effect (approx 24 sc)
Round 5 :
Working 1 sc around edge, *ch2, sc in next to create tiny scallop edge; repeat (approx 12 scallops)
Round 6 :
Working back to center, use surface slip stitch to draw a subtle center vein: sl st down center from tip to base, fasten off (no count)
Info :
Stitch counts for leaves are approximate; shape by blocking. Leaves are worked flat and will be joined to the lattice at their base and tip for a tucked-in look.
— Diamond Lattice Connector Motif (make many as needed) :
Round 1 :
Using cream (Color C). 6 sc in mr (6)
Round 3 :
(1 sc, inc) x6 (18)
Round 4 :
(2 sc, inc) x6 (24)
Round 5 :
Ch5, sk 2, sc in next, *ch5, sk2, sc in next; repeat forming a ring of ch-5 loops around (approx 8 loops)
Round 6 :
In each ch-5 loop: (sc, ch3, 3 dc, ch3, sc) to create expanded diamond points. This round creates 8 diamond points for joining.
Info :
These diamond connectors are the key link between floral motifs. Make a sufficient number to create alternating openwork between medallions; count your layout before joining to ensure symmetry.
Round 7 :
1 sc in each st to tidy edge, sl st to join and fasten off leaving long tail for join-as-you-go; weave tail into cream stitches so join points match across motifs.
— Join-As-You-Go Instructions (Progressive Assembly) :
Info :
Layout plan: Arrange large medallion, medium medallion, small blossoms and leaves in a repeating pattern so the runner tapers at each end. Pin all motifs in final arrangement before joining. Join-as-you-go uses the lattice diamond points and the star points of large medallions as anchor points. Use cream (Color C) for joins to keep seams subtle.
Round 1 :
With one motif flat and right side up, join cream in a star point loop or ch space designated as join point, ch1, sc in join loop, ch3, sc in next join loop, then sl st into corresponding join loop on adjacent motif; fasten with sl st to secure—this creates the first link. Repeat to connect three points then move to next motif.
Round 2 :
Work connecting chains between three motifs: ch4, sl st to motif edge, ch4, sl st to next join point. This forms the small diamond spaces seen around large medallions. Keep tension even so diamonds remain flat.
Info :
When joining, always work through both motif edges and the connecting lattice stitch so the seam is integral. Use a tapestry needle to weave in tails from joined motifs immediately to avoid slipping connections later.
Round 3 :
Where three motifs meet (for example large + medium + small), work [sc, ch3, sc] across to create a small triangular join. Repeat for every three-way junction. Check layout symmetry every few joins.
Round 4 :
Continue joining across length of runner, alternating connector diamonds and small sc bridges until all motifs are attached into a single panel. Use blocking pins frequently to prevent distortion while joining.
— Border and Final Edging :
Round 1 :
After all motifs are joined, work a single round of sc in cream around the entire outer edge to unify the runner. Work 3 sc in corner points to keep edges flat (count varies by layout)
Round 2 :
Work decorative picot-edge: *sc in next 4 sts, [ch3, sl st to last sc] to create pointed edges at each diamond tip; repeat around. This creates the star-like points around the runner perimeter.
Round 3 :
Optional raised chain round: In each sc set, work BLO sc to form a rope-like ridge around the edge adding definition (stitch count will follow previous sc count)
Round 4 :
Final tidy round: 1 sc in each st, working extra sc into points to keep shape (final count depends on final layout). Fasten off and weave in all ends thoroughly.
Info :
Block the entire runner to the desired dimensions on a flat surface using pins. Steam or wet-block carefully; the runner should be pinned flat to maintain the openwork diamonds and pointed edges.
— Finishing Details and Small Adjustments :
Info :
After blocking, trim stray fibers and re-check joins. If any join is loose, reinforce by stitching a second pass of sc across the connection on the back side. Press gently with a steam iron if using cotton yarn to smooth out minor ripples.
Round 1 :
Optional decorative chain tassel: Make 4 small loops of ch20 attached at each runner end spaced evenly, slip stitch into base and fasten off; weave ends. This adds weight and a finishing flourish if desired.
Info :
Weave in ends through several stitches and trim close. Use small drops of fabric glue on ends if you want extra security, particularly where motifs receive handling or cleaning frequently.
This vintage floral table runner brings warmth and texture to any table with its layered petals, leafy accents, and delicate lattice. Each motif is a tiny piece of craft love sewn together into a cozy heirloom you’ll be proud to display. Pin, block, and share your finished runner — it makes a thoughtful handmade gift or a charming centerpiece for seasonal gatherings. 🧶🌼✨