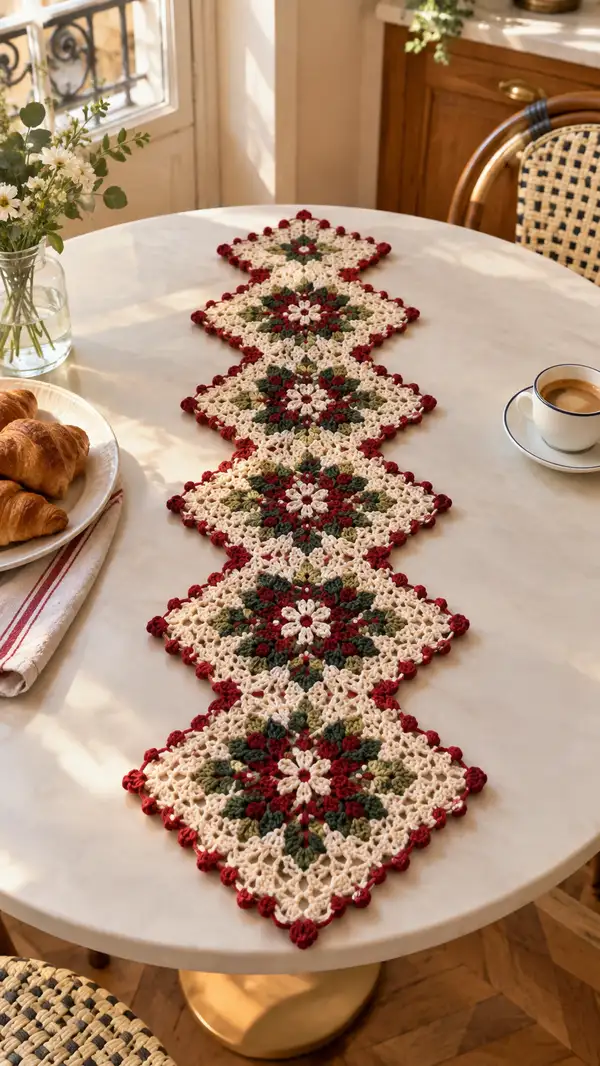
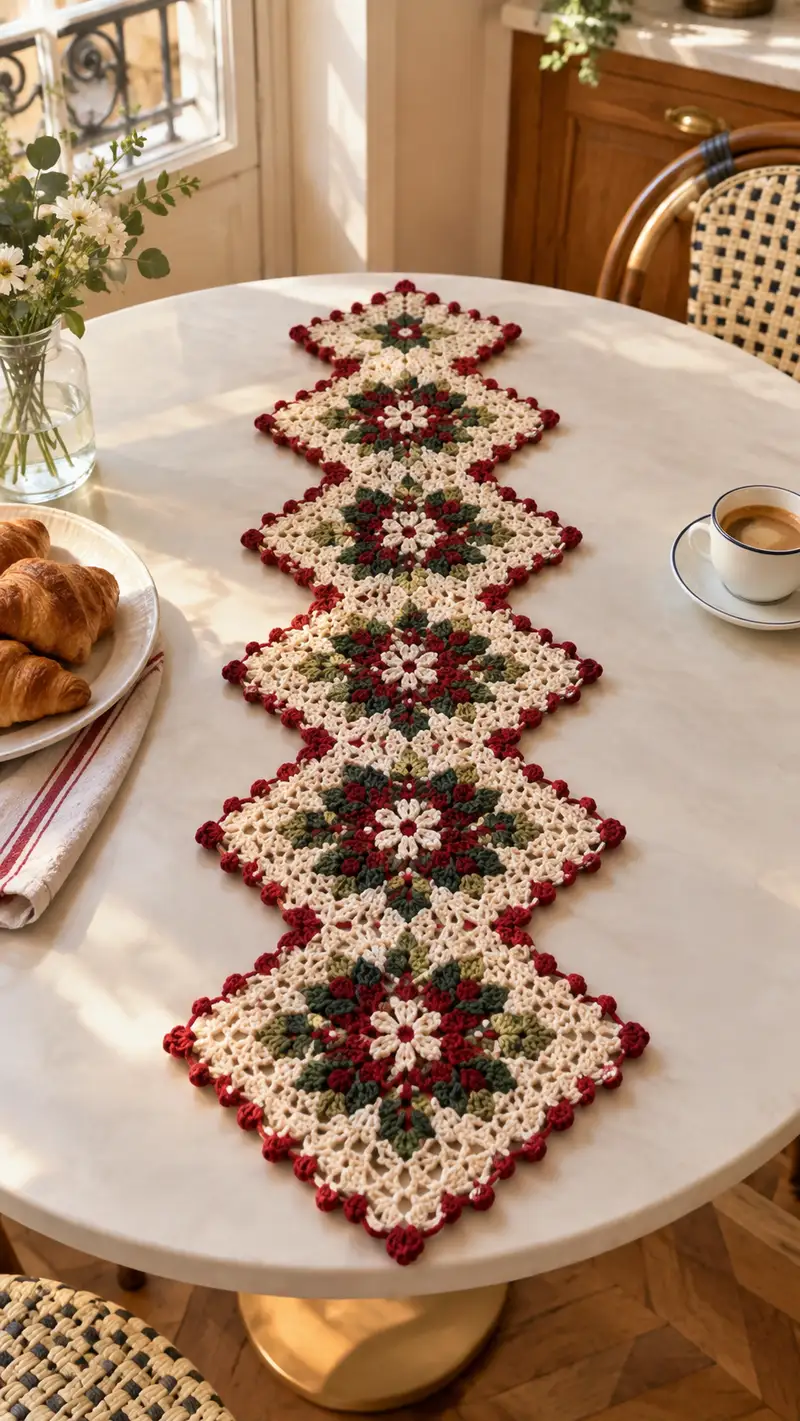
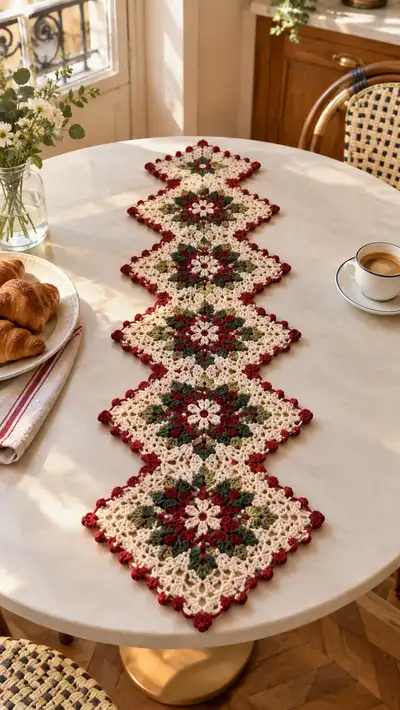
A warm, vintage-inspired table runner made from connected diamond granny motifs with floral centers in burgundy, olive and cream. Each diamond features a lacy openwork background and a dramatic burgundy bobble edge. Perfect for holiday settings or to add a cozy, handmade accent to your dining table.
Progress Tracker
0% Complete
— Overview :
Info :
This runner is made of 7 diamond granny floral motifs joined on the diagonal using join-as-you-go (JAYG). Make motifs flat, block each motif, then JAYG them into a linear runner. Final edging is a burgundy bobble-picot border. Gauge and hook will affect final length; adjust number of motifs for a longer or shorter runner.
Info :
Colors used: Color A = Cream (background), Color B = Burgundy (flower accents & border), Color C = Olive (leaf clusters), Color D = Dark Green (optional depth). Change colors according to your stash and preference.
— Diamond Floral Motif (Make 7 - each motif is worked in rounds) :
Motif 1 - Round 1 :
With Color B (burgundy) - mr, ch3 (counts as dc), work 2 dc into ring, ch2, *(3 dc into ring, ch2) x7; join with sl st to top of ch3. (24 dc, 8 ch-2 sps)
Motif 1 - Round 2 :
Change to Color C (olive) - In each ch-2 space: (3 dc, ch2, 3 dc). Join with sl st to first dc. (48 dc, 8 ch-2 corner sps)
Motif 1 - Round 3 :
Change to Color C (olive) - Working into the ch2 corners only, make four corner shells to begin square shaping: *in every other ch-2 space make (3 dc, ch3, 3 dc) to form larger corner; in the alternate ch-2 spaces make (3 dc, ch1, 3 dc). Repeat around and join. (Increase +8 dc compared to previous round; final count 56 dc; 4 ch-3 corner spaces, 4 ch-1 side spaces)
Motif 1 - Info :
These alternating chain spaces create the diamond/square silhouette across the next rounds. Keep tension even and count cluster groups rather than individual stitches to avoid confusion.
Motif 1 - Round 4 :
Change to Color A (cream) - In each corner ch-3 space work (3 dc, ch3, 3 dc); in side ch-1 spaces work (3 dc, ch1, 3 dc). This widens the corners and begins flattening into a square rotated as a diamond. Join. (Estimate 72 dc; 4 ch-3 corners remain)
Motif 1 - Round 5 :
Color A - Working into each side space between corner clusters, make chain loops to create open lace: *3 dc, ch3, 3 dc into corner; 3 dc, ch1, 3 dc in side spaces*. Join. (Estimate 88 dc; counts increase consistently by adding 16 dc roughly)
Motif 1 - Info :
At this stage you are creating a lacy shell pattern. Keep stitch counts by clusters: there are 8 cluster positions around each motif — four larger corner clusters and four smaller side clusters.
Motif 1 - Round 6 :
Change to Color A - Work a decorative open round around the motif: *in each smaller side space work (2 dc, ch2, 2 dc); in each corner space work (3 dc, ch4, 3 dc).* Join with sl st. This creates larger chain arches that will be filled on the next rounds. (Estimate 104 dc)
Motif 1 - Round 7 :
Change to Color D (dark green) - To form petal-like triangular clusters that will read as leaves and petals: in each corner arch work (dc cluster shell: 5 dc in same space, ch2); in side arches work (3 dc, ch2). Join. (Estimate 124 dc clusters counted as groups)
Motif 1 - Info :
Here we're starting to build colorwork that reads as leaves and petals. Carry unused yarn loosely behind work if you prefer not to fasten off; otherwise fasten off and join new color as instructed.
Motif 1 - Round 8 :
Change to Color B (burgundy) - Work small berry/bobble clusters into alternate small chain arches: *in chosen side chain spaces make 3 dc, bobble (see abbreviation), 3 dc to form little flower buds.* In corner spaces keep (3 dc, ch3, 3 dc) to maintain the diamond form. Join. (Estimate 140 stitches in total grouped into clusters)
Motif 1 - Round 9 :
Change to Color A (cream) - Begin lacy mesh background: Into each space along sides work (ch5, sl st to create long arch); into corner spaces work (3 dc, ch5, 3 dc) to preserve the points. Join. This round opens the motif into a delicate lace field. (Stitch count measured in clusters; maintain symmetry)
Motif 1 - Info :
Check alignment of burgundy buds: placements are every other side space so the final motif shows alternating burgundy and olive accents around the central floral medallion. If needed, adjust which side spaces you place buds in to match the photo symmetry.
Motif 1 - Round 10 :
Color A - Continue mesh with consistent loops: (ch4, sl st) into each small arch across the sides, filling between petals to create a consistent lacy background. Join. (Maintain same number of sets of arches as previous round.)
Motif 1 - Round 11 :
Color A - Work a refined shell and chain round to square off corners further: in corner arches work (3 dc, ch3, 3 dc), in side arches work (2 dc, ch2, 2 dc). Join and fasten off cream color later after Round 12 if you want tidy ends. (Evenness matters more than absolute stitch totals here.)
Motif 1 - Info :
Begin to weave in the small ends from color changes every 2-3 motifs to keep things tidy. Use small neat knots if necessary before weaving for temporary hold, then remove before final finishing.
Motif 1 - Round 12 :
Change to Color B (burgundy) - Work small puff/bobble clusters at each corner and at the midpoint of each side to start the distinctive bobble border later: *in each corner ch-3 space do (bobble, sl st into next point). In each side midpoint do (bobble, ch1) to form small raised dots visible after blocking.* Join and fasten off burgundy if you prefer to join motifs later. (8 bobbles placed: 4 corners + 4 sides)
Motif 1 - Round 13 :
Color A - Work an even finishing round: 1 sc in each dc and 1 sc in each long chain loop around the motif to regularize edges and prepare for joining. Join and fasten off. (This gives a stable edge of single crochets all around.)
Motif 1 - Round 14 :
Color A - Block the motif lightly: dampen and pin to a diamond shape, stretching gently so corners sit at equal angles. Let dry completely before joining. (Info: blocking evens stitches and opens lace.)
Motif 1 - Round 15 :
Info :
Motif 1 - Round 16 :
Info :
Info :
The first motif is complete. Make six more motifs following Motif 1 rounds 1-13. You may choose to fasten off color yarns after each motif and weave ends, or carry colors between motifs if you prefer continuous yarn management. Expect slight variations in counts depending on how you place bobbles; aim for symmetry and even tension.
— Motif 2 (Repeat Motif 1 Rounds 1-13 exactly; place offset) :
Motif 2 - Round 1 :
With Color B (burgundy) - mr, ch3, (3 dc, ch2) x7; join. (24 dc, 8 ch-2 sps)
Motif 2 - Round 2 :
Color C - (3 dc, ch2, 3 dc) in each ch-2 space; join. (48 dc)
Motif 2 - Round 3 :
Color C - Create four larger corner shells (3 dc, ch3, 3 dc) and four side shells (3 dc, ch1, 3 dc) alternating; join. (56 dc)
Motif 2 - Round 4 :
Color A - Expand corners (3 dc, ch3, 3 dc) and side clusters (3 dc, ch1, 3 dc); join. (72 dc)
Motif 2 - Round 5 :
Color A - Add lace arches: 3 dc, ch3 between corner clusters and 3 dc, ch1 in side spaces; join. (88 dc)
Motif 2 - Round 6 :
Color A - (2 dc, ch2, 2 dc) in side arches, (3 dc, ch4, 3 dc) in corner arches; join. (104 dc)
Motif 2 - Round 7 :
Color D - Petal shells in corner arches (5 dc, ch2); side shells (3 dc, ch2); join. (124 dc)
Motif 2 - Round 8 :
Color B - Add small buds with bobbles into alternating side hooks; keep corners intact. (140 stitch-equivalents)
Motif 2 - Round 9 :
Color A - Mesh round with ch5 arches and sl st joins to build the lacy face; join and fasten off any carried colors you prefer. (Evenness and tension are key.)
Motif 2 - Round 10 :
Color A - Fill mesh with ch4 sl st arches to even edges; join.
Motif 2 - Round 11 :
Color A - Shells to finalize diamond shape: corner shells (3 dc, ch3, 3 dc) and side shells (2 dc, ch2, 2 dc); join.
Motif 2 - Round 12 :
Color B - Place 8 bobbles (4 corners + 4 sides) evenly; join and fasten off burgundy ends if preferred.
Motif 2 - Round 13 :
Color A - 1 sc around edges into each dc or chain head to tidy edges and prepare for joining; fasten off and weave ends or leave tails for joining. Block motif gently.
Info :
Make Motifs 3-7 following the same rounds above. Keep a consistent pattern of where burgundy bobbles sit (for example, always in the same four side positions) so the runner has a rhythmic look. Block each square flat into a diamond for neat joins.
— Motif 3 (Repeat Motif 1 Rounds 1-13) :
Motif 3 - Rounds 1-13 :
Work as Motif 1 Rounds 1-13. Block after finishing.
— Motif 4 (Repeat Motif 1 Rounds 1-13) :
Motif 4 - Rounds 1-13 :
Work as Motif 1 Rounds 1-13. Block and prepare for joining.
— Motif 5 (Repeat Motif 1 Rounds 1-13) :
Motif 5 - Rounds 1-13 :
Work as Motif 1 Rounds 1-13. Block and set aside.
— Motif 6 (Repeat Motif 1 Rounds 1-13) :
Motif 6 - Rounds 1-13 :
Work as Motif 1 Rounds 1-13. Block carefully so diamonds sit flat and even.
— Motif 7 (Repeat Motif 1 Rounds 1-13) :
Motif 7 - Rounds 1-13 :
Work as Motif 1 Rounds 1-13. This will be the final motif in the linear runner; block and align with others before joining.
Info :
Before joining, lay out the seven blocked diamonds in a straight line with corners just touching as seen in the photo. Decide which two edges meet (point-to-point) and maintain consistent orientation so the floral centers align visually down the center of the runner.
— Join-As-You-Go (JAYG) to assemble motifs into runner :
Info :
We recommend joining with Color A (cream) for a subtle seam, or use Color B (burgundy) if you prefer the joins to read as a decorative line. Join-as-you-go attaches the new motif to the already-made one on the final sc round.
Join Step - Positioning :
Place Motif 1 flat with one corner pointing toward you. Position Motif 2 rotated so the corner of Motif 2 meets Motif 1 at one point. You will join along the two small side edges that meet. Use pins to hold in place.
Join Round 1 (Motif 2 Connection Edge) :
With right sides up on Motif 2, attach yarn to the first sc of the final sc round at the joining edge. Work 1 sc into the motf edge st, then chain 1 and insert hook through corresponding edge space on Motif 1 and sl st to join. Continue alternately: sc in Motif 2 edge, sl st into Motif 1 edge space, repeating to the corner. Fasten off and weave ends. (This results in a ladder-like seam that is flexible and neat.)
Info :
Work slowly for the first join to establish tension and alignment. If the seam draws too tight, block again after joining, or use a looser join stitch (sl st only) to prevent distortion. Use a stitch marker at the mid-point of the edge to keep both sides aligned.
Join Round 2 (Continue along second edge) :
Turn Motif 2 and join the second edge to Motif 1 in the same way, working sc into Motif 2 and sl st into Motif 1, or alternatively use slip stitches into both motifs for a flatter join. Fasten off and weave ends neatly.
Info :
Repeat the join procedure to attach Motif 3 to Motif 2, then Motif 4 to Motif 3, continuing until all 7 motifs are connected in a straight line. For each join, pin motifs carefully and join on the final sc round edge to ensure the bobble points match up visually.
— Neatening and Border Preparation :
Info :
Once motifs are joined, check for loose ends. Weave ends through the back of the runner using a yarn needle, pulling ends toward the back edge so they will not be visible from the top. Block the entire runner flat to even seams and allow to dry fully.
Border Round 1 :
With Color B (burgundy) - Join yarn at any side corner. Work 1 sc in each edge st around the entire runner (this includes the diagonal seams where two motifs meet). On corners, work (sc, ch2, sc) to keep corners crisp. Join with sl st to first sc and fasten off if desired. This gives a stable perimeter to work the final decorative bobble edge.
Border Round 2 (Bobble-Picot edge) :
With Color B - Join at a corner and follow: *[skip 1 sc, (bobble in next sc), ch1, sl st in next sc]* across each side edge so that bobbles sit at the previous bobble placements and corners. On corner points, work (bobble, ch2, bobble) to emphasize the corner. Be consistent so bobbles line up evenly around the whole runner. Join and weave in ends.
Info :
For a pronounced bobble edge, work bobbles tightly with a slightly smaller hook (3.5mm) and then block to relax them. Alternatively, make smaller picot dots by replacing bobbles with (hdc, ch2, hdc) if you prefer a subtler finish.
Border Round 3 (Optional Lace Trim) :
Color A (cream) - For a secondary scalloped lace trim between bobbles, add: *(ch3, sc in next st) across sides and (ch4, sc) across corners* to create a light open frill. This can be worked after the burgundy bobbles to soften the border contrast. Fasten off and weave in ends thoroughly.
Info :
Finally, give the full runner a gentle steam-block or wet-block: pin to shape on blocking mats and steam or spritz lightly, allowing to dry. This opens the lace and flattens joins for a professional look.
— Finishing Touches :
Info :
Trim all ends, check alignment of bobbles and edges, re-block any areas that feel uneven, and press lightly if fabric permits. Place runner on table and enjoy!
Finishing this runner is such a satisfying moment — watching the seven floral diamonds come together into a long, elegant table accent is pure joy. The burgundy bobbles frame each motif and the cream lace balances the bolder colors beautifully. Add fresh flowers or seasonal decor and your table transforms instantly. 🧶🌿 A perfect handmade piece to cherish or to give as a thoughtful gift. Enjoy every stitch and the cozy warmth it brings! ✨