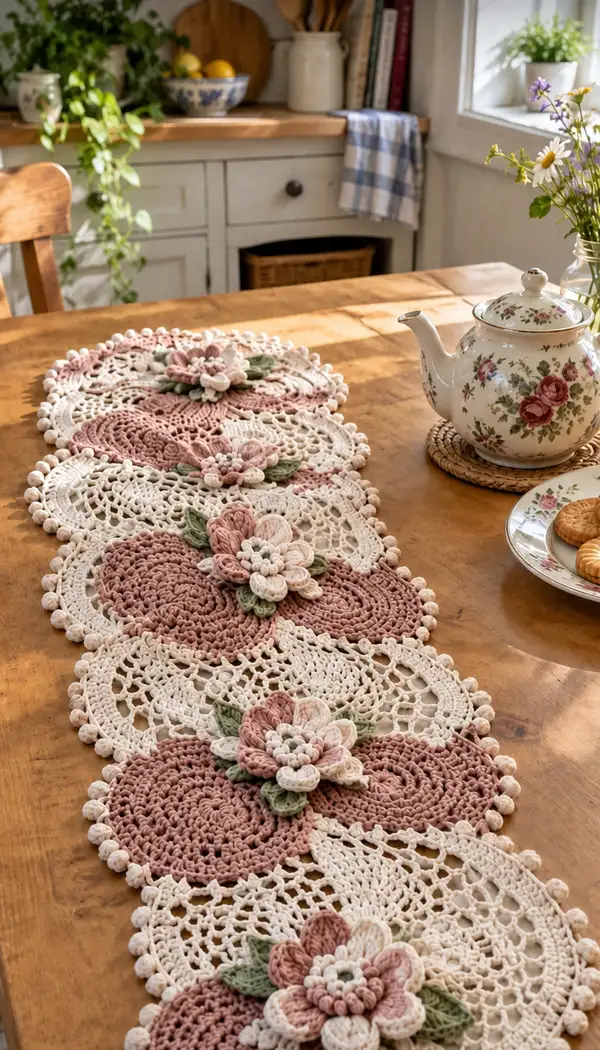
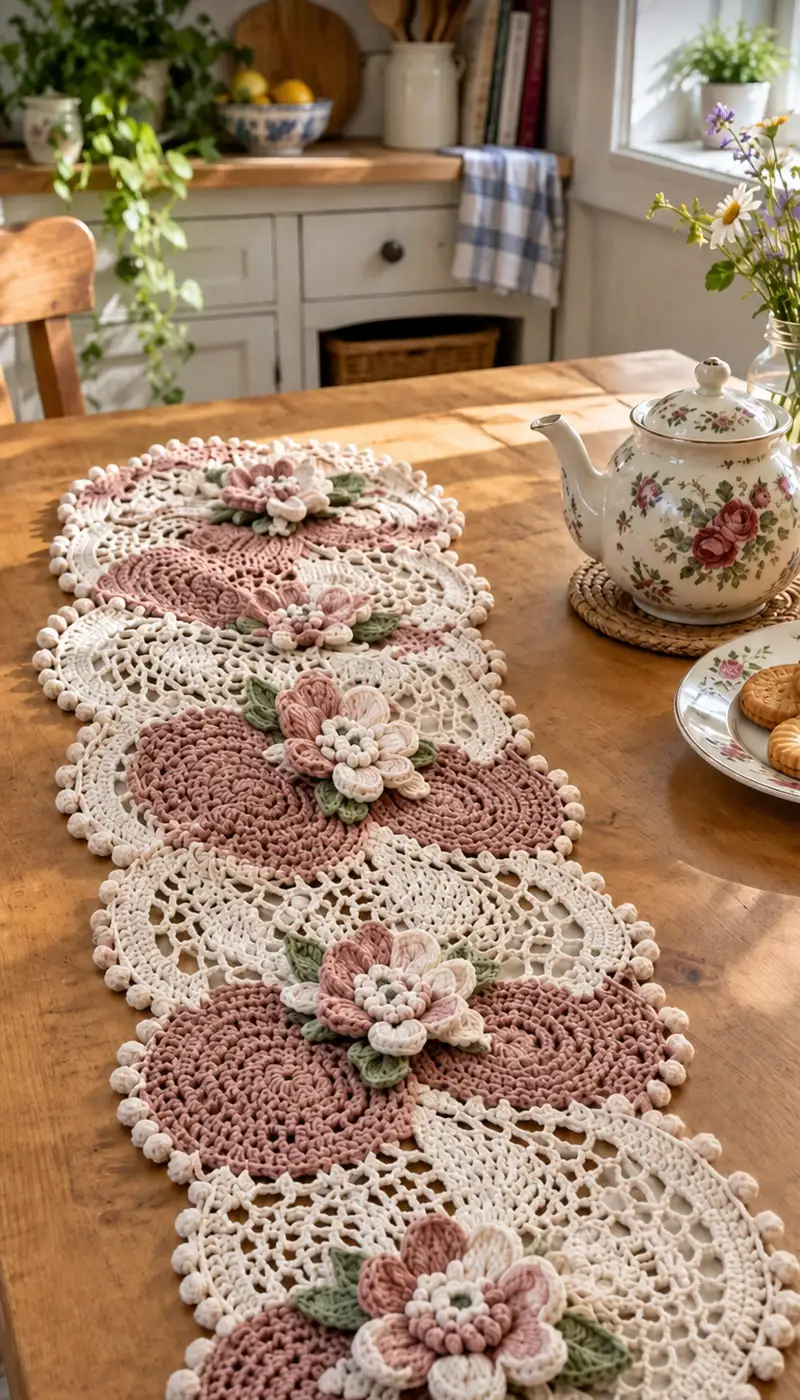
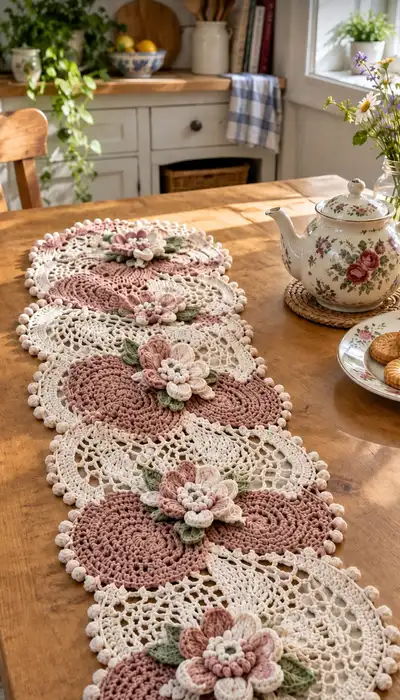
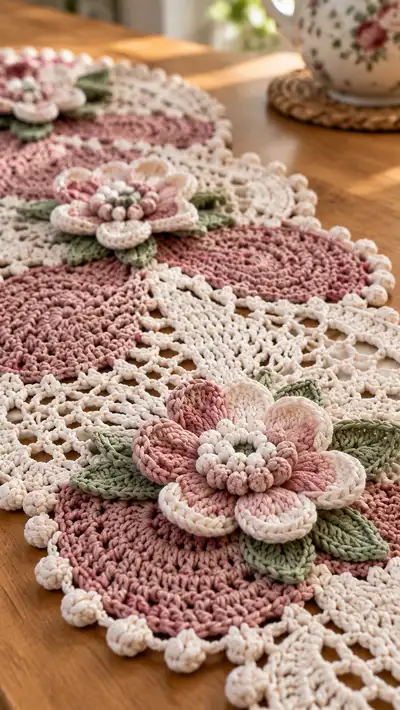
A romantic, vintage-inspired crochet table runner made of linked circular lace motifs with raised 3D flowers and sculpted leaves. This runner features dusty rose centers, soft cream lacy edges and sage-green leaves for a timeless botanical look. Perfect for a dining table centerpiece or dresser adornment, it blends solid textured rounds and delicate openwork with sculptural flower appliques for a handmade heirloom finish.
Progress Tracker
0% Complete
— Notes & Special Stitches :
Info :
This pattern is modular: each full motif is worked individually and motifs are joined as you go to form a table runner. Use the same hook throughout for consistent gauge; you can go down one hook size for crisp bobbles. Work tightly in the center rounds (sc rounds) for stability and slightly looser in openwork rounds so lace lays flat. When changing colors, carry yarn neatly along the back of the work for short floats or fasten off if long floats would show.
Info :
Bobble stitch (for this pattern): *Yarn over, insert hook, pull up loop (3 loops on hook), yarn over insert hook same st, pull up loop (5 loops), yarn over insert hook same st, pull up loop (7 loops), yarn over and pull through all 7 loops, ch1 to sit the bobble.* Work bobbles consistently using the same hook to match texture in the photos.
— Main Circular Motif (Make as many as needed) :
Round 1 :
mr, 6 sc in ring (6)
Round 3 :
(1 sc, inc) x 6 (18)
Round 4 :
(2 sc, inc) x 6 (24)
Round 5 :
(3 sc, inc) x 6 (30)
Round 6 :
(4 sc, inc) x 6 (36)
Round 7 :
(5 sc, inc) x 6 (42)
Round 8 :
(6 sc, inc) x 6 (48)
Round 9 :
(7 sc, inc) x 6 (54)
Round 10 :
(8 sc, inc) x 6 (60)
Round 11 :
(9 sc, inc) x 6 (66)
Round 12 :
(10 sc, inc) x 6 (72)
Info :
Rounds 1-12 build a dense, stable center. Check for twisting after Round 1; always join rounds with sl st to first sc if you are working joined rounds. Keep tension slightly firmer here so centers are solid and do not warp when lace rounds are added.
Round 13-16 :
1 sc in each st around (72)
Info :
At the end of Round 16 the motif will be a flat dense disc. If working multiple motifs, keep them nearby to ensure consistent tension and size. If your disc cups slightly, block lightly before continuing to lace rounds.
Info :
Change to cream yarn for the lace rounds: join with sl st to any sc.
Round 17 :
*4 sc, ch3, skip 2 sc* x 12 (72 sc + 12 ch-3 loops)
Round 18 :
*(sc in next 4 sc), (sc, 3 dc, sc) in ch3 loop* x 12 (108 total stitches: 12 shells of 5 in loops + 96 sc)
Info :
Round 18 builds small shells into the ch-3 loops. Count shells and sc groups to verify you have 12 shells. Use markers every 3 repeats if helpful.
Round 19 :
*ch4, skip next 3 sts, sc in next 6 sts* x 12 (12 ch-4 loops + 72 sc placements; total stitch count 84 when counting sc placements and loops as stitch anchors)
Round 20 :
Work into ch-4 loops: *(sc, 5 dc, sc) in ch-4 loop, sc in next 6 sts* x 12 (12 shells of 7 sts + 72 sc = 156 sts)
Info :
This round expands the lace dramatically and creates the petal-like lacy segments. If your work flares too much, block lightly with steam after finishing this round and before continuing.
Round 21 :
*sc in next 3, ch5, skip 5, sc in next 4* x 12 (12 ch-5 loops, 84 sc count approximate depending on shells; work evenly into available sc spaces) (156)
Round 22 :
Into each ch5: (sc, 7 dc, sc) ; sc around remaining sc spaces to anchor (12 shells of 9 stitches + remaining scs = 216 total stitches)
Info :
Rounds 21-22 create pronounced lace loops. Keep stitch counts by marking each shell as you work; this ensures the motif remains round rather than scalloped irregularly.
Round 23 :
*sc in each dc and sc across the shell row, then make ch3 loop between shells* Work a tidy anchoring round across all stitches using 1 sc in each stitch and make a single ch-3 between each shell repeat to prepare for outer decorative border. Final stitch count will be the sum of previous stitches minus none (work into every st) (count will vary by your shells but aim to maintain proportional spacing)
Info :
Use this anchoring round to straighten any uneven edges. If you find extra or missing stitches, add or skip evenly across the round to maintain overall symmetry (aim for a multiple of 12 repeats).
Round 24 :
*sc in next 4, bobble in next ch-3 loop, sc in next 4* x 12 (12 bobbles + 96 sc = 108 stitches total)
Info :
For each bobble make the bobble stitch as described in the notes. Keep bobbles tight and consistent; use the same hook for these to match the dense look in the photo. Leave long tails on bobbles if you prefer to secure them extra by sewing through the bobble base to the motif center.
Round 25 :
Sl st to close, fasten off and weave in ends if working this motif as a free-standing piece. If joining to another motif, do not fasten off; prepare to join as described in joining section.
Info :
Each completed motif at this stage will read as a large lacy disc with a solid rose center and a cream openwork surround finished with consistent bobbles around the edge. Make as many motifs as your runner requires (this pattern photos show 6 motifs linked in a continuous row for a medium dining table runner).
— Raised Layered Flower (Make 1 per motif) :
Info :
The flower is worked separately in layered rounds. Colors alternate between rose, blush and cream to create dimensional petals. Work petals with FLO (front loops only) or use elongated stitches to create petal height. Use a 3.25 - 3.5mm hook for crisp petals.
Flower Round 1 :
Using cream or blush for the central petite ring: mr, 6 sc in ring (6)
Flower Round 2 :
6 inc (12)
Flower Round 3 :
(1 sc, inc) x 6 (18)
Flower Info :
This small center forms the base for bobble cluster petals. Keep this section firm and compact; it becomes the anchor for the petal layers.
Flower Round 4 :
Change to sage or small accent color: *bobble in next stitch, sl st in next stitch* around (9 bobbles, 9 sl st alternating) (18 total anchors)
Flower Round 5 :
Change to dusty rose for first petal layer. Attach color with sl st at center base between two bobbles. *(ch2, 3 treble cluster in next st, ch2, sl st into same anchor to form a petal) in every second anchor* around to create 6 small petals (6 petals)
Info :
Petal stitch: ch2, (yo insert, pull up loop) x3 to create triple cluster then close cluster; finish petal by anchoring back at base with sl st. Work petals evenly spaced; use marker at 1st petal.
Flower Round 6 :
Fasten off dusty rose if changing shade; change to a lighter blush and make larger petals behind the rose petals: *join, ch3, (dc, tr, dc) all in same anchor, ch3, sl st in next anchor* x 6 (6 larger petals)
Info :
Work the larger second layer behind the first by inserting your hook under the base of the small petals and anchoring with sl st between anchors. This creates a stacked, dimensional flower like the reference photo.
Flower Round 7 :
Create an outer petal rim in cream: join, *(ch4, sc in base of petal to make a scallop), sc in next anchor* x 12 to tidy edges and unify layers (24 stitches + loops)
Flower Round 8 :
Fasten off leaving long tail for sewing. Weave in short ends but keep long tails for secure attachment to motif.
Info :
Steam-block petals gently to shape them; use finger shaping while petal is warm to slightly cup petals as in photo. Be careful not to over-steam cotton yarn, a light mist is usually enough.
— Flower Center Bobble Cluster :
Round 1 :
Using soft white: mr, 6 sc in ring (6)
Round 2 :
*bobble in next st, sl st in next st* x 3 (3 bobbles + 3 sl st anchors) (6 anchors)
Info :
Sew this bobble cluster to the very center of the layered flower to give the raised clustered center seen in the photographs. Sew securely through the motif center to ensure it will not detach with handling.
Round 3 :
Fasten off leaving a long tail to sew through the flower layers and anchor into the motif center.
— Leaves (Make 2-3 per motif) :
Leaf Round 1 :
With sage green: ch7, sc in 2nd ch from hook, hdc in next, dc in next 2, hdc in next, sc in last ch (6 sts along chain) - rotate and work down opposite side: sc, hdc, dc in next 2, hdc, sc in anchor. Sl st to join at base (12 sts total)
Leaf Round 2 :
Work around leaf edge to shape: *(sc, hdc, dc, tr, dc, hdc, sc) - place increases in the center top (add 2 dc at peak) to create a pointed, sculpted leaf.* Fasten off leaving long tail for sewing (approx 14-16 sts depending on increases)
Info :
Make leaves slightly stiff by using a smaller hook or by gently starching after blocking. Attach leaves so they peek out from beneath the flower as in the photo.
— Petal Accent Layer (Optional contrast layer) :
Round 1 :
Using blush: mr, 8 sc in ring (8)
Round 2 :
*(ch2, (dc, tr, dc) in same st, ch2, sl st in next) around to create eight rounded petals anchored by the 8 sc base* (eight small petals)
Info :
This slim accent layer can be slipped under the main petal layers for a more complex, multi-color flower. Pin layers together before sewing to check alignment.
— Joining Motifs (As-you-go joining recommended) :
Info :
Arrange motifs in the desired layout: photos show motifs centered and overlapping slightly so each floral appliqué sits over the seam between two adjacent motifs. Join motifs by slip-stitch or single crochet into corresponding outer rounds (we used Round 24 bobble round as anchor points).
Joining Round 1 :
Work final bobble edging on motif A but on last motif B alignment row, when you get to join point: insert hook into corresponding stitch on motif B and make a sl st to join, then continue bobbles on motif A. Repeat for each pairing point. Join at 4 evenly spaced anchors per adjacent pair to create a stable continuous runner. (See diagram notes for spacing)
Info :
Pin motifs together on a flat surface before joining; check spacing by placing flower appliques and leaves on motifs to ensure they will sit correctly after joining. Joining as-you-go yields clean seams and fewer ends to weave.
Joining Round 2 :
For a more visible seam, use a slip-stitch join through the back loops of both motifs every 6-8 stitches to create a decorative ladder-like seam. For a nearly invisible join, use sewing with matching yarn and a whip stitch through corresponding stitches on both motifs. (Join count will depend on motif count; anchor at 6-8 points across the seam.)
Info :
If you prefer motifs not to overlap, join them fully edge-to-edge using single crochet join: working through both motifs, sc in each st around to bind edges. This runner uses partial overlaps so sew selectively at anchoring points only.
— Outer Edging / Finishing Border :
Border Round 1 :
With cream yarn, join at any outer stitch: *sc in next 3 sts, picot (ch3, sl st into top of last sc), sc in next 3 sts, bobble in next st* around motif edge where there is space between shells. Aim for 12 picot-bobble combos spaced evenly across motif edge (approx 108-120 operations depending on motif growth)
Border Round 2 :
Work a tidy finish row of sc in BLO across the anchoring round to create a subtle raised ridge; sc in each st around (maintain rhythm across joins) (st count equals previous anchor st count)
Info :
Edge work ties the motifs together visually and creates the small spherical bobble border seen. Take time to make each picot identical in height (3 chains before sl st) for neat uniformity.
Border Round 3 :
Fasten off and weave ends. If you want extra weight to help the runner lay flat, attach a narrow cotton tape or a light linen strip across the back of the seam areas with small slip stitches to stabilize without showing on the front.
Info :
Block the full runner after assembly. Wet-block or steam-block gently: pin motifs on shaping board to square the runner and set the lace. Allow to dry fully before removing pins.
— Final Assembly / Applique Attachment :
Info :
Position each layered flower so its base overlaps the join between two motifs; pin flower base and leaves, adjust for symmetry across runner length. Use long tails from flower and leaves to sew them flat to the motif base through both motifs (if needed) and catch 2-3 rounds into the motif to secure them. Reinforce flower bases with a few discreet stitches at the underside for longevity.
Assembly Round 1 :
Sew flower center bobble cluster into the center of the layered petals. Stitch through the bobble base and through the center of the dust-rose motif to anchor. Hide ends inside the center of the motif or weave to the back and secure.
Info :
Arrange leaves so they peek from beneath the flower toward the runner edges; stitch leaves down through the motif anchoring points used for joins. Check both front and backside to ensure no long tails or knots show through the lacework.
Final Care :
Hand-wash or gentle machine wash on delicate cycle in a mesh bag; reshape and block while damp. Cotton yarn may soften and relax after the first wash; re-block to restore the crisp lace and petal shapes.
This vintage floral table runner pattern brings together lace, texture and dimensional flowers to create a beautiful heirloom for your home. Each carefully worked motif, cluster bobble and petal adds character and charm to your table. Whether made for daily use or special occasions, this runner will become a treasured focal point. Enjoy the relaxing rhythm of the rounds as the whole piece comes together — and delight in the pretty layered flowers at every seam. 🧶🌸