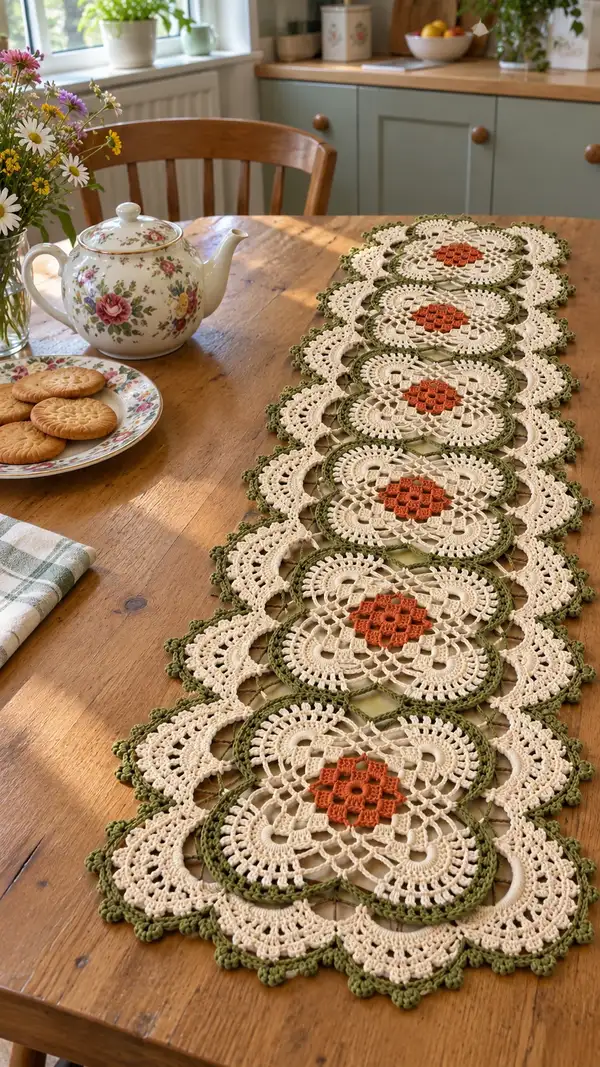
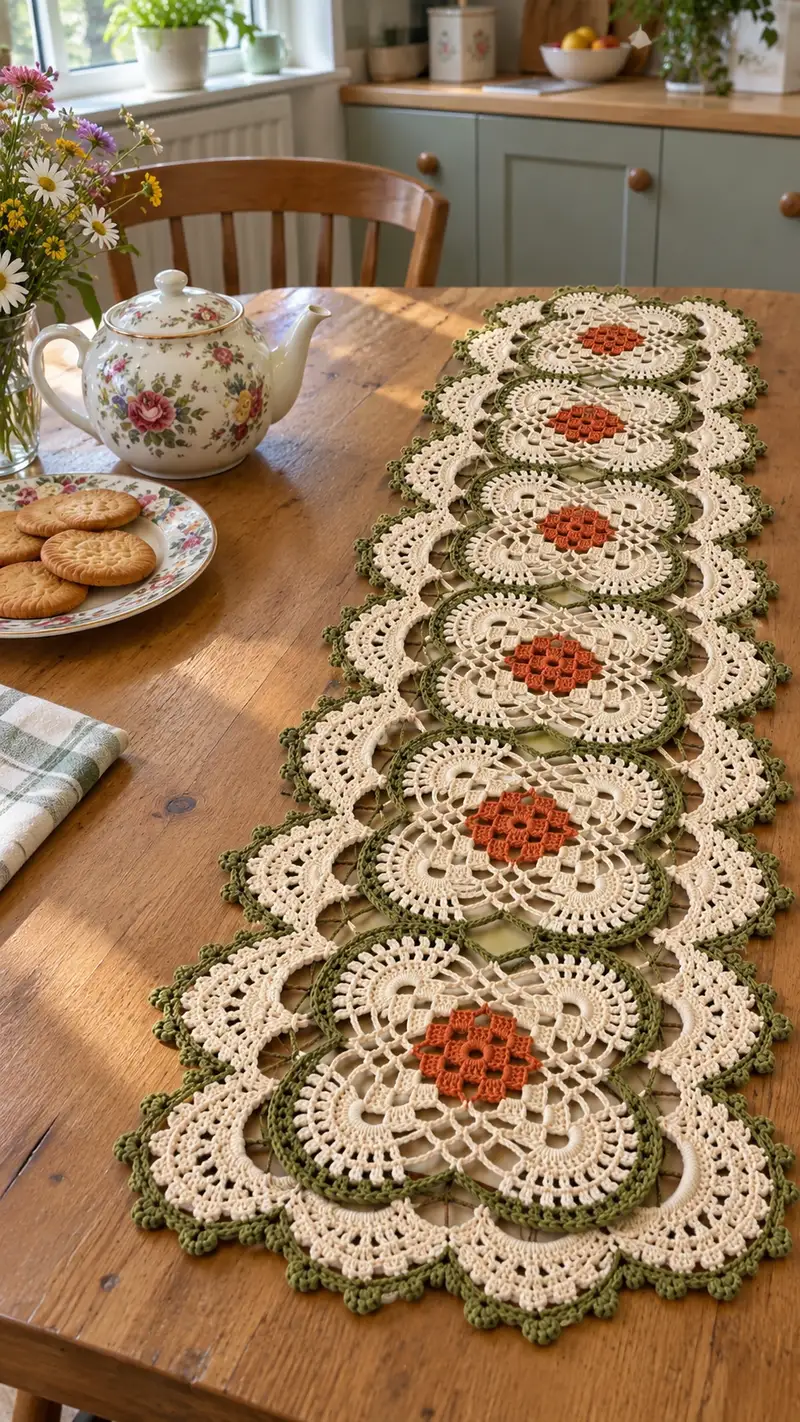
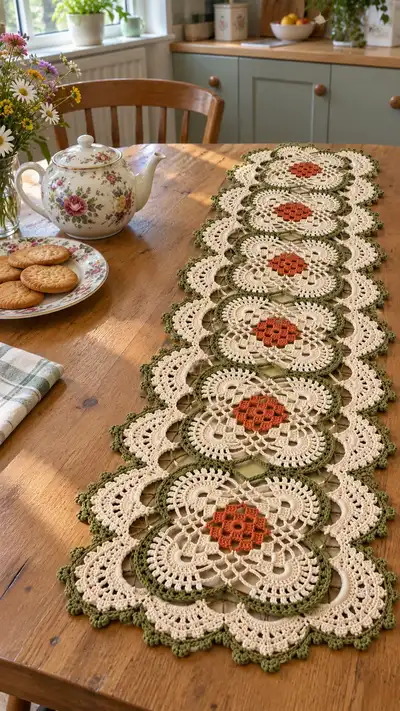
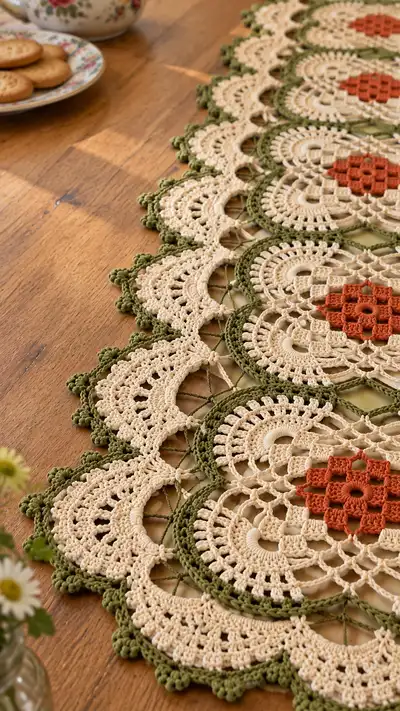
Create a charming vintage-inspired floral table runner worked in three soft colors: warm terracotta centers, creamy petals and olive-green outlines. This runner is constructed from repeated lace motifs joined as you go and finished with a scalloped picot edging. The pattern includes thorough, step-by-step rounds, color-change notes, blocking and assembly tips so you can reproduce the delicate openwork shown in the photo.
Progress Tracker
0% Complete
— Overview :
Info :
This pattern describes a single floral lace motif and explains how to join motifs using a join-as-you-go method. Work the motifs flat; each motif is worked in rounds. After completing the motif rounds, follow the joining rounds to connect next motifs along the runner length. Abbreviations follow standard US terminology. The entire runner in the photos is seven motifs long, but you can make any length by adding or subtracting motifs.
— Materials & Tension :
Info :
Use mercerized cotton DK or sport cotton for a crisp lace appearance. With 3.0mm hook and DK cotton, a single finished motif measures approximately 15.5cm (6.1in) across the longest dimension. Tension: 22 sc = 10cm in plain single crochet is a general guide. Adjust hook to match measurements and to ensure motifs block to correct size.
— Center Flower (Terracotta) :
Round 1 :
Make a magic ring, ch1, 8 sc in ring, pull tight (8)
Round 2 :
Ch3 (counts as dc), *ch1, skip next sc, dc in next sc; rep from * around to create 8 dc with 8 ch-1 spaces (8 dc, 8 ch-1 sp)
Info :
These ch-1 spaces will be used to anchor small raised clusters in the next round; keep center flat by working stitches evenly into the tops of the dc.
Round 3 :
In each ch-1 sp: *(3 dc cluster, ch1); rep around, join with sl st to top of first dc. End with 8 clusters and 8 ch-1 spaces (8 clusters)
Round 4 :
Sl st to center of first cluster, ch1, *sc in center of cluster, ch3, sc in center of next cluster; rep around to create small ch-3 petals between cluster centers (8 sc, 8 ch-3 sps)
Round 5 :
Working into each ch-3 sp: (2 dc, ch1, 2 dc) to form boxy raised petals – this produces 8 small boxed petals around the center (approx 32 dc total with 8 ch-1 sps)
Info :
Fasten off terracotta color, weave ends to back. Ensure center sits slightly raised; this creates the textured floral focal point seen in the photo.
— Transition Round (join terracotta to cream) :
Round 6 :
Join cream yarn with a sl st into any space between petals, ch1, 1 sc in same sp, *ch4, skip to next space and 1 sc; rep around creating 8 ch-4 picot-like arches that will receive the first full cream round (8 sc, 8 ch-4 sps)
Info :
Carry terracotta tail to the back and weave securely. Use a small stitch marker to mark the start of this new cream round for consistent counting.
— Inner Lace Shells (Cream) :
Round 7 :
Into each ch-4 sp: (1 sc, ch3, 1 tr, ch3, 1 sc) — this creates open arch shells radiating from the center (8 shells)
Round 8 :
Ch3, 2 dc in same st, *sk next sc, (2 dc, ch2, 2 dc) in ch-3 arch from previous round; rep around to make 8 double clusters separated by ch-2 mesh (approx 32 dc clusters)
Info :
Work evenly and do not pull the yarn too tight in mesh areas. These open stitches create the honeycomb effect visible in the inner motif; blocking will open them fully.
Round 9 :
Sl st to next dc, ch2 (counts as hdc), hdc in next 3 sts, *ch4, sk 4 sts of shell, hdc in next 4 sts; rep around making 8 ch-4 loops separated by hdc groups (32 hdc, 8 ch-4 sps)
Round 10 :
Into each ch-4 loop: (1 sc, ch5, 1 sc) to enlarge connecting loops and create more airy space (8 sc, 8 ch-5 sps)
Round 11 :
Ch3, 3 dc in first ch-5 loop, *ch2, 4 dc in next loop; rep around, join with sl st (approx 32 dc with 8 ch-2 sps). This round begins the oval expansion.
Info :
Count stitches after this round to verify ~32 dc. If your cluster counts differ, adjust by adding or omitting one dc in selected clusters to keep motif symmetrical.
— Oval Expansion Rounds (Cream) :
Round 12 :
Ch1, sc in same st, *ch3, sk next 2 dc, sc in next 4 dc, ch3, sk next 2 dc; rep to form alternating sc blocks and ch-3 bridges (approx 32 sc, 8 ch-3 sps)
Round 13 :
Into each ch-3 sp: (2 dc, ch1, 2 dc) creating small shell clusters along the longitudinal axis so motif becomes more oval (approx 8 shells, 32 dc total)
Round 14 :
Ch1, sc in first shell, *ch5, sc in next shell; rep around creating 8 ch-5 connecting arches along the long axis and 8 short bridges at sides (approx 8 sc, 8 ch-5 sps)
Info :
At this stage the motif clearly becomes an elongated oval. Count the number of shell clusters along both long and short axes to ensure symmetry before proceeding to the elaborate side lace.
Round 15 :
Work into each ch-5 arch: (1 sc, ch7, 1 sc) — these longer chains form airy networked bridges which will be later emphasized by green outline stitches (8 sc, 8 ch-7 sps)
Round 16 :
Ch2, 9 hdc worked evenly around the long sides (distribute 9 hdc across each long edge, total approx 36 hdc), then ch1 to corner, continue around short edges with 6 hdc each; this evens out the perimeter for the green round
Info :
If your motif edge appears wavy, add or remove an hdc or two in this round to even tension; the goal is an even foundation for the green outline round that follows.
— Decorative Mesh & Fan Rows (Cream) :
Round 17 :
Ch4, sk 1 hdc, dc in next 2 hdc, ch2, *sk 2 hdc, (dc, ch2, dc) in next hdc; rep across forming small fans along the long edges and fans in short edge areas to blend corners (approx 40 fans total)
Round 18 :
Working into each fan valley: sl st, ch1, 3 sc to secure each fan and create small solid anchors. This provides structural points to receive the olive outline round (approx 120 sc total)
Info :
Fasten off cream if you prefer to use a separate strand for the green outline to keep crisp color definition. Leave a 25-30cm tail if you will weave or sew the green join later.
— Olive Outline Round (green) :
Round 19 :
Join olive green yarn in any anchor sc, ch1, sc evenly around entire motif working 1 sc in each previously made sc and 3 sc across each chain loop to create dense outline. Final stitch count should be approximately 160 sc (confirmed by counting after work)
Round 20 :
Ch3, *sk next sc, (2 dc, ch1, 2 dc) in next sc to create pronounced oval shells around motif; rep around (approx 40 shells)
Info :
These green shells visually frame each cream motif and create the connecting points where motifs will be joined. Keep shells consistent in size to make joins trivial.
Round 21 :
In each ch-1 space of the green shells: ch2, 3 tr (treble), ch2; this elongates and strengthens the shell center to keep the outer shape crisp (approx 40 tr clusters)
Round 22 :
Ch1, sc in top of each shell, *ch5, sc in next shell top; rep creating 40 ch-5 spaces which will be used for join-as-you-go connections (approx 40 sc, 40 ch-5 sps)
Info :
Mark the top of 4 evenly spaced shells (two long-axis tips and two short-axis tips) to line up joins when adding adjacent motifs. These marks ensure motifs align straight in a runner without twisting.
— Outer Lacy Fans (Cream) :
Round 23 :
Rejoin cream yarn at a marked shell top, ch1, sc in same st, *ch7, sc in next shell top; rep around forming large ch-7 arches between green shell tops (approx 40 sc, 40 ch-7 sps)
Round 24 :
Into each ch-7 arch: (2 dc, ch3, 2 dc, ch1, 2 dc, ch3, 2 dc) creating layered fan shells along edges (approx 40 multi-dc fans)
Round 25 :
Sl st to base of each fan, ch1, *(sc, ch3, sc) in fan base, ch4 bridging to next fan; rep producing an openwork scallop network (approx 40 small sc pairs and 40 ch-4 bridges)
Info :
Check that the fans along the long edges sit flat. If any fan is tighter, gently pull loops outward and add an extra ch in the next fan to equalize the perimeter before moving on.
— Short Edge Scallops & Picot Clusters (Cream & Olive) :
Round 26 :
For short edge scallops, work (3 dc, ch2, 3 dc) into each short-edge fan base, then sl st to next base. This makes the short edges fuller and balances long-edge lace (approx 16 larger scallops)
Round 27 :
Switch to olive, ch1, sc evenly across previous cream scs around entire motif to create a neat border and a place to connect next motif; work 3 sc into larger scallop tops and 1 sc into smaller points (approx 180 sc)
Info :
These olive sc anchors will be used in join-as-you-go – keep the sc spacing even and note which scs fall at motif corners and long-edge centers to align joins with adjacent motifs.
Round 28 :
Ch3, *picot cluster (3 sc in same st, ch3, sl st to top of that 3-sc group) then sk 2 sc, sc in next st; rep around forming small olive picot bobbles at regular intervals (approx 30 picots)
Round 29 :
Fasten off leaving a 25cm tail if this is a single motif to be sewn, or leave live for join-as-you-go. Weave in ends on motif back or keep tails for joining.
Info :
Block the motif now: pin to shape on blocking board to the measurements noted (approx 15.5cm across). Use steam or water blocking for cotton. Allow to dry fully before joining to ensure lace holds shape.
— Join-As-You-Go Method (for linking motifs lengthwise) :
Info :
Work the first motif completely and block. For the second motif, work up through Round 27 and start Round 28 and 29 with olive live so you can join to the finished motif's matching sc anchors. Join at the long-edge and short-edge anchor points as follows.
Round 30 :
Place second motif next to first, right sides up. When you reach the first long-edge connection point on the second motif's Round 27 olive sc, instead of finishing the sc, insert hook into corresponding sc on the first motif and sl st to join, then complete sc in second motif. Repeat for each long-edge anchor: join every 3rd sc across the long edge to make secure but open joins (repeat approx 12 joins along each long edge)
Round 31 :
Continue around second motif completing Round 28 picot clusters; where you encounter a join point, do (3 sc, ch3, join with sl st to adjacent motif sc, sl st back into same st, continue) to create small linked picot clusters across the motifs (approx 24 join points)
Info :
Pin first motif to second firmly before joining to keep edges aligned. Check alignment after every 4 joins; adjust tension on joining sl sts to keep the runner flat and even.
Round 32 :
For the seam area, after joining long edges, fill the short-edge joins by connecting the short-edge scallop scs to the short-edge scs on adjacent motif: work sl st through both scs, then ch3 and sc in the next motif sc to lock seam neatly (approx 8 short-edge joins per motif end)
Info :
When joining three or more motifs, join motifs sequentially (motif 1 to 2, then 2 to 3, etc.) keeping motifs straight by working along one long edge at a time. If you prefer a removable runner, leave a 15cm gap between motifs and tack lightly rather than fully joining.
— Reinforcing Round After Joining :
Round 33 :
After all motifs are joined in a single length strip, with olive yarn work 1 sc in every join and 1 sc in each exposed sc around to even out tension across the joins (approx 200 sc across a 7-motif strip, adjust proportionally)
Round 34 :
Ch3, *dc in next sc, sk1, dc in next sc, rep to add a neat double-dc ridge along both long edges to visually tie motifs into a single runner (approx 180 dc)
Info :
This reinforcing round creates a stronger, cleaner edge and helps straighten any waviness caused during the joining stage. Keep tension relaxed so edge lies flat when blocked again.
— Decorative Outer Scallop Edging (Cream & Olive) :
Round 35 :
Switch to cream, ch1, *in next long-edge loop work (sc, ch4, 5 dc, ch4, sc) forming full scallop shells; rep across long edge; at short edges add (3 dc, ch3, 3 dc) per short scallop to maintain symmetry (approx 40 long scallops + short scallops as required)
Round 36 :
Ch1, sc in each dc across scallops, then at each scallop tip work 5 picot bobbles: (sc, ch3, sl st in same st) x5 to create small clustered beads around outer edge (approx 200 sc + 200 small picots)
Info :
Picot clusters create the tiny beads seen on the runner edge. If you prefer a subtler edge, work simple sc shells instead of picot clusters. Keep picot tension loose so they sit rounded after blocking.
Round 37 :
Switch to olive for final highlight: in each shell valley work (sc, ch3, sc) and at each picot cluster top place a single sc to anchor, then finish with one round of sl st around the entire outer perimeter to smooth edges (approx 220 sl st)
Round 38 :
Fasten off and weave in ends. Block entire joined runner flat, stretching scallops gently with blocking pins to emphasize picots and shells.
Info :
Final blocking: use steam or wet block and pin to a flat surface. Allow to dry completely. If scallops curl, use more pins to flatten and maintain shape for at least 12 hours.
— Optional Extra Lace Variation (Add more texture) :
Round 39 :
If you desire extra texture, add a round of (1 sc, ch5) between Round 34 and Round 35; this will create deeper bridging chains that can be garlanded with small picots or tiny 3-sc bobbles spaced evenly
Info :
This variation increases the runner height slightly and adds an additional lacy row for vintage character. Use if you want more negative space between motifs.
— Finishing Touches :
Round 40 :
After blocking and weaving ends, lightly mist the runner with fabric-safe stiffener if you wish for a tabletop piece that holds shape better; brush out excess and re-pin to final shape while drying
Info :
Care :
Hand wash cold or gentle machine wash in delicate bag. Reshape while wet and lay flat to dry. Iron on low with pressing cloth if needed to flatten picots and ensure shells lie neatly.
Info :
Notes on scaling: use thinner crochet thread (size 10) with a 1.75–2.25mm hook for a smaller, more formal runner; use heavier cotton with 3.5–4.0mm hook for a more rustic, bold lace that reads from a distance. Adjust yarn quantities accordingly.
This floral table runner is the perfect combination of vintage lace and farmhouse charm — every motif brings a little blossom to your table! The step-by-step instructions and join-as-you-go technique make assembly satisfying and neat. Enjoy blocking each motif to life and watching the delicate picots become tiny beads that crown the scallops. I hope this pattern brings the same warmth and cozy feeling to your home as it did to mine. Happy crocheting and may your tea always be warm! 🧶🌼