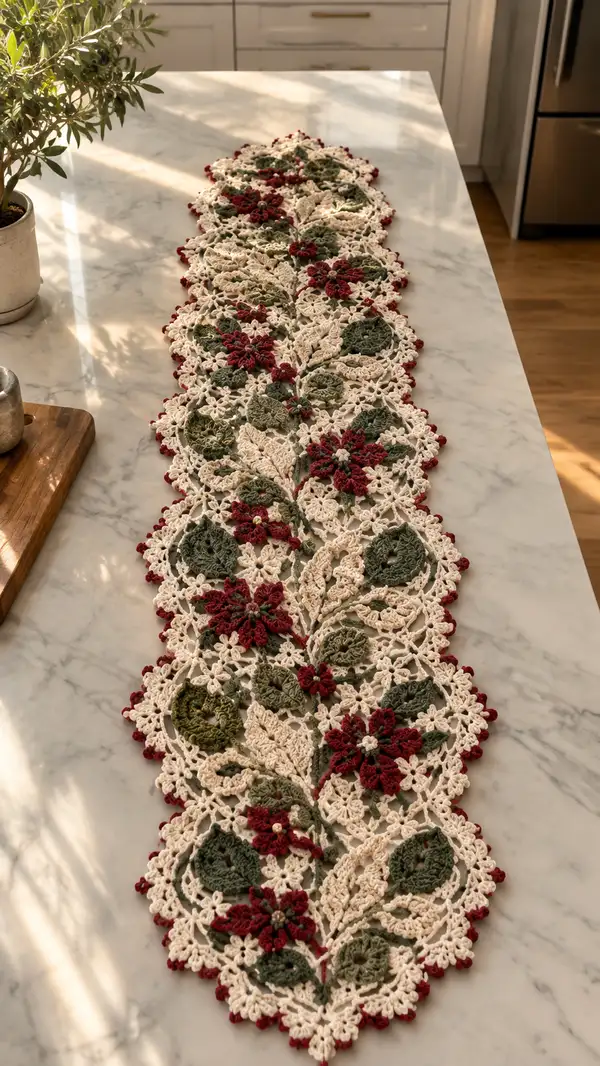
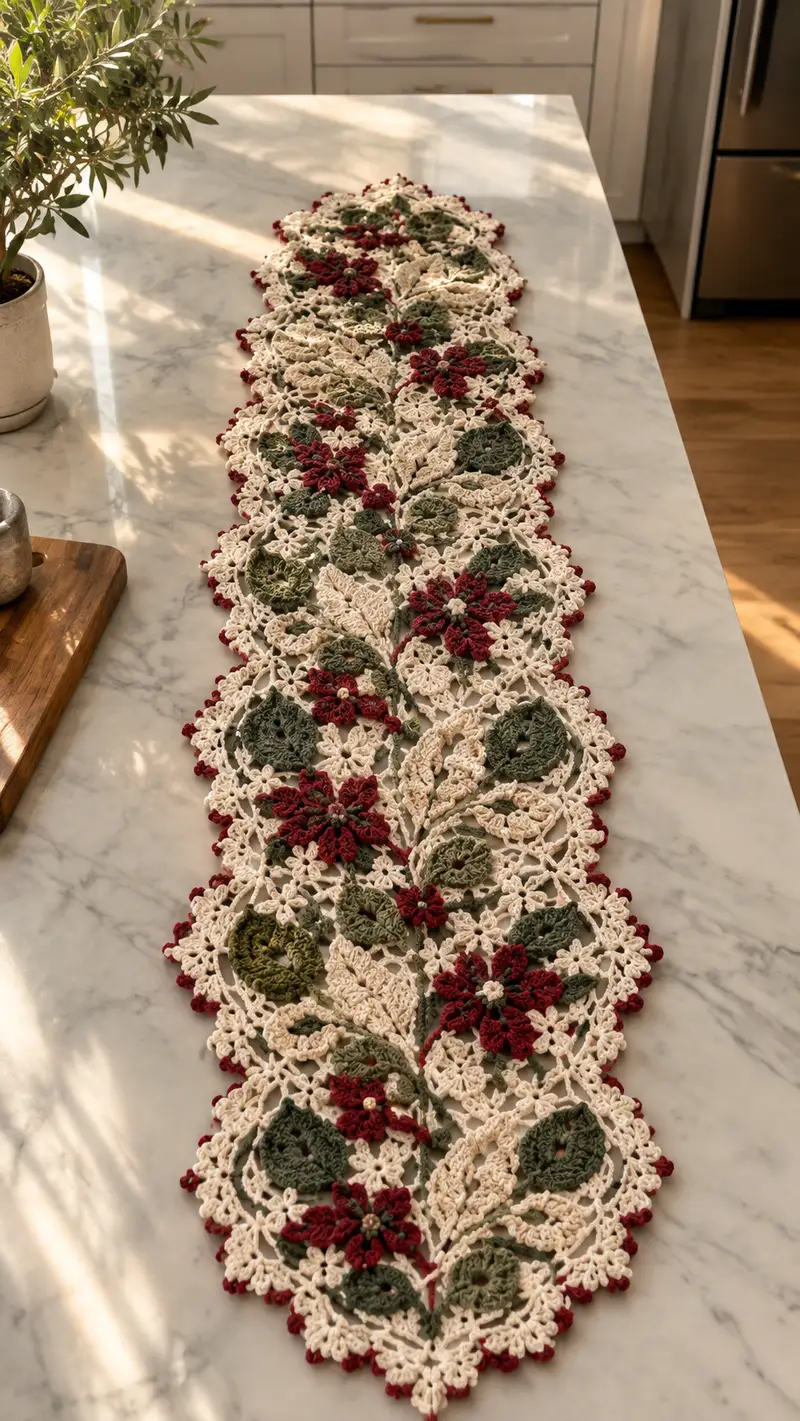
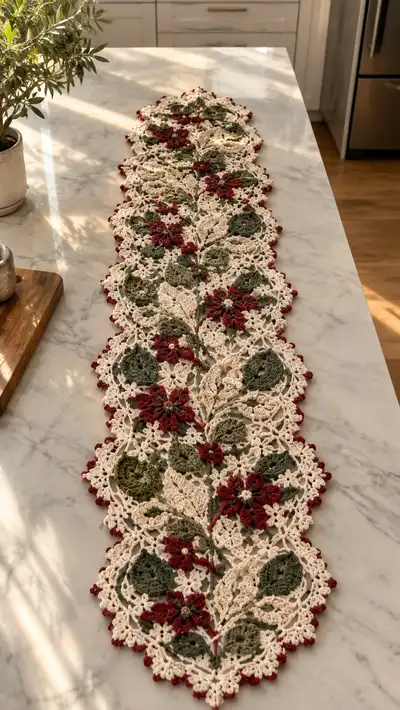
Create an elegant, vintage-inspired lace table runner featuring deep burgundy poinsettias, olive leaves and a warm ecru lace ground. This pattern shows how to crochet individual floral and leaf motifs, join-as-you-go, and finish with a delicate scalloped edge. Perfect for holiday tables or year-round vintage charm, it combines textured petals, layered leaves and openwork lace for an heirloom-quality runner.
Progress Tracker
0% Complete
— Overview :
Info :
This table runner is made from repeating modular motifs: Large Poinsettia Motif (centerpiece), Leaf Motif (paired leaves), Small Filler Flower, Connecting Star Motif and a delicate Picot Scallop Edging. Work each motif flat, block, and join-as-you-go when directed. The sample photo shows a runner composed of 7 large poinsettia motifs arranged in a single center column with staggered leaves and filler flowers; adjust number of repeats to change length.
— Abbreviations & Gauge Notes :
Info :
Use 3.5mm hook with worsted cotton for lace drape similar to sample. Gauge is not critical for aesthetics but keep tension consistent so motifs match. Each large poinsettia motif measures approximately 6.75" (17cm) across when blocked; a runner of 7 motifs yields ~47" length before edging. Note: adjust motif count for your desired length.
— Large Poinsettia Motif (Make 7 or desired count) :
Round 1 :
With burgundy, mr, ch 3 (counts as dc), 11 dc into ring, pull ring closed and sl st to top of ch3 to join (12 dc) (12)
Round 2 :
Ch 1, sc in same stitch, *ch 3, skip 1 dc, sc in next dc* around to form 6 ch3 loops; sl st to first sc (6 ch-spaces, 12 sc total by placement)
Round 3 :
Switch to ecru for a small contrast center join: join with sl st in any ch-3 loop, (ch1, 12 sc evenly distributed around the ring into ch-3 loops and dc tops) finish with sl st (12)
Info :
This small center rounds establishes a firm base to attach petals. Use a smaller hook if petals feel loose.
Round 4 :
Change to burgundy. In each ch-3 loop work: (sc, hdc, 3 dc, hdc, sc), join with sl st to first sc — creates 6 raised petals (petal base each uses 6 sts and sits in loop)
Round 5 :
Ch 2, *in tip of next petal work (2 tr, ch2, 2 tr) as a pointed petal cluster, sl st in next petal tip* rep around for 6 points. Fasten off burgundy. (6 petal points)
Info :
Petal shaping uses taller clusters to create texture. Keep finger tension on the clusters so they sit above the next round of lace.
Round 6 :
Join olive green in a space between petals, ch4 (counts as tr+ch1), *(tr in next nearest sc at petal base, ch1) twice*, continue working a looping chain to create a ring of 12 ch1 loops between petals; sl st to join (This creates foundation loops for leaves) (12 loops)
Round 7 :
Work around foundation loops: in each ch1 loop: (sc, hdc, 3 dc, hdc, sc) — this yields 12 small leaflets alternating around the flower; sl st to first sc (12 leaflets)
Info :
At this point petals and surrounding leaflets form the raised poinsettia. Attach a small pearl bead or french knot in the center if desired; secure bead before blocking. Weave in tail into the center ring.
Round 9 :
Switch to darker olive to add shading veins: join with sl st at base of one leaflet, ch1, *sc in next 2 sts, ch2, skip 2*, rep around making 6 ch2 arches for later leaf joins; sl st to join (6 arches)
Round 10 :
Change to ecru. Join in a space between every petal and leaflet and work (ch5, sl st in next gap) around to create an openwork ring that will connect motifs (6 large loops). Fasten off ecru.
Info :
These ecru connecting loops form the lace ground and will be used to join motifs later; ensure uniform loop size for easier joining.
Round 11 :
With burgundy, rejoin at a petal tip and work 6 tiny picot clusters: *(ch3, sl st in base) in between each petal tip* around to add a small raised dot on each petal tip. Fasten off and weave ends. (6 picot dots)
Round 12 :
Blocking: Pin motif flat, gently steam or wet-block to 6.75" across. Shape petals and leaflets outward evenly. Allow to dry before joining.
Info :
Block each poinsettia motif after finishing to keep petals uniform. Mark a top petal and a bottom petal to orient motifs consistently when joining to the runner.
— Large Poinsettia Petal Detail (Rowed Petal Edging Rounds 13-22) :
Round 13 :
Re-attach with burgundy at the base of a petal, ch1, sc in same st, (sc, ch2, sc) into tip to form tiny lace loops; rep around each petal to add lace-to-lace join points (work into petal tops and outer loops) (6 sets)
Round 14 :
Change to olive, join in first ch2 loop and work (ch4, dc, ch4, sl st in same loop) creating a small arch over each petal; rep for all 6 petals (6 arches)
Info :
These arches form attachment points for the larger leaves that will be worked in olive shades; keep arches even and count stitches carefully to ensure symmetry across petals.
Round 16 :
Work leaf foundations off the arches: in each arch work (ch6, sl st in arch base), repeat to make 6 foundation chains for full leaves. Fasten off olive and change to moss olive for texture.
Round 17 :
With moss olive, in each foundation ch6 work (sc, hdc, 3 dc, hdc, sc) to form the first leaf half (6 leaf halves created). Join and continue for opposite half of leaf on returning side to form full teardrop leaves (6 leaves)
Round 18 :
Change to darker olive for veins: working from leaf base toward tip, surface crochet 6 small chain veins: *ch2, sl st down to create slight raised lines* across each leaf; fasten off and weave ends.
Round 19 :
With ecru, join in small space between leaves and work 12 small star picots: *(ch4, sl st in base) spaced evenly* to knit the leaf foundations into the lace ground. These will be used to later join motifs. (12 picot stars)
Info :
At the end of this section you have completed a layered poinsettia with inner petals, outer leaflets and foundation arches for joining. Keep motifs in sets so that joining sequence is consistent when assembling runner.
— Small Filler Flower (Make many) :
Round 1 :
With burgundy, mr, ch1, 6 sc into ring, sl st to join (6)
Round 2 :
Ch2, in each sc work (1 hdc, ch2, 1 hdc) into same st to create 6 petal loops; sl st to join (6 petals)
Round 3 :
Change to ecru: join in any ch2 loop, (sc, ch3, sc) in each loop to make delicate connectors; fasten off. Add small bead or ecru center if desired. (6 connectors)
Info :
Small filler flowers tuck between large motifs and fill negative space in the lace ground. Make 2-3 around each large motif depending on your layout.
— Leaf Motif (Make 14 pairs or as needed) :
Round 1 :
With olive green, ch8, sc in 2nd ch from hook, hdc in next, 3 dc across center, hdc next, sc last (forms half leaf); continue on opposite side of starting chain to mirror and complete leaf: (hdc, 3 dc, hdc, sc) then sl st to beginning (16 sts approx per leaf)
Round 2 :
Work around leaf edge: (sc, ch2) along the edge for scalloped look; at tip work (2 sc, ch3, 2 sc) to form small point then continue return edge (even). Fasten off and block flat.
Info :
Make alternating leaves in olive and moss to create depth. Leaves are worked flat and joined to poinsettias at their arch anchors using join-as-you-go or whip stitch later.
— Connecting Star Lace Motif (Make many to fill ground) :
Round 1 :
With ecru, mr, ch3 (counts as dc), 11 dc into ring, sl st to top of ch3 (12)
Round 2 :
Ch1, sc in same st, *ch4, sc in next dc* repeat around to create 6 ch4 loops; sl st to first sc (6 ch4 loops)
Round 3 :
In each ch4 loop work (sc, ch3, sc) producing 6 small star points; sl st to first sc (6 star points)
Round 4 :
Ch6, sl st into next star point; rep around to make 6 long connecting chains (these chains will be used to tie motifs together). Fasten off. (6 chains)
Info :
These small star motifs knit the larger modules into a continuous lace ground. Place them so each large poinsettia will join to two star motifs on each side to create a continuous column.
— Join-As-You-Go Method (Sequence) :
Info :
When you make each Large Poinsettia, you will join to the previously worked motif(s) using the ecru loops or star motif chains. Always position the new motif with right side up, align connecting loops, and work sl sts or single crocheted joins through both motif loops. Join points are indicated in individual motif rounds above as 'connecting loops' or 'arches'.
Info :
Recommended join order for a center-column runner: work first poinsettia fully; work second poinsettia and join its two left and right ecru loops to the star motifs attached to the first. Continue this alternating join pattern to make the column straight and even.
— Detailed Join Rounds for Large Motif (Join Rounds 1-10) :
Round 1 :
With ecru on new poinsettia, locate the first connecting loop on motif A and the corresponding loop on motif B. Insert hook through loop on motif A, then through loop on motif B, yarn over and sl st to join; repeat across 6 join points to connect motifs securely (6 sl sts joins per side)
Round 2 :
After making the row of sl st joins, chain 3 and work a sc in the next ground loop to stabilize the join. Repeat for each cluster of joins to create a small bridge (6 little bridges per join row)
Info :
When joining motifs, keep the tension of sl sts slightly looser than your working tension so the lace does not pucker. If a join looks too loose, work one or two additional stabilizing sc along the joining chain.
Round 4 :
Work along both edges of the runner to secure leaves and small fillers by sewing through leaf foundation arches into ecru star motifs using matching yarn and mattress stitch for invisibility. Secure with 8-10 stitches per leaf attachment for stability.
Info :
Sew leaves with yarn needle rather than working with hook when the shape is delicate. This gives more control for exact placement and prevents stretching the lace.
— Ground Lace Fill (Ecru, worked intermittently as motifs are joined) :
Round 1 :
With ecru, ch5, *sl st in next motif loop, ch5* repeat forming a chain scaffold that links star motifs and provides anchor points for filler flower placement. Work across a run of three motifs then secure ends with sl st.
Round 2 :
In each ch5 space, work (sc, ch3, sc) to create a small 3-loop filler that visually unifies the pattern. Fasten off and weave ends as you go.
Info :
Keep a consistent count of ch5 scaffolds between motifs—if one section has ch6 instead of ch5 the lace will shift; mark the start of each motif with a safety stitch marker to maintain even spacing.
— Border / Scalloped Edging (Work after full runner assembly) :
Round 1 :
With burgundy, join at runner corner/navel point: *sc evenly into outermost ecru picot loops around the entire runner edge approximately 3-4 sc per motif scallop; use 2 sc for tighter curves and 4 sc on longer edges to maintain gentle edge curve.* Continue around full runner (sc count will depend on final runner length)
Round 2 :
Ch3, skip 1 sc, sl st in next sc to form small looped edging around entire runner. This evens the edge and prepares for picot. Fasten off burgundy if you prefer only burgundy picots; otherwise continue in same color.
Round 3 :
With burgundy, rep around edge: *(sc, ch3, picot (ch3 sl st in top), sc) in each loop along edge to create small berry-like picot clusters* evenly spaced. This creates the tiny burgundy dots you see along the edge. Fasten off and weave ends behind scallops.
Info :
Edge picots add a gem-like finish and anchor the eye around the runner perimeter. Use a small hook for the picots if you want tight, neat points; adjust spacing to avoid crowding the lace motif feet.
— Blocking & Final Finishing Rounds :
Round 1 :
Pin runner flat on blocking mat, stretching gently to even the repeat spacing. Place pins at every motif junction and along outer scalloped edge. Steam or wet-block per yarn manufacturer instructions then let dry completely.
Round 2 :
After blocking, trim any visible tails and weave in ends on backside using tapestry needle. If beads were added to flower centers, ensure they are secured with several stitches and a small dot of fabric glue if desired.
Info :
Blocking is essential for this lace runner to achieve the desired width and to flatten motifs and petals. Use rust-proof pins and check that motifs are not over-stretched during drying.
— Optional: Add Beaded Centers :
Round 1 :
Sew small pearl or glass beads into the centers of each poinsettia using a sharp beading needle and matching thread. Secure with three passes and a knot through several inner rounds and weave tail inside center.
Info :
If adding beads, stitch before final blocking for slight repositioning during drying. Be careful with heat if using glass beads near steam blocking.
— Sizing & Adjustments (Extensive Guidance) :
Info :
To create a shorter runner, reduce number of large poinsettia motifs. To create table runners wider than the single column, work two parallel columns and join them by duplicating joining sequences for additional width. For smaller motifs, substitute DK yarn and a 3.25mm hook—expect each motif to reduce ~10-15% in diameter.
Info :
When adding another column, place connectors such that the ecru star motifs interlock; this keeps the overall pattern balanced and prevents holes or large gapes.
— Full Sequence Example for One Runner Column (Step-by-step actions) :
Round 1 :
Make Poinsettia 1 and block. Make Star Motifs A and B and join them to Poinsettia 1 in the ecru connecting loops. Place Leaf Pair 1 and attach to Poinsettia 1 using mattress stitch at specified arch anchors.
Round 2 :
Make Poinsettia 2; before completing outer ecru connecting loops, align with Poinsettia 1 and join opposite ecru loops to Star Motifs A and B using sl sts as described above. Complete Poinsettia 2's outer lace.
Round 3 :
Make filler flowers and tuck them into open ground spaces; attach using single crochet through ground loops to hold them flush with the surface. Continue repeating the make-and-join sequence until desired length is reached.
Round 4 :
Once full column is assembled, add extra ecru ground lace along both long sides if needed to visually even the runner before edging. Block entire runner again to ensure all joins lie flat.
Round 5 :
Finish with burgundy scalloped picot edging all the way around. Press gently if desired with an iron on the lowest setting and a hand towel between lace and iron.
Info :
This runner sequence takes advantage of repeating rhythm: motif, star, leaf, join, filler. Organize your workspace by grouping finished motifs in stacks to streamline join steps and reduce color switching errors.
— Troubleshooting & Tips (Interspersed Info) :
Info :
If a motif is slightly larger than its neighbor, give it a light wet-block but do not overstretch; alternately add one extra ecru linking stitch in the join row to ease alignment. Use a running stitch across misaligned joins and re-pin, then steam lightly.
Info :
To avoid tangling many colors, wind small center-pull balls and place them in labeled bowls. Carry only one color at a time across a motif and fasten off cleanly when the next round requires a different color to prevent long floats on the wrong side.
Info :
When sewing leaves in place, work from underside where possible, taking small hidden stitches through the leaf foundation back to motif base to secure without visible top-side thread lines.
— Pattern Notes & Alternative Construction (Extensive Info) :
Info :
If you prefer to finish motifs fully and then hand-sew (instead of join-as-you-go), use ecru star motifs as visible seams and whip stitch connecting loops through chain spaces. This method is slower but allows more precise edge alignment before final blocking.
Info :
For a denser runner, add an extra ecru connecting ring round around each flower before joining; this will close gaps and give a heavier textile feel—use more yarn and adjust blocking tension accordingly.
— Final Care Instructions :
Info :
Hand wash gently in lukewarm water with mild detergent. Lay flat to dry. Re-block if necessary after washing. Avoid bleach. If storing long-term, roll the runner around acid-free tissue to prevent creasing.
Completing this runner is such a satisfying journey—each motif is a small win that becomes part of a beautiful whole. The deep burgundy petals and olive leaves pop against the ecru lace to create a timeless centerpiece. With careful joins, blocking and a little patience, you'll have an heirloom-quality runner to enjoy for years. 🧶🌿 Brighten your table for holidays or everyday elegance—happy stitching! ✨