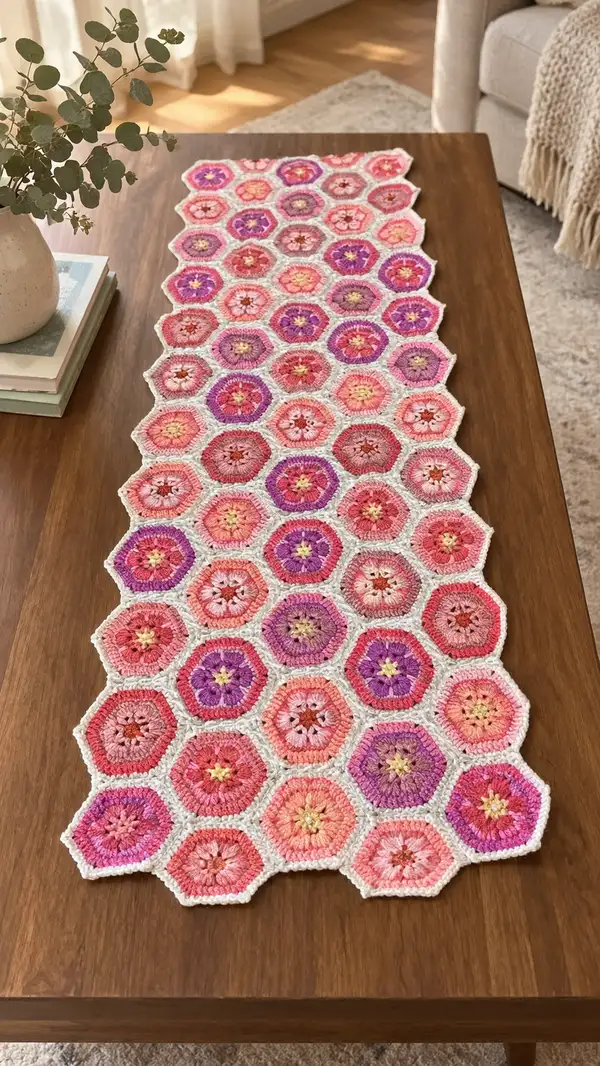
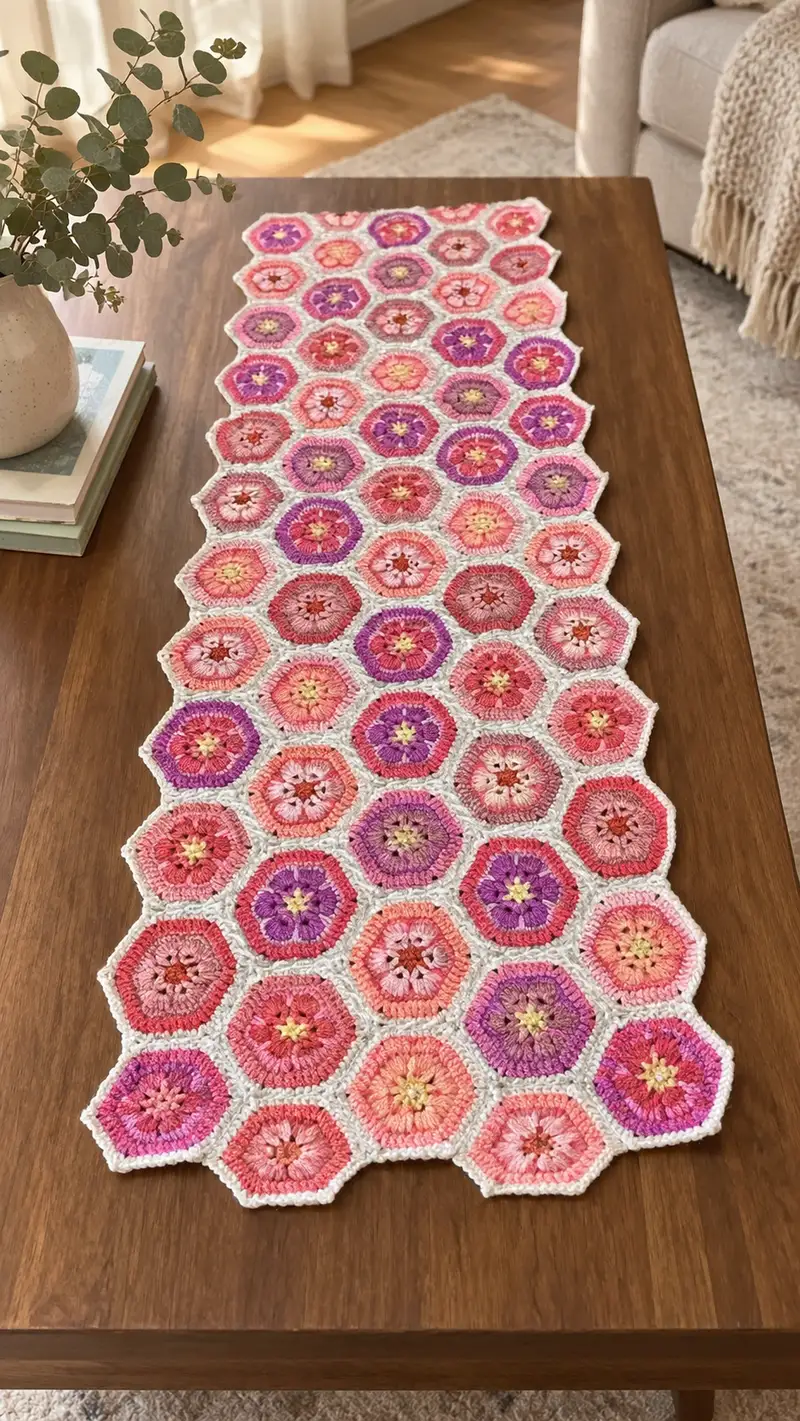
A long, elegant table runner made from joined hexagon floral motifs in soft pinks, corals and purples with a crisp off-white join and border. The hexagons feature a textured floral center, layered petals and a neat octagonal/hexagonal edge to create a lacy yet substantial runner. Perfect for dressing a dining table, console or sideboard, this pattern focuses on repeatable motifs and a clean join-as-you-go finishing edge.
Progress Tracker
0% Complete
— Overview :
Info :
This pattern is written to make the individual hexagon floral motif and then join them together using a join-as-you-go (JAYGO) method. You will make multiple motifs (count described below) and join them row by row. The motif rounds are purposely detailed so you can reproduce the textured flower centers and petals seen in the photo. The runner photographed measures approximately 12 x 48 inches and uses 42 motifs; adjust motif count to change final size.
Info :
Gauge for one finished hexagon motif (after blocking): approximately 3.25 inches across flat-to-flat using 3.5mm hook and DK yarn. If you achieve a different gauge, your motif size will change and so will the number of motifs required for your runner.
— Special Stitches & Techniques :
Info :
Puff stitch used: yo, insert hook, yo pull through (repeat 4 or 5 times into same stitch), yo pull through all loops, ch1 to close puff. You can substitute 3dc cluster for a different texture. Work tight, even tension for puff stitches so the motif sits flat.
Info :
Join-as-you-go (JAYGO): On the last round of each motif you will work slip-stitches or single crochets into adjacent motifs at predetermined join points to create a flat, seamless connection.
— Motif (Make 42 or as many as required) :
Round 1 :
Make a magic ring. Ch1 (does not count as st), 6 sc into ring, pull tight (6)
Round 2 :
Switch to color A (inner star/pale yellow). 6 inc (12)
Round 3 :
Change to color B (soft coral). (1 sc, inc) x6 (18)
Info :
Keep joins between rounds tidy by finishing color changes with a sl st and carrying colors loosely on the wrong side or fastening off and weaving in later.
Round 4 :
Change to color C (darker coral/pink). (2 sc, inc) x6 (24)
Round 5 :
Change to color D (variegated pink/purple). (3 sc, inc) x6 (30)
Round 6 :
Change to color E (accent color). 1 sc in each st (30)
Round 7 :
Petal texture: switch to petal color. *Ch1, puff stitch in next st (see special stitch), ch1, skip 1 st; rep from * around placing a puff every other stitch. You should make 15 puff spaces (15 puff sts and 15 skipped spaces) (30 spaces accounted).
Info :
To make the petal round sit flat, keep puff height moderate (do not pull loops too tall). Use a contrasting color to show petal detail; alternatively use same color for subtle texture.
Round 8 :
Secure petal row: join with color C (or same as round 5) by sc in the top of each puff stitch and sc in the ch-1 spaces between puffs. 1 sc in each st (30)
Round 9 :
Transition round: (4 sc, inc) x5 + 0 sc remainder to keep counts accurate — to expand evenly to 36 sts do (5 sc, inc) x6. We will work (4 sc, inc) x6 to reach 36. (36)
Round 10 :
Even round: 1 sc in each st (36)
Round 11 :
Prepare for hex shaping: (5 sc, inc) x6 (42)
Info :
This is a good place to change to your main motif color if you want a two-tone motif. The increases above are spaced to make the circle larger for hex edge shaping.
Round 12 :
Even round: 1 sc in each st (42)
Round 13 :
Begin shaping flat hexagon: *sc 6, (inc) 2 sts in next st* repeat 6 times to emphasize 6 sides. Work pattern precisely: (6 sc, inc) x6 (48)
Round 14 :
Even round: 1 sc in each st (48)
Round 15 :
Side shaping: *sc 7, inc* x6 (54)
Info :
By gradually increasing at the same six points you are creating the faint angles that will become the straight sides of the hexagon when the final rounds are worked. Keep increases exactly where instructed to keep geometry regular.
Round 16 :
Even round: 1 sc in each st (54)
Round 17 :
Edge definition round: Change to off-white/cream for join round later. (8 sc, inc) x6 (60)
Round 18 :
Even round in cream: 1 sc in each st (60)
Round 19 :
Octagon/hex highlight: *sc 9, inc* x6 (66) - this provides breathing room for final flat edge and join points
Info :
At the end of Round 19 you should have a textured, slightly large circular motif that will flatten into a hexagon during the final shaping and blocking. The cream rounds begin to outline where joins will be placed; keep these rounds neat as they will be the visible join surface.
Round 20 :
Even round in cream: 1 sc in each st (66)
Round 21 :
Define hex edges: We will create 6 side groups. Repeat around: (sc 11, dec) x6 to reduce to 60. Calculation: (sc11, dec)x6 = (11*6)+(6 dec) = 66-6=60 (60)
Round 22 :
Even round: 1 sc in each st (60)
Info :
At this stage each side of the hexagon has about 10 stitches; mark the center stitch of each side with a small stitch marker — these are where you'll align join points when connecting motifs.
Round 23 :
Corner shaping: *sc 8, dec* x6 to better flatten hexagon (54)
Round 24 :
Even round: 1 sc in each st (54)
Round 25 :
Final flattening: (sc 7, dec) x6 (48)
Round 26 :
Even round: 1 sc in each st (48)
Info :
Now that motif is flat and roughly hexagonal (approx 48 sts round), finish by fastening off leaving a 6-8 inch tail if you will weave in ends later. If you prefer to work join-as-you-go you'll leave the yarn attached for the final join round.
Round 27 :
Optional decorative ridge: change to a color contrast and work 1 sc BLO around to create a raised ridge (48)
Info :
Make the total number of motifs needed: the sample runner uses 42 motifs arranged in a narrow rectangular layout 6 motifs wide x 7 motifs long (6x7=42). Calculate your layout for the size you want.
— Join-as-you-go & Assembly (Work as you make motifs or join later) :
Info :
We recommend assembling row by row using JAYGO on the final round of each motif (Round 27/28 depending on your motif). These JAYGO instructions assume you are joining motifs while working the final cream round so seams are neat and visible like the photograph.
Join Round 28 :
With cream yarn attached, ch1, sc in same st, *sc in next 7 sts (this forms a side), join to adjacent completed motif by inserting hook into corresponding side st on adjacent motif and sl st to join (if no adjacent motif work sc), sc in next 1 st (corner), rep across 6 sides. Total stitch count remains 48 when working non-joined sides; decreases by sl st replacements where joins occur but maintain same edge geometry. Work joins only where motifs touch; the central motifs will have 6 joins, edge motifs fewer.
Info :
When joining, align marked center side stitch to the center of the adjacent side. The join is made by replacing a sc on the final cream round with a sl st into the corresponding st of the adjacent hexagon. This creates a neat seam without extra bulk.
Join Round 29 :
Continue around motif: when you come to a side that borders two motifs already joined, work sc then sl st into each adjacent motif at the indicated positions to create a three-point join. Work methodically so joins do not twist the motif.
Info :
It helps to pin the motif in place on top of the completed neighbors before you make each join. This keeps rows flat. Use blocking pins sparingly while joining if necessary.
Join Round 30 :
Corner reinforcement: after joining sides, go back with a sl st around the corner join points to tidy up; pick up one loop on each motif at the corner and sl st through both loops then move to next corner. This creates a tiny visible point at each hex corner, similar to photo.
Info :
Work motifs into rows: Begin with a row of 6 motifs. Join them side-by-side using JAYGO as you complete each motif. When adding the next row, offset motifs so each motif in new row nests between two motifs of previous row (staggered hex tiling). Join at three points for perfect geometry.
Join Round 31 :
Edge motifs: motifs at the outer boundary will have free sides — maintain clean sc stitches on these sides to prepare for the final border. When you reach a free side, simply sc across and do not sl st to a neighbor.
Info :
Count motif joins: central motifs will have 6 join sides, edge motifs 3-4, corner motifs 2. Make sure motif placement and orientation are consistent so pattern flows visually (flower centers generally facing same orientation unless you want an alternating look).
Join Round 32 :
After assembling rows and checking layout (6x7 recommended for photographed size), work a final cream pass around the entire runner to even out join tension. Sc evenly across each free side and sl st into join points to create uniformity. This pass will not dramatically change counts but will improve the visual continuity across motifs.
Info :
Step back every few motifs and check runner lies flat. If small gaps appear at join points, you can reinforce with an extra sl st or small stitch to pull seams snug. Avoid pulling too tight which will pucker motifs.
— Border & Final Edging (work around whole runner) :
Border Round 33 :
Attach cream yarn in any free stitch on outer edge. Ch1, sc around entire runner working (sc1 in each edge stitch, 3 sc in each corner point created by motif joins) to build a uniform foundation round. Keep count flexible — you'll be working across many stitches; simply ensure equal sc spacing across each side and 3 sc at each corner peak to keep edge flat.
Info :
Work slowly around complex edges where two motifs meet corner-to-corner. Use 3 sc in those corner peaks to avoid corner curling. Mark the start of the round with a stitch marker to keep track.
Border Round 34 :
Even round in cream: 1 sc in each st around (foundation round count will be high; this is an even pass to level the edge)
Border Round 35 :
Scallop setup: *skip 2 sts, 5 dc in next st, skip 2 sts, sl st in next st* repeat around to create scallops between motif corners. Add or reduce stitches skipped to make scallops even across varying edge contours.
Info :
If scallops feel too large for the runner scale, reduce dc cluster to 3dc. Test a small stretch and adjust until scallops look proportional to motif size.
Border Round 36 :
Finishing round: work 1 sc in each st around, finishing with a tight sl st to join. Fasten off, weave in ends neatly on wrong side.
Info :
For a crisp edge you can block the runner after the scallop round and then do one last neat slip-stitch trim in cream to sharpen edges.
— Optional Reinforced Border (for table protection) :
Extra Round 37 :
Attach a contrast color and work 1 hdc in each st around to add weight and durability to runner edge. This gives a subtle ridge and better protection from wear.
Extra Round 38 :
Finish with 1 sc in each st BLO to form a clean rope-like edge if desired. Fasten off and weave in ends.
Info :
Adding extra rounds will increase runner width slightly; account for this if measuring for a specific table size.
— Blocking & Finishing :
Info :
Wet-block or steam-block your runner gently. Pin each hexagon flat with blocking pins into your desired rectangular layout and leave to dry. Use a towel underneath and damp cloth if steam-blocking. This shapes edges and ensures seams lie flat.
Info :
Weave in all ends with yarn needle. For security, pass tails through 4-6 stitches in zigzag before trimming close to work. If runner will be washed frequently, consider using a small amount of fabric glue on the back side of critical joins, allowed to dry thoroughly.
Info :
Optional: Add small dots of invisible non-slip fabric grip to underside before using on a polished table to stop sliding.
— Variations & Size Adjustments :
Info :
To make a shorter runner, reduce the number of rows of motifs; for a wider runner increase motifs per row. Because motifs tile as hexagons, adding/removing motifs changes perimeter geometry — ensure you add motifs in whole rows or columns that match the offset tiling pattern.
Info :
If you prefer a continuous color for the join and border instead of cream, adjust color changes accordingly and work final rounds in that chosen color. You can also swap the scalloped edging for a picot edge if you prefer a delicate finish.
— Troubleshooting & Tips (many Info passages spread through pattern) :
Info :
If your motifs cup or bowl slightly, work two additional even rounds in cream to add weight before joining. If motifs flare at the edges, block each motif flat prior to joining.
Info :
Keep track of motif orientation: mark the top of each motif with a small removable stitch marker if you want all flowers to face the same direction rather than having alternating rotations.
Info :
When joining motifs for the first time, practice the sl st replacement on two motifs to understand how the seam behaves. The more consistent your tension when making that sl st, the flatter the seams will be.
Info :
Use a yarn thinner or smaller hook for the join round if your join becomes too bulky; swap to 3.0mm hook only for cream rounds while keeping motif rounds at 3.5mm to keep motifs dimensional and joins neat.
This floral hexagon table runner brings handmade charm to any room and is endlessly customizable. Each motif feels like a tiny flower garden, and watching the runner grow is so satisfying. Keep a cup of tea and enjoy the rhythm of making repeated motifs — the result is a beautiful accent piece perfect for gifting or home. 🧶🌸✨